How to Change a HEIC File to JPEG on Mac/PC
Seeking the method on how to change a HEIC file to JPEG? Then, you have come to the right page. Here, you will get to know a simple, easy and fast way to covert HEIC to JPEG.
Apple has released iOS 13 and macOS Catalina and one bigger change are seen in the way new iOS devices and Mac store photos. Apple has now a new standard image format, i.e. High-Efficiency Image Format that takes half the size of JPEGs. Thus, it is a huge space-saver for iOS and Mac users. This new file format is developed by MPEG and can also store multiple photos.
However, many image editors still don’t support the new file format, HEIC and currently, it does not have support in Windows and Android environments. It means if you have HEIC photos on your Windows PC, then you can’t view the photos using default Windows Photos application. Also, Mac running with below macOS High Sierra has a compatibility issue with the HEIC file. As HEIC file is not widely compatible as JPEG and that’s why you can convert HEIC photos to JPEG to make them compatible with the various environment. Here, in this guide, we will tell you how to convert the HEIC file to JPEG on both Windows and Mac.
Part 1: How to Change a HEIC File to JPEG on Windows
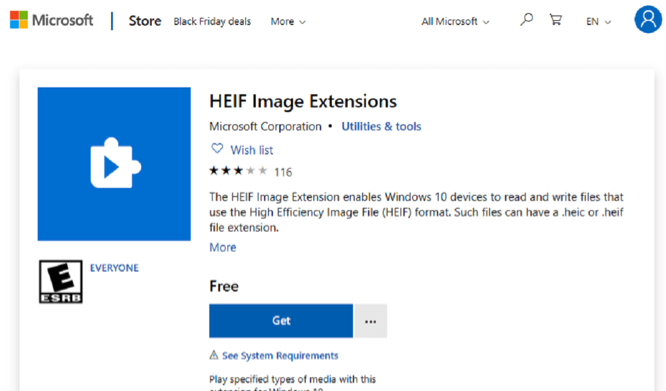
Windows users who have installed Windows 10 on their system, they can view HEIC photos on their system by installing the HEIF Image Extensions from the Microsoft Store. When you try to open the HEIC photo with the Photos app of your Windows 10 PC, you will get the link “Download codecs at Microsoft Store”. So, click to the link and download codecs to view HEIC photos.
How to Change a HEIC File to JPEG on Windows
However, you can just view the photos, but if you want to change the HEIC photo to JPEG, then you need to use an online HEIC converter tool that will help you to convert HEIC photos to JPEG. Moreover, once you convert incompatible file format to the most compatible format, JPEG, you can view the photos on every Windows version PC. If you don’t want to use an online converter tool, then you can use the cloud storage, DropBox to view HEIC photos as it supports a new image format. You can upload the HEIC photos to your DropBox account to open and view HEIC photos.
Part 2: How to Change a HEIC File to JPEG on Mac
If you have Mac running macOS High Sierra or later, then you can view and open HEIF files using Apple Photos and Apple Preview app, like JPEG files. However, you need to use an online HEIC converter to convert HEIC photo to JPEG so that you can view and open it on Mac running below macOS High Sierra.
Luckily, if your Mac has updated with macOS High Sierra, then you can change HEIC files to JPEG format using the built-in Preview App of Mac.
Step 1. Open Finder, and then, go to the folder where you have store HEIC photos. After that, select the ones that you want to change to JPEG.
Step 2. Next, right-click on the selected photos and then, Open the photos with “Preview App” as shown in the below figure.
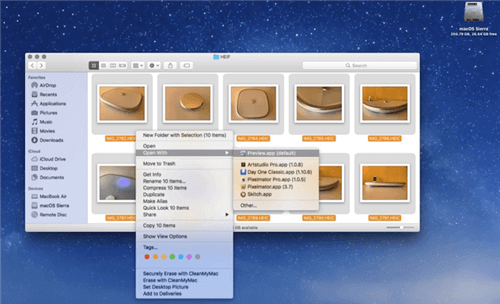
How to Change a HEIC File to JPEG on Mac – Step 2
Step 3. When selected HEIC photos will open in the Preview App, click on “Edit” and then, select “Select All”. Thereafter, click on “File” and then, choose “Export Selected Images”.
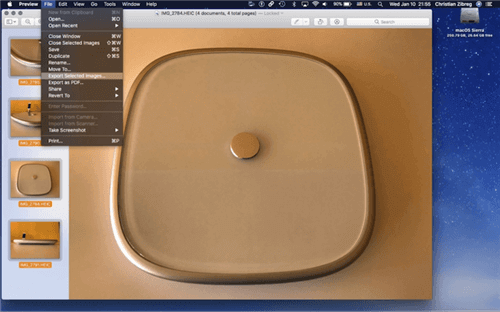
How to Change a HEIC File to JPEG on Mac – Step 3
Step 4. Finally, click on “Options” and then, select “JEPG” from the format menu to change selected HEIC photos to JPEG format.
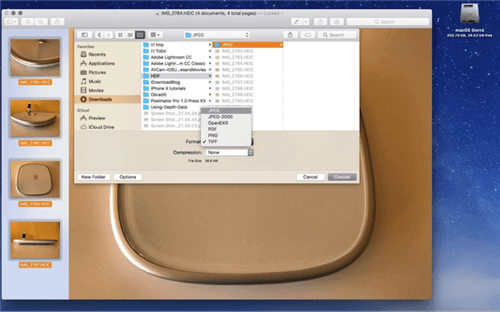
How to Change a HEIC File to JPEG on Mac – Step 4
Part 3: How to Change a HEIC File to JPEG Online Free with iMobie HEIC Converter
If your Mac system is not updated to macOS High Sierra, then Top & Free HEIC File Converter can help you to view and open the HEIC photos on your Mac with ease. Here we recommend you one of the top free HEIC conversion tools – free online iMobie HEIC converter, which is compatible with both the Windows and Mac operating system. It has made easier for users to access HEIC file on the platform that it does not support by converting the file to a most compatible format, JPEG.
Here are its key features:
- It is 100% secure and safe to use on the system as it is a spy-free and virus-free tool.
- The tool gives you multiple options for image quality you want, which includes Standard, Medium, and High.
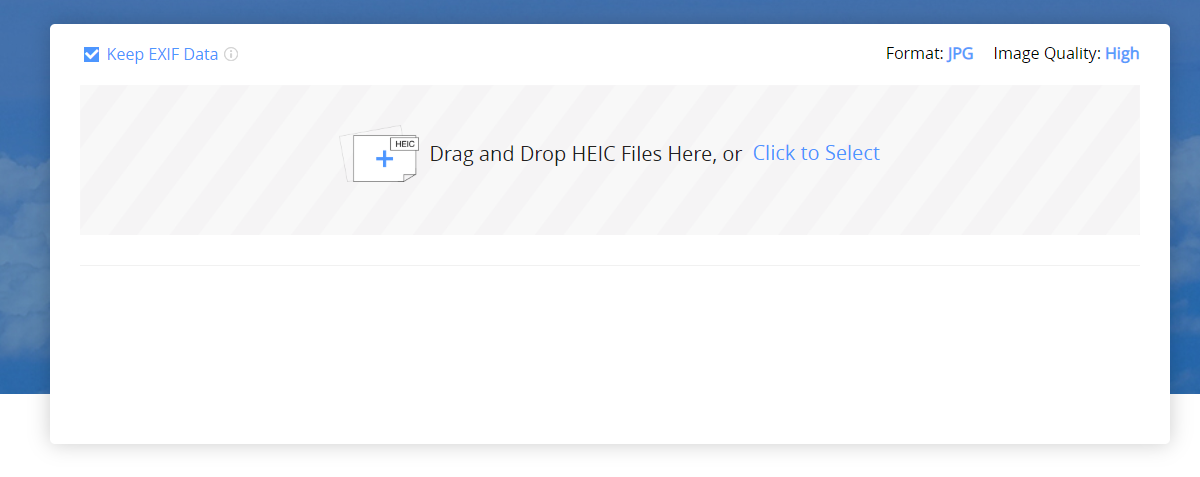
- It let you preserve EXIF metadata of the images even after you convert them into JPEG format.
- This tool is easy-to-use and has a simple interface as you can upload HEIC image using the drag and drop feature
Here are the detailed steps on how to convert HEIC photos to JPEG using the iMobie HEIC Converter:
Step 1. Access to this HEIC-to-JPG converter official site and then, upload the HEIC photos either by drag and drop or click to select from the computer.
iMobie HEIC Converter – Step 1
Step 2. Once HEIC files were uploaded to the tool, it will initiate the conversion process.
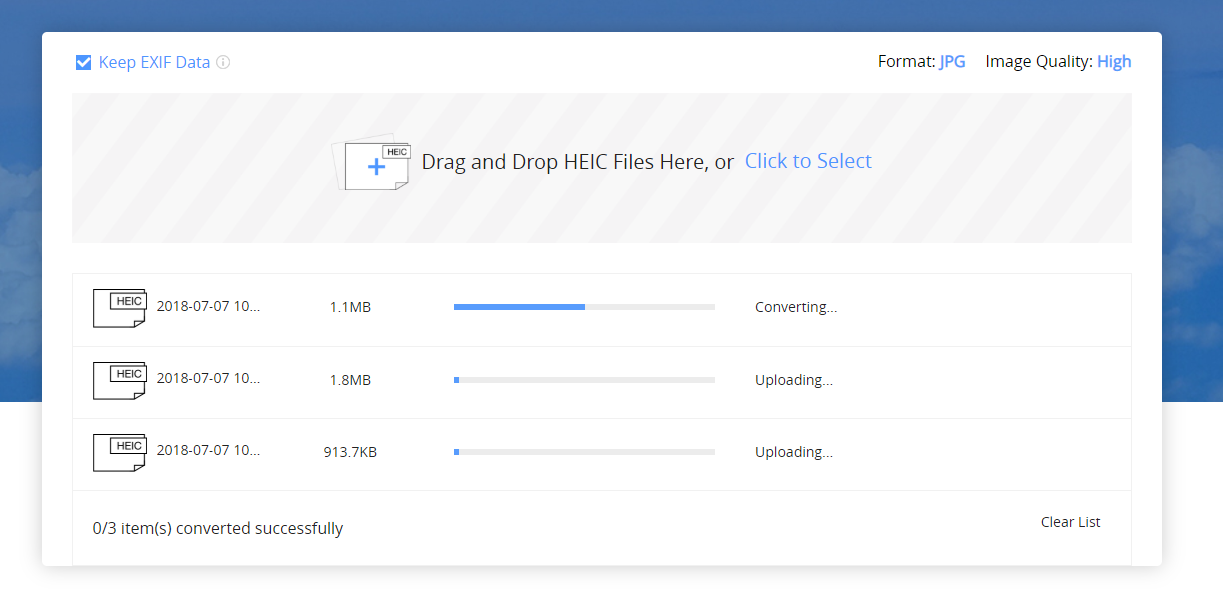
iMobie HEIC Converter – Step 2
Step 4. After HEIC photo converted successfully, you can download the photo as JPEG by clicking on “Download JPG” or “Download All JPGs”.

iMobie HEIC Converter – Step 3
The Bottom Line
Thus, users who want an easy and simple way on how to convert HEIC file to JPEG; they can use free online iMobie HEIC Converter. No doubt, the HEIC file is smaller in size as compared to the JPEG file, but still, the JPEG format is compatible with every platform. And the great way to change HEIC to JPEG in just a few minutes is an online HEIC converter. If you have doubts, please feel free to ask in the below comment section.
More Related Articles

A writer for iMobie, has been covering iOS, Mac, and Android related How-to Articles / Apps Reviews for 5+ years. Like sharing something about data transferring & recovering knowledge.

iMobie HEIC Converter
FREE & Simple Tool to Convert Any HEIC File to JPG in 3-Step:
- * 100% Free & Safe