How to Fix iPhone iPad Screenshot Not Working on iPhone/iPad
Some iPhone users reported that screenshot not working on their iPhone or iPad after iOS updating. Read this guide to get some quick solutions.
Common iOS Issues & Tips
Siri Issues & Tips
iPhone Screen Issues
WiFi & Battery Issues
So I was recently trying to screenshot on my iPhone 11 and it wouldn’t let me and I was wonder if people who were having the same problem could respond.
As the user mentioned above, your device may suddenly stop allowing you to take screenshots. Or after updating your iPhone or iPad to new iOS versions, it seems to trouble you that the screenshot is not working properly. Especially for the new iPhone 12 and iPhone 11, screenshot becomes different from the others. Maybe you tried to take a screenshot but just locked your iPhone or activated Siri. Actually, this is only one of the common iOS problems you may meet on an iPhone iPad. In this iMobie guide, we will show you how to fix screenshots not working on iPhone iPad with some easy solutions.
Tip 1. Firstly Restart your iPhone/iPad
How to Restart iPhone
Restart iPhone X and later: Press and hold the Side button (on the right side of your iPhone), simultaneously press either volume button until the slider appears. Drag the slider and switch from left to right to turn the iPhone off. To turn iPhone back on, press and hold the Side button again until you see the Apple logo.
Restart iPhone 6/7/8: Press and hold the Side button until the slider appears. Drag the slider and switch from left to right to turn the iPhone off. To turn iPhone back on, press and hold the Side button again until you see the Apple logo.
Restart iPhone SE/5 and earlier: Press and hold the top button until the slider appears. Drag the slider and switch from left to right to turn the iPhone off. To turn iPhone back on, press and hold the top button again until you see the Apple logo.
How to Restart iPad
Restart iPad that supports Face ID: Press and hold either volume button and the top button until the power off slider appears. Drag the slider, then wait 30 seconds for your device to turn off. To turn your device back on, press and hold the top button until you see the Apple logo.
Restart the iPad that has a Home button: Press and hold the top button until the power off slider appears. Drag the slider, then wait for 30 seconds for your device to turn off. To turn your device back on, press and hold the top button until you see the Apple logo.
Further Reading: How to Force Restart your iPhone
Tip 2. Take screenshots with AssistiveTouch
Step 1. Enable AssistiveTouch on your iPhone/iPad: Setting > General > Accessibility > AssistiveTouch (for iPhone X/11: go to Settings > Accessibility > Touch > AssistiveTouch). Toggle the button of AssistiveTouch until it appears green.
Step 2. You will see the AssistiveTouch circular button on your screen. Tap on it > Device > More > Screenshot.
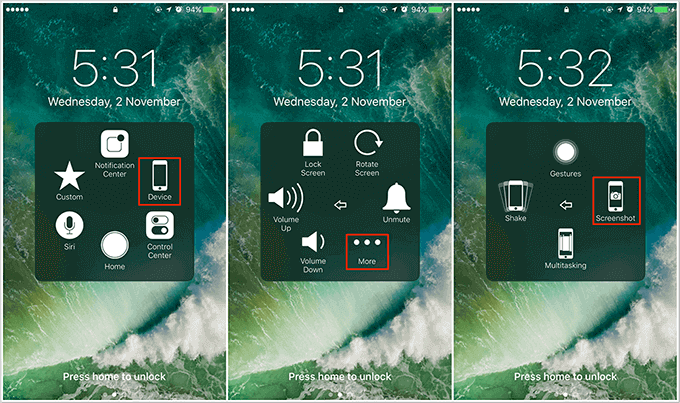
Take Screenshots with AssistiveTouch
Tip 3. Use 3D Touch to Take Screenshots
For iPhone 6s and later, you can add Screenshots to 3D Touch Actions to take screenshots: Setting > General > Accessibility > AssistiveTouch > enter the Customize the Top Level Menu> 3D Touch Actions > and check the “Screenshot”. Then press strongly on the AssistiveTouch circular button and the screenshot should be taken.
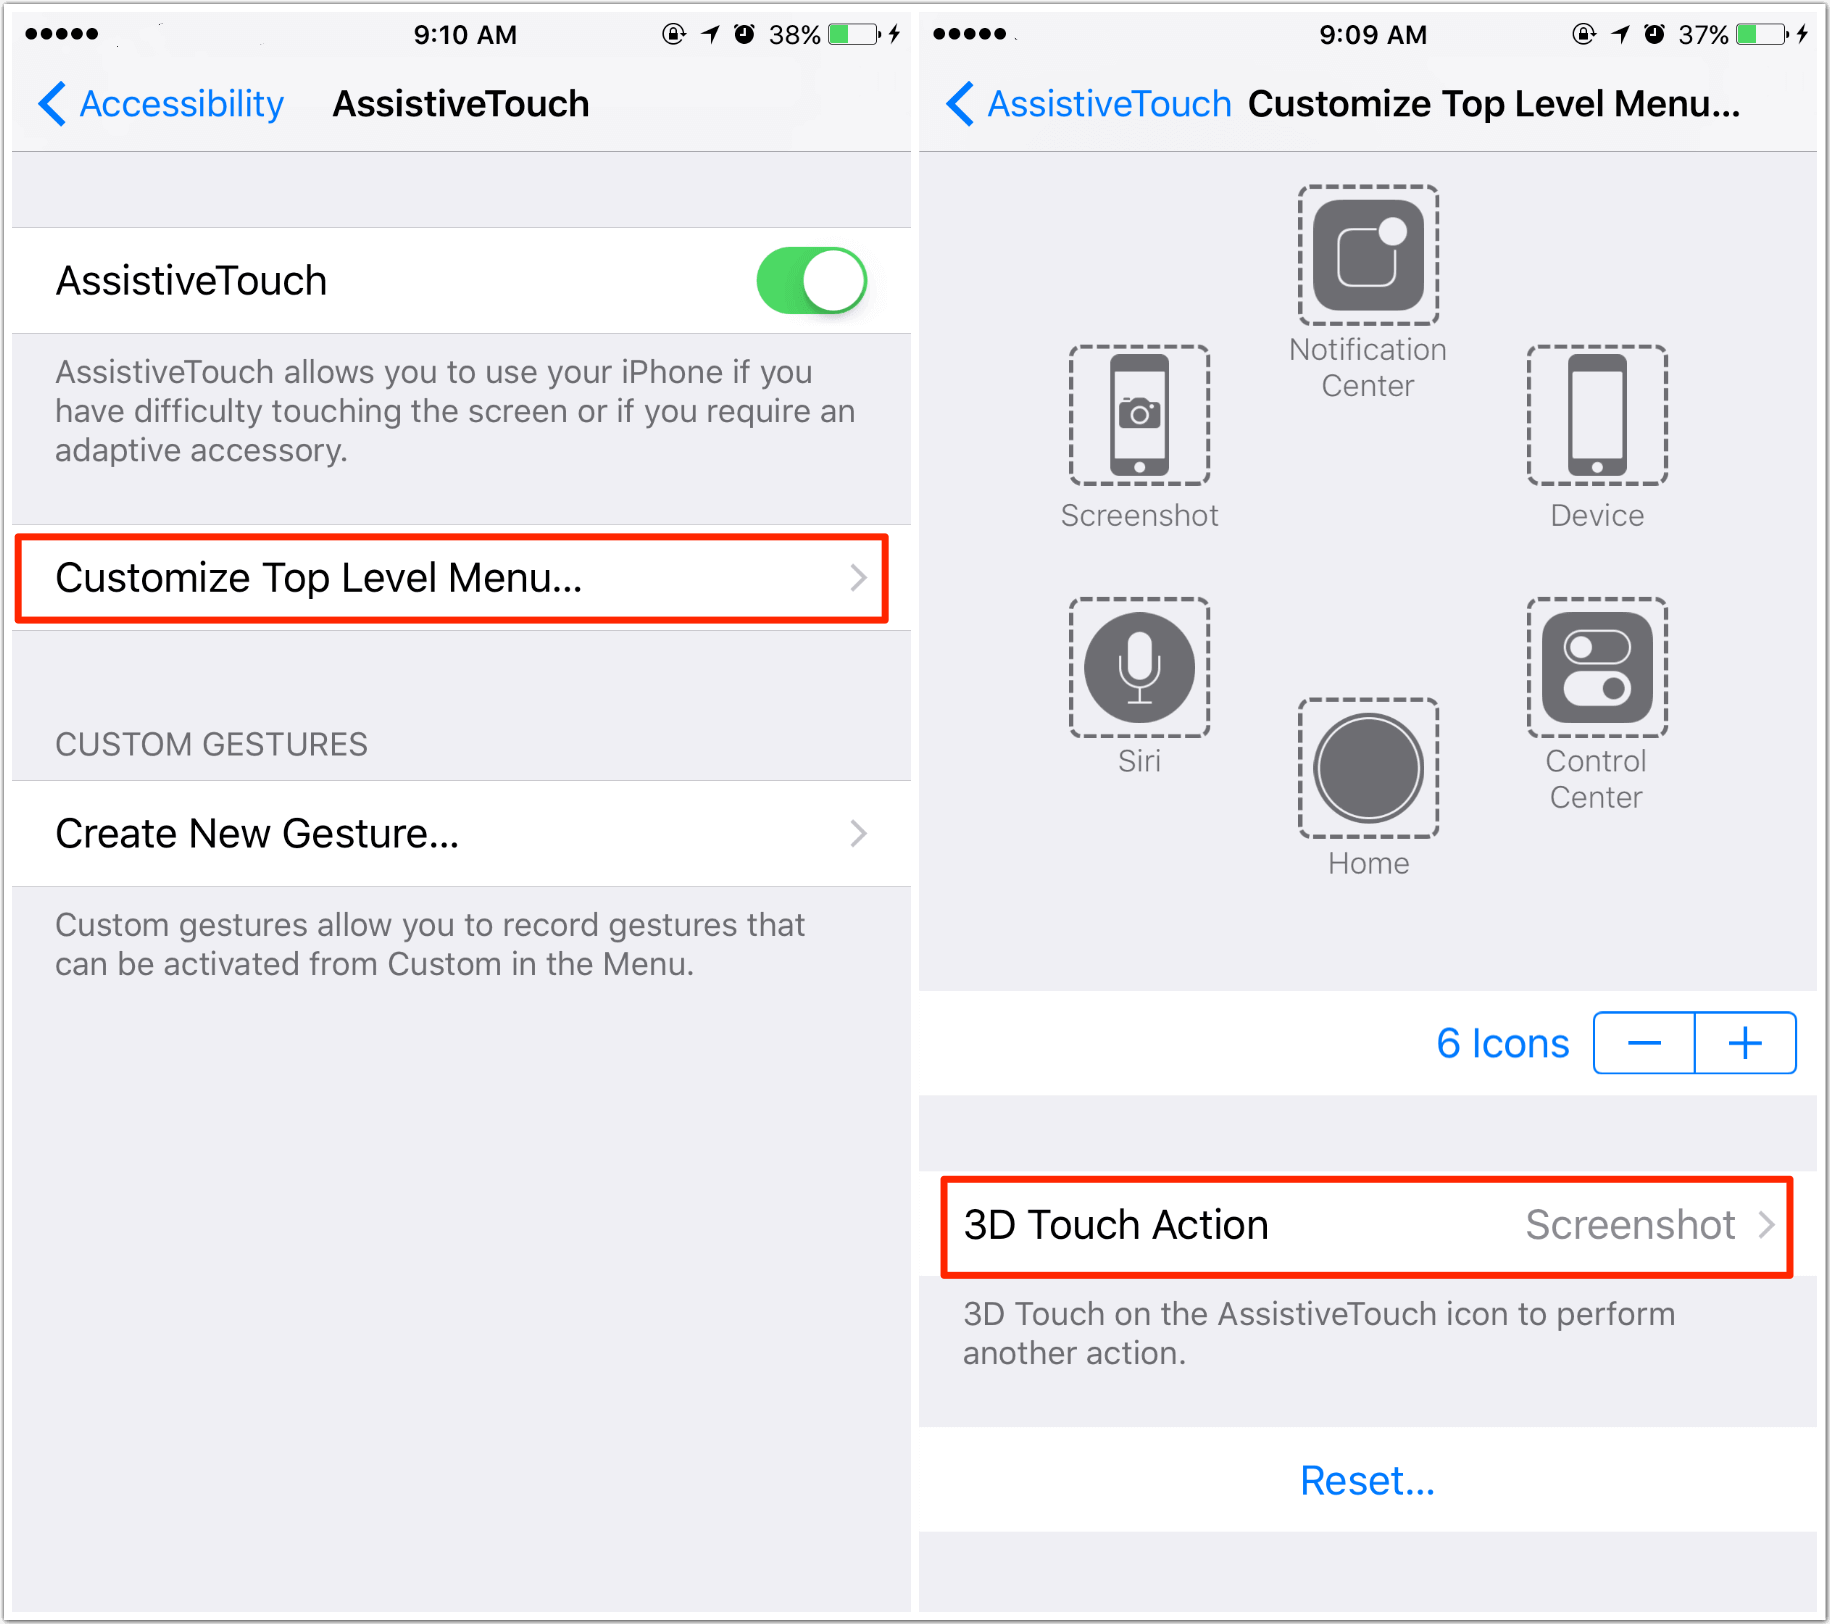
Take Screenshots with 3D Touch Action
For iPhone X/11: go to Settings > Accessibility > Touch > AssistiveTouch > 3D Touch option > Select Screenshot.
Tip 4. Fix iPhone Screenshot Not Working with A Few Clicks
AnyFix, as a professional system/iTunes troubleshooter, supports fixing over 200 iTunes problems and more than 130 system issues within a few steps. Also, it commits to providing a quick and easy way to get your iPhone out of issues in minutes. Now you can follow the detailed steps below to fix the iPhone iPad screenshot not working issue with ease.
Step 1. Download AnyFix and launch it on your computer > connect your iPhone to the computer > choose the System Repair.
Free Download * 100% Clean & Safe
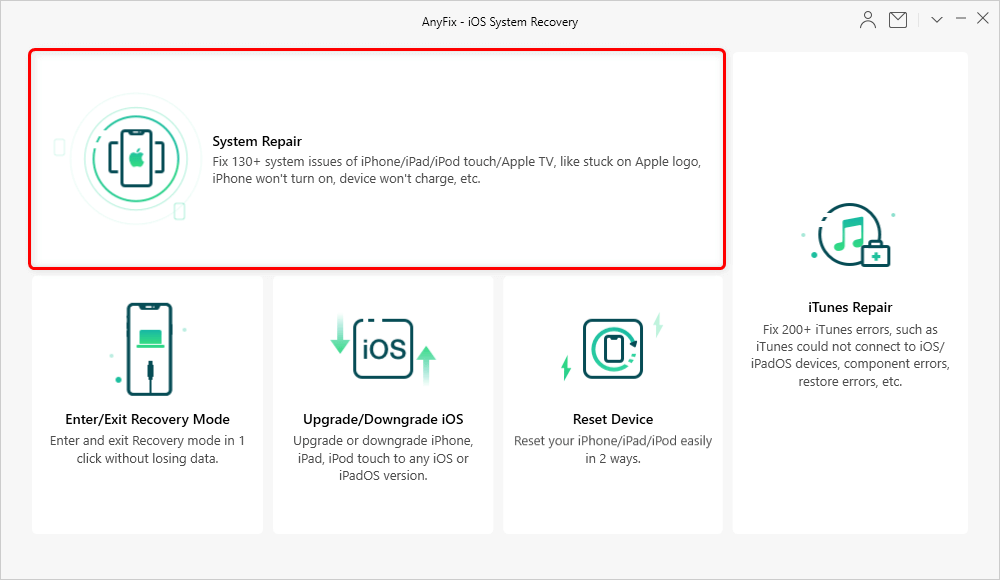
Tap on System Repair
Step 2. Choose the 50+iPhone Problems >Click on the Start Now to continue.
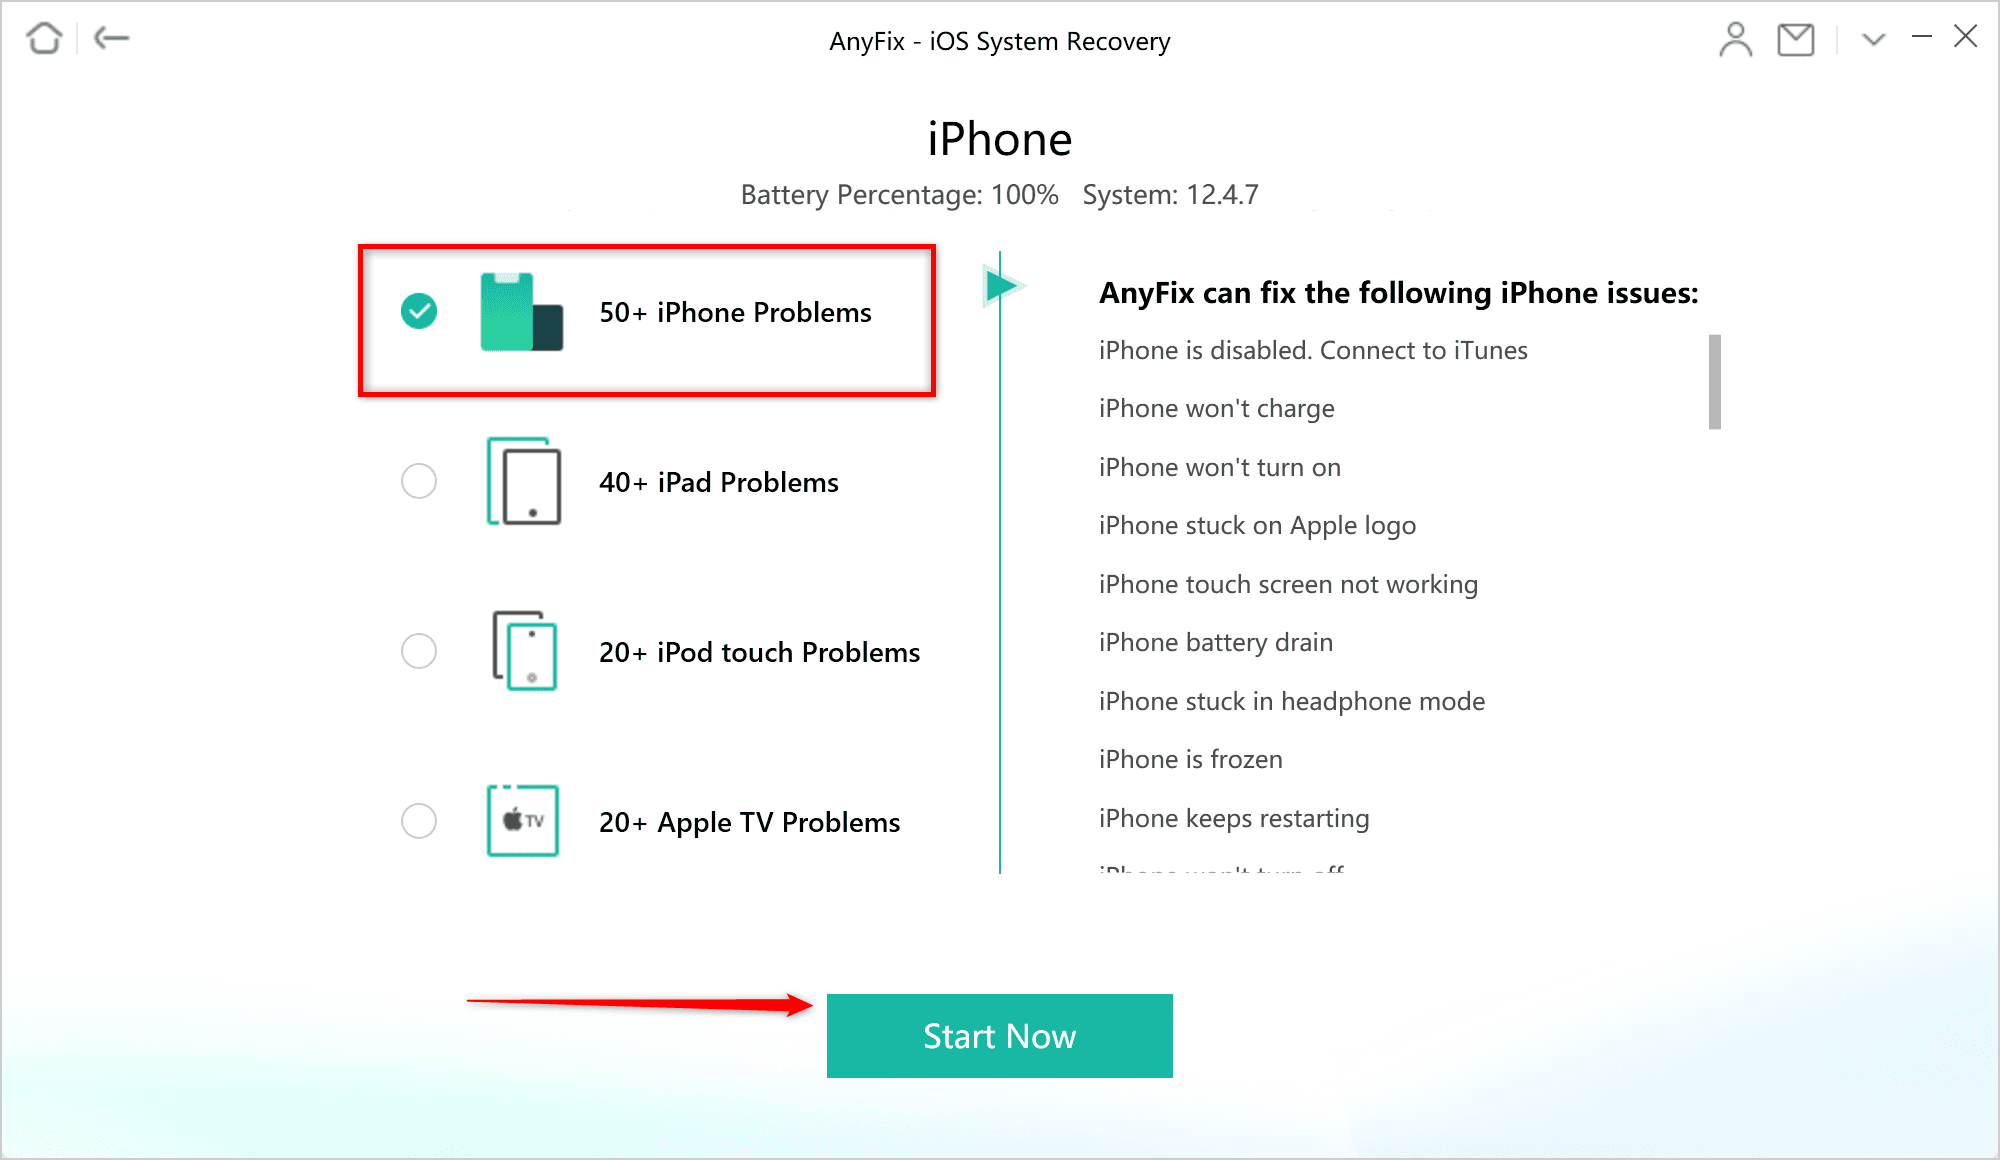
Click on Fix Now
Step 3. Choose Standard Repair as the most suitable repair mode which won’t risk any iPhone data loss.
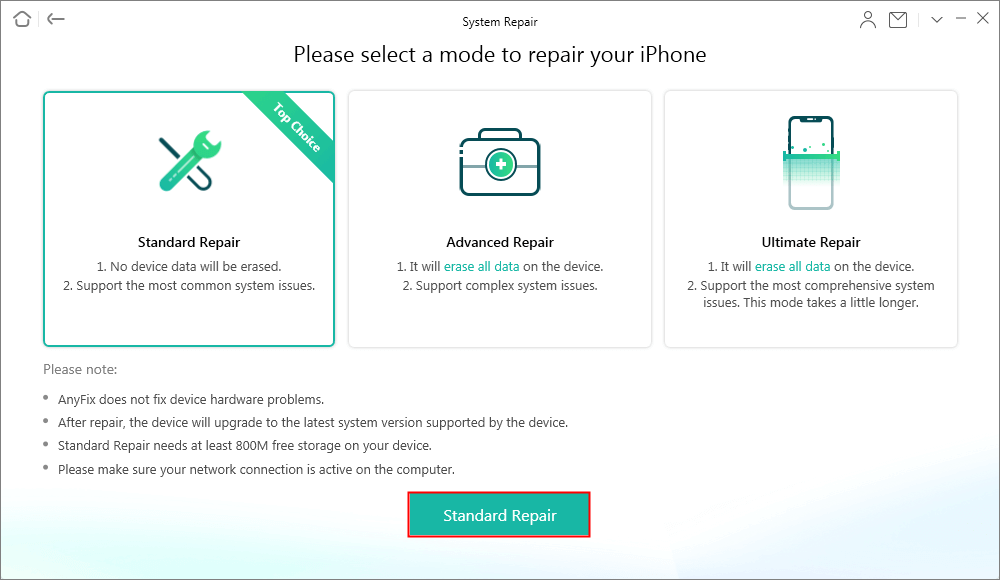
Choose A Repair Mode and Continue
Minutes later, you will see a Repair Completed note on the screen. Now the iOS device will be out of the Screenshots not working issue.
Bonus Tip: How to Manage Screenshots on iPhone
To manage all photos on your iOS devices like screenshots, camera roll, photo stream, photo library, and more, you can try AnyTrans. It is a File Manager for iOS devices, allowing you to transfer screenshots and other photos from iPhone to computer or to another iDevice directly. AnyTrans sorts your photos in Albums and you can find all screenshots without effort. In addition, you can also add photos from computer to iPhone without wiping existing pictures.
Step 1. To manage your iPhone screenshots/photos, you need to download AnyTrans firstly on your computer. Then run it and connect with your iPhone. Go to the page below, and choose Photos.
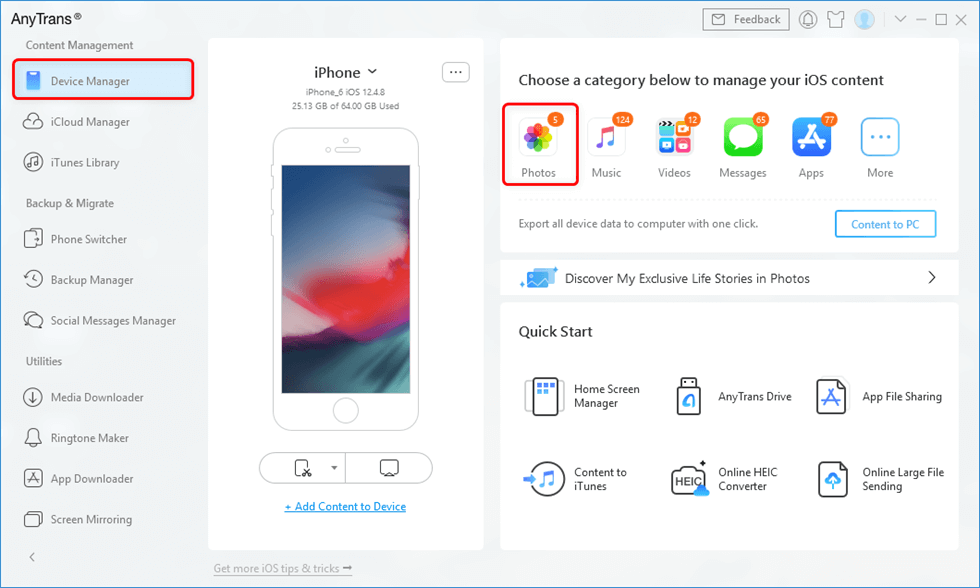
Go to Device Manager and Click Photos
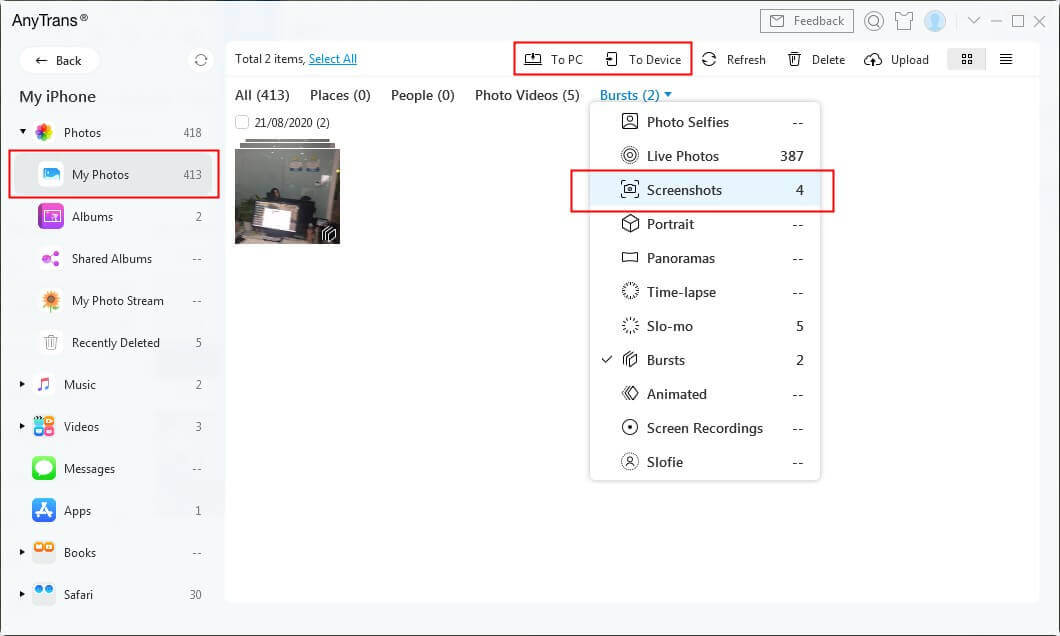
Step 2. Tap My Photos and choose Screenshots to manage. Then you can click the Delete button, Send to PC/Mac, Send to Device button to delete or transfer.
Take Screenshots with AssistiveTouch
The Bottom Line
Many people may meet iPhone/iPad screenshots not working. Here we provide you three useful methods to fix this issue, hope anyone of it can help you. Also, you can use AnyTrans to manage your screenshots, photos, or other data on your device.
More Related Articles

Member of iMobie team as well as an Apple fan, love to help more users solve various types of iOS & Android related issues.
Product-related questions? Contact Our Support Team to Get Quick Solution >
