How to Fully Manage Photos on iPhone
Managing photos on an iPhone is pretty simple, however, it is a good idea to learn the most efficient way to do it. Here we explain in detail how to manage photos on an iPhone so you don’t miss out on the built-in photo features on your device.
The iPhone is an amazing piece of device as it brings with it some of the features that you would not find in any other devices. One of the notable features of an iPhone is its camera quality. If you use an iPhone for taking photos, you would know how efficient and great it is to take photos with your device.
Because of that, a lot of users go capturing photos on their devices endlessly. If you are one of these users, you would want to make sure that you know how to properly organize your photos. Managing photos on your iPhone is an important thing or your photos will remain scattered here and there on your device.

Fully Manage iPhone Photos
In the following guide, you are going to learn how you can best manage photos on your iPhone. You will take a look at how you can share your photos, how to transfer your photos, and so on.
How to Manage Photos with iPhone
Apple understands that people love taking photos. Therefore, they have added some of the useful features to manage photos right into the operating system of the device. The Photos app on your device is a clear example of it as it comes equipped with all the organizational features you need.
Let’s see how you can do certain things with the photos on your iPhone.
Share Photos on iPhone
When you capture some amazing photos on your device, you may want to share them with your friends and family. iPhone provides you with an easy way to do that and here is how you do it for yourself.
Step 1. Launch the Photos app on your iPhone and select the photo or photos you would like to share.
Step 2. Tap on the up-arrow icon at the bottom-left corner to share the selected photo. You may then choose how you would like to share your photo.
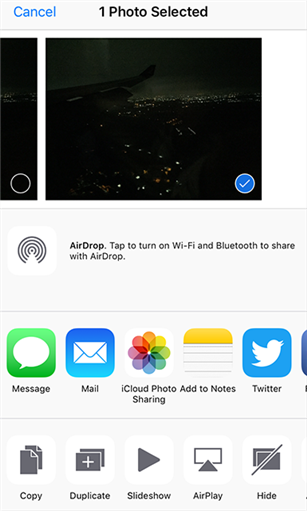
Share photos using various options on an iPhone
You can share your photos using AirDrop, Bluetooth, email, among other options.
Transfer Photos on iPhone with iTunes
Transferring photos and sharing photos basically mean the same thing, however, transferring usually means copying your photos from your iPhone to your computer. If that is what you would like to do, it is easy to do on your iPhone.
Step 1. Unlock your iPhone and connect your iPhone to your computer using a compatible cable.
Step 2. Launch the iTunes app on your computer and select your device. Click on the Photos option beneath your device details.
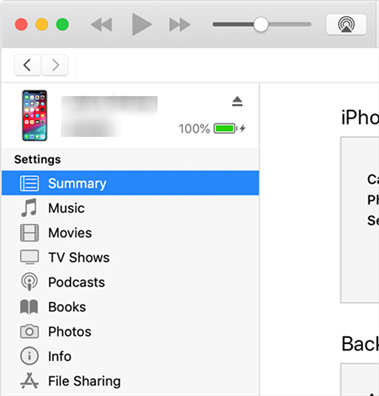
Transfer photos from iPhone to computer with iTunes
You will now find the option to sync your iPhone photos with your computer. Choose the option and all of the photos saved on your iPhone will be transferred to your computer.
Upload Photos to iCloud from iPhone
If you’re running out of memory space on your iPhone or you simply wish to have your photos in your iCloud account, there is an easy way to upload photos to iCloud from an iPhone.
Step 1. Launch the Settings app on your iPhone and tap on your name at the top.
Step 2. Tap on iCloud followed by Photos on the following screen on your iPhone.
Step 3. Turn on the option that says iCloud Photo Library. Then, from the options available beneath the toggle, ensure the one that says Download and Keeps Originals is check-marked.
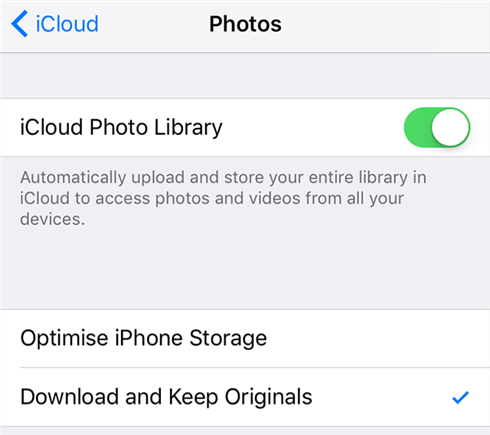
Upload the iPhone photos to iCloud
What you have done is you have enabled iCloud photo library on your iPhone. Your iPhone will now start uploading all the photos available on it to your iCloud account.
You can then view the photos on the iCloud web version from any of your devices.
How to Manage iPhone Photos with iCloud
Once your iPhone photos are uploaded to your iCloud account, iCloud is where you will then be able to manage your photos from.
Here are some of the things you can do with the photos in your iCloud account.
Download iPhone Photos from iCloud
If you ever need to download a photo that is saved in your iCloud account, you can do so using a few clicks as shown below.
Step 1. Head over to the iCloud web version and log-in to your account. Click on Photos.
Access the Photos section on the iCloud website
Step 2. Select the photo you need and click on the download icon. Your photos will start to download on your device.

Download iPhone photos from iCloud
You can then use any photo viewer on your device to view the downloaded photos.
Delete iPhone Photos from iCloud
Since iCloud could sync a number of data including your photos across your devices, the photos that you delete on the web version of iCloud will also be deleted on your iPhone.
Step 1. Open the iCloud website and click on the Photos option.
Step 2. Select the photo you would like to delete and click on the delete icon.
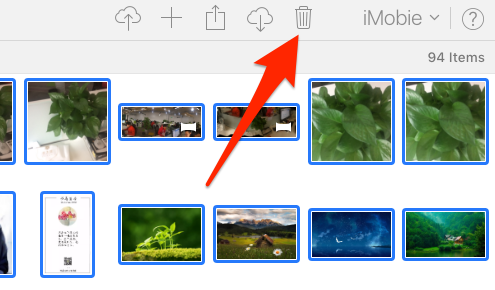
Delete iPhone photos on iCloud
Your photo will be removed from all of the devices where you are signed-in with your Apple account.
All-in-one iPhone Photos Manage Tool
While Apple by default allows you to perform many of the basic operations on your photos, these built-in services often lack the convenience that other third-party apps offer.
Meet AnyTrans, a third-party app that helps you transfer photos from your iPhone to your computer, from your computer to your iPhone, and from one iPhone to another with ease. The reason why you may want to use this app over any other method is that the app gives you the convenience that you deserve.
AnyTrans – iPhone Photo Transfer
- Transfer over 3000 photos from iPhone to laptop within 32 SECONDS.
- Transfer all photos like Camera Roll, Photo Stream, Photo Share, etc.
- No harm to the picture and will be kept in original quality.
- Work well with all iPhone models as well as iOS systems.
Free Download100% Clean & Safe
Free Download100% Clean & Safe
Free Download * 100% Clean & Safe
There are no confusing options in the app. It has a neat and clean interface and works in just a few clicks. The following shows how you can use the app to transfer photos from your iPhone to your computer.
Step 1. Download and install AnyTrans on your computer. Connect your iPhone to your computer and launch the app.
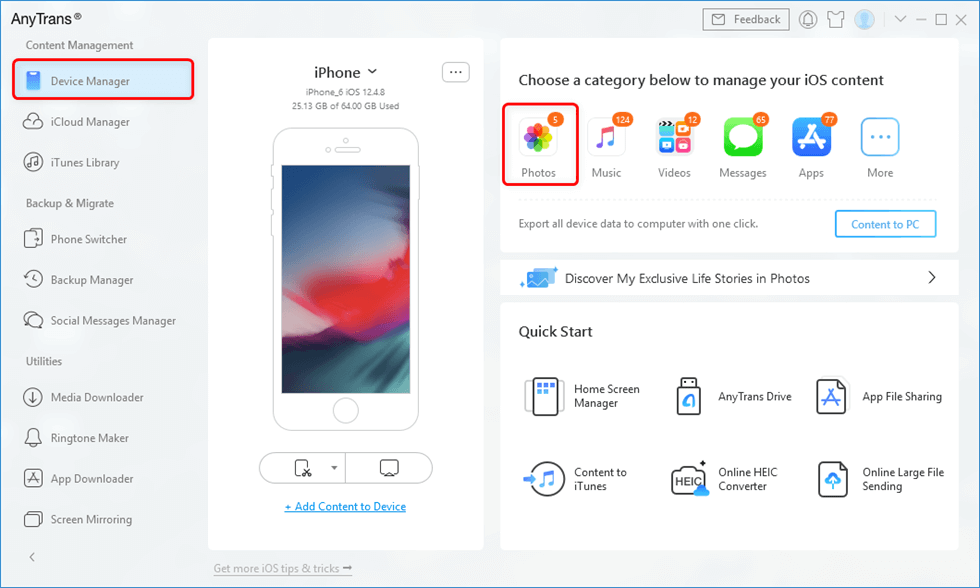
Click Photos in Device Manager
Step 2. Choose a category to manage your iOS content on the right side of the main interface. Here choose Photos and then, select the album you want to manage.
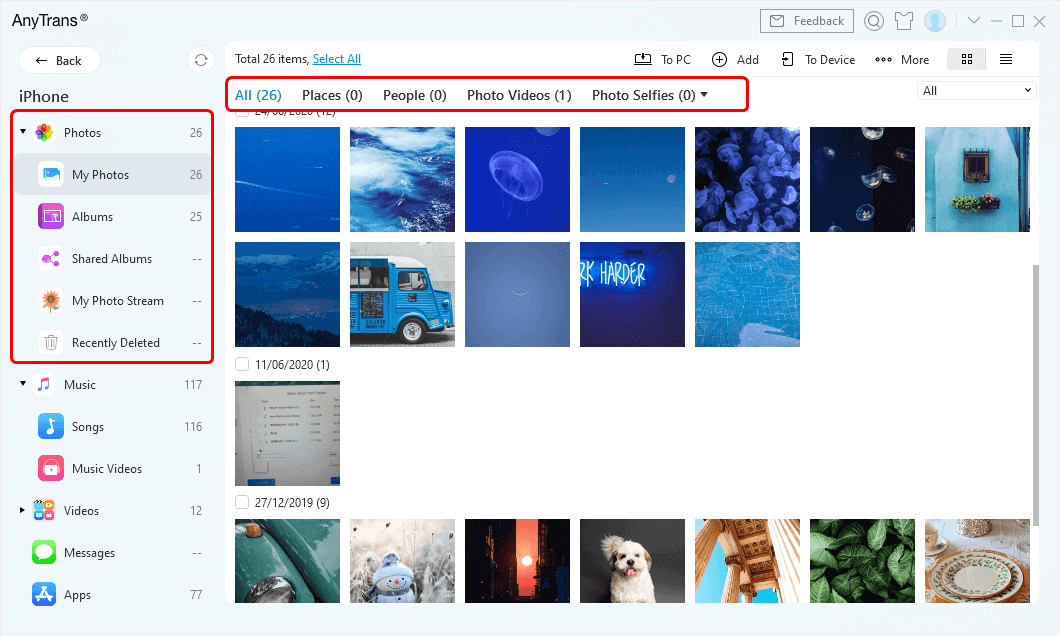
View Albums with AnyTrans
Step 3. On the following screen, select the photos you would like to transfer to your computer and click on the To Computer button at the top.

Select Photos and Send to PC
Your chosen photos will be transferred to your computer. To find these photos, just check the export path by clicking the down arrow on the upper right corner.
The Bottom Line
Managing photos on an iPhone is not as hard as you might think when you use AnyTrans. With the built-in options and a third-party app, you can easily share, transfer, and remove your photos on your iPhone.
More Related Articles

Member of iMobie team as well as an Apple fan, love to help more users solve various types of iOS & Android related issues.
Product-related questions? Contact Our Support Team to Get Quick Solution >
