
How to Jailbreak Your iPhone/iPad on Windows?
Jailbreaking an iPhone or iPad is the necessary thing you need to use the “Bypass iCloud Activation Lock” function and “Turn Off Find My iPhone” function of AnyUnlock - iCloud Activation Unlocker. But there is no direct jailbreak tool for the Windows system in the market currently. The good news is that you can create an environment manually to jailbreak your iPhone or iPad on a Windows computer. View the detailed guides to learn how to create an environment for jailbreaking iOS and complete a jailbreak on a Windows OS computer.
Note: Even though we prepare for these detailed instructions, we still admit that Jailbreak is a bit of a complex process.
- This guide is for Windows OS computer users to jailbreak the iPhone or iPad.
- It's easier to jailbreak your iOS devices with a Mac if you own one (macOS 10.13-10.15). And AnyUnlock - iCloud Activation Unlocker (Mac version) will directly help you finish the jailbreaking process of your iPhone/iPad on your Mac: here is a detailed guide on How to Bypass iCloud Activation Unlock on Mac with AnyUnlock.
Preparations for Jailbreaking iOS on Windows
Attention: Jailbreak may let you take the risk of losing Apple security, so please please think twice before jailbreaking the iOS devices.
Preparations needed for jailbreaking iOS devices on Windows:
1. Please make sure your computer runs Windows 7 or later (8/10), 32 or 64 bit;
2. Prepare a USB flash drive with 2 GB or more capacity;
3. Download ubuntu .iso file to your computer;
4. Download rufus.exe to your computer;
5. Download checkra1n-x86_64 file on your computer and then copy (or drag) it to your flash drive for creating Ubuntu environment.
Detailed Instructions for Jailbreaking iOS on Windows
Step 1. Create Ubuntu USB Flash Drive
① Plug in your USB flash drive to the computer;
② Run rufus on your computer (If you have not downloaded it yet, please download it at first);
③ Left-click the rufus file to open it;
④ Click ‘SELECT’ > Select the downloaded checkn1x ISO > Retain other options by default > click ‘START’.
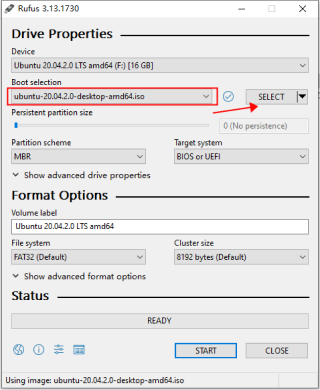
Select the Downloaded Checkn1x ISO
⑤ A warning message will pop up. Choose the ‘Write in ISO Image mode’ option. Then, click ‘OK’ option.
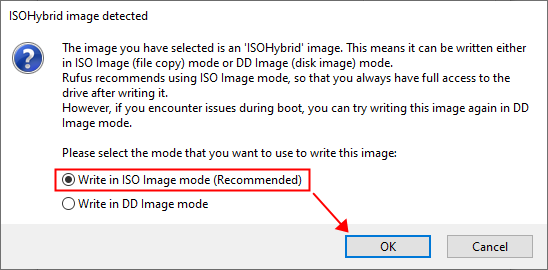
Choose “Write in ISO Image mode” Option
Note: This process will erase all data on your USB flash drive. We highly recommend you to back up your USB flash drive at first.
⑥ It starts writing image. Please wait for a moment.
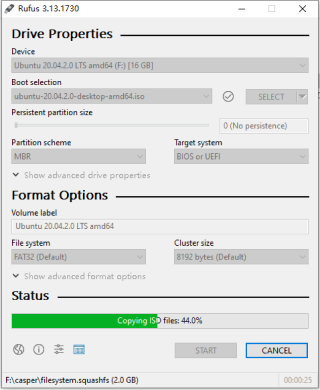
Wait for Writing iMage process
⑦ After complete the writing prcess, please click ‘CLOSE’ option.
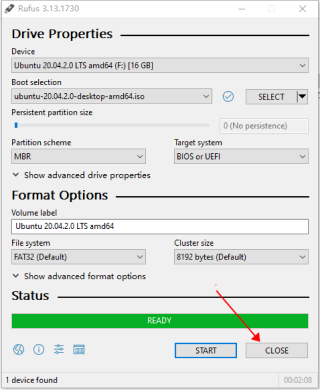
Writing Process Completed
⑧ Please unplug your USB flash drive and then plug it to your computer again.
Note: This process is vital because the Windows system may not detect your USB flash drive after creating Ubuntu drive.
Step 2. Boot Ubuntu on Windows Computer
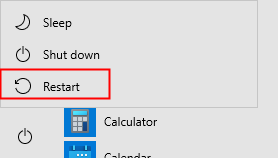
① Go to "Windows" on your computer > click "Restart" option to restart your compuer.
Restart Your Computer
② Press the F12 shortcut key when the computer is turned on and before the operating system loading.
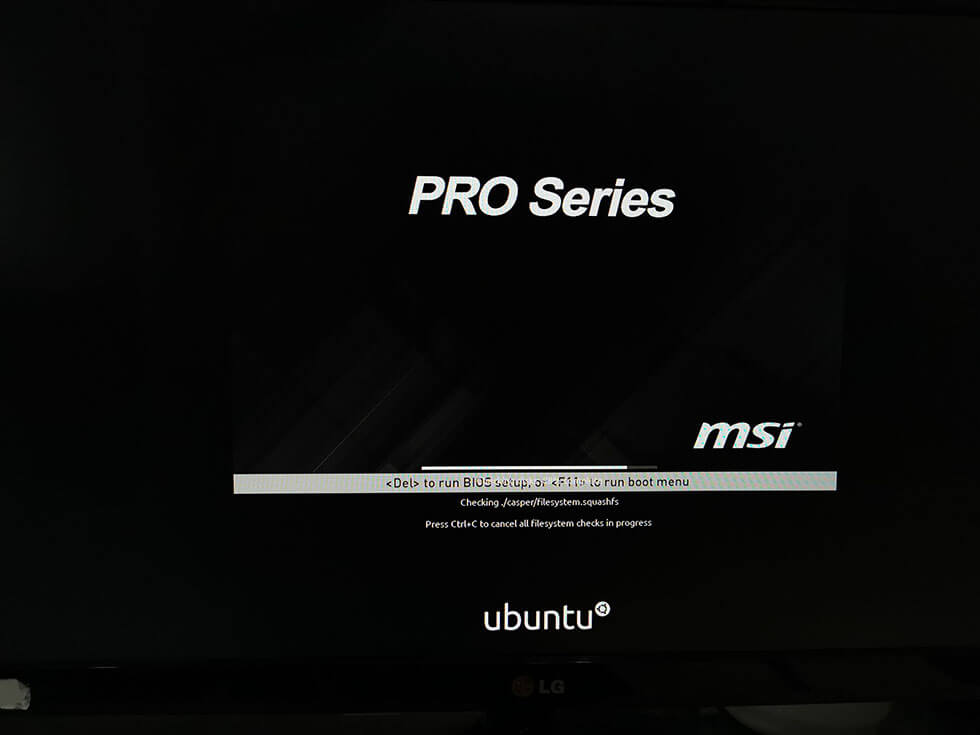
Press F12 to Boot Computer
Note: F12 is the shortcut to open the Boot Menu for most brands' computers. If it doesn’t work, please check the list prepared below. You can find your desktop brand and a corresponding shortcut.
| Desktop Brand | Laptop Brand | Motherboard Brand | |
|---|---|---|---|
| ESC | Dell | ASUS, Sony | MAXSUN, UNIKA, SUPOX, Spark, SOYO, EPOX, UNIKA, Jet way, J&W, Colorful, ECS, SOYO, FOXCONN |
| F8 | ASUS, BenQ | ASUS, YESTON, J&W | |
| F9 | HP, BenQ | BIOSTAR, GUANMING | |
| F11 | ASL | ||
| F11 | MSI | MSI, ASRock, ONDA, Colorful,ECS, Gamen, Topstar | |
| F12 | Lenovo, HP, Acer, Hasee, eFound, THTF, Haier | Thinkpad, Dell, Lenovo, TOSHIBA, Samsung, IBM, Acer, Hasee, Haier,eFound, THTF, GIGABYTE, Gateway, eMachines | GIGABYTE, Intel, Cthim, SOYO, FOXCONN, Gamen, Topstar |
Note: If you can’t start Start Menu anyway, please try to enter COMPUTER BIOS / UEFI mode and change the system boot settings to go into Linux CheckRA1n.
③ You'll see the Ubuntu system loading interface. All Ubuntu file system checks are in progress.
④ Please select the first option "*Ubuntu" to boot the selected Ubuntu OS.
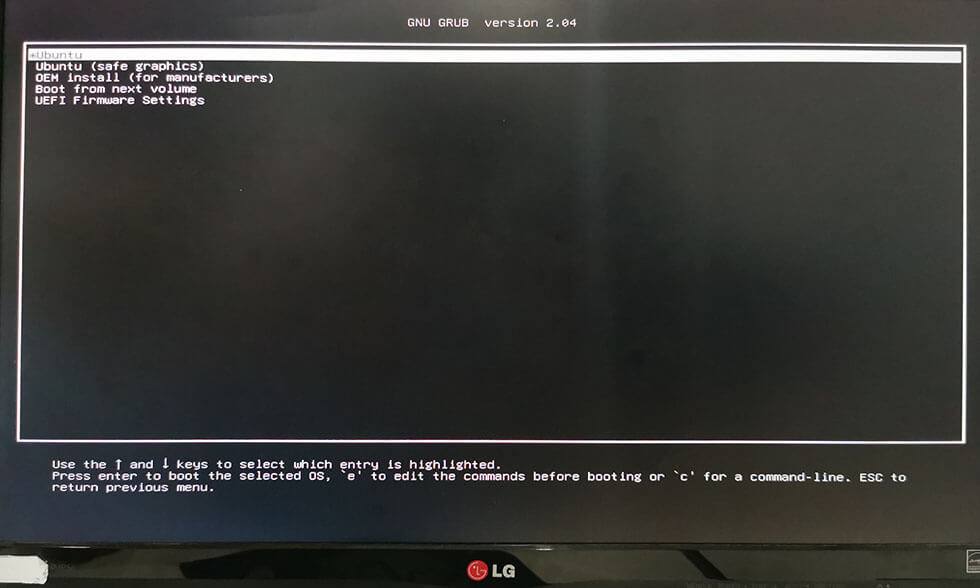
Select the First Option "*Ubuntu"
⑤ When the booting process completes, please select "Try Ubuntu" option to start Ubuntu from your flash drive.
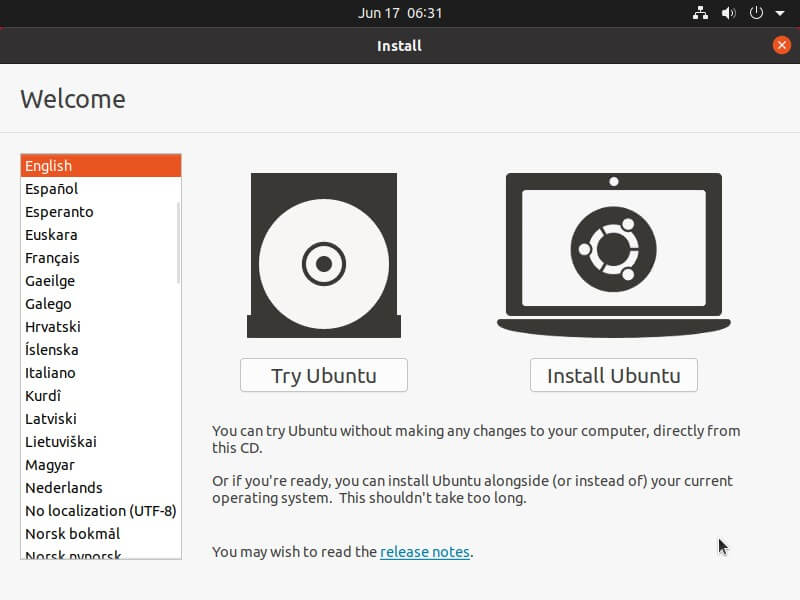
Select "Try Ubuntu" Option
⑥ After that, you've entered the Ubuntu system. Please keep your iPhone/iPad/iPod touch connected to the computer and you'll see it on the desktop.

See Your iOS Device on the Desktop
Step 3. Jailbreak Your iPhone/iPad Now
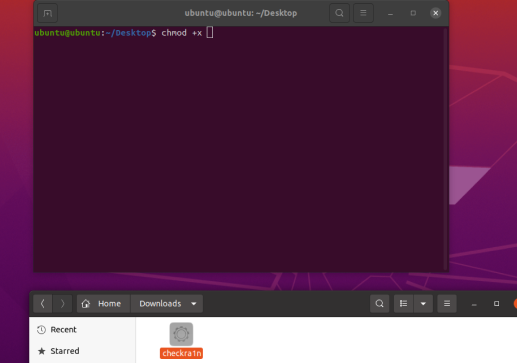
① Please find the "checkra1n-x86_64" jailbreak tool file you've downloaded before. If you haven't downloaded the file before restarting the computer, you can download it now through your computer’s browser. To open Checkra1n jailbreak tool, you'll need to use Terminal.
Use Terminal to Find Jailbreak Tool File
② Open Terminal, enter codes in Terminal in succession ( you can also copy the codes in the quotations directly):
A. Please enter "chmod +x " (there is a space before the plus sign and a space after the x) and drag the "checkra1n-x86_64" file to the Terminal window and press "Enter" key.
B. Please enter "sudo " (there is a space after sudo) and drag the "checkra1n-x86_64" file to the Terminal window again, then press the "Enter" key.
Enter Codes in Terminal in Succession
Note: If the Checkra1n file can't be draged to Terminal, please copy and paste it to the desktop directly. Right click the file and choose "Show in Files" and then drag it again.
③ If the codes are correctly entered in the previous step, then Checkra1n will be running with the following screen appear:
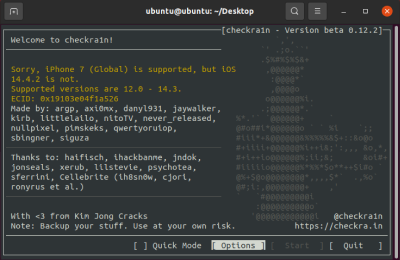
Checkra1n Is Running
#What to Do If the "Start" Button of Checkra1n Is Grey?
If your device is running versions that have not been tested by Checkra1n, especially iOS 13.5.1 and 13.6, the "Start"button on Checkra1n will be grey. You need to click "Options" and select "Allow untested iOS/iPadOS/tvOS versions" and click "Back" then the "Start" button will be usable.
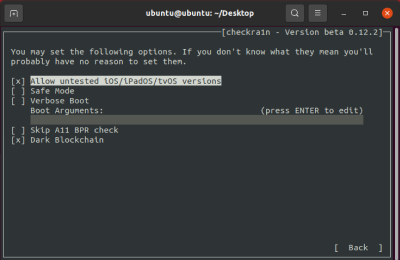
Allow Untested iOS/iPadOS/tvOS Versions
④ It will require you device to be into Recovery Mode for jailbreaking iOS device.
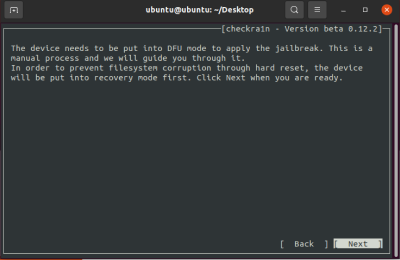
Put into Recovery Mode
⑤ Please click "Next" option and Checkra1n will help your iOS device enter recovery mode automatically.
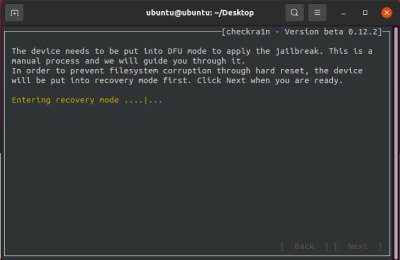
Enter Recovery Mode Automatically
⑥ Please click "Start" option and follow the given instructions on Checkra1n to put your iOS device into DFU mode.
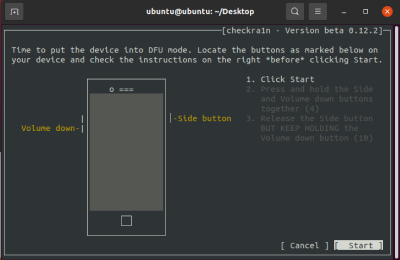
Put Device into DFU Mode
⑦ After entering DFU mode successfully, Checkra1n will immediately start installing jailbreak. Clik "Done" option when the jailbreaking process completes.
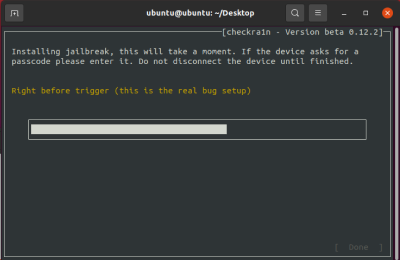
Starting Jailbreak
⑧ After jailbreaking iOS device successfully, please quit Ubuntu and restart your computer.

Restart Computer
⑨ Manually unplug your USB flash from your computer's USB port and then press "Enter". After restarting, your computer will automatically enter the Windows operating system.
⑩ After that, your iPhone or iPad has been jailbroken successfully. Now you can go back and open your AnyUnlock to use the “Bypass iCloud Activation Lock” function and “Turn Off Find My iPhone” function.
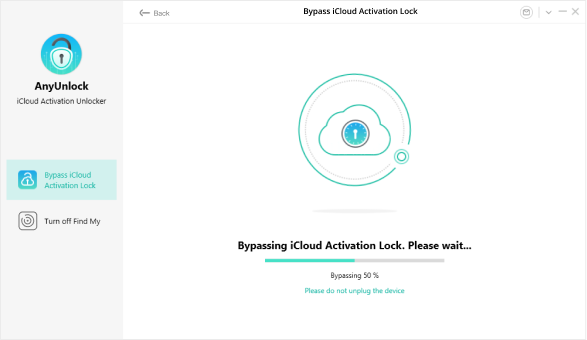
Bypass iCloud Activation Lock