How to Blur Part of A Picture [6 Proven Ways]
Whether you want to blur an entire picture or just a part of it, you will find several ways to do so. In this guide, we have discussed 6 different ways how to blur a picture to help you get started.

Do you want to add some privacy or artistic flair to your photos? Blurring certain parts of an image is a popular and effective technique that you should definitely try out! But with so many methods available, knowing where to start can take a lot of work.
That’s why we’ve created a guide on how to blur a picture so you can discover simple and easy-to-use solutions for photos. We’ll explore beginner-friendly online tools, mobile apps, and even advanced software options, giving you the flexibility to choose the perfect method based on your needs.
Whether you want to protect identities, enhance focus, or create dreamy effects, our guide will help you unlock the creative power of blurring like a pro! So grab your favorite image, get comfy, and let’s dive in!
Table of ContentsHide
How to Blur Part of A Picture with Ease? [Best]
Picsart is a powerful and versatile photo editing app that allows users to enhance their images with ease. It’s particularly useful for those looking to blur parts of a picture to either obscure sensitive information or create a specific artistic effect. With a user-friendly interface and a wide range of editing tools, Picsart makes it simple for both beginners and advanced users to achieve professional-looking results.
- User-Friendly Interface: Easy to navigate, making it accessible for beginners and advanced users alike.
- Variety of Tools: Includes numerous editing tools such as crop, rotate, resize, and more.
- Blur Effects: Offers multiple blur options like Gaussian, Motion, and Zoom blur.
- Stickers and Text: Allows you to add fun stickers and text to your images.
- Filters and Effects: A wide range of filters and effects to enhance your photos.
Steps to Blur Part of a Picture Using Picsart:
Step 1. Download and launch Picsart, tap the ‘+’ button to create a new project, and select the image you want to edit from your gallery.
Step 2. In the editing menu at the bottom, scroll through the options and select ‘Tools’. Then, choose ‘Blur’ from the list of available tools.
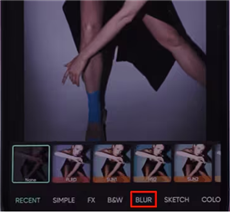
Click Blur
Step 3. Picsart offers several blur effects such as Gaussian Blur, Motion Blur, and Zoom Blur. Select the desired effect to apply to your image.
Step 4. Use your finger to apply the blur effect to the specific area of the picture you want to blur. Adjust the size and intensity of the blur using the on-screen controls.
Step 5. Fine-tune the blur effect by adjusting the intensity slider. You can also use the eraser tool to remove blur from areas where it’s not needed.
Step 6. Once you’re satisfied with the blur effect, tap the checkmark to apply the changes. Then, save your edited image to your device by tapping the ‘Download’ icon.
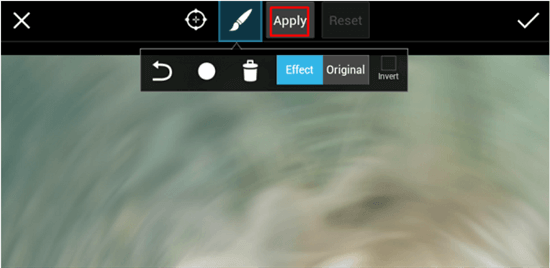
Apply Effects
These steps will guide you through the process of using Picsart to blur parts of your pictures effectively, ensuring your images are both visually appealing and meet your privacy needs.
How to Blur a Picture on iPhone with Portrait Mode?
If you’re an iPhone user who doesn’t want to use a third-party tool to blur your photos, you can do it via the Photos app. You’d be surprised to know that this method is pretty easy! Here’s how it works:
Step 1. Launch the Photos app and open any picture that you want to blur.
Step 2. Now tap on it to view it in full screen, and select “Edit” from the top-right corner.
Step 3. You will see a Depth slider at the bottom of the image. You can slide it around to add a blur effect to your picture.
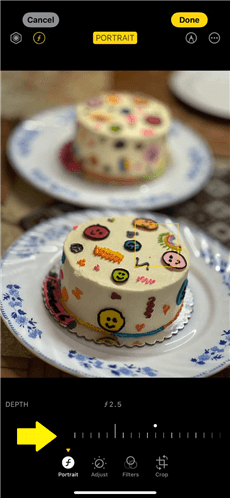
Adjust The Depth Slider
Step 4. Click “Done” to save the changes.
While this method is pretty easy, it only works on photos taken via the camera’s Portrait Mode.
How to Blur Part of A Picture on PowerPoint?
We all know PowerPoint as a software to make presentations; however, did you know that you can also use it to blur part of a picture? Here’s how to blur a picture using PowerPoint:
Step 1. Launch PowerPoint, go to “Insert > Pictures > This Device,” and choose an image from your local storage.
Step 2. Now click on the image for the “Picture Format” menu to appear at the top. Select “Artistic Effects” from these options.
Step 3. Select the “Blur” option from the Artistic Effects to blur the entire image.
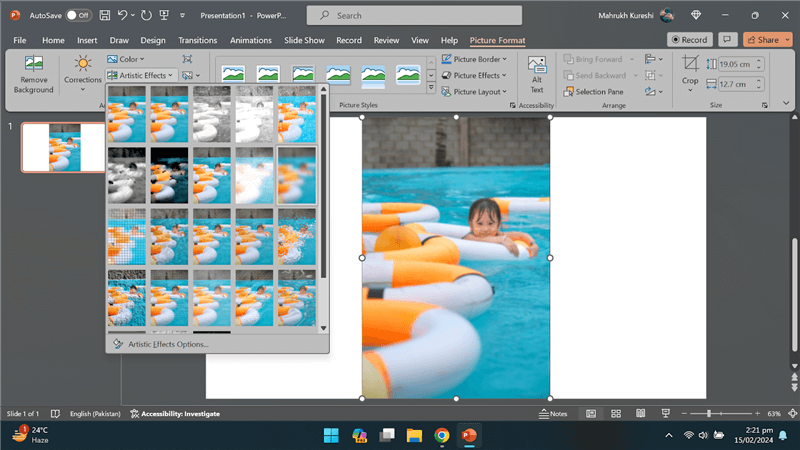
Select The Blur Options
Step 4. To adjust the blurriness level, click “Artistic Effects Options” at the bottom of the effects and adjust the “Radius” slider.
How to Blur A Picture on iPhone/Android for Free?
Another easy hack to blur a picture on iPhone/Android for free is to adjust the camera angle and settings. Here’s what to do:
Method 1: Click the Picture From Up Close
If you don’t have Portrait Mode on your device, you can try taking the picture from a closer angle. This will automatically blur the background.
Method 2: Try the Optical Zoom Feature
Most of the latest Apple and Android devices come with multiple lenses with a 2x or more zoom feature. This allows the camera to focus on the subject, blurring the background as a result.
Method 3: Manually Adjust the Settings
You can also adjust your camera settings manually to get a blurry background. For instance, use a wider aperture value like f/2.8. This will give you a nice blurry background effect.
How to Blur Part of A Picture on Photoshop?
Next up on our list of how to blur a picture is none other than the trusty Adobe Photoshop. Photoshop has been known for editing images to perfection. Therefore, it can very well blur parts of a picture, too. Here’s how to blur images using Photoshop:
Step 1. Open the picture you want to blur in Photoshop.
Step 2. Now, choose the “Blur Tool” from the left-hand menu.
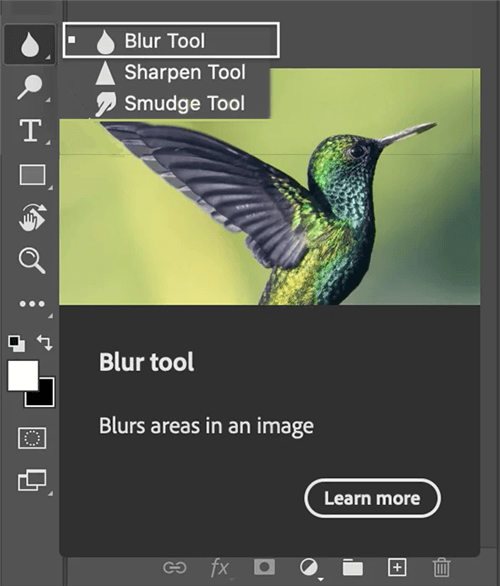
Choose The Blur Tool from The Menu
Step 3. Adjust the settings of the “Blur Tool.” This includes brush size, hardness, etc.
Step 4. Now click and drag the tool over the parts you want to blur. It works like a paintbrush; therefore, you can blur multiple parts in one image.
And that’s how to blur part of a picture using Photoshop.
How to Blur A Picture Online?
If you’re not very tech-savvy and are having trouble using apps to blur your picture, you can always opt for an online image editor to get the job done. Here are two free online tools to blur your entire image or a part of it:
Online Tool 1: Kapwing Blur Image
The first online tool that we recommend to blur your pictures is Kapwing Blur Image. To blur your image using this tool, you just need to upload your image to the website and adjust the settings. Here are the detailed steps for it:
Step 1. Go to the Kapwing Blur Image website and click on “Upload an Image” to open the Kapwing Editor.
Step 2. Now click on “Upload Image” and select an image to blur from your local storage.
Step 3. You will see a menu on the right with several editing options. Scroll down to the Blur slider.
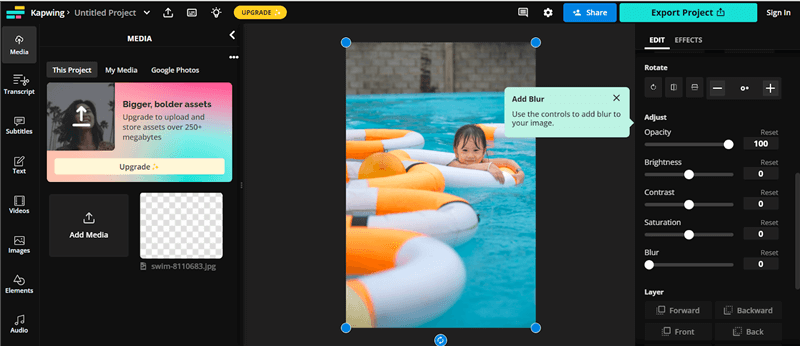
Scroll to The Blur Slider from The Right Side Menu
Step 4. Slide the slider to adjust the blur level.
Step 5. Once you have blurred the image to your liking, click on “Export Project” to download it to your PC.
Online Tool 2: Gifgit Blur Tool
Another free online blur tool is the Gifgit Blur Tool. Just like Kapwing, all you need is to upload the image you want to blur and adjust a few settings, and you’re good to go! Let’s have a look at the detailed steps to use Gifgit:
Step 1. Go to the Gifgit website and click on “Choose File” to upload an image to blur.
Step 2. Once your image is uploaded, click on the “Blur” brush indicated by a tear-drop icon.
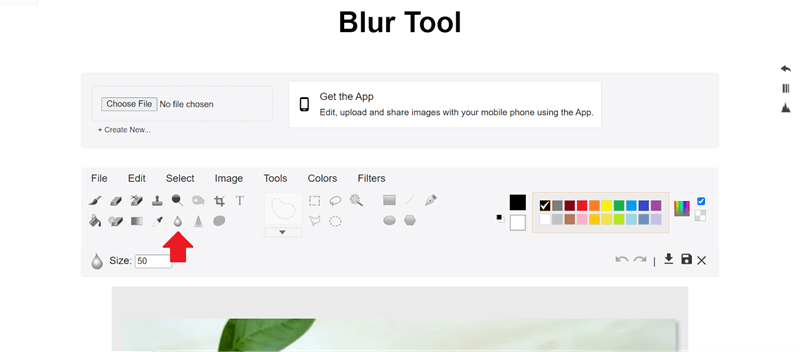
Select the Blur Brush
Step 3. Now, use the brush to blur the whole image or selected parts of it.
Step 4. Once you have blurred the required parts of your image, click on the arrow or disk icon at the top to save and download your photo.
And that’s how to blur part of a picture easily using an online tool.
The Bottom Line
In this comprehensive guide, we have discussed 6 different ways to blur an entire image or a part of it. We’ve covered everything from third-party tools and desktop-based software to mobile apps and browser-based tools.
However, if you’re looking for ways how to blur a picture with utmost perfection, we recommend using Picsart. It has several other editing features to give a finishing touch to your image. So, learn how to blur part of a picture seamlessly with Picsart!
Product-related questions? Contact Our Support Team to Get Quick Solution >
