5 Easy Ways to Crop A Photo on Mac/MacBook
Learn 5 easy ways to crop a photo on Mac/MacBook. Discover built-in tools like Preview and Photos app, plus online tools, and third-party apps for effortless cropping.

Wondering how to spruce up your photos? Cropping would possibly be the answer you are seeking out.
If you’re a proud owner of a Mac or MacBook, you are in good fortune. Cropping a photo to your device is less complicated than you might suppose! By cropping a picture, you could get rid of distractions, or truly improve the composition. So, let us display you five guides on the way to crop an image on Mac. Your photos are about to get a serious upgrade!
Table of ContentsHide
Why Do You Need to Crop a Photo on Mac?
Did a stranger photobomb your shot? Or is your photo titled? Do you want to fix it? Simply crop your photo on your MacBook.
Cropping isn’t just about cutting out unnecessary elements or resizing an image to fit a specific frame. It’s about telling a story and drawing attention to what matters most. Sometimes, your photo might contain distracting elements that detract from the main subject. Or you want to fit your photo on a specific platform.
Fortunately for you, cropping has never been simpler thanks to the Mac’s built-in tools and other third-party apps!
How to Crop a Photo on Mac Using Preview?
Using the Preview app is the first thing to do when cropping a photo on a Mac. The Mac’s built-in photo and PDF viewer is called Preview. This is how you crop a picture with it.
Step 1: Open Preview and select the image you wish to crop.
Step 2: To crop the photo, first select the area you want to keep in the final result.
Step 3: Once you have selected the area, go to Tools, and then Crop.
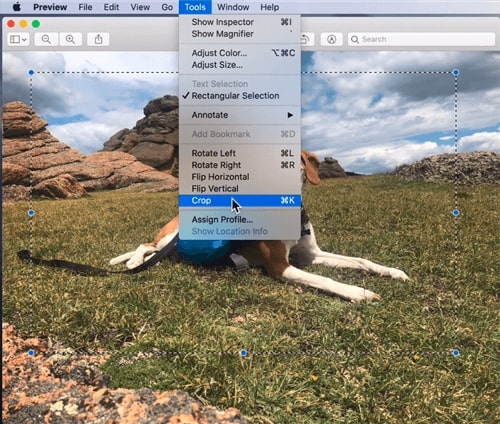
Click the Crop Option
Your photo is now cropped, and you can save it permanently on your Mac.
How to Crop a Photo on Mac Easily?
Picsart is a comprehensive photo editing tool that is not only available on mobile devices but also on Mac, offering a seamless experience for users looking to enhance their photos. Known for its user-friendly interface and powerful editing features, Picsart allows you to perform a variety of photo edits, including cropping, directly on your Mac. This makes it an ideal choice for anyone wanting to make quick adjustments to their photos with ease and precision.
Key Features of Picsart for Cropping Photos on Mac:
- Intuitive Interface: The app is designed for ease of use, making it simple to navigate and find the cropping tool.
- Precision Cropping: Offers precise control over the crop area, allowing you to adjust the dimensions exactly as needed.
- Aspect Ratio Options: Provides multiple aspect ratio presets (such as 1:1, 16:9) for easy cropping to standard sizes.
- Additional Editing Tools: Besides cropping, Picsart includes tools for resizing, rotating, and enhancing photos.
- Seamless Integration: Easily integrates with your photo library, allowing quick access and editing of your images.
Steps to Crop a Photo Using Picsart on Mac:
Step 1. Download and install Picsart on your Mac. Launch Picsart, then click on ‘Open’ to select the photo you want to crop from your library or drag and drop the photo into the Picsart window.
Step 2. In the editing toolbar, select ‘Tools’, then choose ‘Crop’ from the list of options.

Click Tools Below
Step 3. Adjust the cropping frame by dragging the corners or edges to select the area of the photo you want to keep. You can also choose from preset aspect ratios for precise cropping.
Crop a Photo
Step 4. Once you’ve selected the desired crop area, click the checkmark or ‘Apply’ button to crop the photo.
Step 5. Save your edited photo by clicking the ‘Save’ button or ‘Export’, then choose your desired format and location to save the cropped image.
How to Crop a Photo on Mac via Photos App?
You can crop your photographs easily and conveniently with the help of the Photos app on your Mac. Here’s how to crop photos with the Photos app, step-by-step:
Step 1: Open the Photos app on your Mac.
Step 2: Double-click the image you want to crop to open it from the library.
Step 3: Click the “Edit” button in the upper right corner of the window once the photo has opened.
Step 4: Click the “Crop” icon located in the editing toolbar at the top of the window.
Step 5: Click and drag the corners or edges of the crop box to resize and reposition it over the part of the image you want to keep.
Step 6: Once you’re satisfied with the cropping, click the “Done” button in the editing toolbar to apply the changes.
Click the “Crop” Icon
Step 7: After cropping, press “Command” + “S” on your keyboard to save.
Next up is using an online tool to crop a photo.
How to Crop a Photo on Mac Online?
Another way to crop a photo on a Mac is to use an online tool such as Luminar. Luminar is a great photo editor that is available for free online. It helps you edit your images without any need to download the setup on your Mac. Here is how you can crop a photo on a Mac with Luminar.
Step 1: Go to the Luminar website.
Step 2: Click on “Start Now.”
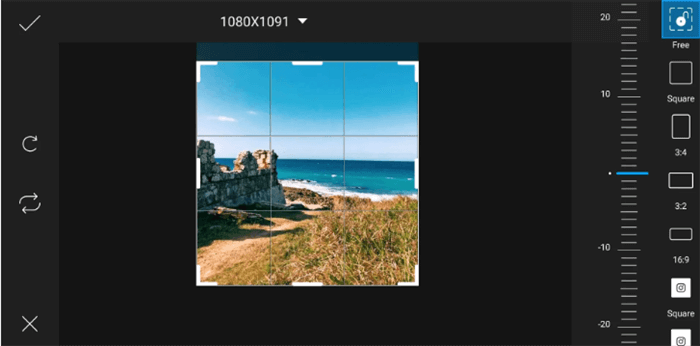
Step 3: Upload the photo you want to crop.
Step 4: Once the image is uploaded, click on “Crop” in the right panel.
Cropping an Image
Step 5: Make the adjustments and then click on “Apply.”
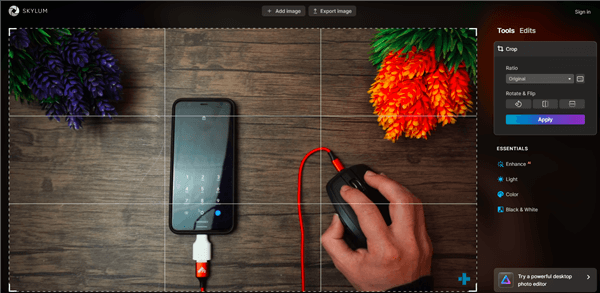
Step 6: If you are satisfied with the image, click on “Export Image” at the top of the screen.
And with that, your image is cropped and ready to go.
How to Crop a Photo on Mac with Third-Party Tool?
Last but not least are the third-party tools. These are tools that are designed for a specific reason such as editing photos. One such tool is CameraBag Pro. It is a simple yet professional-grade photo editor. You can also use it to crop a photo with ease. Here is how you can do so:
Step 1: Go to the official website of CameraBag Pro.
Step 2: Download it on your Mac and launch it.
Step 3: Select the image you want to crop with the Finder window.
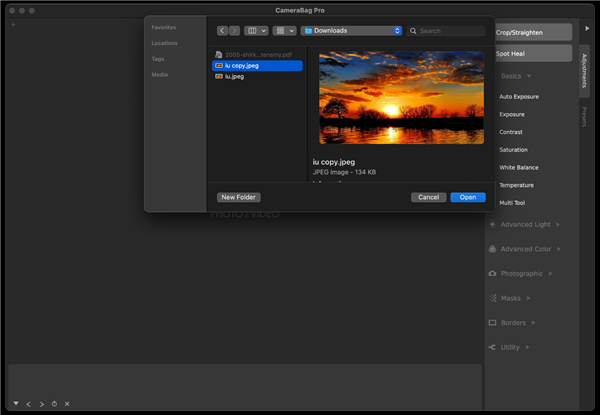
Add Image
Step 4: Click on “Crop/Straighten” in the top right corner of the window. Adjust the crop box and click on “Done.”
With that, we are all done with the ways of cropping photos on Mac. Now, let us tell you some tips to remember when cropping photos on Mac.
Tips to Remember While Cropping
Cropping is a pretty simple thing to do but there are some tips you can use to make sure your photos come out looking great. Let’s take a look at some of them here:
- Maintain Aspect Ratio: Don’t let your photo lose its charm! Keep the aspect ratio intact so that your photo stays true to its original form. Look for options to lock the ratio and preserve those perfect proportions.
- Rule of Thirds: Ever heard of the rule of thirds? It’s like a secret ingredient for picture-perfect cropping! Align your key elements along the gridlines or intersections to create a composition that’s bound to turn heads.
- Experiment with Composition: Time to get creative! Mix things up with different cropping compositions until you find the one that speaks to you. Who knows? A small tweak could make a world of difference!
- Consider the Story: Every photo has a story to tell. Before you crop, think about the tale you want to share. Trim away distractions and focus on what truly matters to bring your narrative to life.
- Backup Originals: Keep your options open! Always make a backup of the original photo before diving into cropping. That way, you can unleash your creativity without any worries.
- Mind the Resolution: Don’t let your masterpiece lose its shine! Pay attention to the resolution as you crop, especially if you plan on printing or enlarging your photo. Quality matters!
- Practice and Patience: Rome wasn’t built in a day, and neither are cropping skills! Enjoy the journey, experiment fearlessly, and watch your cropping prowess grow with each edit.
Apply these tips to your photo cropping adventures and watch them stand out!
The Bottom Line
In conclusion, cropping photos on your Mac is very simple thanks to tools like Picsart. It’s like sculpting your images to perfection! Take your time to experiment and find the right balance. Remember, editing on your Mac is all about expressing yourself and bringing your vision to life. So, jump in, explore different techniques, and let your creativity shine through each crop. Happy editing!
Product-related questions? Contact Our Support Team to Get Quick Solution >
