How to Overlay Other Images on A Picture (New!)
There are different workarounds that you can use to overlay other images in a picture. Read this guide and learn three proven ways to overlay images on a picture effortlessly.

Overlaying other images on a picture can be a very tricky and time-consuming process. However, when you understand how this technique works, you can easily transform your ordinary photos into captivating works of art that tell a richer story.
With that said, if you’re wondering how to overlay images on a picture, this comprehensive guide will walk you through the best methods to overlay images. Stick around!
Table of ContentsHide
1. Overlay Multiple Images for A Creative Look Instantly [Easy&Fast]
The fastest and most effective way to overlay images is by using Picsart – Overlay Images Online for Free that gives you the creative freedom to overlay images on any device using efficient features.
Picsart Logo
Picsart’s image overlay feature allows users to add layered images or textures to photos to create unique, creative effects. With rich layer options, users can overlay various materials, including stickers, textures and other images, to make their works richer and more diverse. At the same time, you can also adjust the transparency and blending mode of the overlay layer to create a personalized visual style.
Key Features
- Rich overlay materials: Provides a variety of overlay layers, including stickers, textures, artistic effects, etc., to meet different creative needs.
- Flexible blending modes: Picsart allows users to choose different blending modes to create unique visual effects and artistic styles.
- Adjustable transparency: Users can adjust the transparency of overlay layers to control the visual presentation of the image.
- Custom overlays: Users can use their own images as overlay layers to create unique, personalized creations.
How to overlay images with Picsart:
Step 1: Open Picsart and click to upload pictures. You can upload pictures from your own computer or select pictures from the material library.
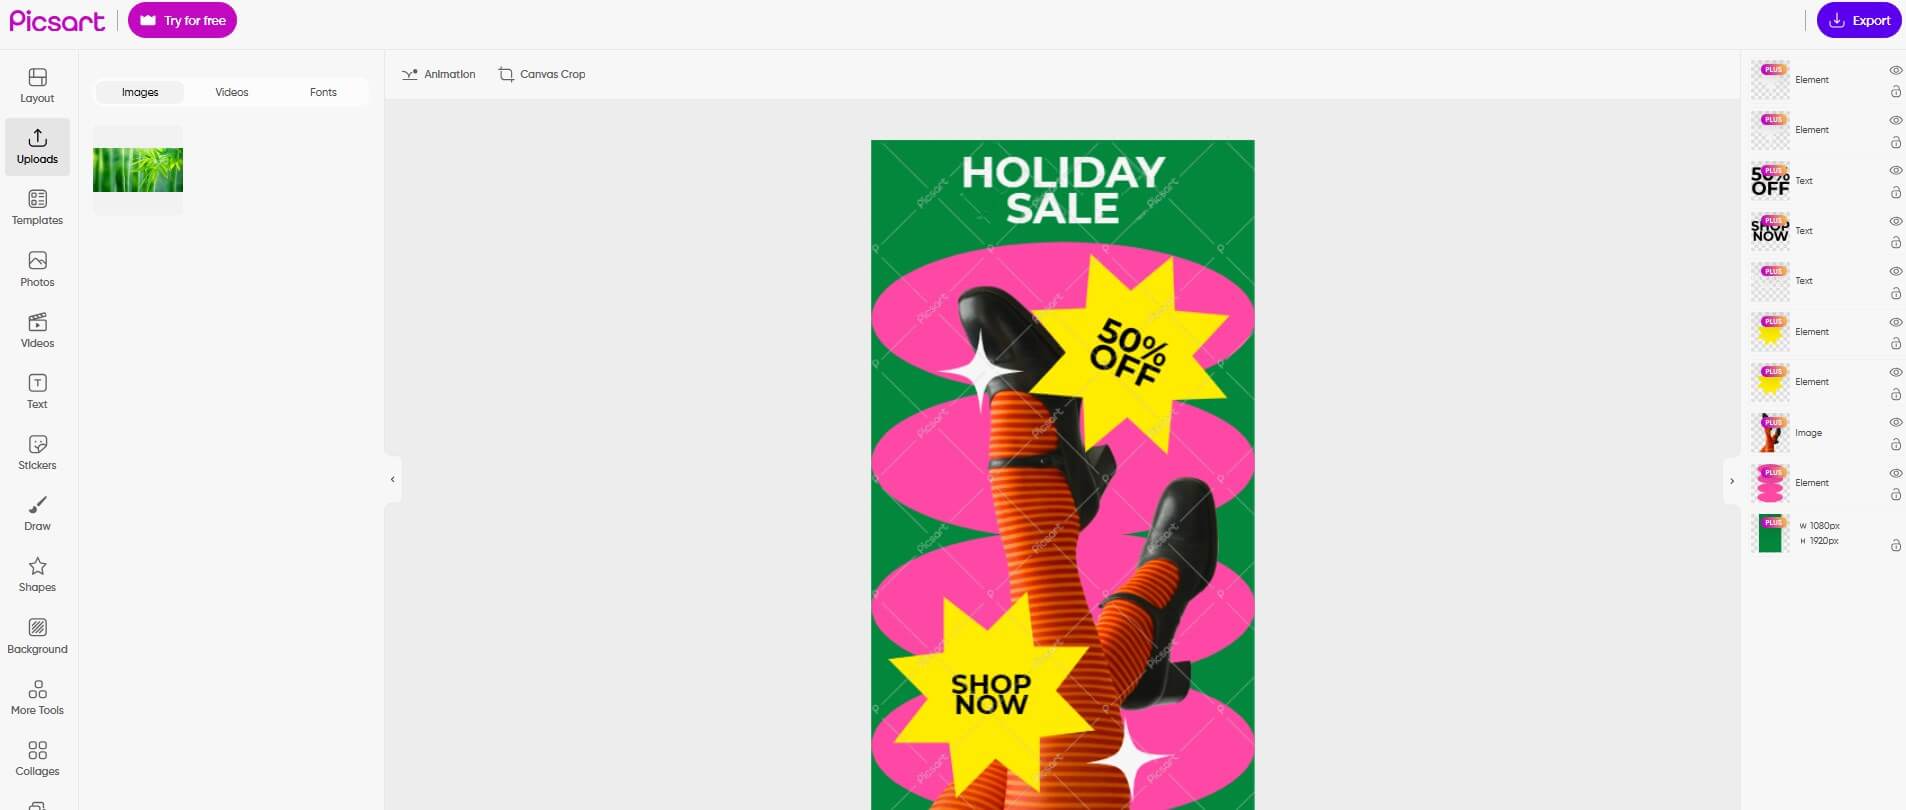
update a picture
Step 2: Then upload an image you want to overlay again.

continue adding pictures
Step 3: Adjust the position, transparency, and layer of the overlay image as needed.
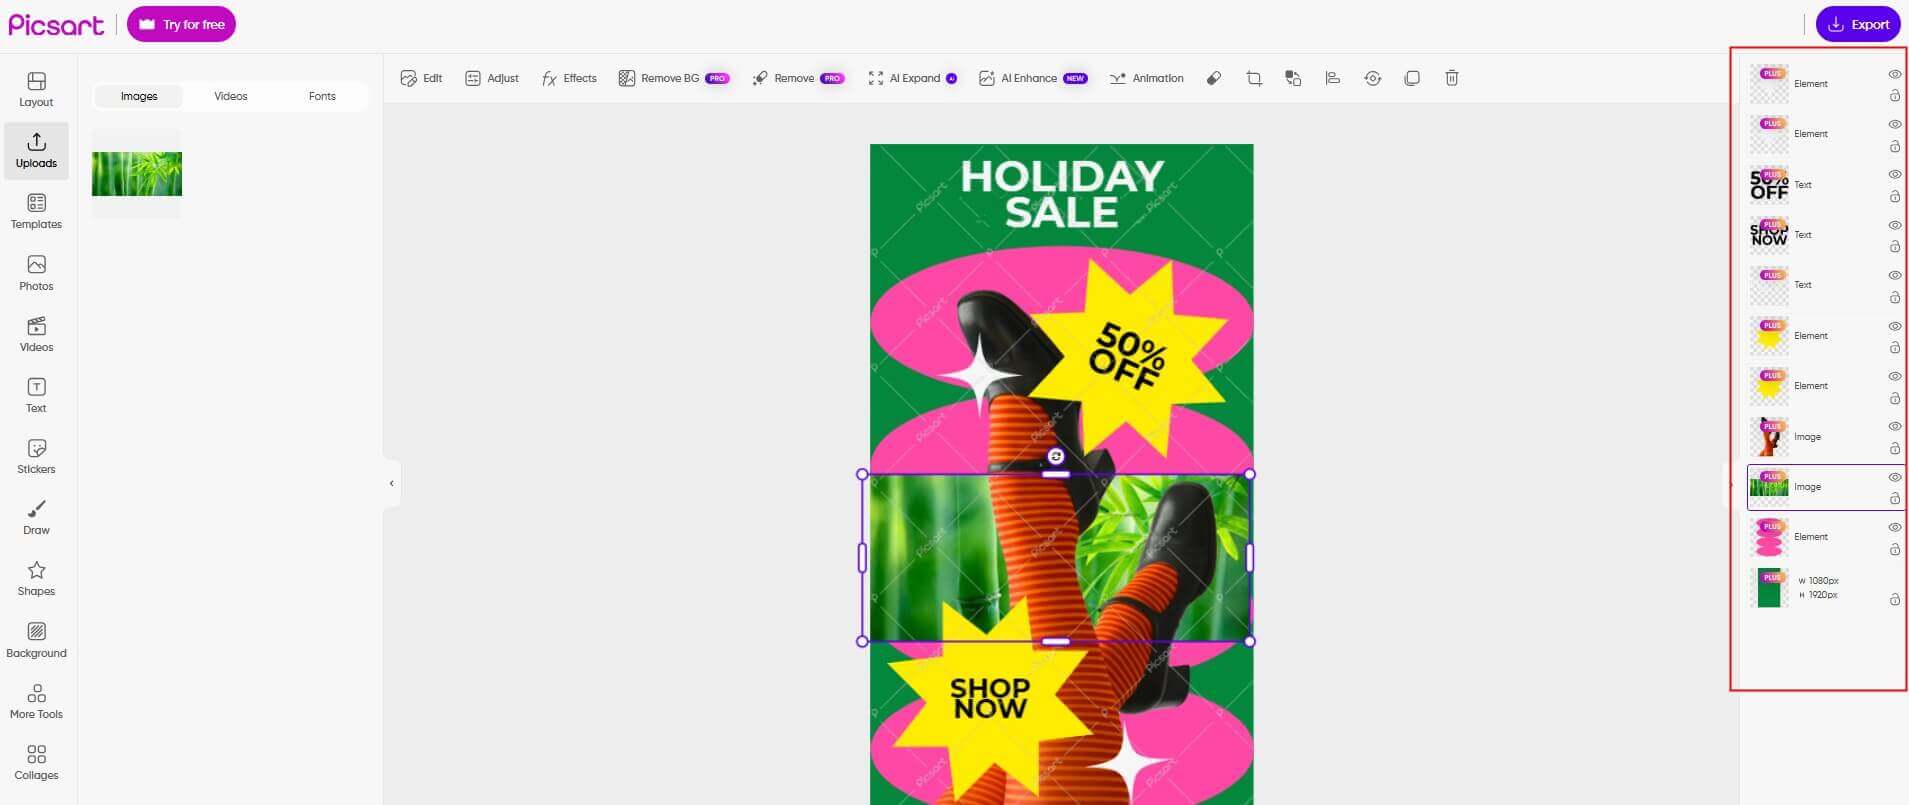
adjustment layer
Step 4: Then, continue making adjustments based on your needs. Click to export your completed superimposed image.
2. How to Overlay Other Images on iPhone (Complicated)
If you use an iPhone, the good news is you can overlay images on your device without having to install any third-party app. This technique involves using the built-in Shortcuts app. you can follow the steps outlined below to learn how it works;
1: Open the “Shortcut” app on your iPhone and tap on the “(+)” icon at the top-right side of your screen.
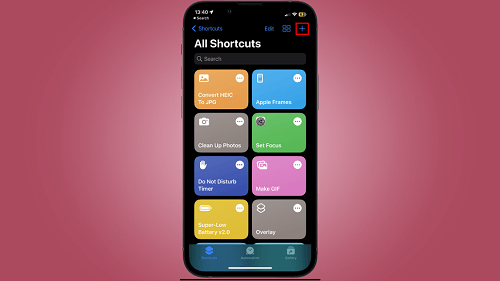
Open the “Shortcut” app on your iPhone
2:Tap on the “Info (i)” icon at the bottom of your screen and turn on the toggle next to “Show In Share Sheet”. Then, tap on “Done” to proceed.
Tap on the “Info (i)” ico
3: On the new screen, you should see a “Shortcut” option at the top that allows you to see your received media files. Tap on the option that says “Images and More”.
- Turn of the toggle next to all settings option except “Images” and “Media”. Then, tap on “Done” to proceed.

Tap on the option that says “Images and More”.
4: Tap on the “Add Action” button and type “Select Photos” into the search box in the pop-up that appears.
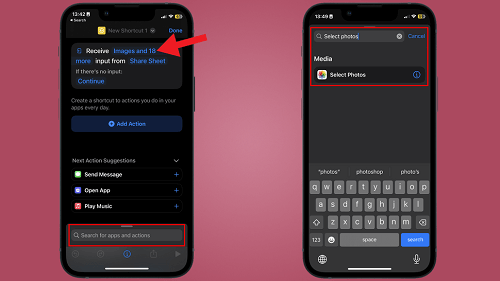
Tap on the “Add Action” button
- After that, type “Select Photos” again into the search bar at the bottom yours screen.
5: Once again, tap on the “Search bar” at the bottom of your screen. But this time, type Overlay Image” and select the relevant option from the result.
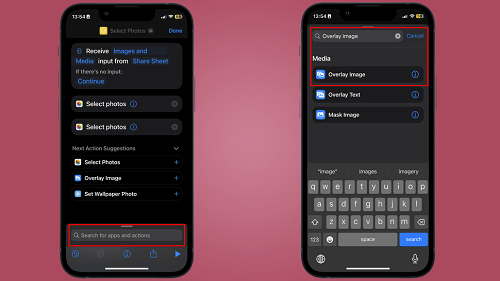
Tap on the “Search bar”
6: Now, tap on “Image” in the “Variable” section as shown in the screenshot below. Then, choose “Select Variable”.
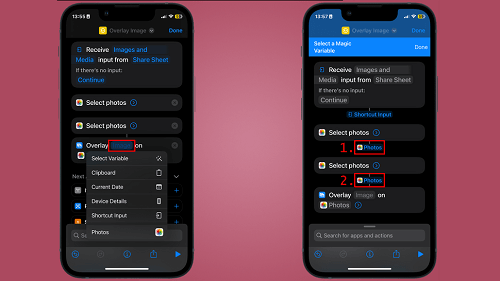
Tap on “Image” in the “Variable” section
7: On the new page, tap on the “Photos” option under the first “Select Photos” and upload the Image you want to overlay.
- Next, tap on the “Photos” option under the second “Select Photo” option and add the second image.
8: Tap on the “Search Bar” at the bottom.of your screen one more time and type “Save To Photo Album” this time. Then, select the relevant option.
9: Tap on the “Drop-down” icon next to “Select Photos” at the top of your screen and select “Rename”. Then, rename the project.
Tap on the “Drop-down” icon
- Tap “Done” at the top right corner once you rename the project.
10: Finally, tap on the option that shows the name of your project. In our case it is “Overlay Projects”. This will prompt you to select an image. Please select the image that you want to appear at the top of he overlay.
- After that, tap on the icon again and select the second image. Then, adjust relevant settings and save your overlay image.
NOTE: Your iPhone must be running iOS 13 or later to be able to use this method. Also, the procedure is very complicated.
3. How to Overlay Images in Photoshop
Adobe Photoshop is also good for overlaying images. It offers reliable features that you can use to quickly get the job done. However, we only recommend this way for professionals who understand how to navigate their way around the Photoshop software interface.
- Install the “Adobe Photoshop” app on your computer and launch it. Then, open the image you want to add an overlay to.
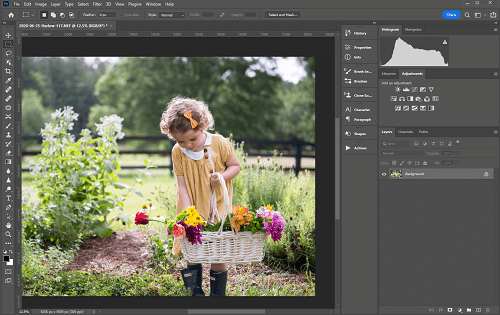
Overlay Images in Photoshop
- Next, open your “File Manager” (for Windows users) or “Finder” (for Mac users) and locate the image you want to use as an overlay. Then, drag and drop the image to the Adobe Photoshop software interface.
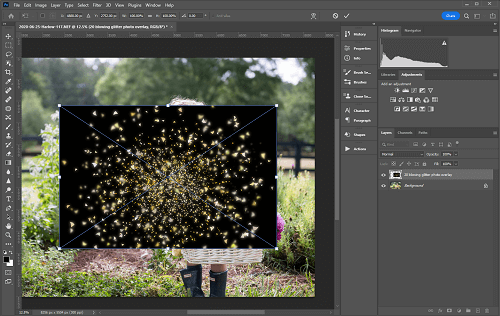
Drag and drop the image
- Adjust the overlay to the segment of your image that you want it to appear and click the “Layer” tab on the right pane. Then, click the drop-down icon next to “Blend Mode” and select “Screen”.
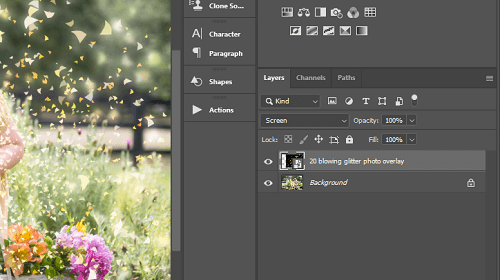
Click the drop-down icon next to “Blend Mode” and select “Screen”
- Save the overlaid image to your local storage.
Conclusion
Learning how to overlay your images is a smart way to improve your creativity in visual storytelling and design. With the techniques discussed in our article, you should be able to overlay other images on a picture in just a few clicks. We recommend Picsart Online Photo Editor for users looking to blend creativity with efficiency. The tool has a lot of features that make it exceptionally easy to create multiple overlay images instantly.
Product-related questions? Contact Our Support Team to Get Quick Solution >
