How to Resize An Image on Mac
Resizing an image on your Mac is not as difficult as you might think. Read this post and find out how to resize an image on Mac easily.

Resizing your image is one of the best ways to ensure it’s optimized for your website, social media posts, etc. However, the procedure to execute this operation would vary depending on the kind of device you use.
So, if you’re using a Mac computer and wondering how to resize images on Mac, this article will introduce you to the proven ways to resize an image on Mac without losing quality.
Table of ContentsHide
What Is Resizing An Image?
Image resizing is an image editing technique that is used to adjust the dimension of an image to make it look larger or smaller without cutting out any part. One of the reasons many folks resize their image is to reduce the file size so it can be easily shared on other platforms.
How To Resize An Image on Mac with Preview
One of the ways you can resize an image on Mac is by using the Preview feature. Preview is a built-in image and PDF viewer on Mac that offers a wide range of functionalities, including image editing tools that you can use to perform simple tasks like image resizing. Here is how it works;
- Locate the “Image” you want to resize and double-click it to open it in the “Preview” interface.
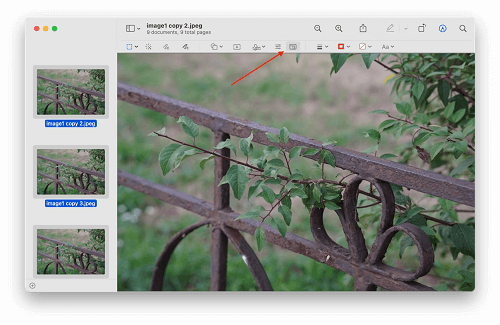
- Navigate to the top of the menu bar in the Preview page and click on the “Markup icon”.
- Click on the “Adjust Size” icon as shown in the image below.
Resize An Image on Mac with Preview
- Next, select your image customization settings from the pop-up window and click on “OK” once you’re done.
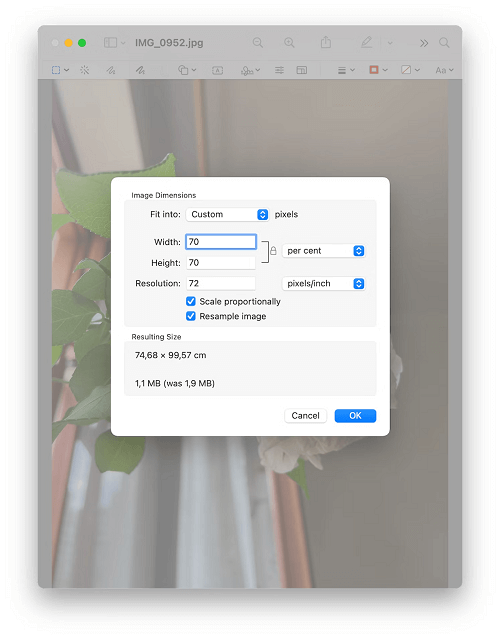
Click on “OK” once you’re done
- Finally, check the resized image to see if it suits your requirements. Then, save it to your computer.
How to Resize Single or Multiple Images on Mac Without Losing Quality [Professional]
Although the built-in Preview app on your Mac allows you to resize your images without any issues, it might not be an efficient choice if you want to resize multiple images. So, we recommend Picsart’s Online Image Editor to resize your images without losing quality.
1. What Is Picsart Photo Editing
Picsart Photo Editing is a feature within the Picsart app that provides users with a range of creative tools to enhance their photos. It offers filters, effects, adjustment tools, text and sticker options, drawing and painting features, and collage templates. Picsart’s intuitive interface makes it easy for users of all skill levels to customize their images and create unique visual content.
Key Features
- Diverse filters and special effects: Provides a wealth of filters and special effects, allowing users to easily adjust the style of photos and enhance their artistic sense.
- Advanced editing tools: Picsart provides advanced editing tools such as layers, masks, and blending modes to provide users with a professional-level editing experience.
- Stickers and text: A large number of creative stickers and multiple text styles allow users to easily add personalized elements to photos.
- AI background removal: Picsart’s AI technology supports the background removal function, allowing users to quickly replace the background and enhance their creative space.
See how to make use of Picsart Image Editor below
2. How to resize a photo with Picsart
Using Picsart’s picture editor, you can quickly resize your pictures. Even if you are not an experienced graphic designer. Here’s how to use the Upscale tool to instantly resize an image.
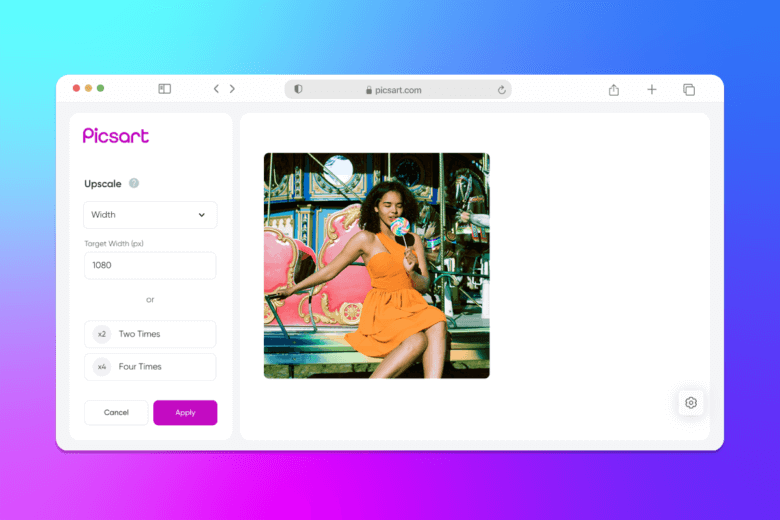
how to resize a photo with picsart
On the web:
- Open the Picsart online image enhancement tool.
- Click “Upload Image Now” to select an image from your gallery. Up to three images can be uploaded at one time for batch editing.
- Select the desired dimensions (height and width) in the drop-down menus, or choose to use the preset options to make the image two or three times larger.
- Click “Apply” in the lower left corner to resize the image. Then, click on the resized image to download the edited version.
On mobile:
- Open the Picsart app and click the plus sign (+) to upload your image.
- Click “Tools” and select “Resize” to resize the image.
- Enter the desired width and height and press OK to apply the changes.
- Click “Next” and then select “Save & Download” to save your resized image.
3. How to reduce picture size with Quicktools by Picsart
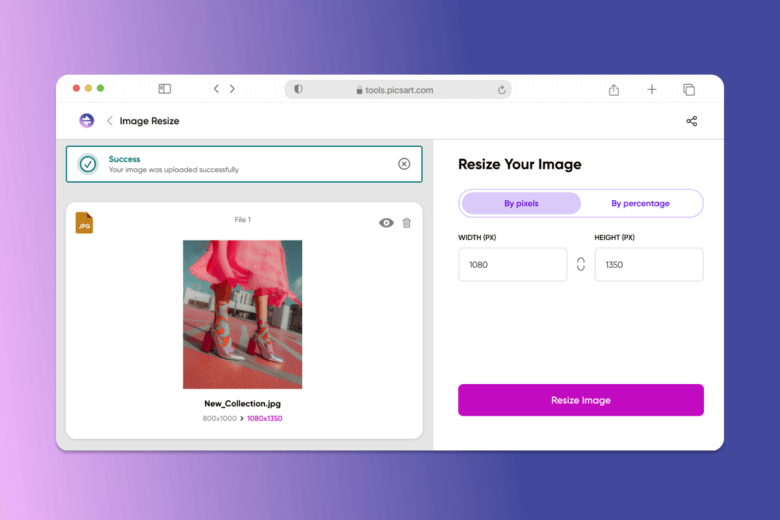
how to reduce picture size with quicktools by picsart
Step1. Open the Resize Image tool.
Step2. Drag and drop an image into the dotted box, or click “Select Image” to upload an image from your gallery.
Step3. Select “By Pixel” in the right toolbar to set your desired image width and height. Alternatively, you can select “By Percent” to scale the image down.
Step4. After completing the settings, click “Resize Image” to make changes.
Step5. Click “Download Image” to save the image you just resized.
Conclusion
That’s all for today’s guide. As you can see, the steps to resize images on Mac are not complicated. It only takes a few clicks. We recommend using Picsart Image Editor to edit and resize images to avoid issues. Additionally, it provides various options for resizing images.
Product-related questions? Contact Our Support Team to Get Quick Solution >
