How to Remove Audio From Video with 7 Proven Ways
Unwanted sounds can make your hours of video shoot feel like a waste of time. But the good news is that there are several workarounds that you could use to remove unwanted audio from video without requiring a video editing skill.

For the sound you don’t want or like in a video, you may wonder if it’s possible to remove audio from the video. Yes, of course. You can take sound out of a video as long as you understand the ideal techniques to get the job done. This post is here to help. Read on to learn seven different methods to remove audio from video without reducing quality.
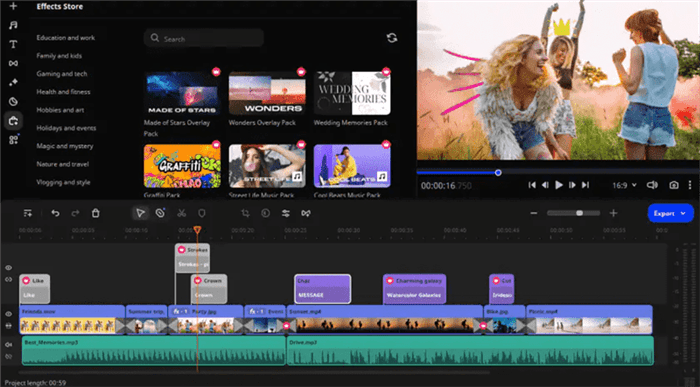
Way 1: Remove Audio From Video Using Movavi Video Editor
A professional video editing app like Movavi Video Editor is the best solution to remove audio from video clips. This app offers efficient features that enable you to perform different types of video editing tasks like audio removal, background removal, noise removal, and lots more. Besides, thanks to its drag-and-drop user interface, you don’t necessarily need to be tech-savvy to utilize this app for your video editing tasks. It also offers a wide range of filters and overlays that you can use to make your video look more stunning and interactive.
Key Features:
- Supports powerful AI tools to execute video editing tasks like background removal and noise removal faster.
- Intuitive drag-and-drop interface.
- Offers different export options, including popular social media platforms like Vimeo, YouTube, etc.
- It also allows you to trim, cut, crop, and resize videos without reducing quality.
Here is how to use Movavi video editor to remove audio from video in three simple steps;
Step 1: Download and install Movavi Video Editor app on your Mac or Windows computer.
Remove Audio From Video Using Movavi Video Editor
Step 2: Run the installed software and click “Add Files” to upload the “Video file” you want to remove audio from. Then, drag-and-drop the clip to the “Timeline”.
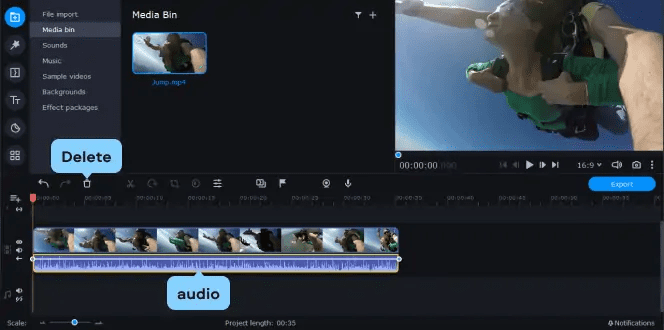
Add Files & Clip to Timeline
Step 3: Now, click on the “Audio track” of your video from the “Timeline”. Then, click the “Delete” icon from the “Quick settings” area to remove the audio.
Way 2: Remove Audio From Video With VLC
Although VLC is known for playing media files, you can also use it as a video editor to remove audio from your video clip. This open-source media player tool offers features that allows you to execute basic video editing tasks like the removal of audio from video, and it’s very easy to use. See the steps below;
Steps On Windows Computer
Step 1: Download and install VLC media player on your Windows computer.
Step 2: Open VLC and go to the “Media” tab in the menu. Then, select “Convert/Save” from the dropdown menu.
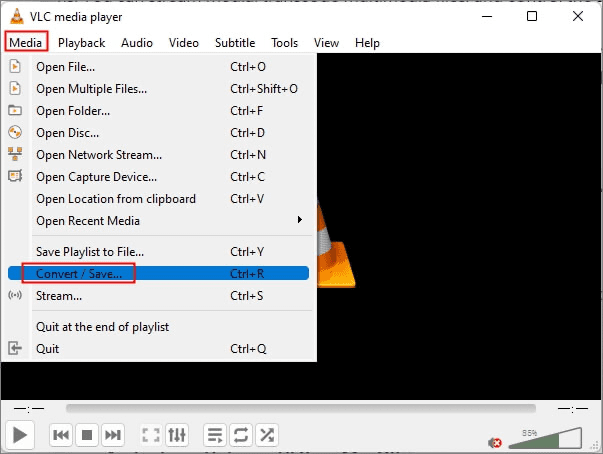
Go To VLC Media on PC
Step 4: Click on the “Add” button and choose the video file you want to edit. Then, click on “Convert/Save” at the bottom right side.
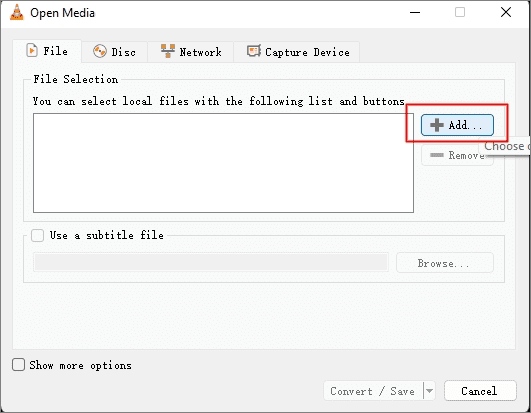
Add Files to VLC Media
Step 5: Navigate to the sections that are labeled “Profile” and choose a “Video format” for your video.
Convert Video in VLC
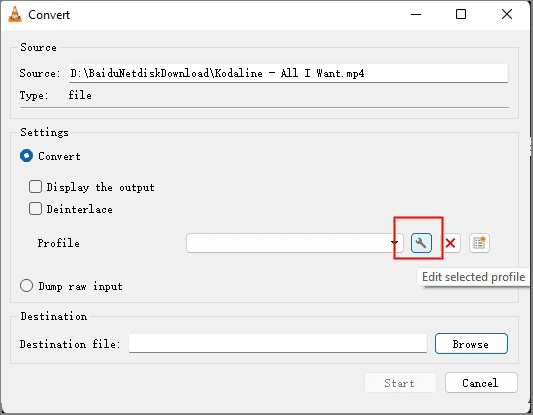
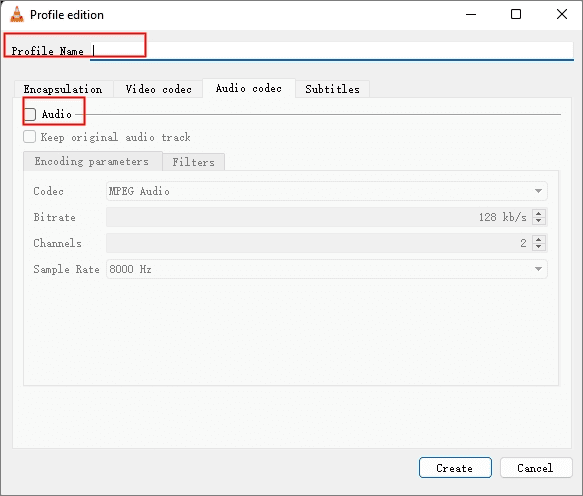
Step 6: After you select a preferred format, scroll to “Audio codec” and uncheck the checkbox next to “Audio”.
Name Video Files in VLC
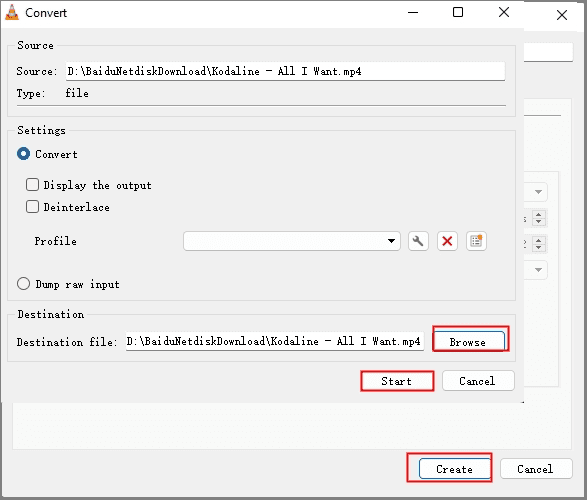
Step 7: Click “Create” > “Browse”. Then, choose a folder to save the video.
Step 8: Click the “Start” button to remove the audio clip.
Start Convert in VLC
Steps on Mac
Step 1: Open the “VLC” program on your Mac and upload your video file.
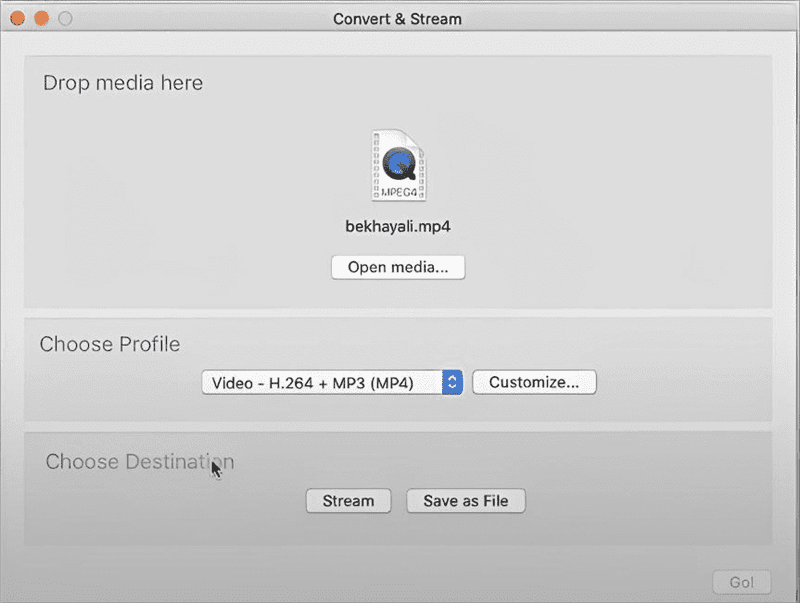
Step 2: Select “Media” > “Convert Stream…”
Step 3: Click on “Open Media” and choose “Customize”.
Step 4: Scroll to “Audio Codec” and deselect the “Audio” option.
Step 5: Click on “Apply” to confirm the settings.
Step 6: Click on “File” and choose a destination to save the video file.
After that, click on the “Save” button to complete the process.
Save Video in VLC
Way 3: Remove Audio From Video With iMovie
The iMovie app on your Apple device can also help you remove audio from your video clip. It offers basic video editing features that you can quickly use to make little adjustments on your video like the removal of audio clips.
To learn how to use iMovie to remove audio from video, you can follow the simple steps provided below;
Steps on iPhone/iPad
Step 1: Launch the “iMovie” app on your iPhone and select “Movie”.
Step 2: Choose the relevant “Video” file and tap on “Create Movie”.
Step 3: Tap on the “Video clip” in the “Timeline”.
Step 4: Tap on the “Volume” icon at the bottom of your screen. Then, adjust the volume to “Zero”.
Step 5: Tap on “Done” at the top-right corner and save the video on your device.
Steps on Mac
Step 1: Open iMovie on your Mac and click on “Create New”.

Create New Video in iMovie on Mac
Step 2: Drag and drop the video onto the timeline or click on “Import Media” to upload the video file.
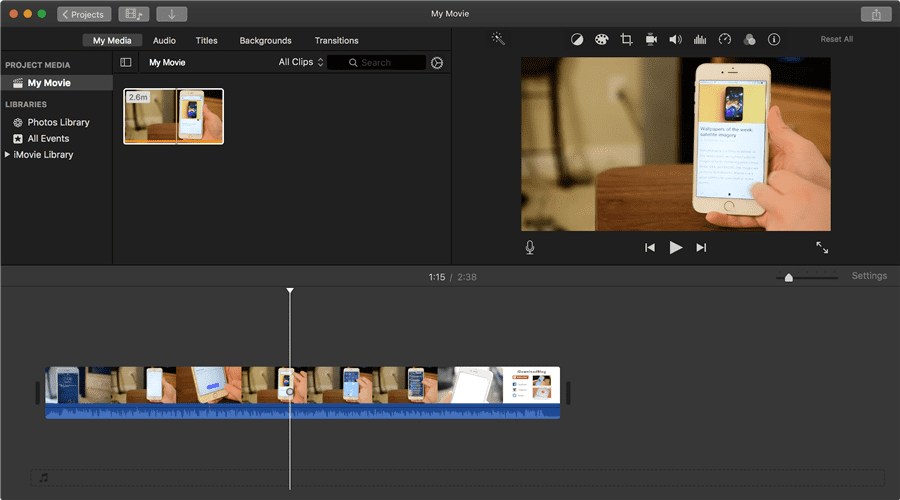
Upload Video on Mac
Step 3: Right-click on the video clip and select “Detach Audio” or “Audio Detach.”
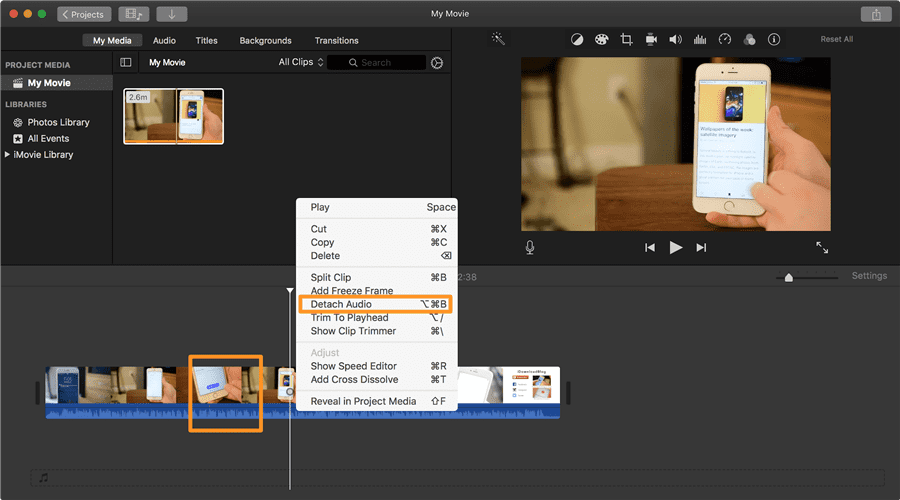
Select Detach Audio
Step 4: Now, “right-click” on the “audio track” from the timeline and select “Delete” from the drop-down menu.
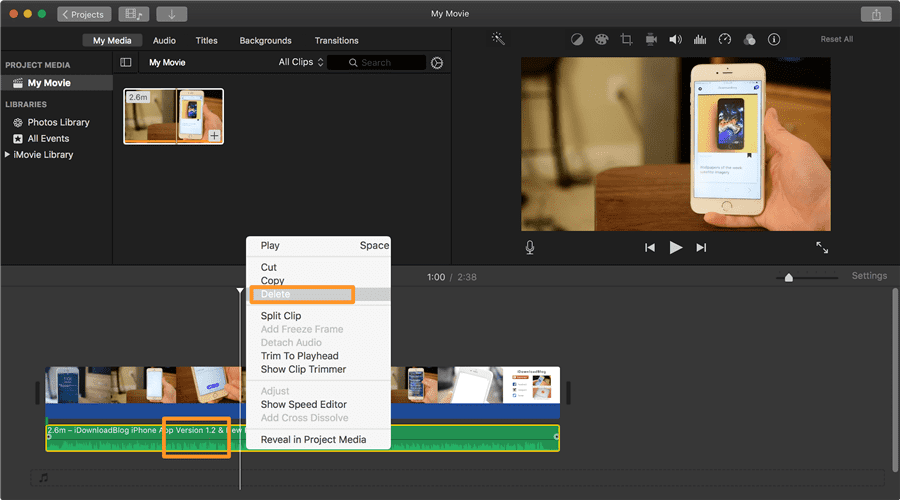
Delete Audio in iMovie Mac
Step 5: Preview your video to ensure that the audio has been successfully removed.
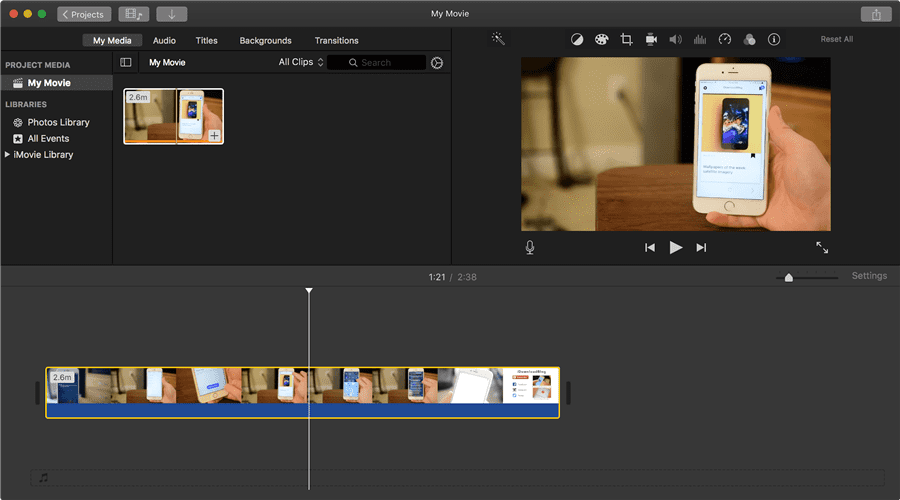
Preview the Video Without Audio
Step 6: Export the edited video in your desired format.
Way 4: Remove Audio From Video With Windows Movie Maker
Similar to iMovie, Windows Movie Maker is a Windows native video editing app. This free tool offers basic editing features that allow you to perform operations like removing audio from video, adding background music to videos, adding animated text to videos, and lots more. Here’s how you can use Windows Movie Maker;
Step 1: Open Windows Movie Maker on your computer.
Step 2: Create a new project and import the video you want to edit.
Remove Audio From Video Using Windows Movie Maker
Step 3: Once you upload the video, you should see an option that says “Place it on storyboard”. Please click on it.
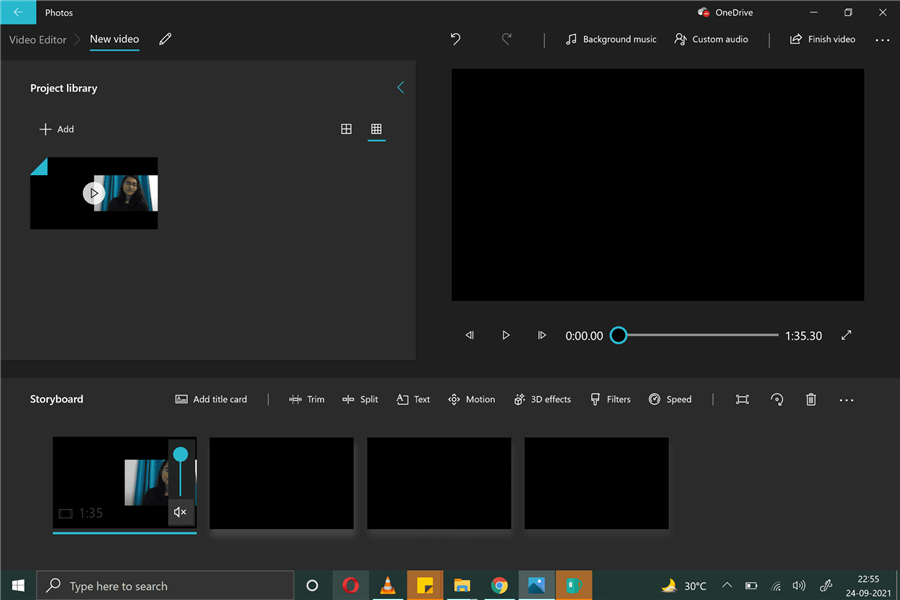
Step 4: Now, double-click the “Volume” icon on the video in the “Storyboard” section to remove its audio.
Remove Audio From Video Using Windows Movie Maker
Step 5: Preview and export the video to a desired location on your computer.
Way 5: Remove Audio From Video With Photos App (iOS Devices Only)
If you’re using an iOS device, you can use the built-in Photos app on your iPhone to remove audio. All you need to do is to use the “Edit” option to access the video settings and use the “volume” option to mute the audio. See the steps below;
Step 1: Open the Photos app on your iOS device.
Step 2: Select the video you want to edit and tap on the “Edit” button in the top-right corner.
Step 3: Tap on the volume icon in the top-left corner to mute the audio.
Step 4: Save the edited video.
Way 6: Remove Audio From Video With Google Photos
Besides allowing you to back up your media files, Google Photos also allows you to edit your video using simple tools. So, if you use Google Photos to manage media files on your Android, follow the steps below to remove audio from your video;
Step 1: Open the Google Photos app on your Android device and select the video you want to edit.
Step 2: Tap on the “Edit” button at the bottom of your screen.
Step 4: Tap on the volume icon to mute the audio.
Step 5: Finally, tap on “Save Copy” to complete the process.
Way 7: Remove Audio From Video Using Online Tools
There are several online tools like ClipChamp, Kapwinh, Clideo, etc., that can also come to your rescue whenever you want to remove audio from your video clip. So, if you don’t want to install any software, you can easily employ an online tool to remove audio from your video. However, keep in mind that some of these tools can reduce the quality of your video drastically.
We’ve shown the steps to use Clideo to remove audio from video online below;
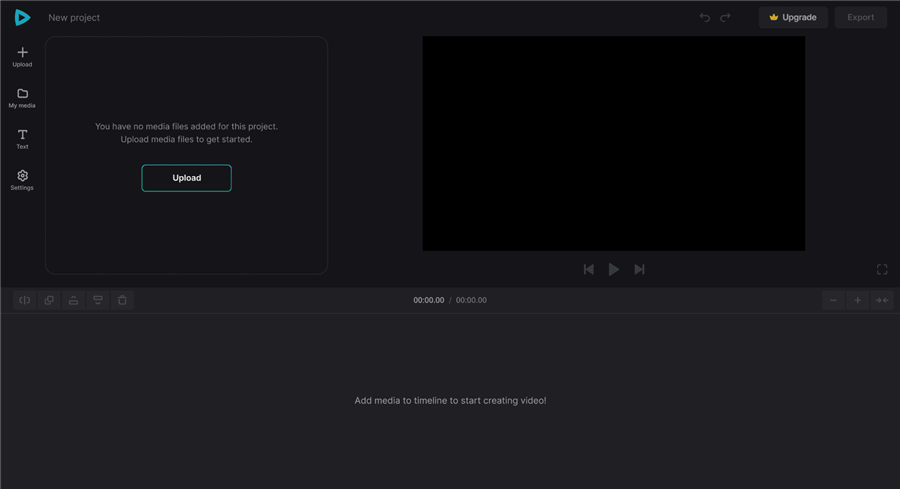
Step 1: Visit the Clideo online video editor website and click on “Get Started”.
Step 2: Upload the video you want to edit.
Upload Video in Online Video Editor
Step 3: Select the “Video clip” from the timeline and click on the “Volume” tab. Then, adjust the volume to zero.
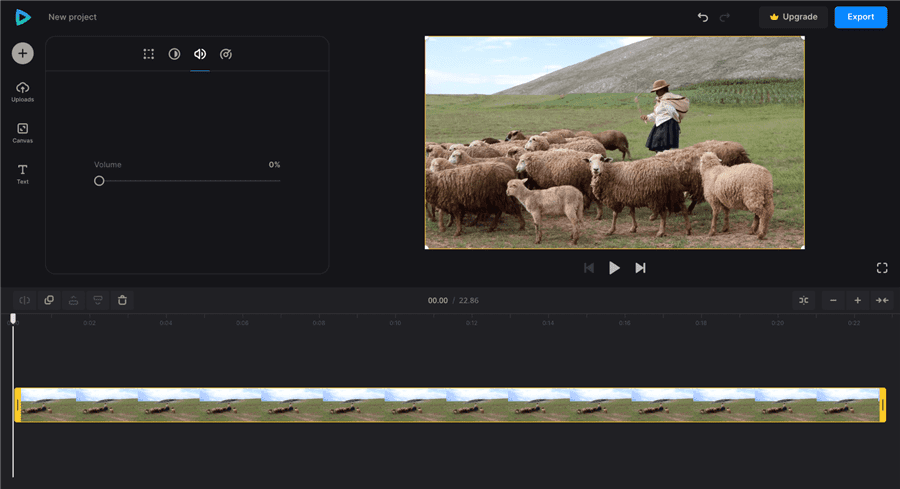
Adjust Video Volume to Zero
Step 4: Wait for the tool to process the video. Then, preview it and click “Export” at the top-right corner of your screen.
Step 5: Download the edited video in your desired format.
FAQs About Removing Audio From Video
1. Can I remove audio from a video without affecting the video quality?
Yes, you can. You need a powerful video editing app like the Movavi video editor, as it ensures your visuals remain the same during the audio removal process.
2. Can I remove audio from a video and replace it with a different audio track?
Yes, most video editing software and online tools allow you to replace the original audio track with a different one. This gives you the flexibility to add your own background music or voiceover.
3. Will removing audio from a video make it silent?
Yes, removing audio from a video will make it silent. It removes all sound from the video, including dialogue, background noise, and music.
Bottom Line
After a series of trials using several methods, the above solutions have proven to be 100% reliable for removing audio from video clips. We recommend following the steps provided in the article correctly to avoid problems during the operation. Also, be sure to take note of the limitations of each method before concluding which technique to use.
Product-related questions? Contact Our Support Team to Get Quick Solution >
