Underwater Video Color Correction: A Complete Guide
Learn what underwater video color correction is and how to do it easily. Enhance colors, fix lighting, and make your underwater footage look amazing!

Imagine you just recorded a beautiful underwater video, but the colors look dull and lifeless. The vibrant blues and greens you saw are missing, and everything seems faded. This happens because water absorbs light, making colors look less bright.
Underwater video color correction can fix this problem. It helps bring back the natural colors and improve the overall quality of your footage. Color correcting makes your recordings seem fantastic, whether you’re a professional diver or just taking pictures while on vacation. This guide will teach you the basics of color correction for underwater videos, how to use programs like AnyEnhancer and Adobe Premiere Pro to do it quickly, and step-by-step methods for enhancing underwater video quality.
Table of ContentsHide
What is the Underwater Video Color Correction?
The technique of correcting fading or drab colors in underwater video is known as underwater video color correction. Underwater recording reduces natural light and absorbs hues like yellow and red, making the footage bluish or greenish. Color restoration modifies these tones to restore the scene’s natural appearance. Improving brightness, contrast, and vibrancy gives the video a more appealing and lifelike appearance. Color correction is crucial for anyone wishing to enhance the quality of their underwater movies, whether they use basic equipment or sophisticated software. It ensures your underwater memories look as colorful and lively as they are.
How Do You Color Correct Underwater Videos? [Including AI Solution]
There are 2 ways to help you color correct underwater videos. Let’s see how them word.
1. Color Correct Underwater Videos via AI
AnyEnhancer uses advanced AI models to enhance video quality, and its Color Enhancement model is perfect for underwater footage. This model highlights the inherent brilliance of underwater scenery, improves brightness, and modifies drab hues. Correcting the bluish or greenish tint frequently found in underwater films ensures that the colors appear precise and vibrant. With our AI solution, you can quickly turn your faded underwater footage into a vibrant masterpiece.
Free Download for all windows & 100% safe Free Download for all mac & 100% safe
Free Download100% Clean & Safe
Beyond color correction, AnyEnhancer offers other powerful tools to improve video quality. The Resolution Enhancement model upgrades video clarity, providing vibrant and crisp visuals in 2K or 4K. The Frame Interpolation model stabilizes videos by increasing frame rates for smoother motion. Other models include Face Restoration to enhance facial details and the Colorize Model to add colors to black-and-white videos.
Key Features:
- Combine super-resolution and facial enhancement for detailed, clear results.
- Remove grain and noise to produce clean and high-quality videos.
- Simple, intuitive design that allows even beginners to enhance videos effortlessly.
Step 1. Free download the AnyEnhancer software on your computer to get started.
Step 2. Open the tool and click “Upload Video” or drag your file into the program.
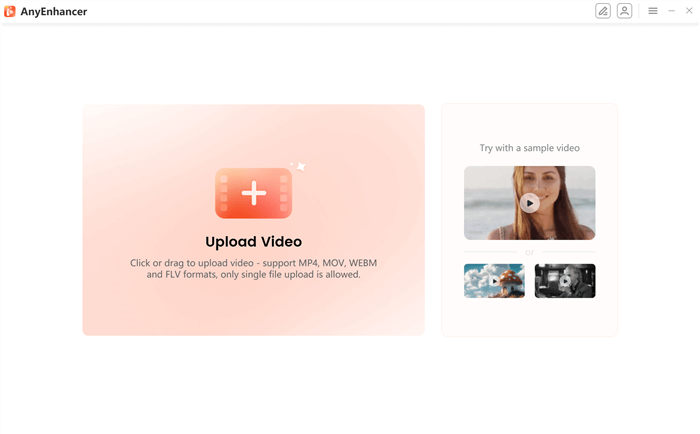
Upload the Original Video
Step 3. Select the “Color Enhancement” option to begin correcting the colors in your video.
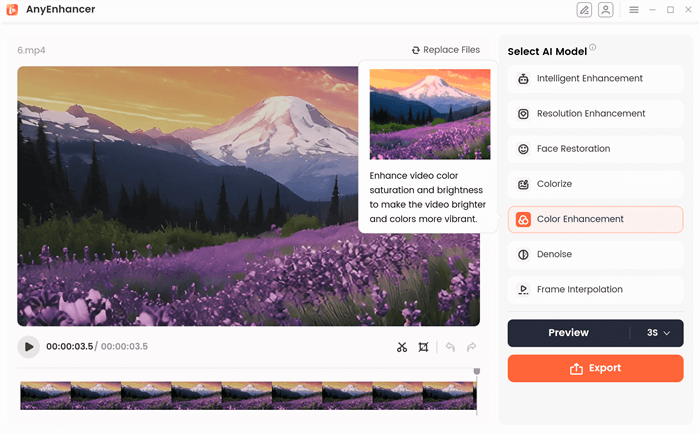
Choose the Color Enhancement Model
Step 4. Click “Preview” to compare the enhanced version with the original footage.
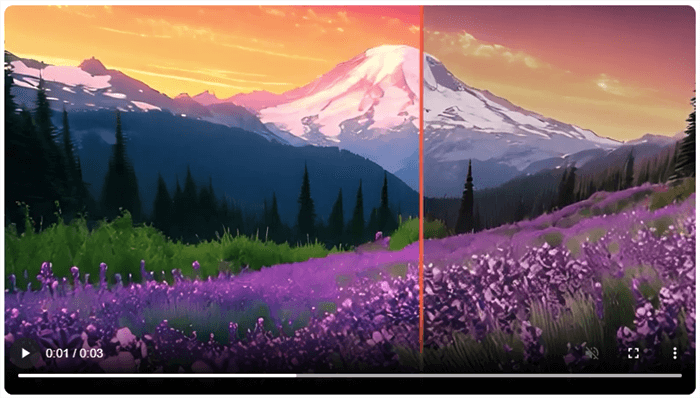
Preview the Color Correct Effect
Step 5. If you’re satisfied with the preview, click “Export.” Choose a file name, select the desired format, save the location, and click “Export” again to finish.
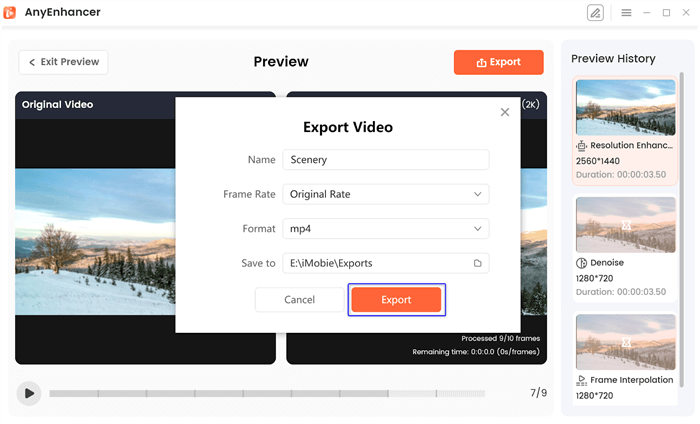
Export the Video
2. Color Correct Underwater Videos via Adobe Premiere Pro
Adobe Premiere Pro, along with Lumetri Color Panel and Lumetri Scopes, is ideal for color correction in underwater footage. The brightness, contrast, and saturation are just perfect here for giving a really saturated yet natural colored film. Equipped with color wheels, advanced curves, and an opportunity to import and apply your own or custom LUTs, it covers all the features for advanced video improvement.
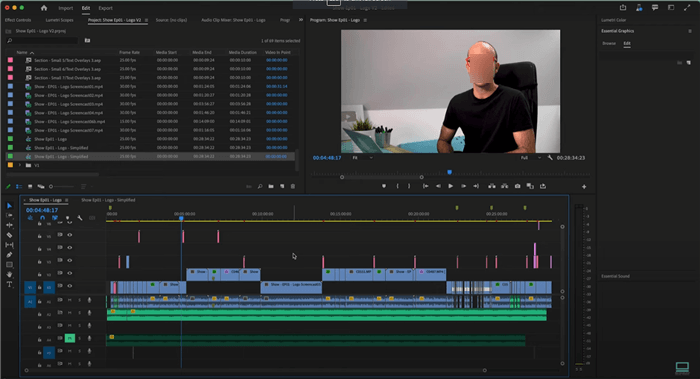
User Interface of Adobe Premiere Pro
Key Features:
- The HSL Secondary Tab lets you refine specific colors for dramatic adjustments.
- Creative Tab Presets provide stylish filters to achieve cinematic tones.
- Vignettes can focus attention by subtly adjusting frame brightness around the edges.
- Auto Color offers quick color correction for an entire sequence effortlessly.
Step 1. Create an Adjustment Layer
To ensure non-destructive editing, begin by creating an adjustment layer. Right-click in the “Project panel” and select New Item > Adjustment Layer. Leave the video settings as is and click “OK.”
Drag the adjustment layer onto the timeline above your sequence and match its length to the clips requiring color correction.
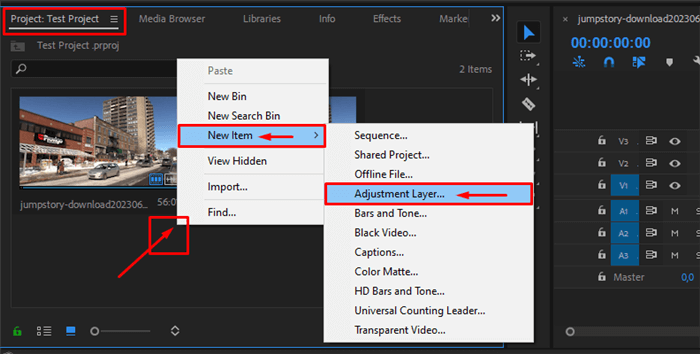
Create an Adjustment Layer
Step 2. Switch to the Color Workspace
Navigate to Window > Workspaces and select Color.
- The Lumetri Scopes panel (on the left) examines the color and brightness of your video, while the Lumetri Color panel (on the right) offers correction tools.
- Utilize scopes such as Waveform for RGB and brightness modifications, Vectorscope for saturation, and Histogram for tonal balance.
Step 3. Perform Basic Color Correction
Start with the Basic Correction tab to fix fundamental issues.
- Use White Balance to adjust temperature and tint.
- Fine-tune brightness and contrast with Exposure, Highlights, and Shadows.
- Adjust Whites and Blacks to set the tonal range.
- Modify Saturation to enhance color intensity.
- Import a LUT (look-up table) via the Input LUT option to apply preset styles for quick results.
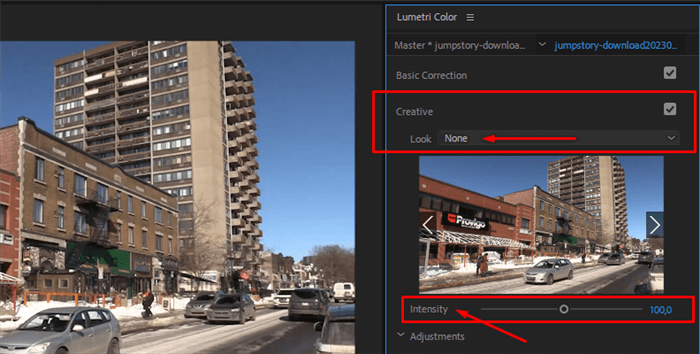
Step 4. Explore Advanced Color Grading Tools
- Creative Tab: Add styles using film stock presets, adjust Vibrance and Saturation, and fine-tune highlights with Tint Wheels.
- Curves: Use RGB curves for tonal adjustments and Hue Saturation curves to refine specific colors (e.g., underwater blues or greens).
- Color Wheels: Adjust shadows, mid-tones, and highlights for customized grading.
Use Creative Tab
Step 5. Focus on Details with HSL Secondary
The HSL Secondary tab allows precise color adjustments, such as enhancing blue tones or isolating vibrant coral hues.
- Use the “Eyedropper tool” to select a color.
- Fine-tune the selection using HSL sliders and adjust the color using the correction controls.
Step 6. Add a Vignette for Emphasis
Vignettes direct attention to the center of the frame, mimicking natural light fall-off. Adjust darkness, size, and midpoint to create a subtle or dramatic vignette effect.
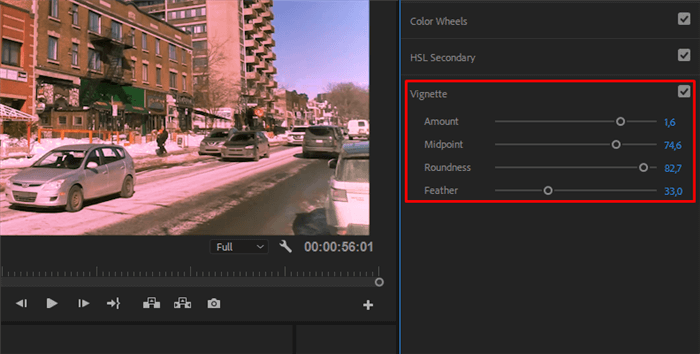
Add a Vignette
Step 7. Export Your Final Video
Once satisfied, go to File > Export > Media. Choose a format, name your file, and select a destination folder. Click “Export” to save your color-corrected underwater video.
How to Improve Underwater Video Quality?
Enhancing underwater video quality is simple with AnyEnhancer. This potent tool increases brightness, saturation, and clarity using cutting-edge AI models like Color Enhancement. AnyEnhancer’s intuitive interface and clever features make underwater video vivid and realistic, making it ideal for both novices and experts. Here are the simple steps to use AnyEnhancer for color correcting:
Step 1. Install the AnyEnhancer software on your computer to get started.
Free Download for all windows & 100% safe Free Download for all mac & 100% safe
Free Download100% Clean & Safe
Step 2. Open the tool and click “Upload Video” or drag your file into the program.
Upload the Original Video
Step 3. Select the “Resolution Enhancement” option to begin enhancing the clarity and resolution in your video.
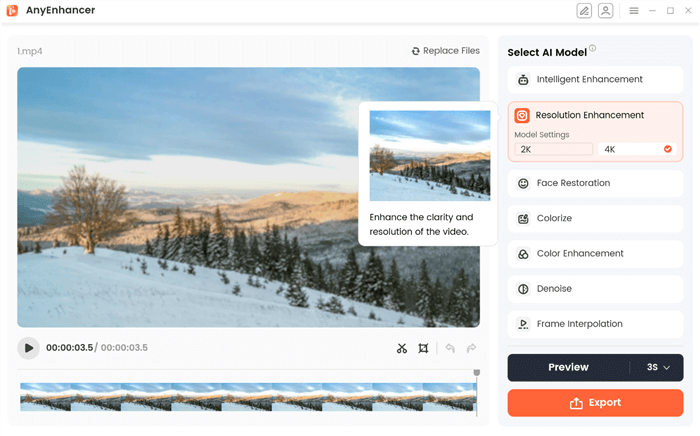
Select Resolution Enhancement
Step 4. Click “Preview” to compare the enhanced version with the original footage.
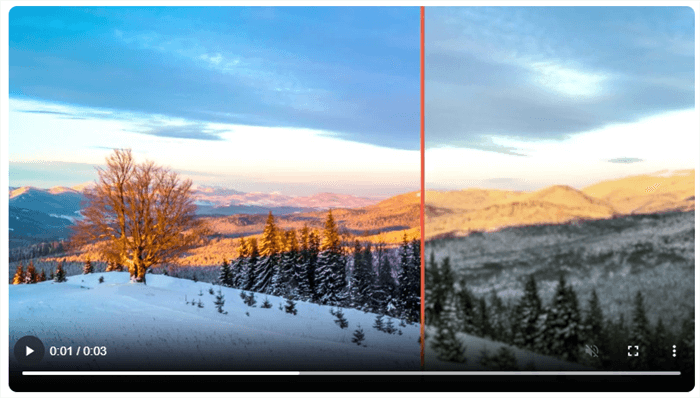
Preview the Resoltion Enhancing Effect
Step 5. If you’re satisfied with the preview, click “Export.” Choose a file name, select the desired format, save the location, and click “Export” again to finish.
Export the Video
FAQs of Underwater Video Color Correction
Why does underwater footage need color correction?
Water is quite a light-absorbent medium, and this factor reflects in the almost lack of natural color of many pieces of footage when the shoot takes place underwater, murkier, or deeper circumstances. Color correction will make your video much more realistic, readable, and restore some colors which have been lost during capture. This helps greatly with underwater photography when light is problematic.
How can I brighten my underwater footage?
Use color enhancement tools to brighten your underwater videos that adjust the exposure and saturation levels. AI-powered tools like AnyEnhancer can automatically improve brightness and colors, giving your footage a lively and crisp appearance without much effort.
Do I need advanced skills to color correct underwater videos?
No, you don’t need advanced skills to color-correct underwater videos. With tools like AnyEnhancer, the process is simplified. Regardless of experience level, anyone can effortlessly improve their underwater films using the software’s automatic color enhancement, exposure adjustment, and overall quality improvement features.
Final Words
Advanced capabilities like RGB curves and color wheels are available in programs like Adobe Premiere Pro to enhance the quality of your underwater film. AnyEnhancer is a simple solution that can automatically improve the colors and clarity of your underwater movies. Both tools contribute to results that look professional. You can produce videos that appear professional using either AnyEnhancer’s ease of use or Adobe Premiere Pro’s sophisticated features. Try AnyEnhancer free today for effortless video enhancement!
AnyEnhancer – AI Video Enhancement
Download AnyEnhancer to enhance your video quality to 4K resolution, remove grain, smooth motion, and add color to black and white videos with just one click.
Product-related questions? Contact Our Support Team to Get Quick Solution >
