User Guide of AnyMiro
Learn how to mirror your iOS or Android screen to a computer in real time with AnyMiro, featuring 4K resolution and synchronized audio, capture screenshots, record, and annotate your mirrored display.Download and try it now.
Free DownloadFor Win & Mac | 100% Clean & Secure


Manage Account
We would like to share some questions we collected.
“I need to sign in AnyMiro. Can you help me?”
“How can I use the Pro version of AnyMiro?”
If you just encounter the similar situation above, don't worry. The following instructions will help you do it.
Different Privileges among Guest, Standard and Pro Version
| Privileges | Guest | Standard | Pro |
| Display resolution (highest) | 1080P | 1080P | 4K |
| Mirror audio |  |
|
|
| Supports popular live streaming tools | |
|
|
| Auto-rotate screen mirroring | |
|
|
| Add/Remove device frame |  |
|
|
| Zoom in/out interface | |
|
|
| No watermark | |
|
|
| Free mirroring time per day | 20 minutes | 40 minutes | No limits |
| Number of logged-in computers | / | 1 | 5 |
Part 1. Sign in AnyMiro.
To enjoy more features of AnyMiro, you need to sign in AnyMiro.
Here are the sign-in (or sign-up, for new users) methods available to you:
Method 1: Create an iMobie ID.
Download and install AnyMiro on your computer. Click the Avatar icon in the upper right corner of the screen and click Create an Account.
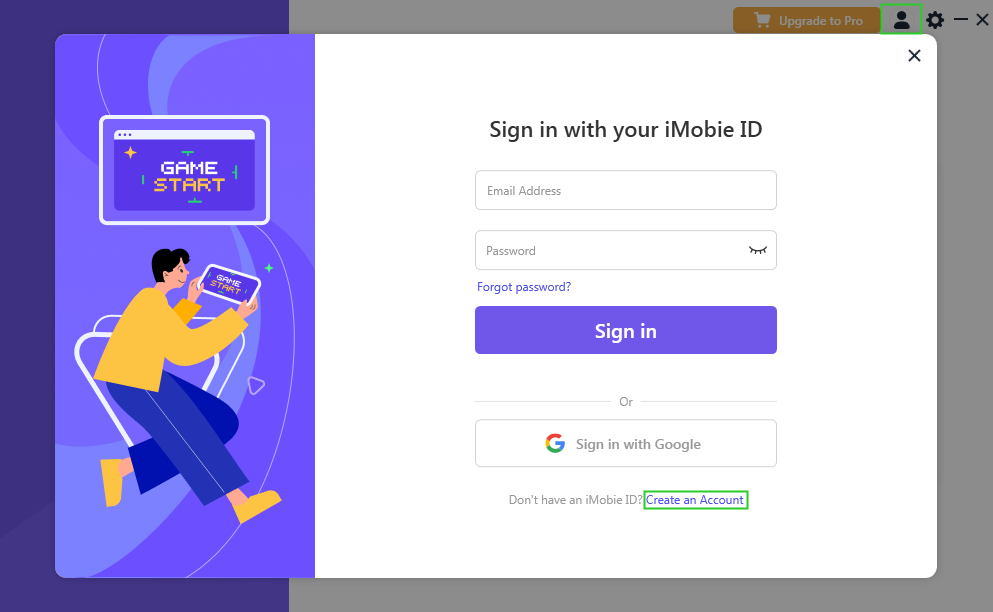
Create an Account
Please enter email address, set and confirm the password. Then click Sign up to create an iMobie ID immediately.
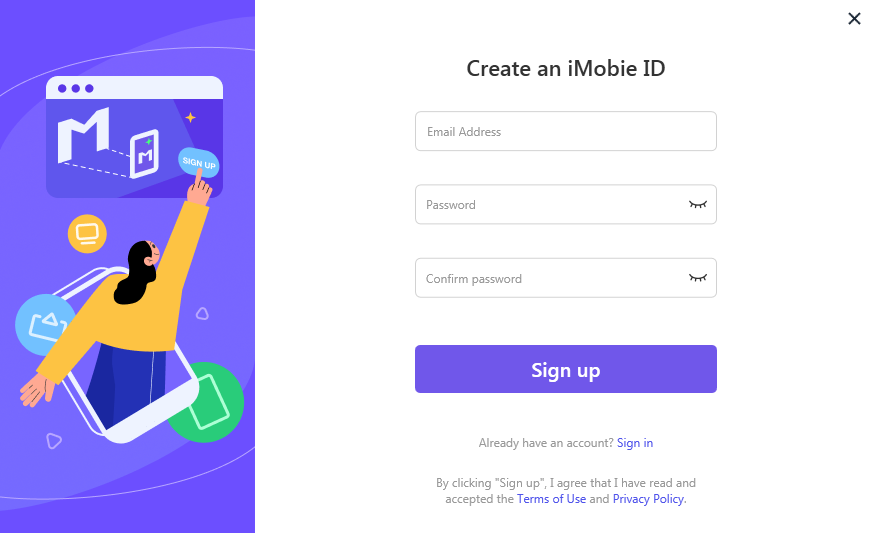
Create an iMobie ID
If you already have an account, please enter your address and password to sign in directly.
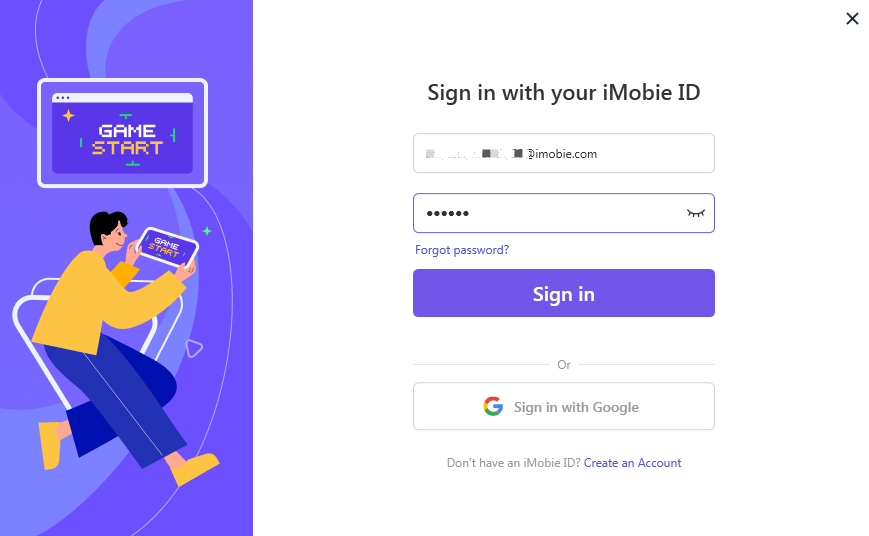
Sign in AnyMiro
Method 2: Sign in with Google.
Please select “Sign in with Google” to sign in AnyMiro.
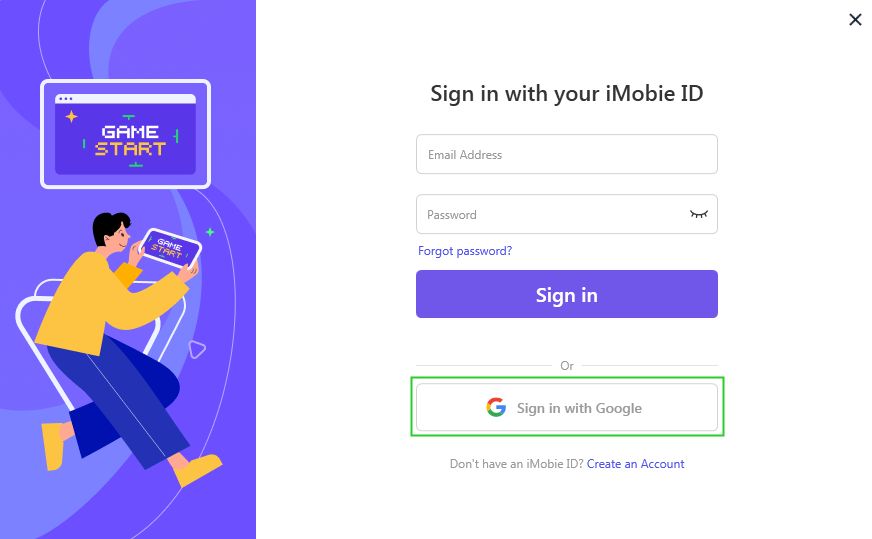
Sign in with Google
Part 2. Activate AnyMiro.
To enjoy all benefits of AnyMiro, you need to upgrade to the VIP Membership version (See Pricing). After the order is placed successfully, your iMobie ID will become the VIP Membership automatically.
Then, please click Upgrade to Pro button to enter the email address and the password. Please also connect your computer to the Internet when activating AnyMiro.
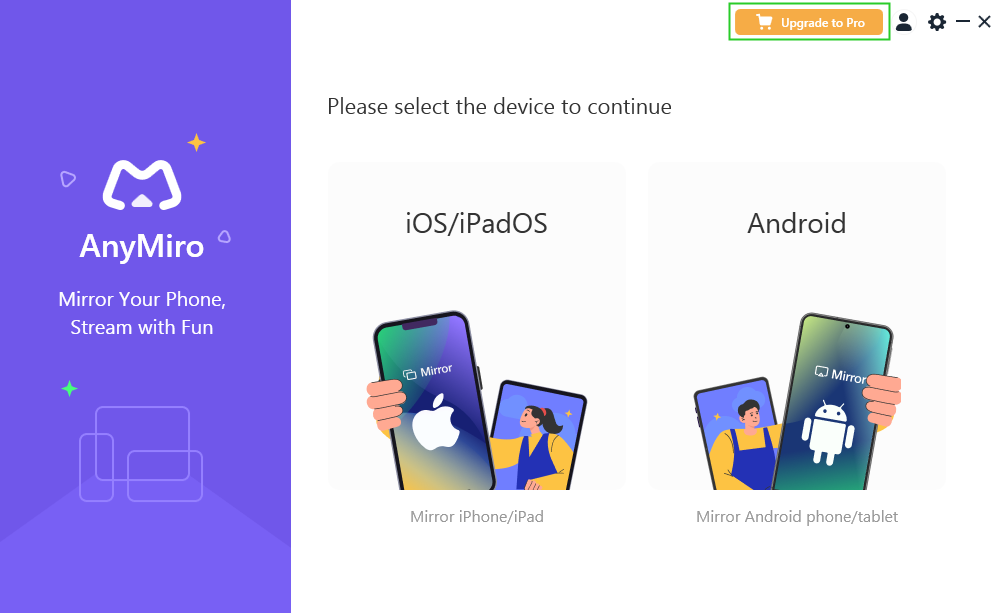
Up to Pro Version
If you are using a different address from the purchased one, you can switch the account by clicking Switch Account button.
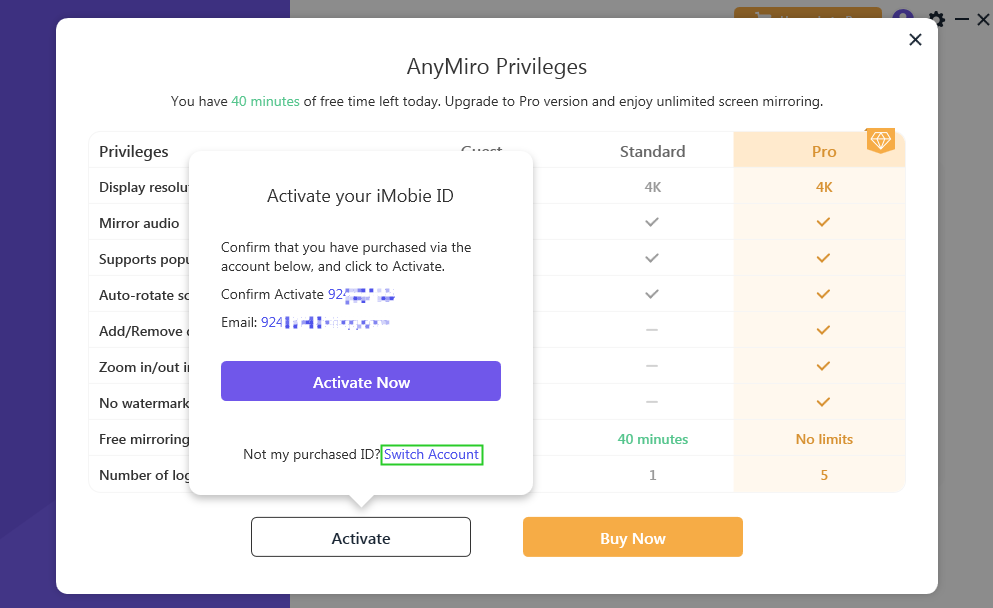
Switch Account
After upgrading to the Pro version, you can check the purchase information under this account by clicking the Avatar icon.
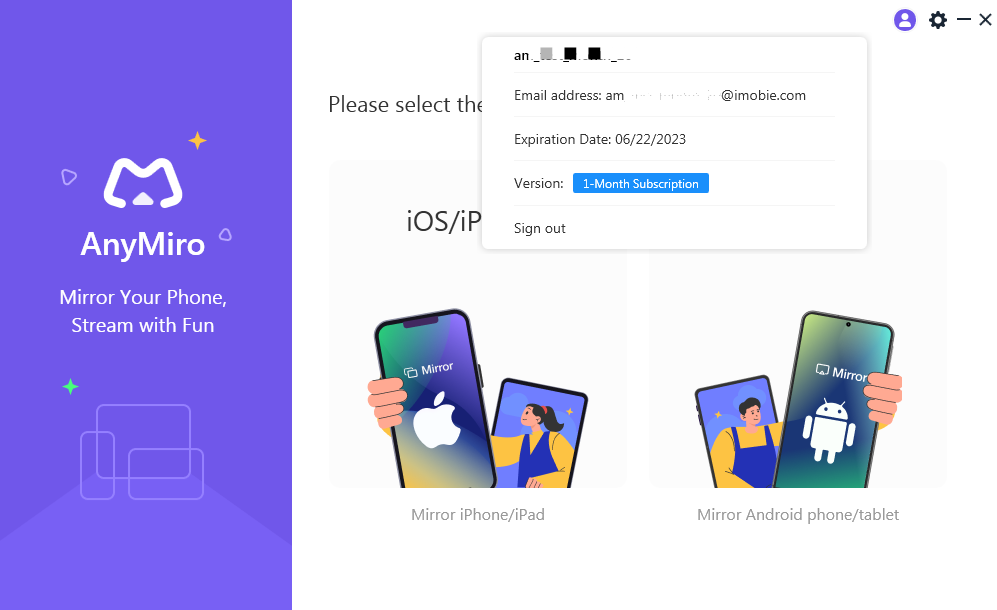
Check Account Info
If you still have questions after reading this guide, please refer to this FAQs page to check more solutions. Or you can contact our Support Team to get further help. We are here to help you!
FAQs About Managing Your AnyMiro Account
1. How do I sign in to AnyMiro?
Launch AnyMiro on your computer and click the Avatar icon in the upper-right corner. You can sign in using your iMobie ID and password or choose “Sign in with Google” to access your account.
2. How do I create an iMobie ID for AnyMiro?
Open AnyMiro and click the Avatar icon in the upper-right corner. Select “Create an Account,” enter your email address, set and confirm your password, and click “Sign up.” Once your account is created, you can sign in and access the available AnyMiro features.
3. What is the difference between the Guest, Standard, and Pro versions of AnyMiro?
The three versions offer different features and usage limits. Guest users can mirror for up to 20 minutes per day, Standard users can mirror for up to 40 minutes per day, and Pro users can mirror without daily time limits. Guest and Standard versions support resolutions up to 1080p, while Pro supports up to 4K. Pro also unlocks additional features, including device frames, interface zoom, and watermark-free mirroring.
4. How do I upgrade AnyMiro to the Pro version?
Visit the official AnyMiro pricing page and purchase a suitable Pro plan. After the order is successfully placed, the iMobie account associated with the purchase will automatically receive Pro membership. Then, open AnyMiro, click “Upgrade to Pro,” and sign in with the email address and password associated with your purchase.
5. Why hasn't my AnyMiro account been upgraded to Pro after purchasing a subscription?
First, make sure your purchase was completed successfully. Then check whether you are signed in with the same account email address used during the purchase. If you are using a different account, click “Switch Account” and sign in with the correct credentials. Also, ensure your computer has an active internet connection.
6. Can I use AnyMiro Pro on multiple computers?
No, the Pro account cannot be used on multiple computers simultaneously. If you need to use it on another computer, you may need to contact the Support Team to unind your account.
7. How do I switch to the account associated with my AnyMiro purchase?
Open AnyMiro and click “Upgrade to Pro.” On the activation screen, click “Switch Account” and enter the email address and password associated with your purchase. Make sure your computer is connected to the internet so AnyMiro can verify your account status.
8. How can I check my AnyMiro account and purchase information?
After signing in and activating Pro, click the Avatar icon in the upper-right corner of AnyMiro. You can view your account information and check the purchase details associated with your account.
9. Do I need an internet connection to activate AnyMiro Pro?
Yes. Your computer must be connected to the internet during activation so AnyMiro can verify your account and membership status. If activation fails, check your network connection, confirm that you are using the correct account credentials, and try again.
10. What should I do if I cannot sign in to or activate my AnyMiro account?
Make sure your email address and password are correct and that your computer has a stable internet connection. If you purchased a Pro plan, sign in with the account associated with your order. You can also try signing out, switching accounts, and signing in again. If the issue persists, contact the Support Team for further assistance.

Try It Out & Share Your Feedback!

We'd love to hear how AnyMiro is working for you.
Give it a try and share your thoughts—your feedback helps us keep improving.
If you're enjoying AnyMiro, we'd be so grateful if you could leave us a review on Trustpilot. Your support helps others discover AnyMiro and motivates our team!

Thank you for being part of the iMobie community — we couldn’t do it without you!
Try It Out & Share Your Feedback!
We'd love to hear how AnyMiro is working for you.
Give it a try and share your thoughts—your feedback helps us keep improving.
If you're enjoying AnyMiro, we'd be so grateful if you could leave us a review on Trustpilot. Your support helps others discover AnyMiro and motivates our team!
Thank you for being part of the iMobie community — we couldn’t do it without you!