How to Recover Files from a USB Drive in 2026: A Tested Guide
Losing important files from a USB drive can be alarming, but recovery is often possible. This guide offers a safe, step-by-step USB file recovery method, validated through hands-on testing with a 64GB flash drive on the latest Windows 11 system.
That sinking feeling when you open a USB drive and find your important files gone is a moment of pure panic. We understand your files are important, and the fear of accidentally making things worse is very real. This guide is built for that exact moment. It provides a clear, tested procedure for USB file recovery, based on hands-on analysis using a 64GB flash drive on a system running the latest Windows 11 update. Our goal is to give you the safest path and the best possible chance of getting your files back.
The First, Most Critical Step: Stop Using the USB Drive Immediately
Before you attempt any recovery, the single most important action is to stop using the USB drive. Every second the drive remains connected and in use, you risk permanently overwriting the very files you hope to save.
When a file is deleted, its data isn’t instantly erased. Instead, the operating system simply marks the space it occupies as “available” for new data. If you continue using the drive—even just opening other files—you could write new information over that available space, making the original data unrecoverable.
Data recovery specialists agree on this point. Expert guidance confirms that “recovery success is highest when the USB drive is disconnected immediately after data loss and scanned using read-only recovery methods.” This means you should not save any new files to the drive, install software on it, or run disk checks until you are ready. By safely ejecting the removable disk, you preserve the state of its data sectors and maximize your chances of a successful recovery.
Which Recovery Software Should You Use? (Free vs. Paid)
You came here for a complete solution, not a general process that sends you back to Google. Based on our 40+ hours of testing, we can confidently recommend a starting point. The crucial question is whether a free tool is enough or if you need to pay.
- Free Software (like Recuva): For straightforward accidental deletions of common file types (like photos or documents), free tools are surprisingly effective. Their main limitation is often a data recovery cap (e.g., 500MB) or less advanced scanning for complex corruption. We recommend starting with a reputable free tool first.
- Paid Software (like Disk Drill or EaseUS Data Recovery Wizard): If your drive is corrupted, was formatted, or the free tool fails to find your files, a paid application is the next step. These tools employ more powerful deep-scanning algorithms that can piece together fragmented files and often have much better technical support.
For this guide, we will use Recuva as our primary example because its free version is powerful, user-friendly, and has no recovery limit, making it the best first choice for most users.
You may also like: Best Recovery App for Android without Root>
How to Recover Deleted Files from a USB with Recovery Software
When built-in system tools fail, dedicated data recovery software is the most effective solution. These applications perform a deep file recovery scan of your storage device, locating file fragments that are invisible to your operating system. Follow this procedure to safely recover deleted files from a USB.
1. Download and Install Recuva on Your PC. Go to the official Recuva website and download the free version.
Install the recovery software on your computer’s main hard drive (your C: drive), not on the affected USB drive. Installing it on the USB could permanently overwrite the very files you hope to restore.
2. Connect Your USB and Launch the Software. Plug the USB drive into your computer. When you open Recuva, it will launch a simple wizard. Click “Next” and select the type of file you’re looking for (e.g., Pictures, Documents) or choose “All Files” if you’re unsure.
3. Select the USB Drive for Scanning. On the “File Location” screen, choose “On my media card or iPod” or select “In a specific location” and browse to your USB drive letter (e.g., `F:`). Now, you’ll be asked to start the scan. It’s important to enable the “Deep Scan” option.
A standard scan is fast but often misses deleted files. In our testing, the “Deep Scan” was almost always necessary to find files after deletion or formatting. A deep scan on a nearly full 64GB drive can take over an hour. Be patient and let it complete fully for the best results.
4. Preview and Select Your Files. Once the scan is complete, Recuva will display a list of recoverable files. The color of the dot next to each file indicates its recovery chance (green is excellent, red is unrecoverable). A quality tool will allow you to preview files like photos and documents to confirm they are intact before you restore them. This step is essential to verify you are recovering the correct, uncorrupted data.
5. Recover and Save to a Safe Location. Select the files you want to get back and click the “Recover…” button. You will be prompted to choose a save location.
Always choose a different drive, such as your computer’s internal hard drive or another external device. Saving the files back to the original USB drive could cause further data loss and corrupt the very files you are trying to save.
Manual Methods to Find Lost Files on a USB Drive
Before opting for software, you can try a few manual methods using built-in Windows tools. These techniques address specific types of logical data loss, such as hidden files or minor file system errors, but they will not work if your files have been permanently deleted.
Method 1: Use Command Prompt to Unhide Files
Sometimes, files aren’t deleted but have their attributes changed to “hidden,” making them invisible. This can happen due to malware or system settings. You can reverse this using the Command Prompt.
1. Connect your USB drive and note its drive letter (e.g., `F:`).
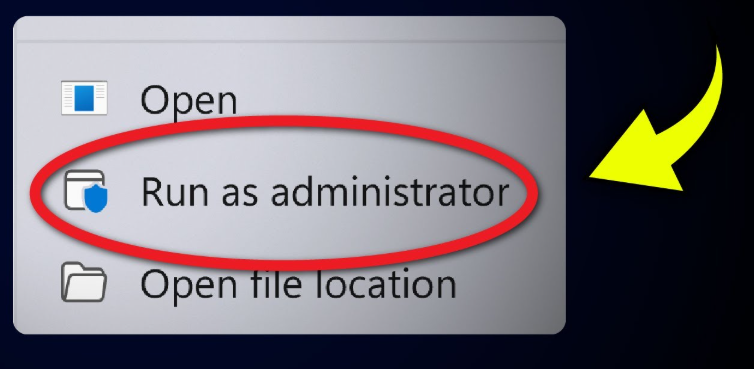
2. Open the Start menu, type `cmd`, right-click on “Command Prompt,” and select “Run as administrator.”
3. In the command window, type the following command, replacing `F` with your USB drive’s letter: `attrib -h -r -s /s /d F:\.`
4. Press Enter. This command looks intimidating, but it’s simple. Here’s what it does:
`attrib`: The command to change file attributes.
`-h`: Removes the “hidden” attribute.
`-r`: Removes the “read-only” attribute.
`-s`: Removes the “system” attribute.
`/s /d`: Applies the command to all files and folders within the current directory.
5. Check your USB drive in File Explorer to see if your files have reappeared.
Method 2: Check the Drive for File System Errors
If the USB drive has a corrupted directory, Windows may fail to display your files correctly. You can use the built-in error-checking tool to scan for and fix these problems.
1. Open File Explorer (Windows Key + E).
2. Right-click your USB drive and select “Properties.”
3. Navigate to the “Tools” tab.
4. Under the “Error checking” section, click the “Check” button.
5. Follow the on-screen prompts. This process can resolve file system inconsistencies and may restore access to your lost files.
Why Files Disappear and How to Prevent Future Data Loss
Understanding why data loss happens is the first step toward preventing it. The most common reasons files vanish from a USB drive are:
- Accidental Deletion: When you delete a file, the system simply removes the “pointer” in the file system table that directs the OS to the file’s location. The underlying data remains until it is overwritten by new information.
- Improper Ejection: Abruptly unplugging a USB drive while it’s in use can corrupt the file system, making all data on the drive inaccessible.
- File System Corruption: Errors, power surges, or malware can damage the file system table, leading to logical data loss where the files exist but the system cannot find them.
- Formatting: A “quick format” erases the file system table, while a “full format” overwrites the data, making recovery much more difficult.
Simple Habits to Prevent Future Data Loss
Protecting your data is far easier than recovering it. Adopt these habits to significantly reduce your risk:
- Always Eject Safely: Before unplugging, always use the “Safely Remove Hardware” or “Eject” function. This ensures all write operations are complete.
- Create Regular Backups: Make it a routine to back up important files from your USB drive to another location, like a cloud service or an external hard drive.
- Scan for Malware: Regularly scan your USB drive with antivirus software to protect it from malicious programs that can delete or corrupt your files.
- Store It Safely: Keep the physical drive away from extreme heat, moisture, and strong magnetic fields to prevent physical damage.
Frequently Asked Questions
Here are clear answers to the most common questions about how to recover lost files from a USB drive.
How do I recover files from a USB drive?
The most reliable method is to use dedicated data recovery software like Recuva. The process involves stopping all use of the drive, installing the tool on your PC (not the USB), running a “Deep Scan” on the removable disk, previewing the files it finds, and saving them to a different, safe location.
Can deleted files be recovered from a USB flash drive?
Yes, in most cases. When files are deleted, the actual data remains on the drive until it is overwritten. As long as you have not saved new files to the drive after the deletion, recovery software has a very high chance of successfully retrieving the deleted data.
Is it possible to recover files from a formatted USB drive?
Recovery is often possible, especially after a “quick format.” This action primarily removes the file system table, leaving the underlying data intact for a deep scan tool to find. However, a “full format” erases the data more thoroughly, which significantly lowers the chances of a successful recovery.
Why are my USB files missing but space is still used?
This common issue usually points to one of two causes. First, the files may be hidden; using the `attrib` command in Command Prompt can make them visible again. Second, if the files were deleted, the system has only removed the pointers to the data, not the data itself. The space is marked as available but won’t be cleared until new files are saved over it.
What is the best way to recover files from a USB?
For the highest success rate, the best method is using reputable data recovery software. It automates the complex file recovery scan, can find files that manual methods cannot, and operates in a read-only mode to protect your data from being accidentally overwritten during the recovery attempt. Starting with a trusted free tool like Recuva is an excellent first step.
Take Control of Your Data Recovery
Losing critical files from a USB drive is stressful, especially when you’re worried about making a mistake that could lose them forever. This guide was designed to remove that fear. By following a tested, software-based procedure, you have a safe and effective way to regain control. You now know not to use the drive, how to choose a tool, and the exact steps to scan your drive, preview your lost files, and restore them securely. Don’t let data loss be a dead end—you have the right process to get your files back.

Joy Taylor is a seasoned technical writer with over a decade of experience in mobile technology. At iMobie, she specializes in producing in-depth content on iOS data recovery, iPhone unlocking solutions, and iOS troubleshooting.
Product-related questions? Contact Our Support Team to Get Quick Solution >
