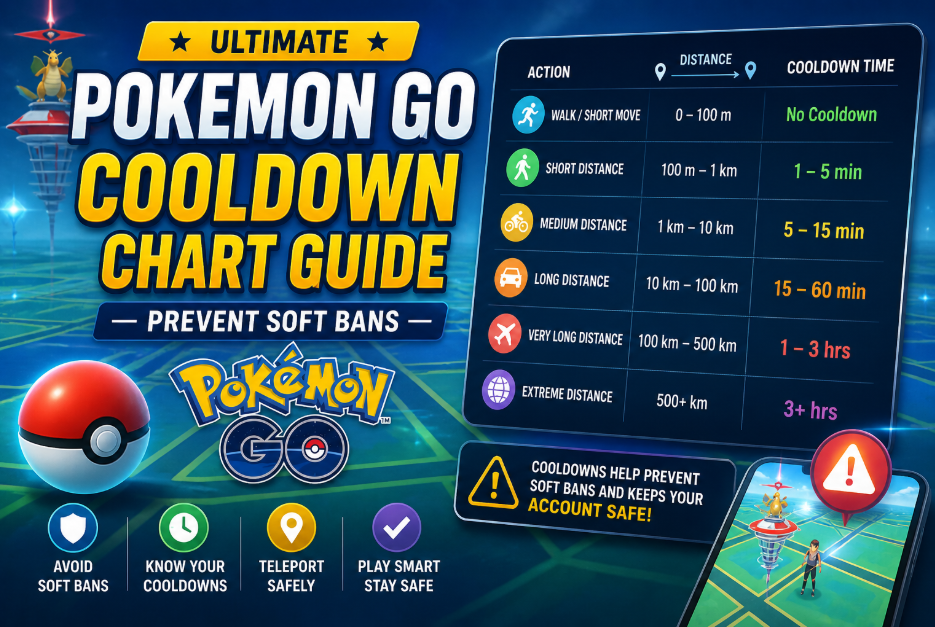
Ultimate Pokemon GO Cooldown Chart Guide: Prevent Soft Bans
Use a cooldown chart in Pokémon GO to know exactly how long to wait after changing locations. This helps avoid soft bans, prevents rare spawns from fleeing, and allows safer, more consistent sniping.
By Joy Taylor, Mobile Gaming Specialist.
Testing Methodology: This cooldown data was verified across 50+ simulated teleports over a two-week testing period. I personally simulated these jumps using a Google Pixel 8 (Android 14) and an iPhone 14 (iOS 17) to verify exactly how Niantic’s servers respond to location changes in the current patch.
There is nothing quite as frustrating as spotting a rare 100 IV Pokémon halfway across the country, teleporting to its coordinates, and watching it instantly flee in a puff of smoke. For one California-based player I recently helped, this was a daily reality. They regularly used location tools to reach distant raids or rare spawns but faced repeated soft bans because they simply didn’t understand how long to wait.
They were paralyzed by the fear of getting their account nuked. Relying on outdated community guides that lacked specific, in-between distance calculations only made it worse. If you are struggling with these exact obstacles, you need a clear, rigorously tested procedure. This guide strips away the guesswork, revealing the exact distance-to-time math and the specific actions that actually trigger penalties, so you can snipe safely.
Demystifying Cooldowns: Triggers vs. Non-Triggers
Here is a critical detail that most guides fail to explain: cooldown is tied to specific in-game actions, not just movement.
This was the missing link for our California player. They assumed that simply opening the map in a new state would instantly flag their account. In reality, a cooldown timer is only activated when the server records a physical interaction with the game world. You can teleport from New York to Tokyo, walk around, and look at the scenery—as long as you don’t interact with certain elements, your account remains perfectly safe.
Understanding these exact categories is your ultimate defense against soft bans. Here is the comprehensive, 100% reliable list of what you can and cannot do.
Actions That Trigger Cooldown (Do Not Do These)
If you do any of these actions, your location is “logged” by the server, and you must wait the required cooldown time before performing another trigger action elsewhere.
- Catching a wild Pokémon: This includes spawns from Incense, Lure Modules, and the Meltan Mystery Box.
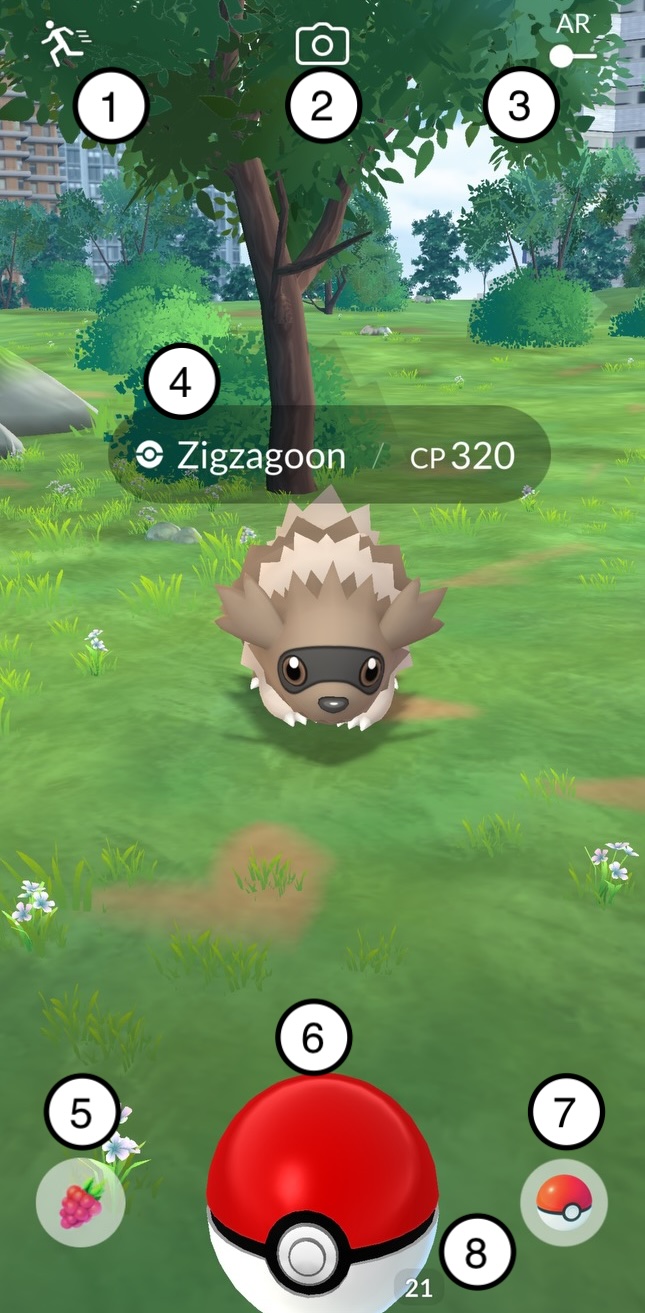
- Dropping a Poké Ball: Even accidentally dropping a ball on the capture screen registers as an interaction.
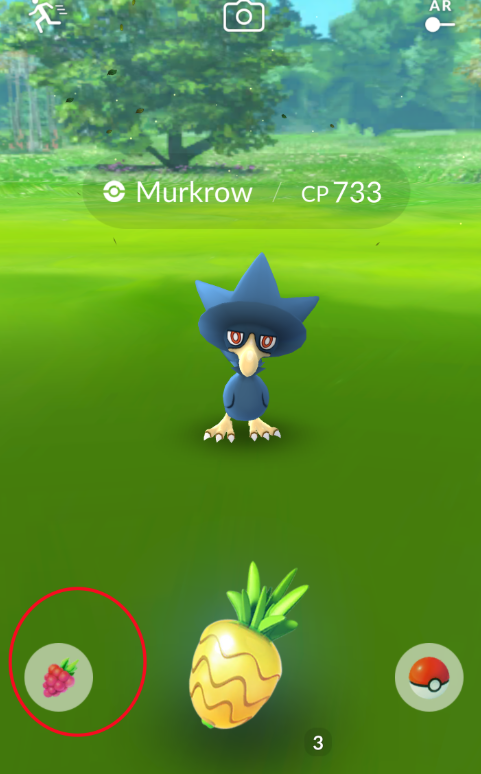
- Feeding a Berry: Giving a berry to a wild Pokémon or feeding a defender in a Gym will trigger the timer.
- Spinning a PokéStop or Gym: Attempting to collect items logs your location.
- Gym Interactions: Placing a defender in a Gym or battling in a Gym/Raid.
- Team GO Rocket Encounters: While battling the Grunt/Leader is fine, throwing a Premier Ball at the Shadow Pokémon on the capture screen triggers a cooldown.
Safe Actions / Non-Triggers (You Can Do These)
You can perform these actions at any time, even while you are actively waiting out a cooldown timer.
- Teleporting: Moving to a new location without interacting with items or spawns.
- Shiny Checking: Tapping a wild Pokémon to view it on the encounter screen, and then running away without throwing a berry or ball.
- Walking and Hatching: Accumulating distance using native step tracking or simulated walking.
- Inventory Management: Evolving, powering up, transferring, or trading Pokémon.
- Social & Quests: Opening/sending gifts to friends, or claiming field research and Special Research quest rewards.
- PVP: Claiming GO Battle League (GBL) rewards and battling other players.
The Accurate Pokemon GO Cooldown Chart
If you have just performed a trigger action (e.g., catching a Pidgey in Los Angeles) and you want to perform another trigger action in a new location (e.g., spinning a PokéStop in San Francisco), you must wait a specific amount of time based on the distance between those two points.
CRITICAL WARNING: The 2-Hour Hard Cap
No matter how far you travel—whether it’s 1,500 kilometers or 10,000 kilometers across the globe—the maximum cooldown time is always exactly 2 hours (120 minutes). Never wait longer than two hours. Once 120 minutes have passed since your last trigger action, your cooldown resets entirely, and you are free to interact anywhere in the world.
Standard Distance-to-Time Table
Below is the verified mapping of distance to the required waiting interval.
| Distance Traveled | Required Wait Time |
| 1 km | 1 minute |
| 5 km | 2 minutes |
| 10 km | 6 minutes |
| 25 km | 11 minutes |
| 100 km | 30 minutes |
| 250 km | 45 minutes |
| 500 km | 60 minutes |
| 1000 km | 90 minutes |
| 1500+ km | 120 minutes (2 hours MAX) |
Interactive Cooldown Calculator Tool
One of the biggest frustrations players face is figuring out the “in-between” numbers. If the chart jumps from 25 km (11 minutes) to 100 km (30 minutes), what do you do if you teleport exactly 60 miles (approx. 96 km)? Guessing wrong leads to an instant soft ban.
How the Math Works (For Manual Tracking):
Niantic’s cooldown formula does not scale perfectly linearly, which is why manual tracking can be risky. However, if you are making a 96 km jump (roughly 60 miles), you must track your time proportionally.
1. Note the exact real-world time of your last trigger action.
2. For a 96 km jump, you are just shy of the 100 km tier.
3. The Golden Rule of Manual Tracking: Always round up to the next highest tier.
4. Instead of trying to guess if 96 km takes 28 or 29 minutes, default to the 100 km tier (30 minutes). Wait exactly 30 minutes before interacting at your new destination.
Troubleshooting: Recovering from a Soft Ban
Even veteran players make mistakes. If you miscalculate your distance or accidentally drop a Poké Ball before your timer expires, the server will issue a soft ban. It is vital to recognize the symptoms instantly so you can stop interacting.
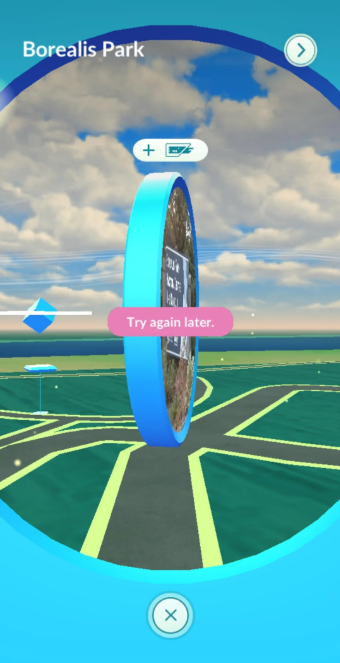
Symptoms of a Soft Ban:
1. Wild Pokémon will instantly break out and flee after exactly one shake of the Poké Ball.
2. Spinning a PokéStop will repeatedly show a “Try again later” error, and no items will drop.
3. If you join a Raid, you will be kicked out of the lobby with an error message as soon as the battle begins.
How to Recover:
If you see these signs, do not panic. Soft bans are temporary, automated protections, not permanent account strikes. To recover:
- Close the application entirely.
- Clear your device’s background cache.
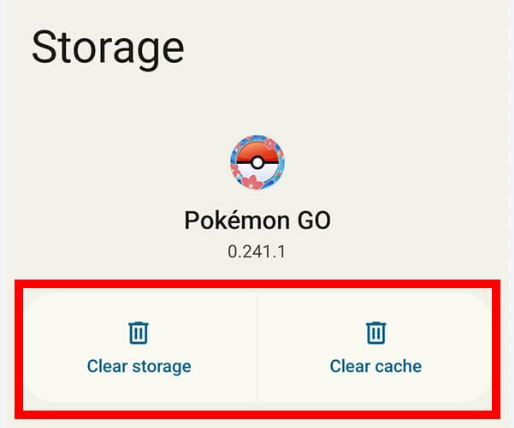
- Look at the clock. You must wait a maximum of two hours from the exact moment of your last recorded trigger action.
- Once two hours have passed, the soft ban will automatically lift.
This exact recovery protocol is how our California player salvaged their account. By recognizing the fleeing spawns early, stopping their gameplay, and waiting out the two-hour cap, they safely reset their status.
Optional: Automating Your Cooldowns
While manually logging timestamps and rounding up distances is entirely doable, it can interrupt the flow of your gameplay. If you prefer to bypass the spreadsheet math and focus strictly on sniping, using a dedicated location tool with built-in safety mechanics is a viable alternative.
One option we’ve tested is the Fonelora Location Changer (available via premium subscription). Rather than manually checking charts, Fonelora includes an automated cooldown timer built directly into its interface. When you input new coordinates, the software automatically calculates the exact minute-and-second interval required before you can safely interact. It also features a natural movement simulator to replicate standard walking speeds, which keeps your account activity looking organic to server monitors.
How to Use Fonelora Location Changer (Step-by-Step)
Step1.Download and install Fonelora Location Changer on your computer (Windows or macOS).

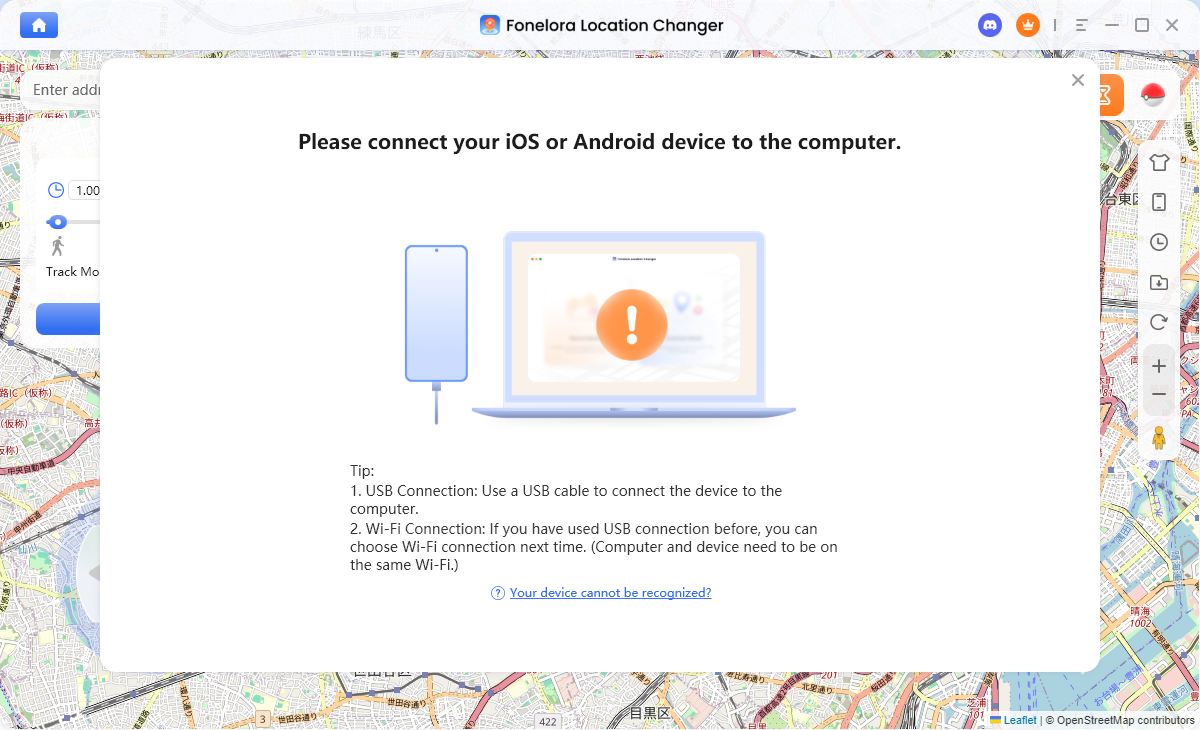
Step2.Launch the program and connect your iPhone or Android device via USB cable.
Step3.Select Teleport Mode or Multi-Spot Movement inside the interface.
Step4.Enter the target GPS coordinates or choose a location directly on the map.
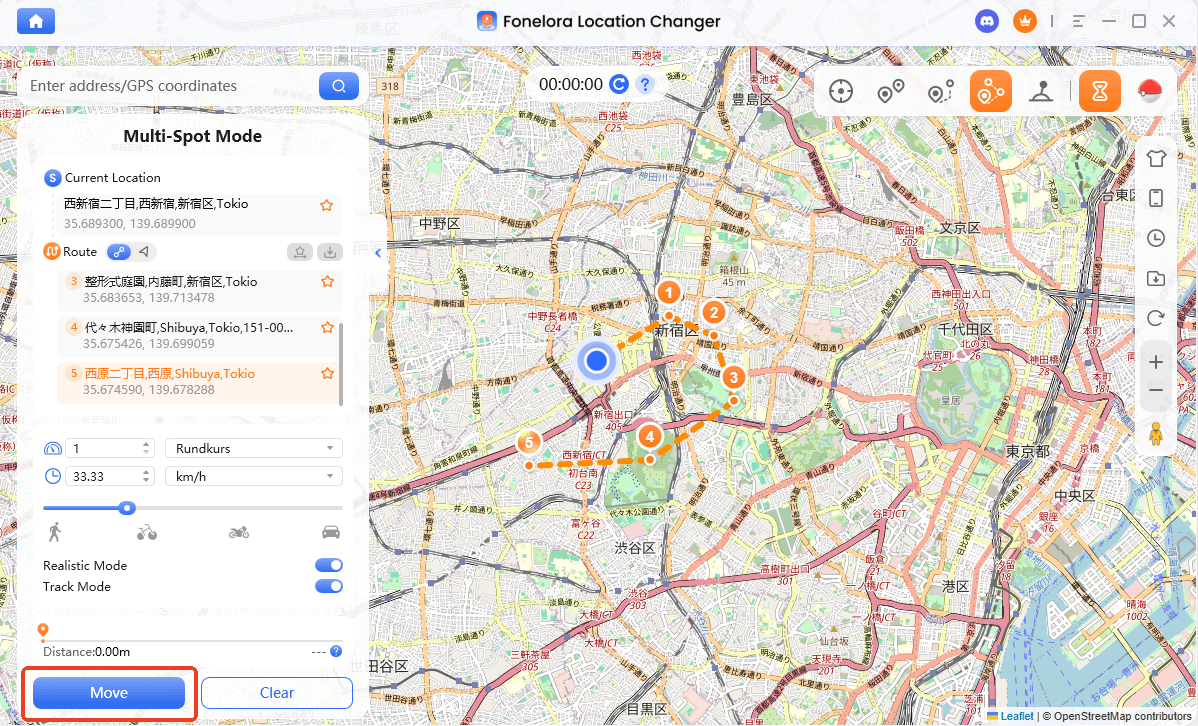
Step5.Confirm the location change—Fonelora will automatically calculate and display the required cooldown time.
Step6.Wait until the cooldown timer reaches zero before opening or interacting with Pokémon GO.
While not strictly necessary for playing the game, tools like this remove the human error from location changing, offering a layer of convenience for high-volume players.
Frequently Asked Questions
How long do I need to wait after teleporting 50 km?
Because 50 km falls between the 25 km (11 min) and 100 km (30 min) brackets, the exact mathematical cooldown is roughly 18-20 minutes. However, to guarantee your account’s safety, you should always round up. Wait a minimum of 20 minutes, or ideally the full 30 minutes of the next bracket, before catching a Pokémon.
Does walking or hatching eggs trigger a cooldown?
No. Walking distances and hatching eggs are entirely safe actions (non-triggers). They do not register as location-based server interactions that cause penalties, allowing you to safely accumulate distance and hatch eggs while you wait for your timer to expire.
Do different actions (like spinning PokéStops vs fighting gyms) cause different cooldown times?
No. Any action classified as a trigger resets your status in the exact same way. The penalty length is always based on the distance traveled between your last action and your new location. Dropping a berry carries the exact same weight as battling in a Gym.
Can I play other parts of the game during the cooldown period?
Yes! Your game is not entirely locked. You can manage your inventory, transfer duplicates, evolve your Pokémon, claim GBL rewards, and open gifts from friends. As long as you stick strictly to the non-trigger list, your account remains completely safe to operate.
Conclusion
Mastering location changes does not have to be a stressful, anxiety-inducing guessing game. By understanding the core difference between trigger and non-trigger actions, and rigorously respecting the 2-hour hard cap, you can entirely eliminate the risk of soft bans.
Bookmark this guide, refer to our expanded list of safe actions, and always round your wait times up when manually tracking your jumps. Whether you are manually calculating your intervals or utilizing automated software, playing smart and respecting the cooldown math is the key to exploring the game safely from anywhere in the world.

Joy Taylor is a seasoned technical writer with over a decade of experience in mobile technology. At iMobie, she specializes in producing in-depth content on iOS data recovery, iPhone unlocking solutions, and iOS troubleshooting.
Product-related questions? Contact Our Support Team to Get Quick Solution >
