How to Quickly Clear or Reduce System Data on Mac
System Data can take a large portion of your Mac’s valuable storage. Learn how to safely clear it to free up some disk space without worrying about deleting critical system files.

Recent Mac user reports indicate that around 40% of Mac users face sudden “Storage Full” warnings, often due to bloated System Data. This hidden category can eat up 30% of total storage if not regularly cleaned. Yet 62% of Mac users admit they don’t know what’s in it or how to clear system data safely.
Unlike photos, videos, or apps, you can’t just drag “System Data” to the Trash or Bin. Deleting the wrong files could break your Mac. But the good news? It’s not that intimidating, and you don’t need expensive third-party tools to reduce system data storage on your Mac.
Our iMobie team has computer repair technicians with several decades’ Mac knowledge and experience. In this troubleshooting guide, we’ll help you learn:
- What System Data actually is.
- 6 reliable step-by-step methods to safely clear it without deleting critical system files.
- How to prevent it from ballooning again, so you never run out of disk space unexpectedly.
Now let’s reduce your Mac’s System Data storage—without the guesswork.
What is “System Data” on Mac?
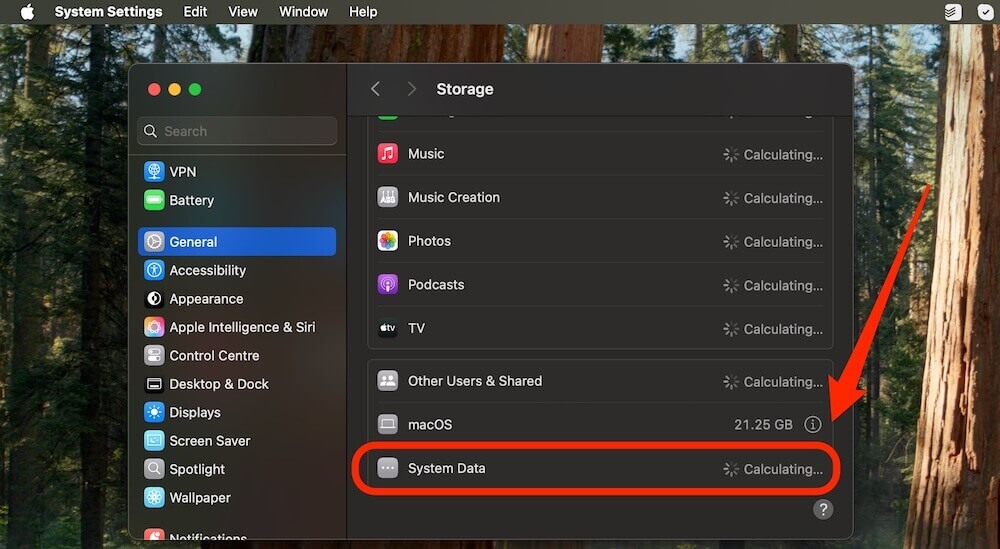
If you peek at your Mac’s storage consumption (Apple Menu > About This Mac > More Info > Storage Settings), you might notice that “System Data” consumes a ton of space.
System data on a Mac includes many different file types, such as:
- System and browser caches
- Error logs and reports
- Application installer files
- Temporary files
- Time Machine snapshots
- App caches, etc.
Almost all of these files are not items that you will directly interact with, but they are typically necessary for your computer in some way. However, this system data is separate from your “macOS data” and can usually be trimmed down without adversely affecting your computer.
Why Does “System Data” Take up So Much Disk Space?

The bulk of System Data consists of caches and temporary files created by macOS during operations.
These files are intended to speed up processes but can grow unwieldy without periodic cleanup.
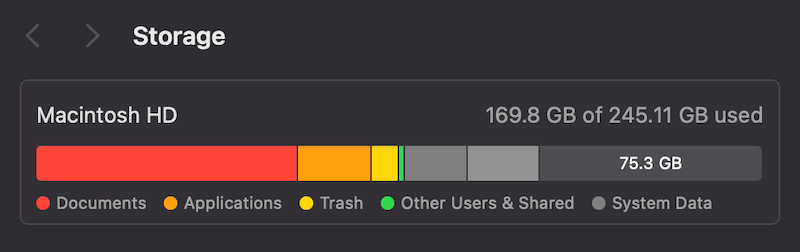
In this case (the above screenshot), system data is taking up 21GB of space — that we would much rather have available to install more games or apps!
Is It Safe to Clear or Delete “System Data” on Mac?
While deleting large files to free up space quickly is tempting, this approach requires some
caution with system data. macOS manages many of these files automatically so that your system remains stable and performs optimally.
Deleting essential system files can lead to malfunctions and data loss.
We recommend using safe methods and tools introduced below for this purpose.
Quick Method: Using a Third-party Cleaning Tool (for Beginners)
Free Download for all windows & 100% safe Free Download for all mac & 100% safe
Free Download100% Clean & Safe
If you are new to Mac, manually clearing System Data can feel a bit overwhelming. Using a trusted third-party Mac cleaner can simplify the process with just a few clicks. Just remember: avoid obscure cleaners—stick to well-reviewed options to prevent accidental file removal or malware risks.
To solve this problem, we recommend MacClean. As a comprehensive maintenance utility designed to clean, optimize, and maintain your Mac’s health, MacClean also offers a suite of additional capabilities, such as app management, malware removal, and real-time system performance monitoring.
The following are the usage steps:
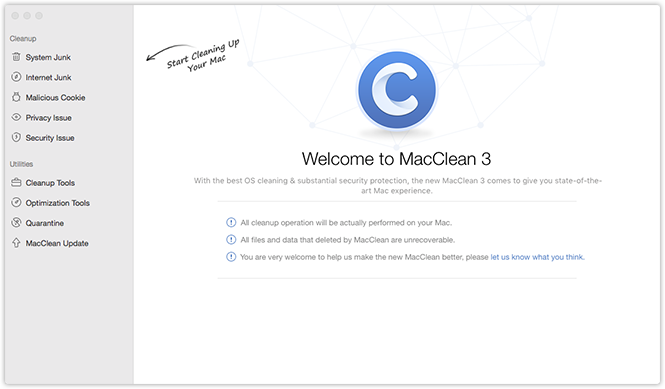
Step 1: Download and open MacClean, you will see the main interface as below:
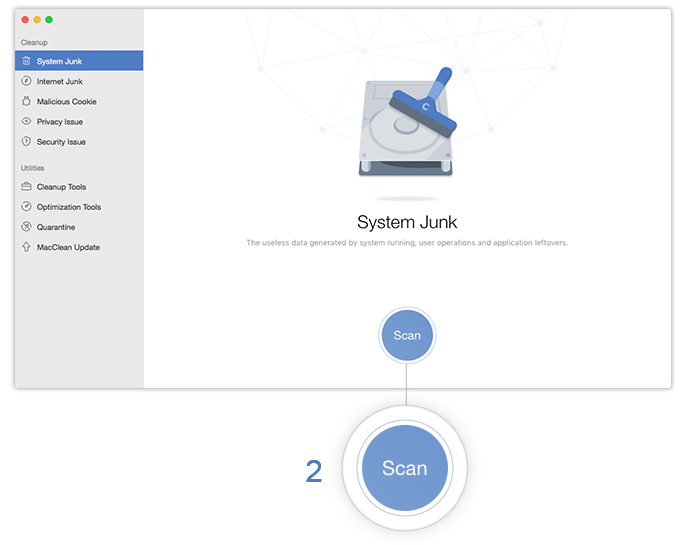
Step 2: Select System Junk from the left “Cleanup” menu to access the junk cleaning page, and click the Scan button (2) to let MacClean analyze your Mac for system junk files.
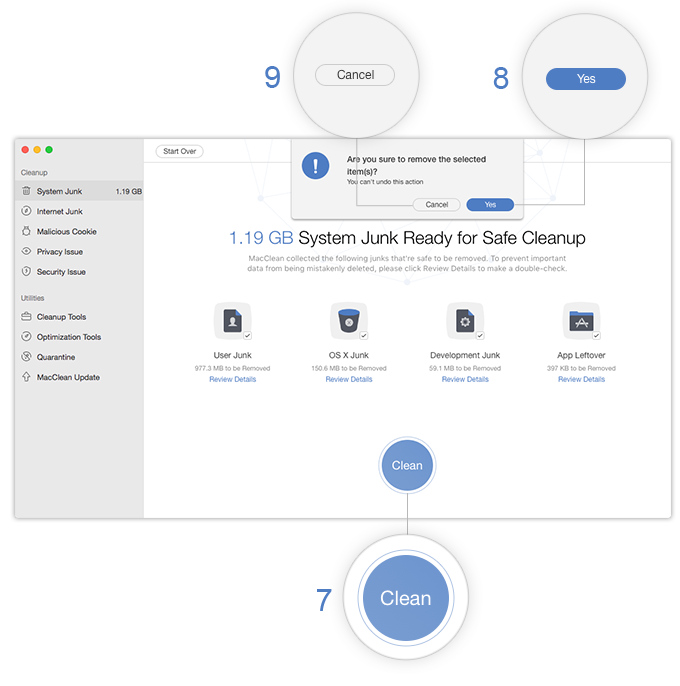
Step 4: Click Review Details (4) to check the breakdown of junk files (e.g., User Junk, OS X Junk) and verify which items you want to delete.

Step 5: Click Clean (7), then confirm by selecting Yes (8) to remove the junk files, or click Cancel (9) to abort if you change your mind.
Once you’ve cleaned up system data and other junk, you can also be rest assured that your Mac is free from viruses, security threats, and unnecessary applications.
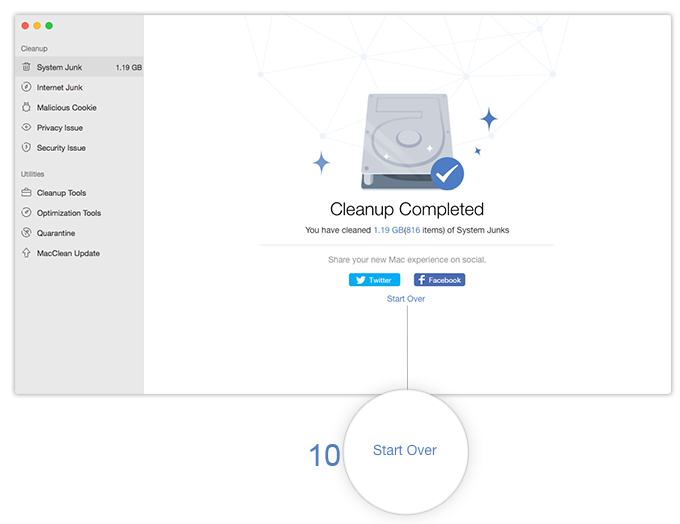
The best part is that each of these types of scans only takes a few minutes, so you will be able to reap the benefits immediately.
5 Manual Methods (Best for Advanced Users)
If you don’t feel like using an automated tool to get the job done for you, there are several manual methods you can use to clear up system data on your Mac and regain valuable storage space.
Method 1: Remove Time Machine Backups
Old Time Machine backups can often take up massive amounts of space on your drive. Time Machine is an essential backup tool for Macs, but over time, the backups can accumulate and take up considerable space.
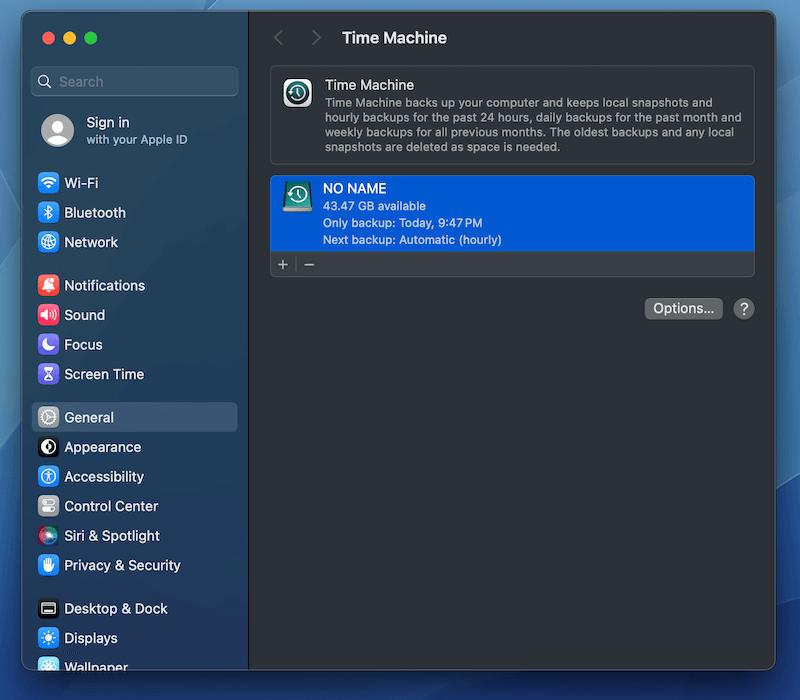
You can delete old backups directly through Time Machine or using Finder. Follow these steps:
- Open Time Machine and navigate to the backup you want to remove.
- Click on the gear icon and select “delete backup.”
- From here, you can confirm the action by entering your admin password.
You can also use Terminal. Type the following command to display all backups:
tmutil listbackups
Then type:
sudo tmutil delete [backup path]
Replace the [backup path] with whatever your Time Machine’s backup location is to remove the ones you choose.
Method 2: Delete Old iOS Backups
iOS backups stored on your Mac can also eat up significant storage. To delete these, open Finder (or iTunes if you are still using macOS Catalina or earlier).
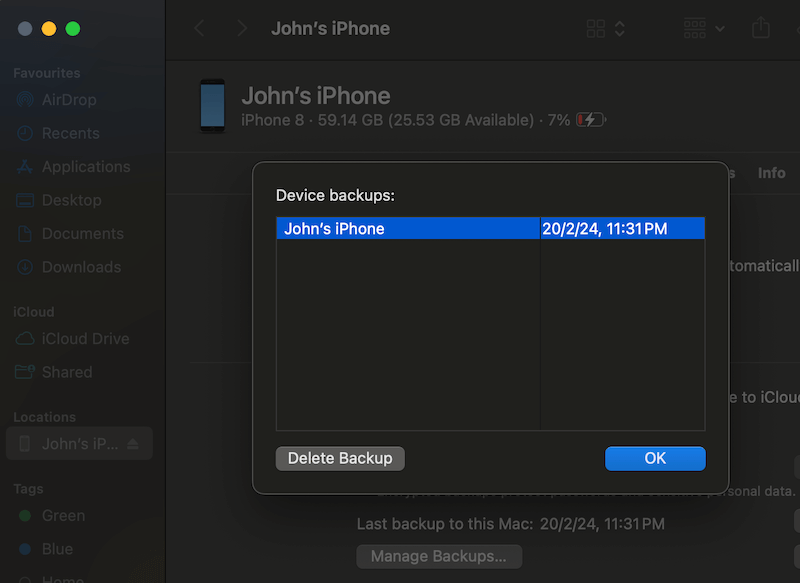
Then, navigate to the device’s backups and delete them from there.
- Connect your device to your Mac
- Select your device name under Locations
- Click Manage Backups…
- Select the backups you don’t need and click Delete Backup
Caution: Only delete backups that you feel are redundant or don’t have important information.
Method 3: Clear Application Logs and Support Files
Applications often leave behind logs and support files, which can accumulate over time.
You can manually delete these application logs via Finder:
- Select Go from your menu bar at the top of the screen
- Select the Go to Folder option
- Navigate to ~/Library/Application Support

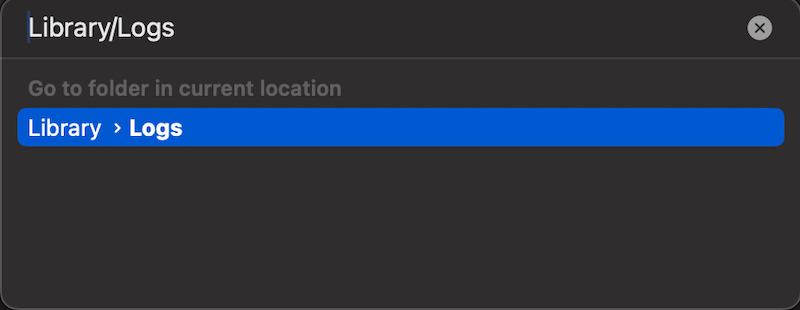
To view and delete Logs, select Go and navigate to ~/Library/Logs using Finder.
Make sure to only delete the files related to apps you no longer use to prevent potential issues with applications still in use. Don’t be alarmed if you happen to delete files for apps you are still planning to use, as these will simply be recreated the next time you launch that app.
Method 4: Remove Hidden System Files
Hidden system files, such as caches or old updates, can be located and removed through Finder.
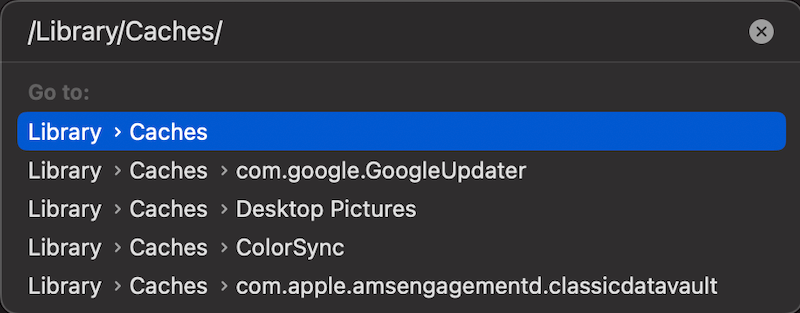
- Click Go from the menu bar at the top of your screen
- Select the Go to Folder option
- Enter paths like /Libary/Caches or ~/Library/Caches to find and delete the files
Method 5: Other Manual Cleaning Tips
There are a few other tricks you should keep up your sleeve to clean up your Mac.
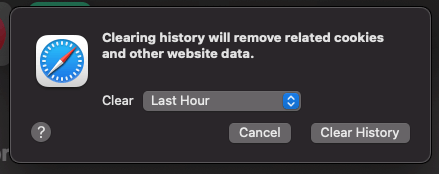
Clear your browser cache. Web browsers store temporary files, which can be deleted to free up space. You can do this within the browser settings under the history or privacy settings.
Another method is clearing the trash. Files aren’t fully deleted until the trash is emptied. Right-click the trash bin icon and select Empty Bin to clear out deleted files permanently.
How to Prevent System Data from Building up Again
While clearing System Data can free up immediate disk space on your Mac, the best long-term solution is preventing it from ballooning in the first place. Here are a few effective strategies:
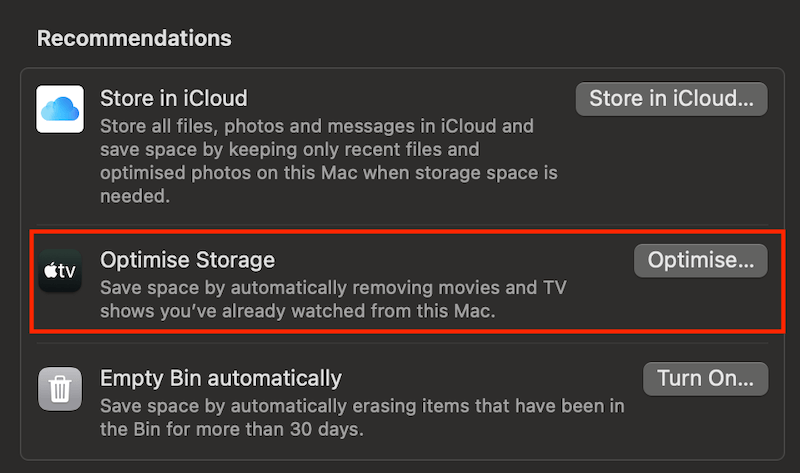
1) Go to Apple Menu > About This Mac > More Info > Storage Settings, toggle on “Optimize Storage” to automatically remove watched TV shows, email attachments, and old files. Also, consider turning on “Empty Bin automatically” and clearing the Downloads folder (use with caution, though).
2) If you use Time Machine, consider backing up to an external drive instead of relying on local snapshots, which silently consume space.
3) Use tools like DaisyDisk or OmniDiskSweeper to find duplicate files, audit old large files to spot hidden storage hogs before they become a problem.
4) For advanced users, schedule periodic maintenance to keep caches and logs in check. Use Terminal to force macOS to clear temporary files regularly (monthly is recommended), or manually clean ~/Library/Caches every few months.
Final Tips: Master Your Mac’s Storage Like a Pro
Whether you’ve been using your Mac for years or just picked up a new one, it’s quite common to see that System Data consumes a significant portion of your Mac’s storage, especially if you have a Mac with limited disk space.
While cleaning it up isn’t that hard or time-consuming. Now that you’ve reclaimed some space, take it further:
- Automate the boring stuff: Set calendar reminders to clear caches quarterly or use MacClean’s scheduling tool to do so.
- Know your enemy: Check ~/Library/Application Support/ for abandoned app data—some big apps like Adobe and Steam are frequent offenders.
- Go “nuclear” when needed: If System Data surges unexpectedly, boot into Safe Mode as this often clears corrupted caches.
Your Mac’s performance is now in your hands. Want to regain more storage on your Mac? Check out this article for 9 ways to free up disk space on MacBook Air (the same principles also apply to other Mac models) —because a faster Mac is just a few tweaks away.
Free Download for all windows & 100% safe Free Download for all mac & 100% safe
Free Download100% Clean & Safe
Product-related questions? Contact Our Support Team to Get Quick Solution >
