How to Move Photos from SD Card to Phone
If you are giving away your SD card and you would like to backup the photos stored on it, the following guide will teach you how you can move photos from an SD card to your phone. Read on to learn the most easiest ways to do the task.
While most of the time you tend to move your photos from the internal storage to the SD card on your device, there are times when you will want to do the reverse. Maybe you are giving away your SD card to your friends and you do not want for them to see your photos. Or maybe you are going to get a new SD card for yourself and you want to first move your photos to the internal storage.
Regardless of the reasoning, the following guide should teach you how to transfer photos from an SD card to your Android phone. It shows both how you can move photos using your computer and how you can do the task from your phone itself.
Let’s get started with moving your photos:
How to Move Photos from SD Card to Phone on Computer
If you are someone who prefers using a computer to do the task, this section is for you. The section will walk you through the steps on how you can use a nice little app on your computer to transfer photos from an SD card to your phone.
The nice little app we are talking about is called AnyDroid. It allows Android users to move data between various devices and storage options using your computer. It acts as a medium to let you effortlessly transfer files between your various devices and storages.
The app comes preloaded with tons of features to help you perform all kind of data management and data transfer operations on your device. The following are some of the features you might be interested in.
- Extremely fast transfer speeds.
- Support for all the major image file formats.
- Preview the images before you transfer them.
- One-click to transfer multiple images.
- Safe, modern, and easy way to transfer.
If you are sick of using traditional slower methods of transferring photos, you are highly recommended to use AnyDroid to perform your transfer operations. The following shows how to download and use the app to move your photos from your SD card to your phone.
Step 1: Open a new tab in your browser and head over to the AnyDroid website. Download, install, and launch the app on your computer.
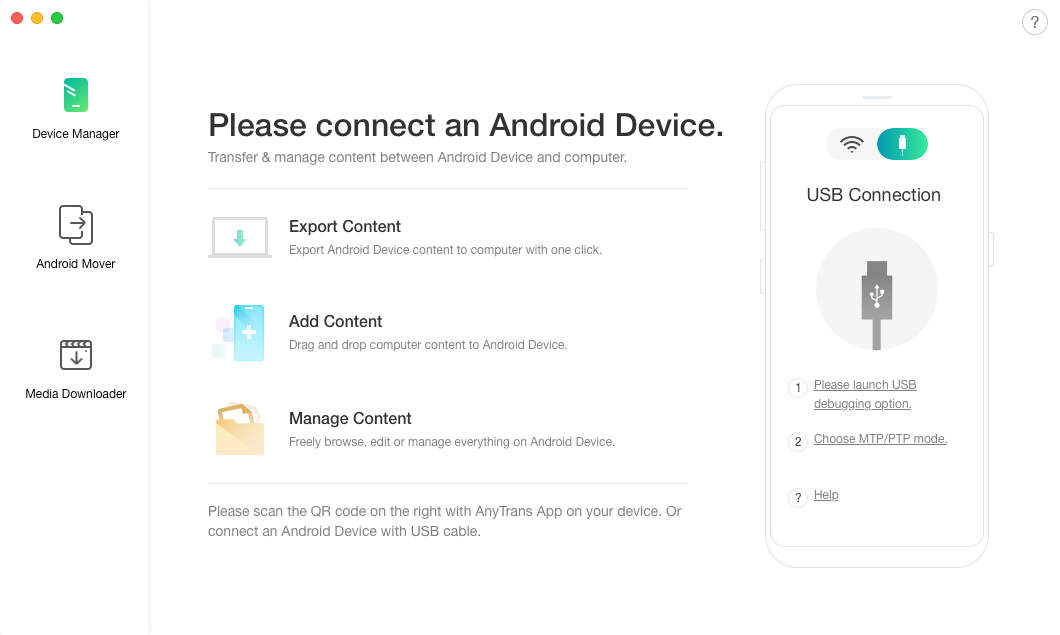
Download and access the AnyDroid app on your computer
Step 2: Connect your Android phone to your computer using a suitable cable and the app will recognize your device. Click on Photos on the main interface of the app to transfer photos.
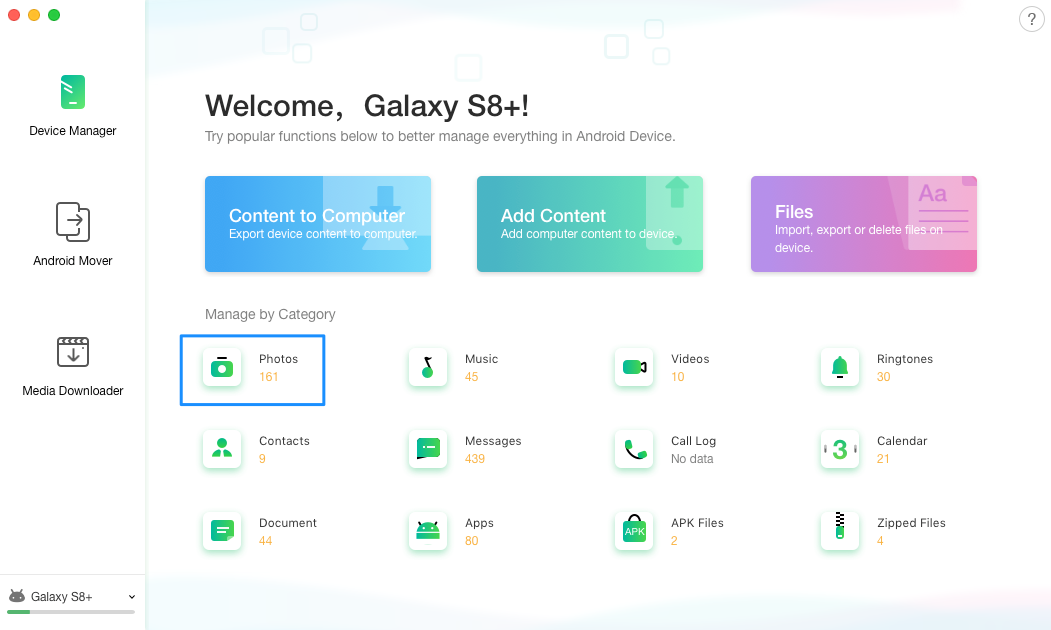
Select Photos to transfer photos from SD card to phone
Step 3: It will take some time to generate thumbnails for your photos. Then, click on all the photos that you would like to move to your phone memory and click on the Send to PC button at the top.
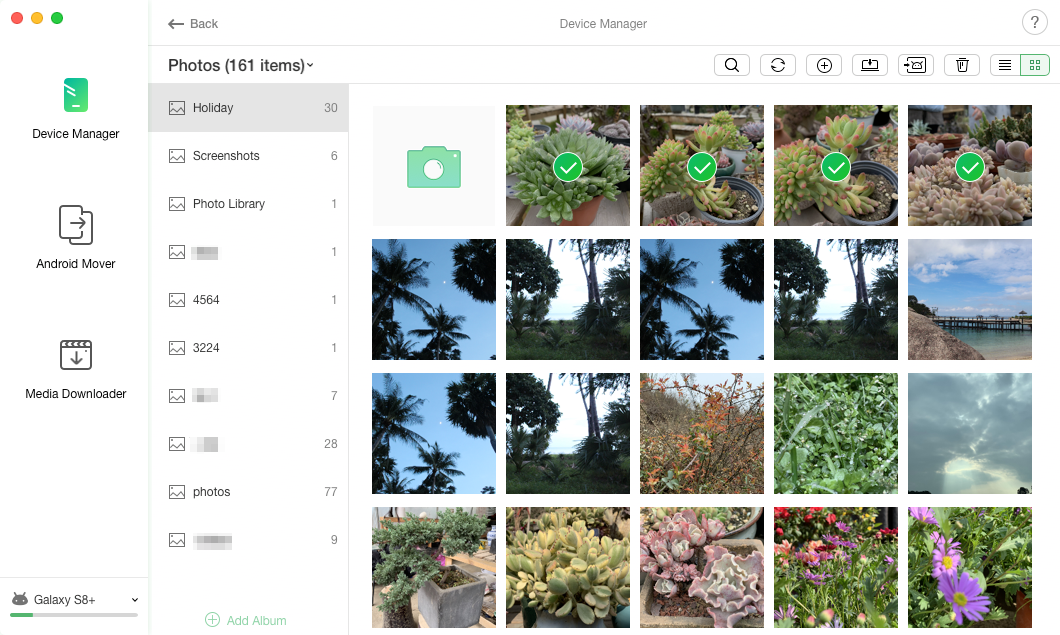
Select and move photos from SD card to phone
Step 4: Select your phone memory as the destination for your photos and the app will start transferring your content. When it is done, you will see the following message on your screen.
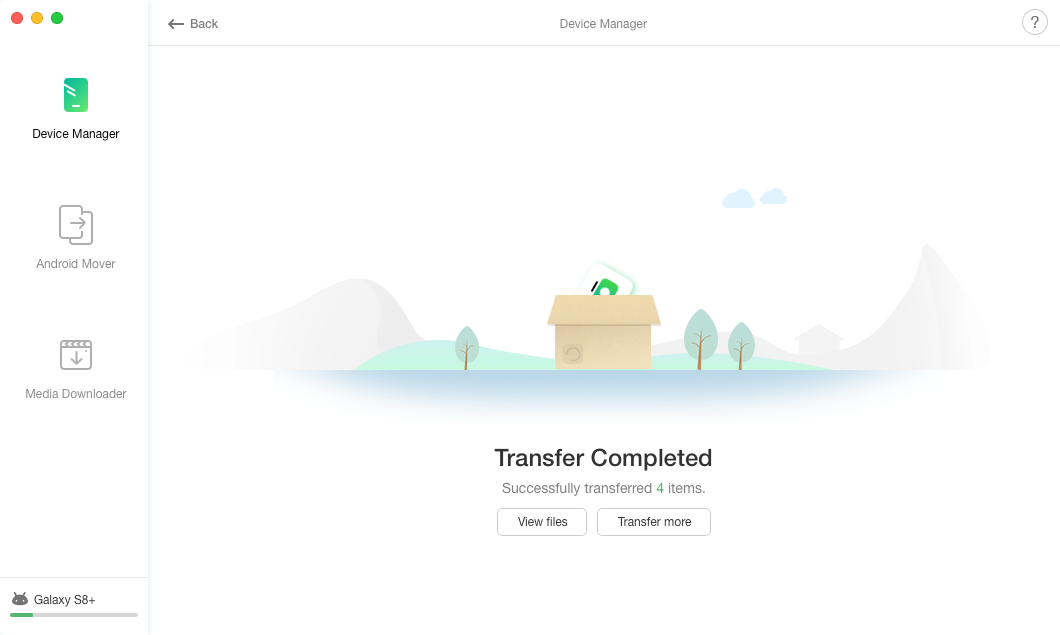
Photos successfully transferred from SD card to phone
You have successfully transferred your selected photos from your SD card over to your phone’s internal storage. The process is just like how you transfer music from SD card to your phone.
You may now eject the SD card from your phone and your photos will still continue to exist on your device. It is because they are now stored on the internal storage of your device.
How to Move Photos from SD Card to Phone Internal Storage
If you do not have access to a computer or you only have a few photos to move from your SD card to your phone, you can use a file manager app on your device to get the job done.
A file manager app lets you manage and transfer files including photos from one place to another on your phone. You can use such an app to have all of your photos moved to your phone’s internal storage from your SD card.
The following are the steps on how you can use a file manager app to transfer your photos to phone memory:
Step 1: Launch the Google Play Store app on your phone and search for and tap on Asus File Manager. Get the app installed on your device.
Step 2: Launch the newly installed app from your app drawer. Tap on Images on the main screen of the app to access your photos.
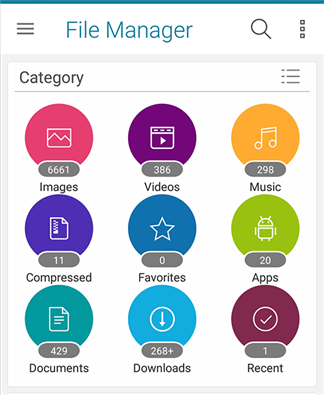
Access the Images option in Asus File Manager
Step 3: Tap and hold on the photos you want to move to your internal storage. Once you have made a selection, tap on three-dots at the top-right corner and select Move to. It will let you move your photos.
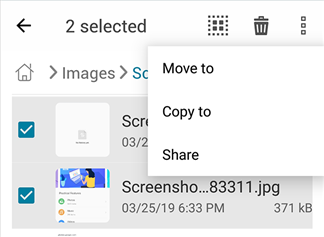
Select photos and choose the move option
Step 4: The app will ask you to choose a destination for the selected photos. Choose your internal storage as the destination and your photos will be moved there.
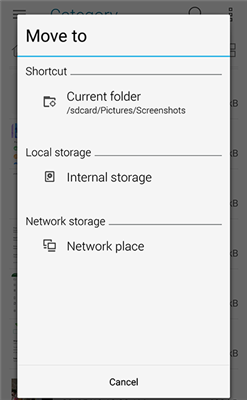
Select internal storage to move photos from SD card to phone memory
Depending on the number of photos you have selected, it should take anywhere from a few seconds to a few minutes to transfer your photos.
Once photos are transferred, access your internal storage using the app and you will find your photos are successfully moved to your phone. Since you have moved your photos, your photos no longer exist on your SD card and feel free to give your SD card away to anyone you want, if that is what you wanted to do.
Conclusion
If you are in a situation where you need to move photos from SD card to phone, the above guide should help you out by providing you with two methods to do the task. We really hope it helps you transfer your photos over to your phone so you are then free to do whatever you want to do with your SD card.

Member of iMobie team as well as an Apple fan, love to help more users solve various types of iPhone related issues.
Product-related questions? Contact Our Support Team to Get Quick Solution >
