How to Transfer Your Music from iPod to Computer – Quick & Flexible
If you have an iPod where all of your music tracks are saved, you might want to learn how to transfer music from your iPod to your computer to enjoy these tracks on your PC/Mac machine as well. This article covers various ways to easily make it.
Apple’s iPod is one of the amazing devices you can ever have for listening to your favorite music tracks. It is an extremely easy-to-use media player that you can use just like how you use your iPhone, but with the main focus being on your entertainment needs. If you have got yourself such a device, you may sometimes want to sync music from your iPod to your computer.
For some old Apple device users, it may be pretty easy to transfer iPod music using iTunes sync. But for most people who don’t use computers often, they will be actually going to face issues mounting iPod as a storage device. If you are also facing the same issue, just read the following ways to flexibly transfer music from an iPod to a computer.
Transfer Selected Music from iPod to Computer Quickly
One of the easy ways to get your iPod music to the computer is to use a third-party app. There is an app called AnyTrans that allows you to load music on your computer from an iPod without needing the iTunes app. You do not even have to get your iPod mounted as a storage device as the app will do it all for you. If you are ready to do the transfer, the following is all you need to do to transfer music from an iPod to a Mac (Windows PC is also supported) without iTunes.
AnyTrans – Transfer iPod Music Quickly
- Drag & Drop selected songs from iPod to PC/Mac.
- Auto-mount your iPod as a storage device on computer.
- Put music on old iPod/iPod touch without data erasing.
- Transfer music across iPhone, iPad, iPod, and computer.
Free Download100% Clean & Safe
Free Download100% Clean & Safe
Free Download * 100% Clean & Safe
Step 1. Grab the latest version of the AnyTrans and install it on your computer.
Step 2. Connect your iPod to your computer using a USB cable. Ensure you use the original cable that came with your device.
Step 3. Launch the app on your computer. Click on the option that says Device Manager in the left sidebar and then choose Music from the right-hand side pane.
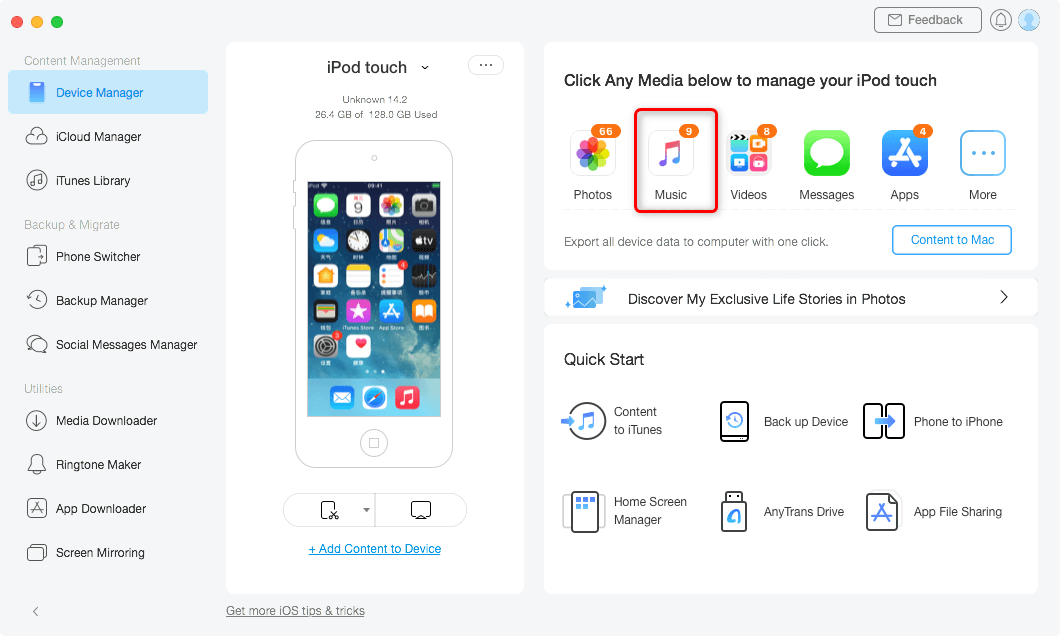
Choose Music in AnyTrans
Step 4. Click on Song in the left sidebar to view all the available songs on your iPod. Then, pick the songs you want to transfer to your computer on the right-hand side pane. Finally, click on the To Computer button at the top to start transferring your songs. (Alternatively, you can simply drag & drop your selected songs to a folder on your computer.)
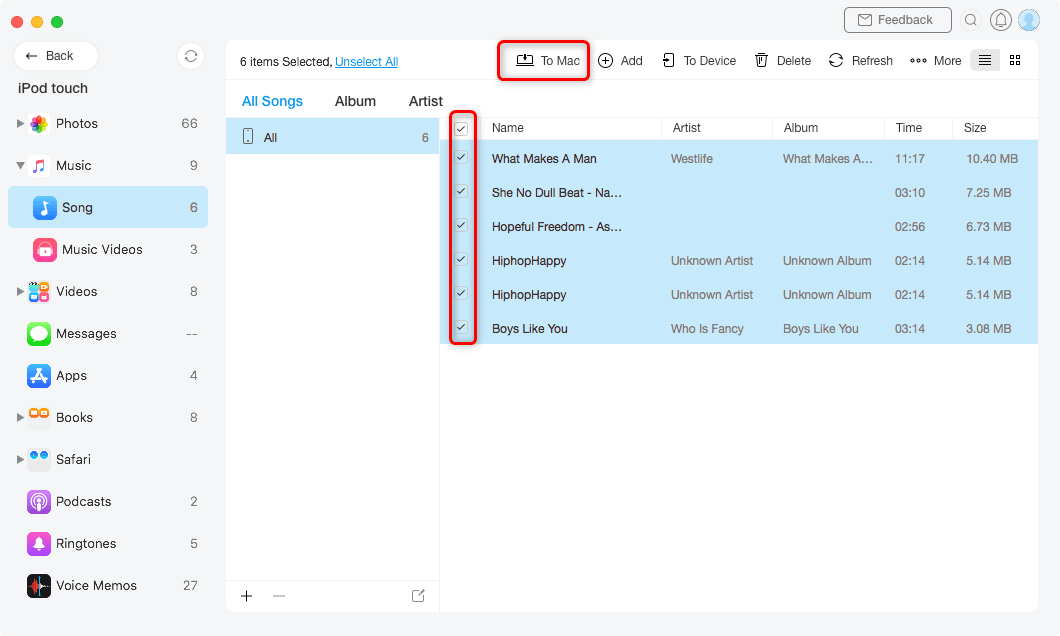
Choose iPod Music to Transfer to Computer
Step 5. Once the music files are transferred, you will see them in the Finder on your computer.
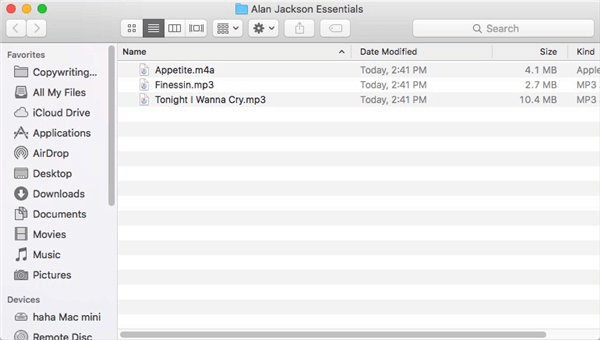
View iPod Music on the Mac
As you can clearly see, all it took was just a few clicks to transfer your chosen music files from your iPod. If it was iTunes or something else, it would have required you to transfer a dozen other file types before you could transfer your music files.
Transfer Music from iPod to iTunes on Computer
If you followed the first method to transfer music, you would have noticed that it transfers your files to a folder on your machine. Your music files are kept as standalone files in their individual folders and they are not imported into any apps like iTunes.
However, if you use iTunes to manage your media files, you will want to get these music files added to the app. One of the ways to do that is to manually add the exported files to your app. But it is going to take really long, especially if you have a number of files to transfer. A better solution would be to use AnyTrans. The following screenshot is how you do it.
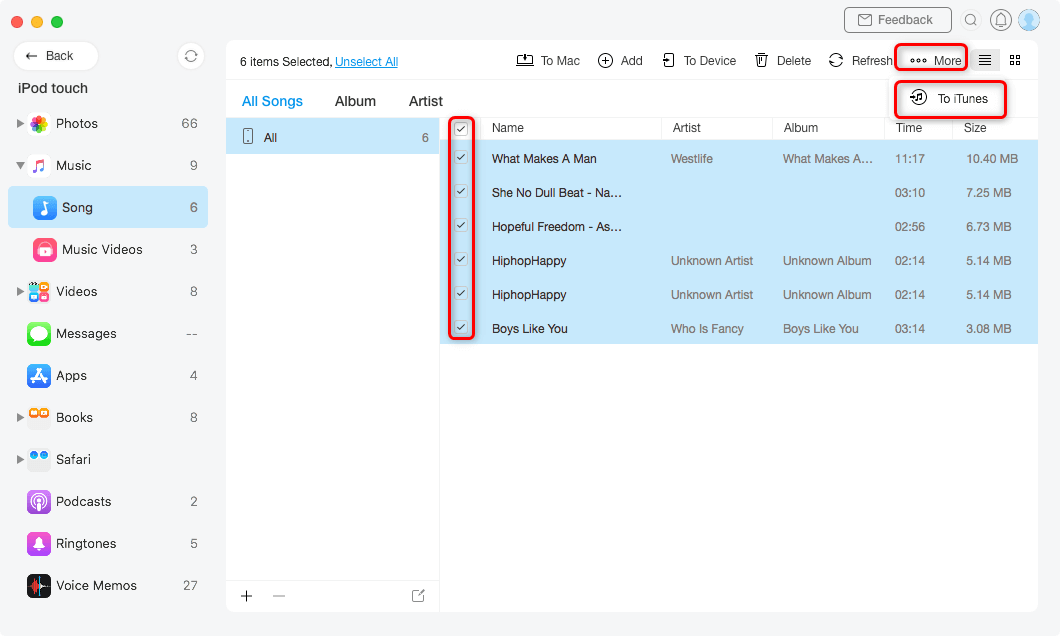
Choose iPod Songs and Transfer to iTunes
With the aforementioned app, all it takes to transfer music from an iPod to iTunes is just a few clicks and you are good to go.
1-Click Transfer All Song from iPod Music to Computer
If you want to 1-click transfer all of your music to computer, you can use AnyTrans “Content to PC” feature. This feature helps you quickly transfer all files from a specific data category like music, photos, ringtones, voice memos, videos, etc.
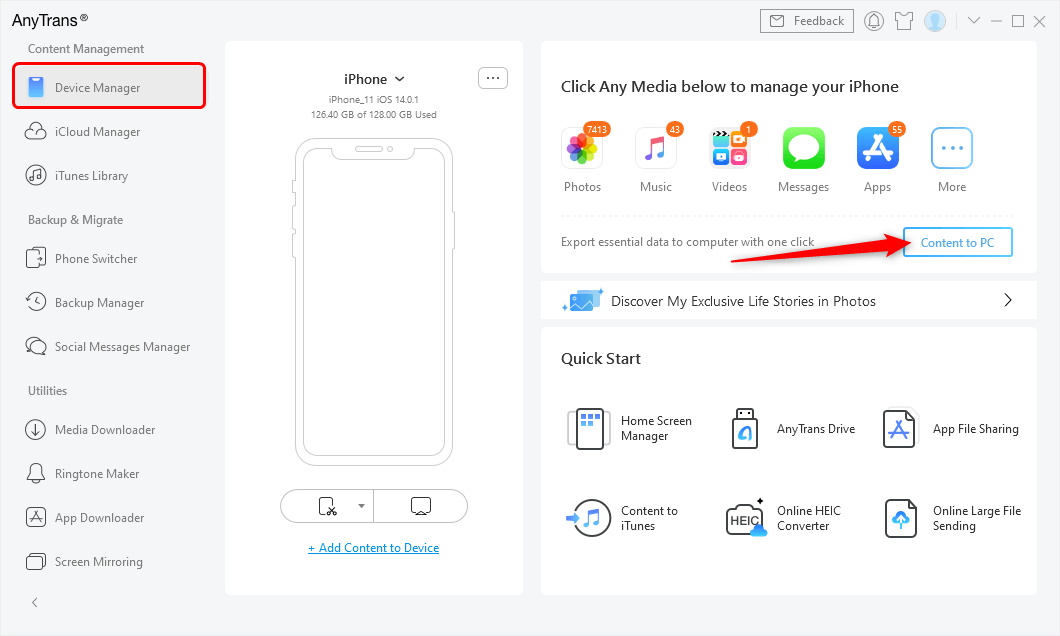
Click Content to PC Under Device Manager
Of course, you can select multiple categories to start your transfer. (Notice that the empty categories won’t appear in the interface. )
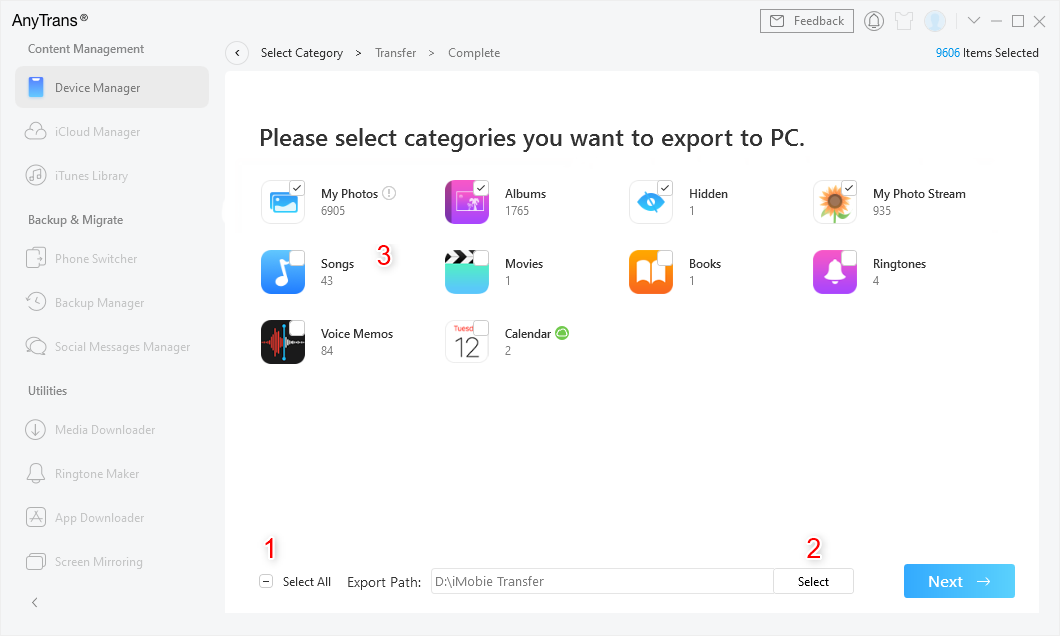
1 Click Export All iPod Music to PC
Transfer Music from iPod to Mac with iTunes
Most people who want to do something with their iOS device such as an iPod will use the iTunes app to do their task. It is because the app provides you with all the features you need to be able to get your content from your device to your Mac and vice versa.
While iTunes has its own restrictions as to what you can transfer from your device to your Mac and so on, it can still be used to transfer music from your iPod to your Mac machine. You will not actually be syncing it but you will use the Finder to extract individual music files from your device.
The following are the steps on how to transfer music from iPod to Mac:
Step 1. Prevent iTunes from auto-syncing your iPod: plug the iPod into your computer > launch iTunes while holding down both Command and Options buttons.
Step 2. Your iPod should now be available as a storage device in the Finder. You should be able to access its files just like how you can access other files on your Mac.
Step 3. You will need to enable hidden files on your Mac to view iPod files. Open the Terminal and run the following command in it to do so.
defaults write com.apple.finder AppleShowAllFiles True; killall Finder;

Show Hidden Files on Mac
Step 4. Open the Finder and click on your iPod name in the sidebar.
Step 5. Access the folder that says iPod_Control and then open the Music folder. You can now copy the files you want from here to your Mac.

Access the iPod Music Folder
That is all there is to it.
While you can always sync your iPod using iTunes to get your music files to your Mac, it is going to apply various other changes as well to your iPod. The above method only transfers the chosen music files which are exactly what you are looking to do.
The Bottom Line
If you are not sure how to transfer music from an iPod to a computer but you want to do it, the above guide has several methods showing how to get the task done on your machine. We hope you can find a suitable method for yourself and get your music moved to your windows and mac computer.

Work for iMobie team for 5 years as well as an Apple fan, love to help more users solve various types of iOS or Android related issues.
Product-related questions? Contact Our Support Team to Get Quick Solution >
