How to Fix FPS Drops in OBS for Smooth Streaming
Dropping frames in OBS is a common issue; however, it can make your video look a bit blurry or less proficient. But don’t worry! In this article, we have put together a number of ways in which you can fix OBS dropping frames.
Are you tired of those frustrating FPS drops ruining your streaming or recording experience on OBS? This comprehensive guide dives into all the nitty-gritty details of fixing OBS dropping frames, walking you through optimizing your system settings, managing your GPU usage, and tweaking your OBS configuration. Whether it’s fine-tuning your encoding settings, dealing with resource-intensive apps, or ensuring your drivers are up to date, we have got you covered.
So, whether you are a newbie or a seasoned pro, say hello to smooth frame rates and a top-notch streaming journey!
Why Do I Lose FPS when OBS Streaming/Recording?
If you’re losing FPS while OBS is streaming or recording, it could be due to many reasons. Some plausible causes for OBS dropping frames are:
1. Background Applications
When you have too many resource-intensive applications running at the same time as OBS, your system’s performance can take a hit. This means that you might experience lower FPS, and nobody wants that!
2. Incorrect Encoding Settings
OBS dropping frames can also be due to incorrect or demanding encoding settings. These settings can put a strain on your hardware, which can ultimately affect your streaming experience.
3. Bitrate and Network
Setting a higher bitrate than your network can handle may cause it to lag. This ultimately leads to FPS drops as OBS struggles to maintain a smooth connection. Besides, if your internet connection is not fast enough, it can cause dropped frames.
4. GPU Utilization
If your graphics card is already handling other tasks, like gaming, it can be one of the main reasons for OBS dropping frames. The app might struggle to access enough GPU power, resulting in reduced FPS.
5. Outdated Drivers
If you haven’t updated your graphic drivers in a while, it can hinder OBS from performing at its optimal level.
6. Hardware Limitations
If your computer’s hardware is not powerful enough to handle both gaming and streaming/recording simultaneously, you may encounter FPS drops.
Regardless of what might be the root cause of OBS dropping frames, NOW we have some quick fixes up our sleeves!
Recommended Article: [Fixed] How to Stop Screen Record on Mac
How to Fix OBS Dropping Frames
Check Your System Resources
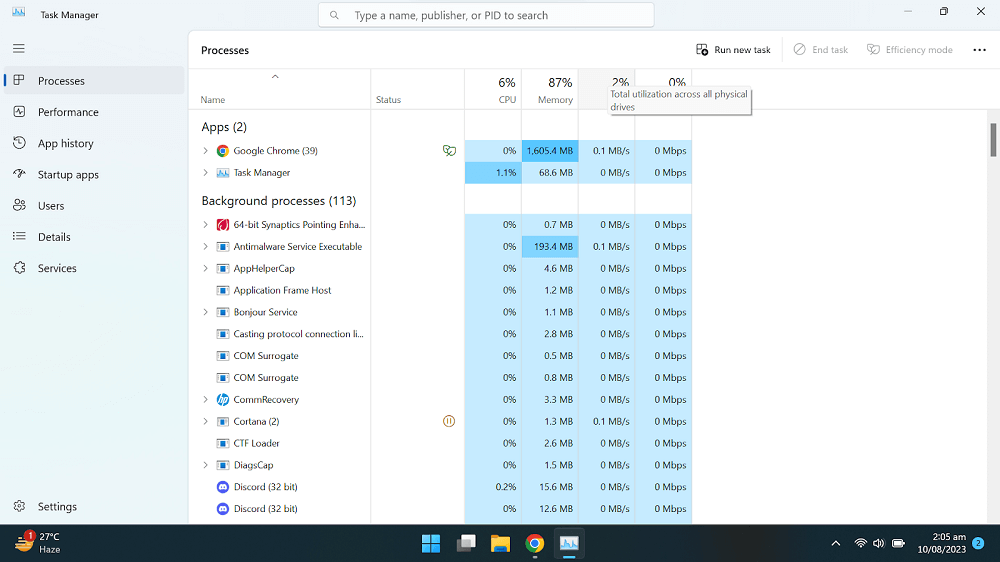
OBS uses a lot of CPU and GPU resources as we mentioned; therefore, if your computer is not powerful enough, the system resources are maxed out, which can reduce the resources available for OBS, causing you to lose FPS during OBS streaming or recording.
To check your system resources and fix OBS dropping frames, here’s what to do:
- Open Task Manager by pressing the Ctrl + Shift + Esc on your keyboard.
- Look at the CPU and GPU usage. If either of these is maxed out, your computer is not powerful enough to stream or record with OBS.
- Select the tasks that are taking up the most resources and end them by clicking on “End Task” at the top-right corner.
Check System Resources
2. Lower Bitrate
The bitrate refers to the amount of data sent per second while streaming or recording. It directly affects the quality of the video and the amount of data your network can handle.
Therefore, lowering the bitrate in OBS is an important step to keep frame OBS dropping frames. It prevents network overloading and buffering and helps maintain a stable streaming or recording experience.
Steps to Lower Bitrate on OBS:
- Launch OBS and go to “File > Settings > Output.”
- Now set a bitrate appropriate for your internet speed, such as 3000-6000 Kbps for 720p resolution.
- Click “Ok” to save the settings.
Lower Bitrate on OBS
3. Use a Wired Internet Connection
As we mentioned earlier, an unstable network connection can drop frames and lower FPS; therefore, if you are using a Wi-Fi network, try switching to a wired network.
Why is this important?
Because a wired connection is much speedier and more reliable than a Wi-Fi network. Plus, it has a lower latency, which is necessary for activities that require real-time communication, such as gaming and video conferencing.
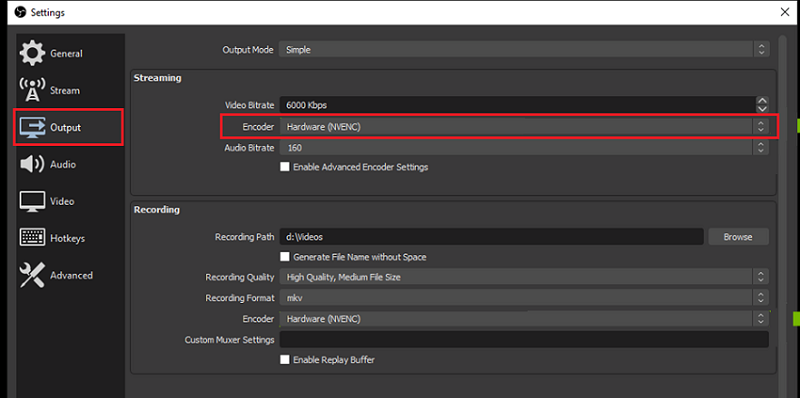
4. Adjust Encoder Settings
The encoder is responsible for compressing and encoding the video data before sending it to your streaming platform or recording it to your local storage. Therefore, it is important to adjust the encoder settings directly, as it impacts how much processing power your CPU or GPU uses to encode the video.
Incorrect settings can lead to high resource usage, causing frame drops, stuttering, or even crashes.
Steps to Adjust Encoder Settings
- Launch OBS, and go to “File > Settings > Output.”
- Click on “Encoder” to access the drop-down menu with several options like “Software (x264),” “Hardware (NVENC),” or “Hardware (AMD).
- Select the x264 software encoder; you will see an option called “Encoder Preset.” Set it to “Faster” or “Very Fast.”
- Click “Apply” to save the encoder settings.
Adjust Encoder Settings
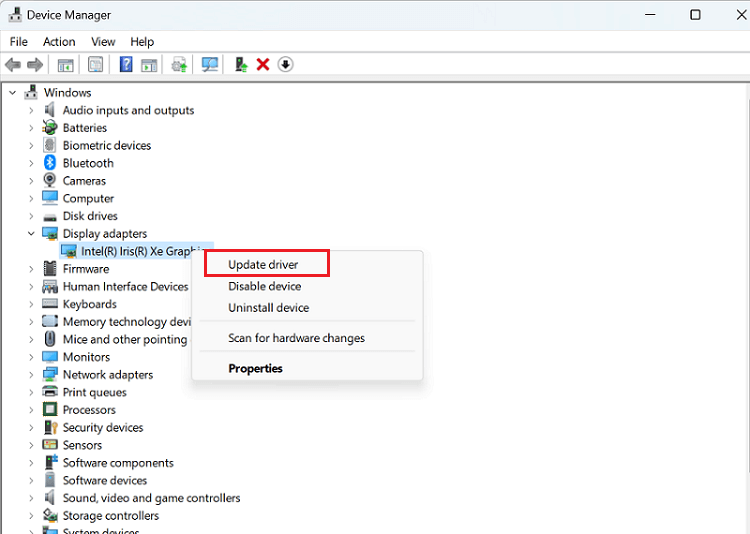
5. Update Graphic Drivers
Updating GPU drivers is vital to maintain optimal performance and can help prevent issues like OBS dropping frames. These drivers act as a bridge between your graphics card and your operating system.
They directly influence how your graphics card interacts with applications, including OBS. Therefore, updating them is important to avoid various problems, including reduced performance, compatibility issues, and even crashes.
Steps How to Update Graphic Drivers
- Identify your graphic card manufacturer (NVIDIA, AMD, or Intel), and download the graphic drivers from their respective websites.
- Now open Device Manager on your PC from the start menu.
- Click on Display Adapters and right-click on the driver.
- Choose Update Driver.
- Then restart your computer for the changes to take place.
Click Update Driver
6. Increase OBS Priority
It’s not uncommon for your computer to have multiple programs running simultaneously, causing them to compete for resources. If you’re using OBS to stream or record content, it’s essential to ensure that it has the necessary resources to function smoothly.
One effective way to accomplish this is by increasing the program’s priority level. This is essential as it helps minimize any potential interruptions or technical glitches during your streaming or recording sessions.
Here’s a step-by-step guide on how to increase OBS priority:
Step 1. Launch the Task Manager by pressing Ctrl + Shift + Esc on your keyboard.
Step 2. Scroll to OBS, right-click on it, and select “Go to Details.”
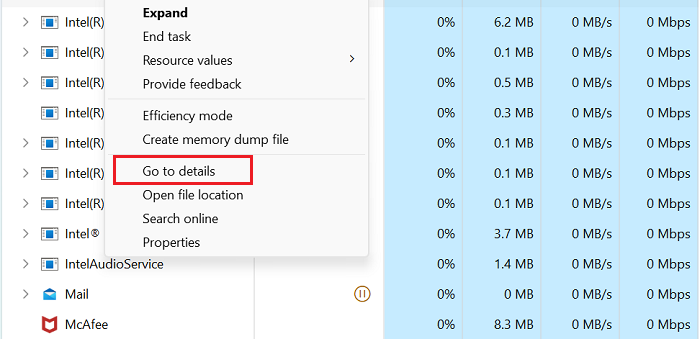
Go to Details
Step 3. You will see a highlighted OBS process in the list. Right-click on it, select “Set Priority,” and set it to “Above Normal” or “High.”

Increase OBS Priority
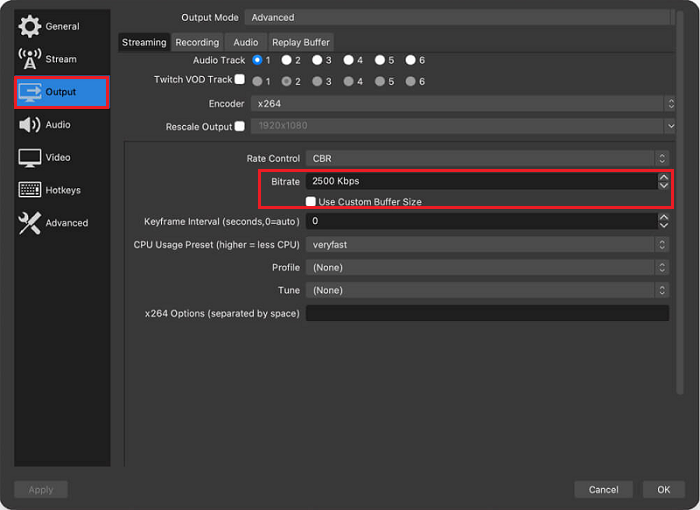
7. Adjust Buffer Settings
Buffers act like little reservoirs that hold a bit of your video data before it’s sent over the network. The buffer size determines how much data is stored before being sent out, helping to smooth out variations in network performance.
Therefore, adjusting buffer settings in OBS is essential to help you maintain a stable streaming or recording experience and prevent issues like dropped frames or stuttering.
Steps to Adjust Buffer Settings in OBS:
- Launch OBS, and go to “File > Settings > Advanced.”
- Scroll down to “Network” and set the buffering settings to a number more than 700ms.
- Click “Apply” to save the new settings.
These were the 7 ways to fix OBS dropping frames. However, if you’re using OBS to live stream to Twitch and face the same issue, how should you go about it?
What to Do if Twitch Dropped Frames
Twitch is one of the most popular live-streaming platforms in the world. It was originally designed to allow users to broadcast themselves playing video games, but it quickly expanded to include other types of content, such as music, creative, and “in real life” streams.
OBS has a built-in option to stream directly to Twitch. So, if Twitch starts dropping frames during a live streaming session, here are a few things you can do:
1. Try Different Broadcast Servers
Twitch offers multiple ingest servers around the world, and selecting the right one can minimize latency and reduce the chances of dropped frames. The ingest server you choose determines the path your streaming data takes from your computer to Twitch’s servers. Therefore, pick a different server that’s geographically close to you to fix dropping frames.
2. Restart Your Stream
There’s a possibility that Twitch or OBS might be acting up due to a software glitch. Therefore, try restarting your stream if you notice Twitch dropping frames.
3. Reset Your Router
If Twitch is dropping frames, it could be due to some issues with your modem or router. Over time, these devices can gather temporary data, run into software glitches, or get bogged down by network congestion. But don’t worry! You can easily fix these problems by restarting them. This will give you a fresh, stable connection to enjoy.
Now that you know what to do in case OBS and Twitch drop frames, let’s answer a very common user query…
How Many Dropped Frames Are Acceptable?
So, the number of dropped frames that’s okay really depends on what you’re doing in your stream and what your viewers are expecting. Let’s break it down:
- For fast, interactive games where split-second reactions matter, keep the dropped frames close to zero.
- For things like podcasts, talk shows, or just hanging out a bit more ]room is okay. Try to stay under 5% dropped frames.
- If you’re showing off images or slides, a few dropped frames might not significantly impact the viewing experience. Therefore, keep it under 10% for a smoother experience.
I hope this rundown helps you understand the gist of dropped frames and how they can affect different types of streaming content.
OBS Alternative Tool Recommendation – Screenify
Screenify is an excellent free OBS alternative that provides a simpler and more user-friendly experience for screen recording and content creation. This tool is especially suitable for those who find OBS too complicated or difficult to understand. Screenify is available for Windows and macOS, allowing users to record 4K videos at 60FPS, making it an ideal choice for high-quality content production without a steep learning curve.
Product Features
- Free and accessible: Free, it is an excellent choice for budget-conscious creators.
- No time limit: Unlike many free tools, Screenify allows unlimited recording time.
- User-friendly interface: Simple and intuitive design, suitable for users of all skill levels.
- 4K 60FPS recording: Ensure high-quality video output without any delay.
- Multiple recording modes: Support full screen, area, locked window recording to meet different needs.
- Customizable watermark: Allow users to add personalized text watermarks for branding.
Record Mac/Win with Screenify
Step 1.Download and Install Screenify on Computer.
Step 2.Launch Screenify on your computer, and select Record screen mode.
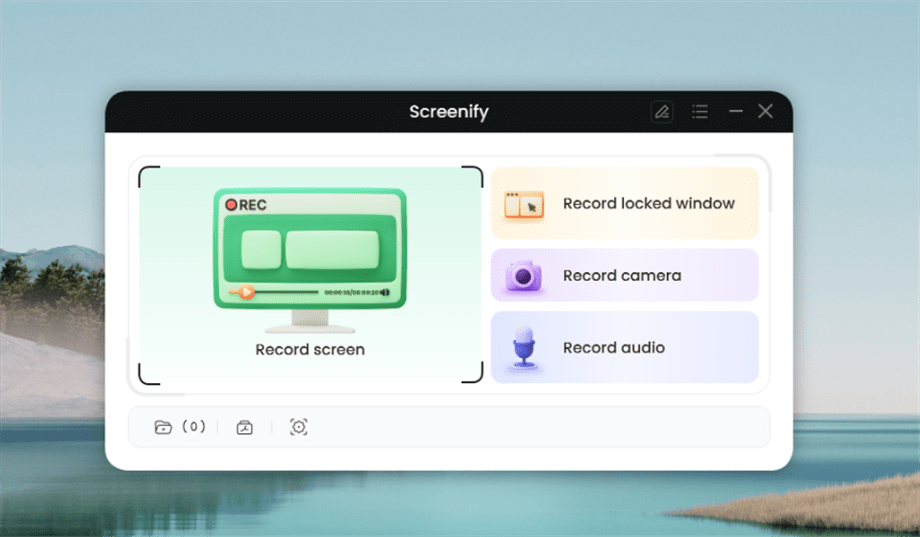
Select Record Screen Mode
Step 3.Configure Recording Settings aims to configure settings like system audio before recording.
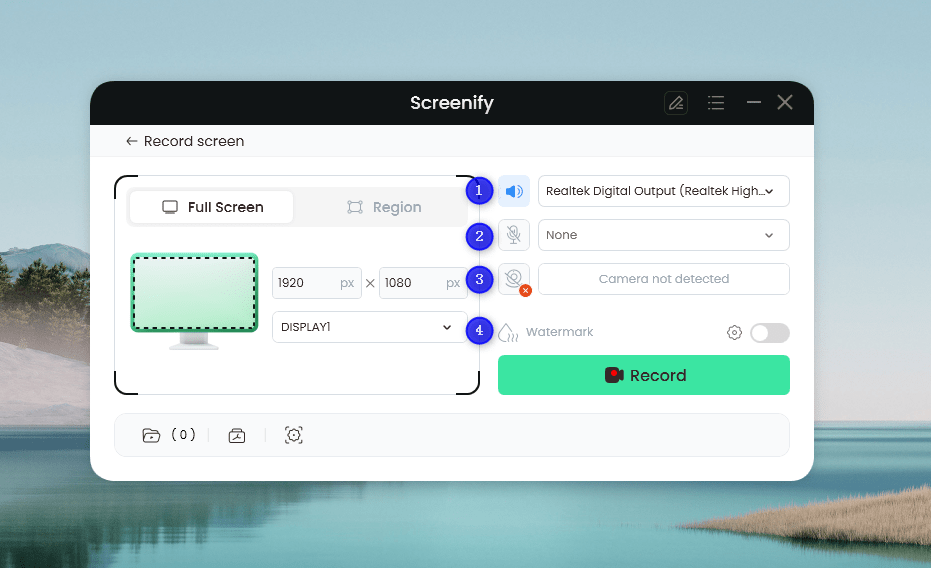
Set Configure Recording Settings
In this setting menu, you can:
1 Choose the System audio.
2 Choose the Microphone you want to record.
3 Choose the Camera you want to use.
4 Choose whether to add a watermark.
Step 4.Select Recording Screen.
Option 1. Full Screen Record
Please select Full Screen mode and choose the display you need to record. Hit Record button to initiate recording.
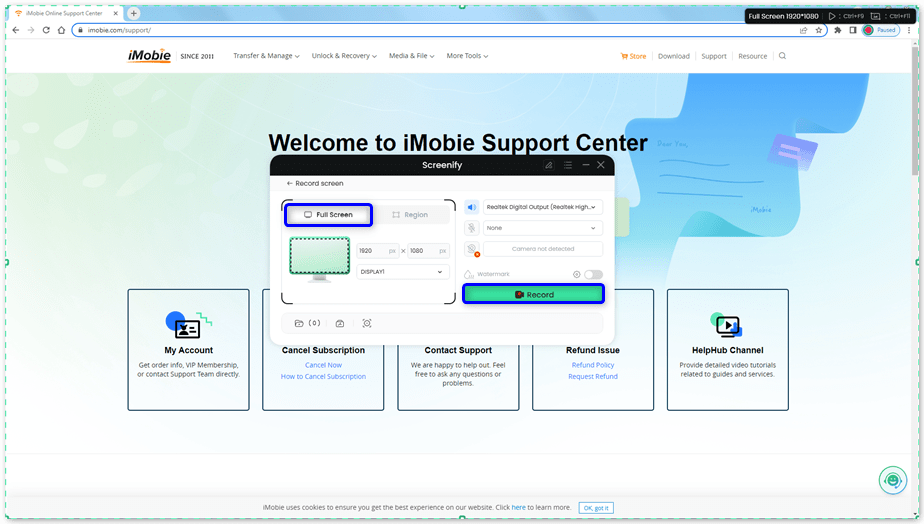
Select Full Screen
Option 2. Region Record
To record region, you need to manually select the recording area. After selection, you can still adjust the selected area. It supports customize selection, full screen, and proportional selection based on common social media dimensions.
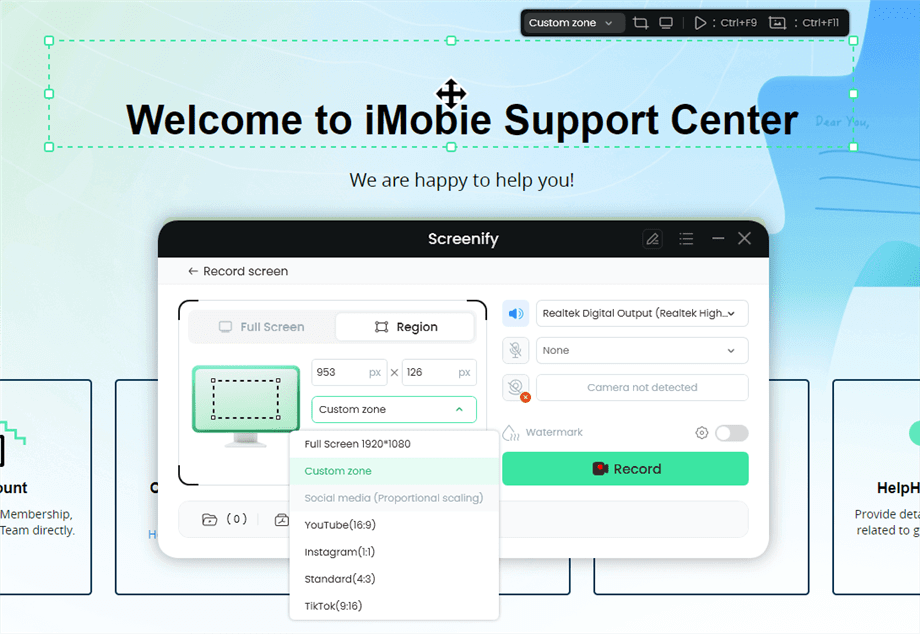
Record Region
Step 5.Wait for the Recording Countdown.
There is a 3-second countdown to help you prepare the recording after you are ready to start recording.
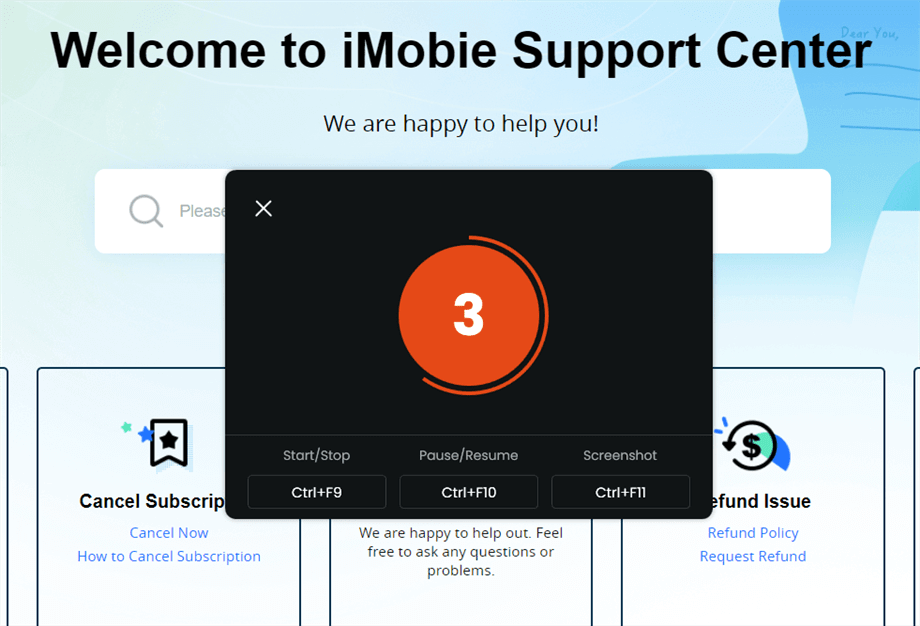
Wait for the Recording Countdown
If you would like to see a recording countdown before your recording starts, you can enable the countdown option. Or you can tap it off. View this post to know how to set the countdown option.
Step 6.Start Recording.
The recording will begin after a 3-second countdown. You can make annotations on the recording interface during the recording.
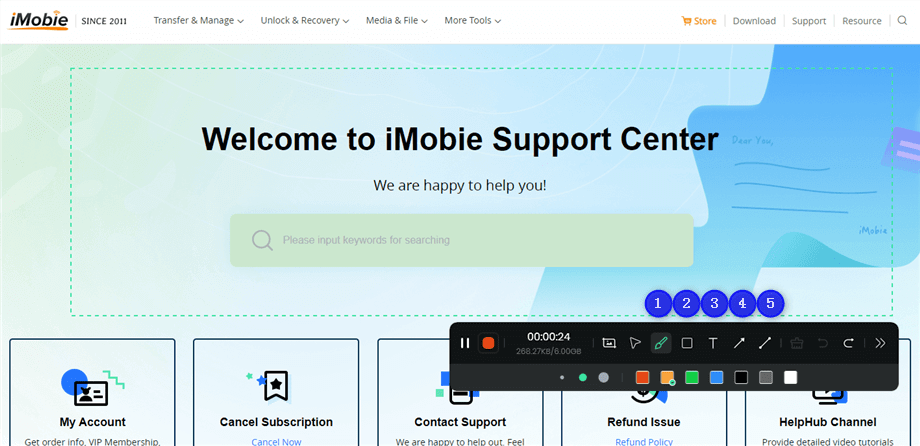
Annotate the Screen during Recording
With the toolbar, you can add the annotation in the screen:
1 Brush: Draw freehand on the screen recording interface to highlight or illustrate specific areas during the recording.
2 Rectangle: Draw rectangular shapes on the screen recording interface.
3 Text: Add written notes or labels directly onto the screen recording interface.
4 Arrow: Draw arrows on the screen recording interface to point out and emphasize specific areas.
5 Line: Draw straight lines on the screen recording interface to underline or connect specific points.
Step 7.Record Screen Process Completed.
When the recording is completed, you can click the red Stop button to end the recording. Your recorded files will be displayed. From here, you can preview and manage the recorded content as needed.
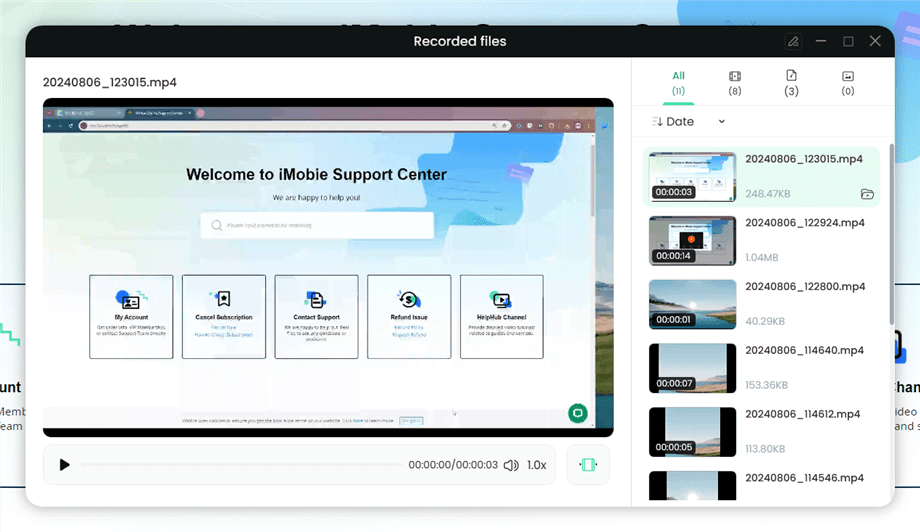
Preview the Recording
You may also want to know: How to screen record protected videos
Conclusion
To sum it up, solving those annoying FPS drops in OBS is a must for any content creator!
With our guide, you’ve got a number of reliable fixes to tackle the issue head-on. From adjusting settings to optimizing your setup and going for the faithful Ethernet cable, we’ve got you covered. Whether you’re a streaming newbie or a seasoned pro, these solutions will run your stream smoothly.
Your content deserves the spotlight, and we’re here to make sure it shines bright. Let’s keep those frames steady and your audience delighted!

Work for iMobie team for 5 years as well as an Apple fan, love to help more users solve various types of iOS or Android related issues.
Product-related questions? Contact Our Support Team to Get Quick Solution >
