How to Get a Transcript of a Zoom Recording
If you don’t know how to get a transcript of a Zoom meeting, this article is here to help. Here, we’ve provided a list of the top 5 tools to generate Zoom meeting transcripts effortlessly.
Screenify – Get a Transcript of a Zoom Recording
Try Screenify for free to record screen on Windows or Mac. Whether full-screen or partial-screen recording, recording with sound or with camera, Screenify can do it with ease.
100% Clean & Safe
In today’s digital age, Zoom has become an indispensable tool for millions of users worldwide. With over 300 million daily meeting participants, the platform is used for everything from business meetings and educational lectures to virtual family gatherings and webinars. Given its widespread use, knowing how to get a transcript of a Zoom recording is more important than ever. Whether you’re a student looking to review a lecture, a professional needing to document meeting minutes, or a content creator aiming to produce accurate captions, having a reliable transcription method is essential. This guide will walk you through the most effective ways to transcribe your Zoom recordings, ensuring you never miss a crucial detail.
PART 1: Why Do You Need a Transcript of a Zoom Meeting Recording?
There are several benefits of saving a Zoom meeting recording transcript. This includes the following;
- Reduced Multitasking: Zoom transcripts saves you the stress of taking notes during a meeting. It allows you to actively participate in conversation, rather than engaging in extensive note-taking.
- Easy Accessibility to Meeting Conversation: Transcripts makes a meeting more accessible to all participants regardless of their background, abilities, and learning styles. Plus, it makes it easy for team members who might have missed the meeting have a record of everything that was said and discussed.
- Communication Clarity: When you save a Zoom meeting transcript, you don’t need to worry about lack of clarity on things you did not understand during the meeting. It can always be your backup to go over the meeting discussions so you can understand things better.
- Reference Purposes: Zoom transcripts also provides you with quick reference for important points, decisions, or action items without having to rewatch the full clip of a recorded Zoom meeting.
PART 2: How to get a Transcript of a Zoom Recording
If you want to obtain a transcript of your Zoom recording, follow these detailed steps:
1. Enable Cloud Recording and Audio Transcription
- Log in to Zoom: Go to the Zoom web portal and log in with your credentials.
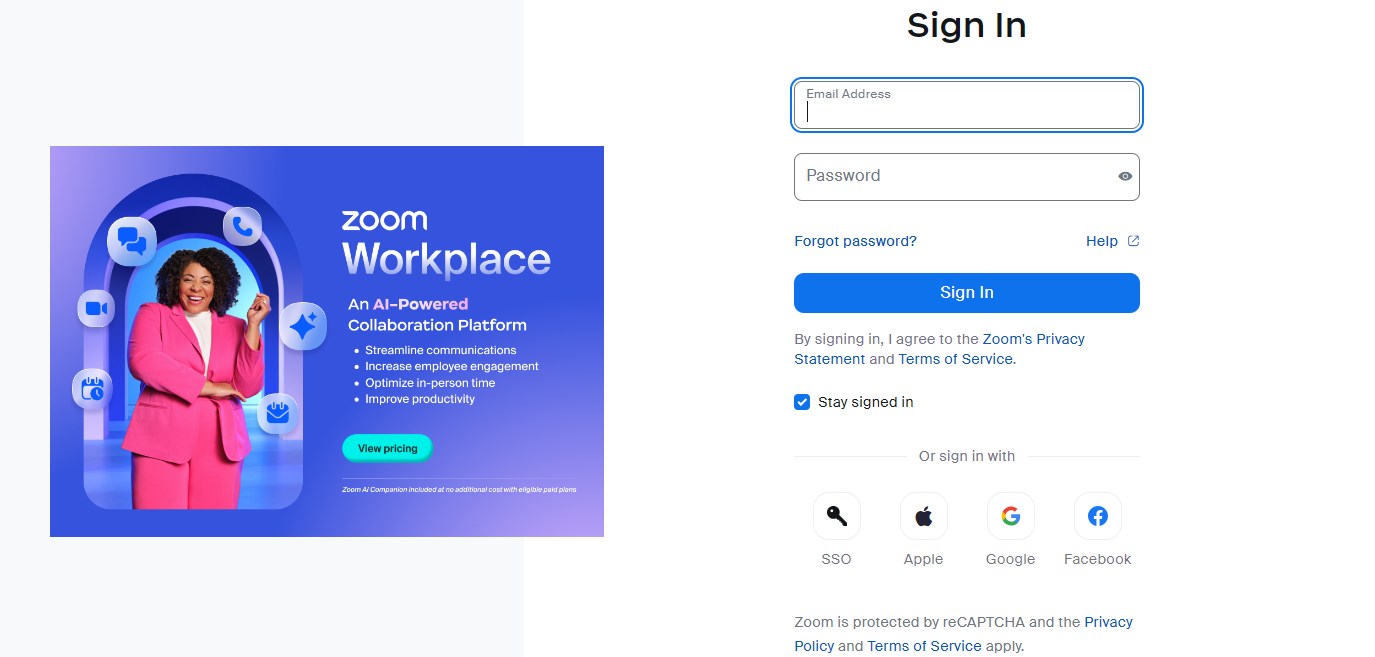
Zoom web portal
- Navigate to Settings: Click on “Settings” in the left-hand sidebar.
- Go to Recording Tab: Under “Recording,” ensure that “Record to computer files” is enabled.
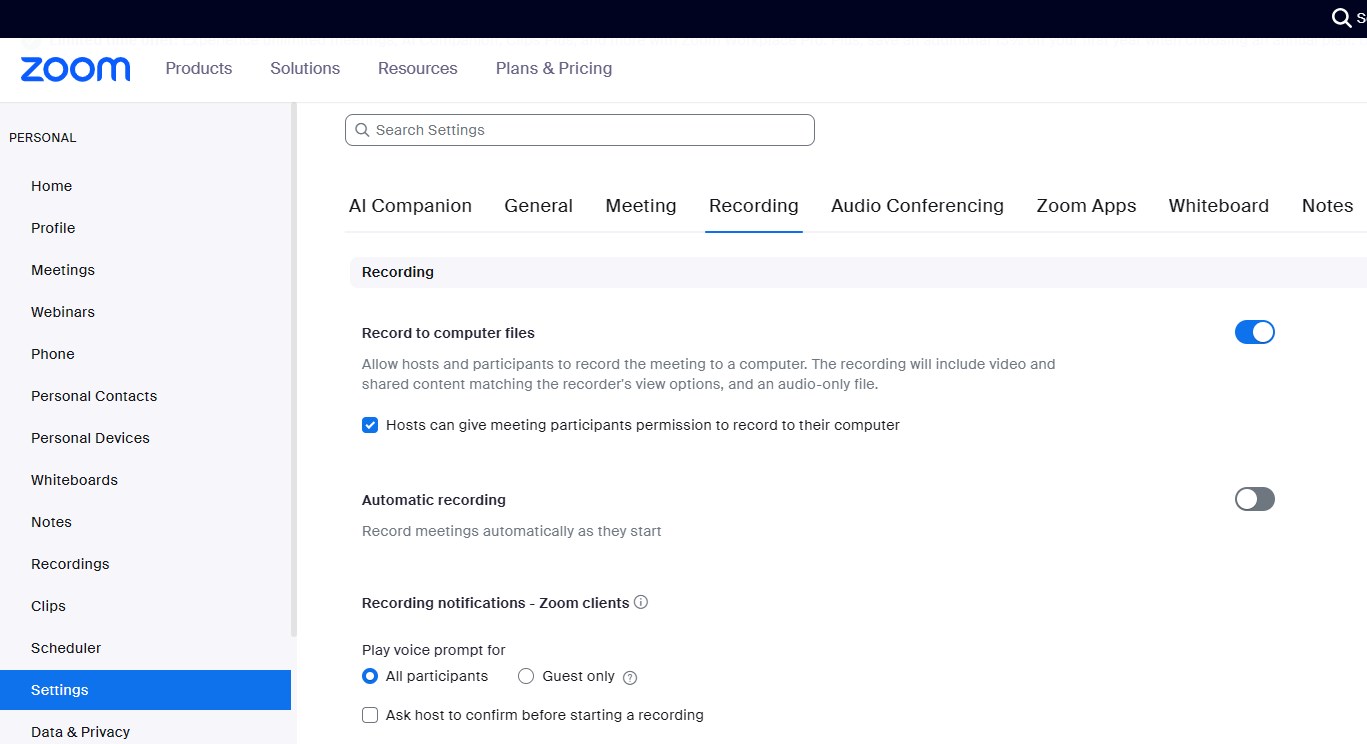
Record to computer files
- Enable Audio Transcript: Scroll down to find the “Automatic recording” option and toggle it on.
2. Start Your Zoom Meeting and Record
- Start a Meeting: Schedule and start your Zoom meeting as usual.
- Begin Recording: Click on the “Record” button and select “Record to the Cloud.”
- Conduct Your Meeting: Proceed with your meeting as you normally would.
3. Access the Recording
- End the Meeting: Once the meeting is over, end the session.
- Log in to Zoom Web Portal: Go back to the Zoom web portal and log in.
- Navigate to Recordings: Click on “Recordings” in the left-hand sidebar.
- Find Your Recording: Locate the meeting recording you want to transcribe in the “Cloud Recordings” tab.
4. Download the Transcript
- Open the Recording: Click on the meeting title to open the recording details.
- Access Transcript: You should see an option for “Audio Transcript” along with the recording files.
- Download the Transcript: Click on the download icon next to the transcript file to save it to your computer.
5. Review and Edit the Transcript
- Open the Transcript File: The transcript will be in a .vtt or .txt format.
- Edit as Needed: Use any text editor to review and make necessary edits for clarity and accuracy.
6. Share the Transcript
- Save the Edited Transcript: After making edits, save the file in your preferred format.
- Share with Participants: You can now share the transcript file via email or any other preferred method with your meeting participants.
By following these steps, you can easily obtain and share a transcript of your Zoom recording, ensuring that all participants have a clear, text-based record of the meeting’s content.
PART 3: Alternative Way to Transcribe Zoom Recording- Screenify
For those seeking an efficient way to transcribe Zoom recordings, Screenify offers a compelling alternative with its powerful features and ease of use. Available for both Windows and macOS, Screenify is a completely free tool that caters to a wide range of users.
Free Download * 100% Clean & Safe
Key Features and Benefits:
- Unlimited Recording Time: Screenify allows users to record Zoom meetings without any time limits, perfect for long meetings. This ensures that you capture every detail you need for an accurate transcription.
- Flexible Recording Modes: Whether you need to record the entire screen or a specific area, Screenify gives you the flexibility to choose the most appropriate mode. This is especially useful when transcribing a specific part of a Zoom meeting.
- High-Quality Output: Screenify is able to record 4K videos at 60FPS, guaranteeing top-notch quality. The high resolution and frame rate make for clearer and more precise transcriptions.
- Live Annotations and Watermarks: During the recording process, Screenify supports live annotations, allowing users to highlight important information. In addition, you can also set text watermarks to protect your recordings and preserve their integrity.
- Comprehensive audio recording: Screenify records system sound and microphone input, providing options for volume adjustment and noise reduction. This feature improves audio clarity and makes transcription more accurate.
To record Zoom using Screenify:
Step 1.Download and Install Screenify on Computer.
Step 2.Launch Screenify on your computer, and select Record screen mode.
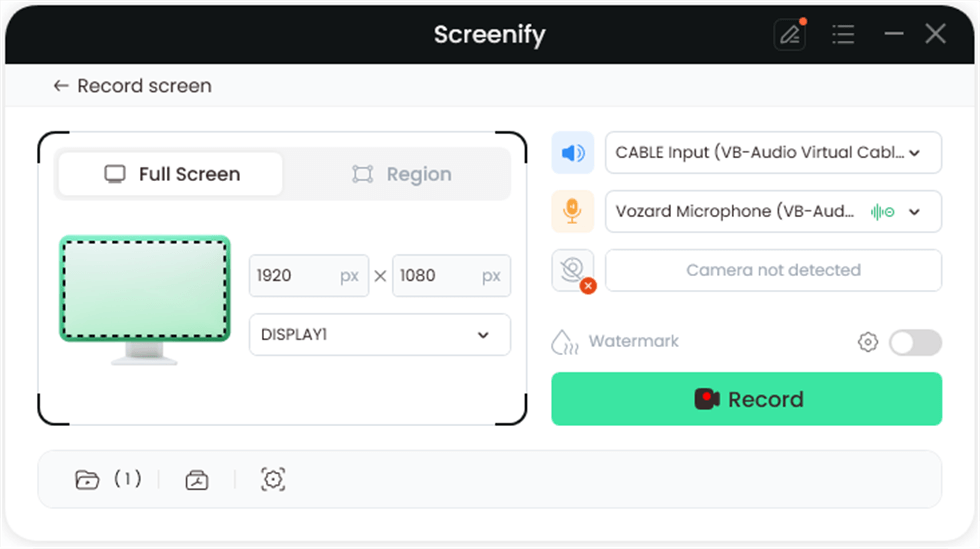
Select Record Screen Mode
Step 3.Configure Recording Settings aims to configure settings like system audio before recording.
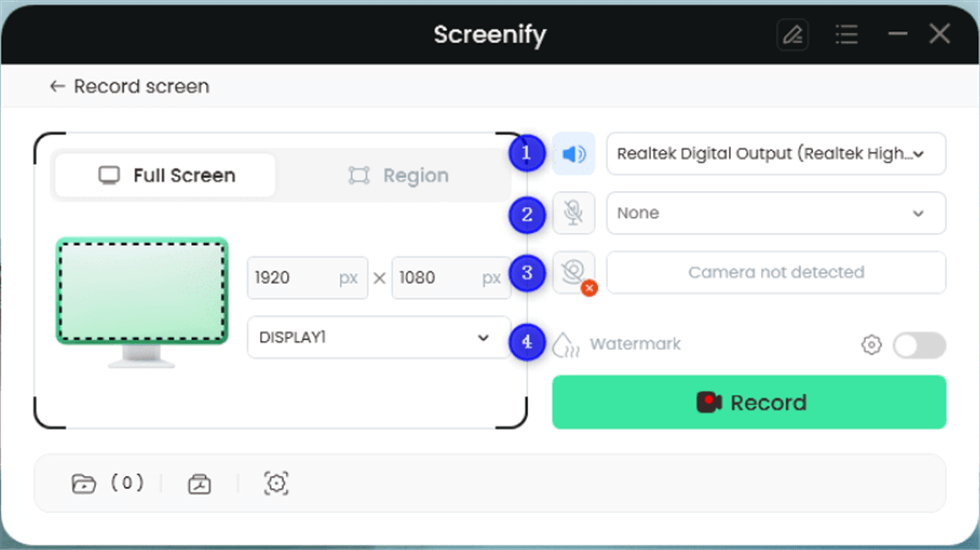
Record Setting
Step 4.Select Recording Screen.
Option 1. Full Screen Record
Please select Full Screen mode and choose the display you need to record. Hit Record button to initiate recording.
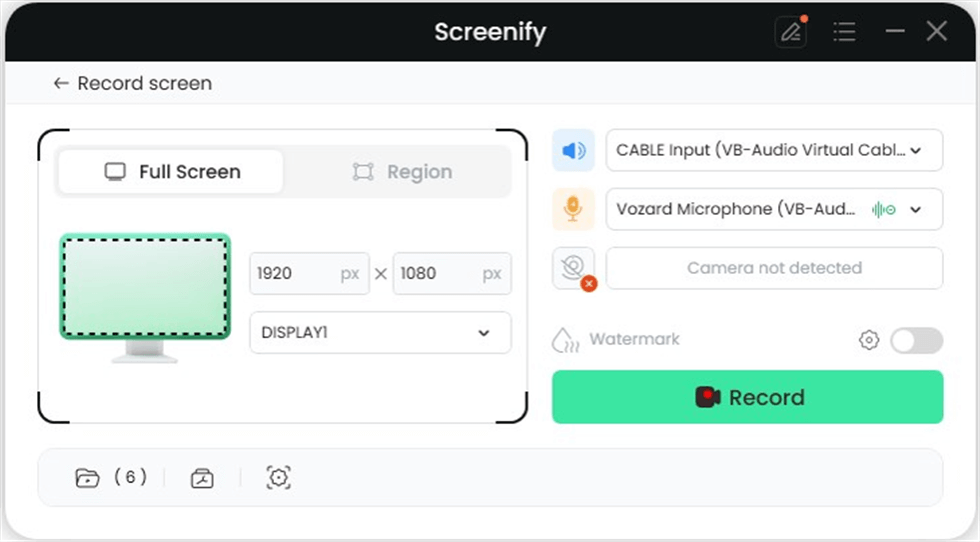
Full Screen
Option 2. Region Record
To record region, you need to manually select the recording area. After selection, you can still adjust the selected area. It supports customize selection, full screen, and proportional selection based on common social media dimensions.
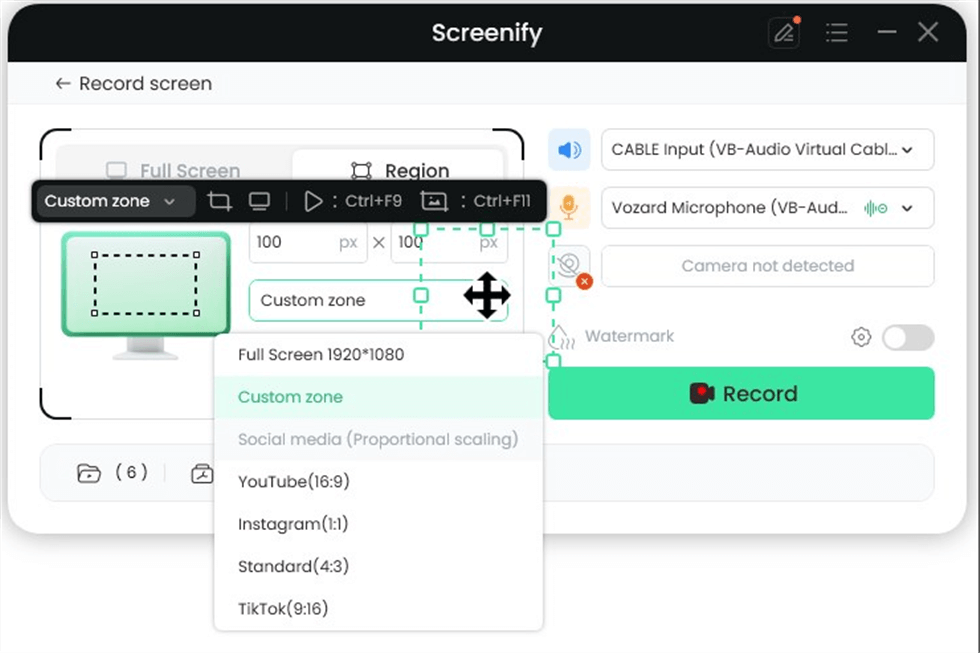
Record Region
Step 5.Wait for the Recording Countdown.
There is a 3-second countdown to help you prepare the recording after you are ready to start recording.
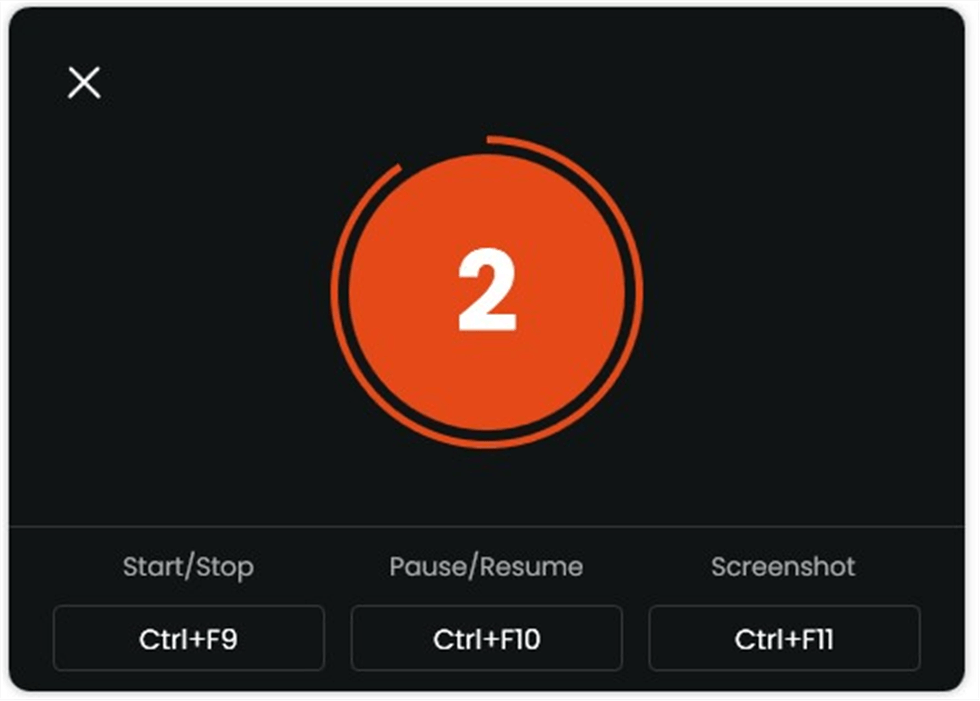
Start recording countdown
If you would like to see a recording countdown before your recording starts, you can enable the countdown option. Or you can tap it off. View this post to know how to set the countdown option.
Step 6.Start Recording.
The recording will begin after a 3-second countdown. You can make annotations on the recording interface during the recording.
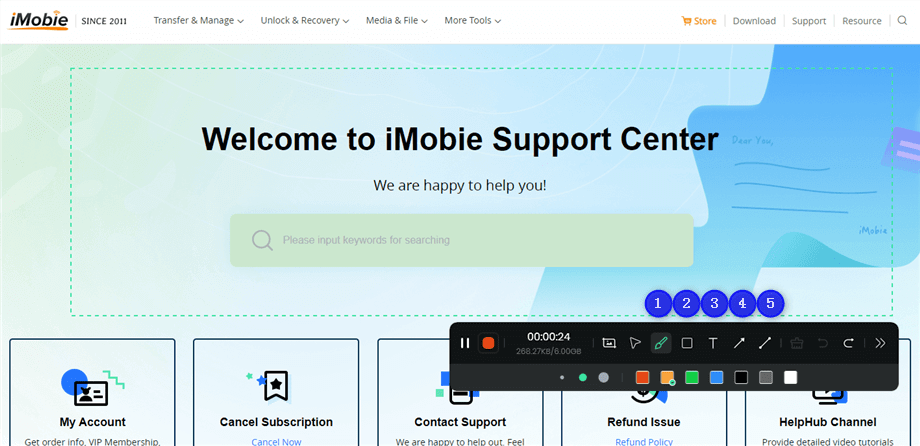
Annotate the Screen during Recording
Step 7.Record Screen Process Completed.
When the recording is completed, you can click the red Stop button to end the recording. Your recorded files will be displayed. From here, you can preview and manage the recorded content as needed.
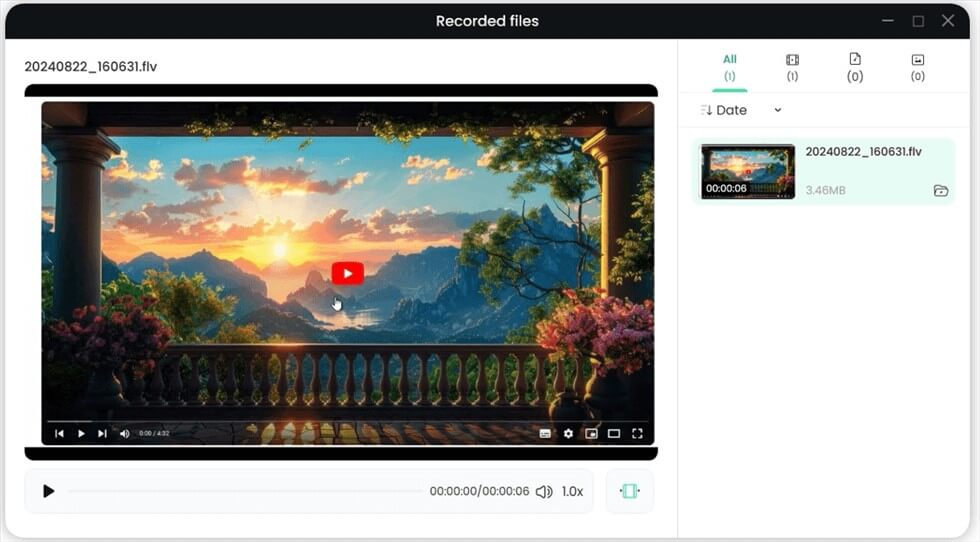
Record Screen Process Completed
By choosing Screenify to transcribe Zoom recordings, you can take advantage of powerful, high-quality recording tools to simplify the transcription process. Its user-friendly interface coupled with a wide range of features make Screenify a must-have tool for anyone who needs to accurately and efficiently transcribe Zoom meetings.
PART 4: Tips for Accurate Transcription
- Use a reliable Transcription tool:
This is one of the most important thing you must do to generate an accurate transcript. Automated transcription tools like the ones introduced above use advanced speech recognition technology to enhance the accuracy of your transcription process. Although they might struggle with distinguishing between slangs and accents, they help you save more time compared to manual taking notes manually.
- Avoid background noise:
There’s no guarantee that your transcription software will accurately detect spoken words in a noisy environment. So, to create the best audio quality for transcription, it’s advisable you do it in a serene space.
- Use the Auto-correct tool to fix grammatical errors:
Transcription tools can also make mistakes. So, to ensure your transcript is 100% error-free, make sure you proofread and edit it using an auto-correct tool.
- Use Timestamps:
Timestamps help to make transcripts more precise. By using timestamps in your transcript, you can easily pinpoint the time specific things are said in your audio, which helps you simplify the process of finding specific information.
- Online meeting participants should implement best practices:
Encouraging meeting participants to implement good practices like using the right microphones with headphones can help achieve precise audio quality, which is very important for accurately transcribing your conversations.
PART5: Frequently Asked Questions
1. How accurate are Zoom transcripts?
The accuracy of Zoom transcripts usually varies. However, research shows that most of the time, there’s a 70%-80% accuracy in generated Zoom transcripts.
2. Can I edit a Zoom meeting transcript after it is generated?
Yes, you can edit a Zoom meeting transcript. Whether you use the built-in transcript generation feature of a third-party tool, you can edit your transcript to fix errors.
3. Does transcription come with all Zoom plans?
Zoom transcription feature is available in all the paid plans, including Zoom Business, Pro, and Enterprise plans.
4. How do I share the transcript with other participants?
There are various ways to share transcripts with other participants. You can either enable the live transcription feature, share cloud recording link, or download and email the transcript to the person whom you want to share it with.
5. What if the transcript is missing or incomplete?
There are several things you can do to resolve missing or incomplete transcript problems.
- Firstly, ensure that your Zoom app is updated.
- After that, go to your Zoom account settings and make sure cloud recording is turned on.
Conclusion
Generating your Zoom meeting transcript is not difficult once you have the ideal tool at your fingertips. The tools shared on this page offer efficient features that you can use to generate Zoom meeting transcripts within minutes, and they’re very easy to use.
If you need reliable software to screen record your Zoom meeting, Screenify is the most efficient screen recorder app that allows you to get the job done perfectly.
Free Download * 100% Clean & Safe
Product-related questions? Contact Our Support Team to Get Quick Solution >

