How to Record Drawing on PC
Are you looking to capture your drawing sessions on your PC? This article walks you through multiple ways of recording drawings on a PC. We have introduced Screenify, a complete recording tool that works on both Windows and Mac. We have also covered how to use built-in features on both operating systems to meet your recording needs.
Digital drawing has been gaining a lot of attention recently. But what if you record these drawings? It can be helpful in sharing your ideas more efficiently or revisiting them later.
And it’s not even the least bit difficult!
In this article, we’ll show you three different ways of recording drawings on a PC. We’ll first introduce you to a software tool that is compatible with both Windows and Mac. Then, we’ll walk you through how to use the in-built features of Windows and Mac for the same purpose.
But first, let’s answer a simple question.
Can I Record My Drawing on PC?
Yes, you can record your drawing on a PC, and you have more than one way to do it.
Many third-party tools can record drawings on a PC. One of the top tools for this job is Screenify. It’s user-friendly and provides many features for recording drawings and editing them.
But if you don’t want to download additional software, there are still other ways. Both Windows and Mac have built-in options to record your screen. While they may not have as many features as Screenify, they are still sufficient for basic recording needs.
Now, let’s give you a detailed guide for each of these methods. We’ll start with Screenify.
Recording Drawing with Screenify
Screenify is a powerful screen recording tool that is designed exclusively for iMobie users. It is 100% free software that can record your screen, webcam, or audio.
Screenify is ideal for anyone who is looking to record educational sessions, tutorials, or even digital drawings. It allows high-resolution recording with no watermarks. So, your recordings remain entirely your own.
Moreover, the one-click save feature makes it convenient to save all your captured content locally on your Windows or Mac computer.
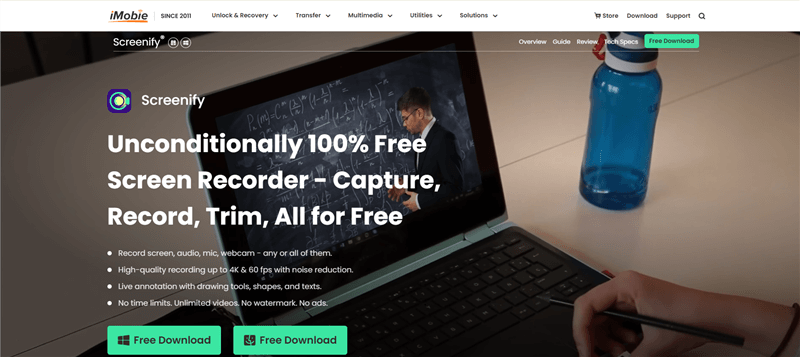
Screenify Website Interface
Key Features of Screenify
Here are some unique features of Screenify.
- Record in multiple resolutions, including 4K, 1080p, and 720p.
- There are no watermarks or time limits on recordings.
- One-click saving to Windows or Mac systems.
- Option to record screen, webcam, and audio.
- Built-in filters and virtual backgrounds for customization.
- No malware or ads, making it a secure choice.
Steps to Record Drawings with Screenify
Follow this stepwise for recording drawings with Screenify.
Step 1. Download, install, and launch Screenify on your computer.
Free Download * 100% Clean & Safe
Step 2. Now choose the mode you want to use in your recording.
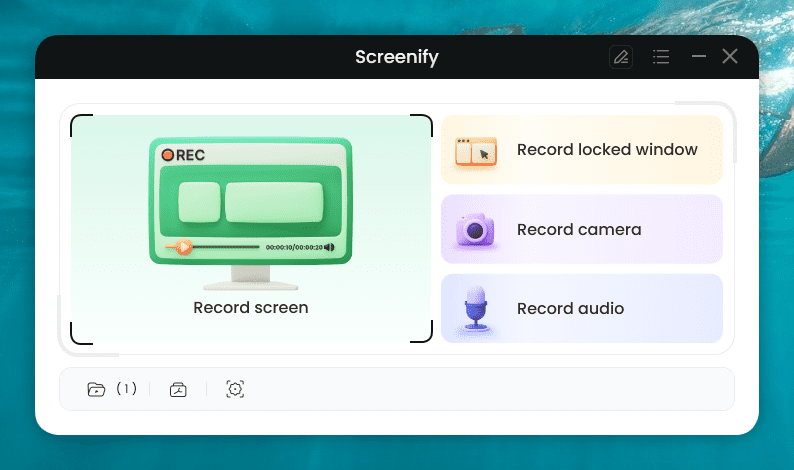
Choose the Mode You want to use
Step 3. Configure the settings before recording. Then, choose the recording screen. It has two options: either record full screen or a specific region. Select your preferred mode and hit “Record.” Then, there will be a three-second timer. After this countdown, the recording will start.
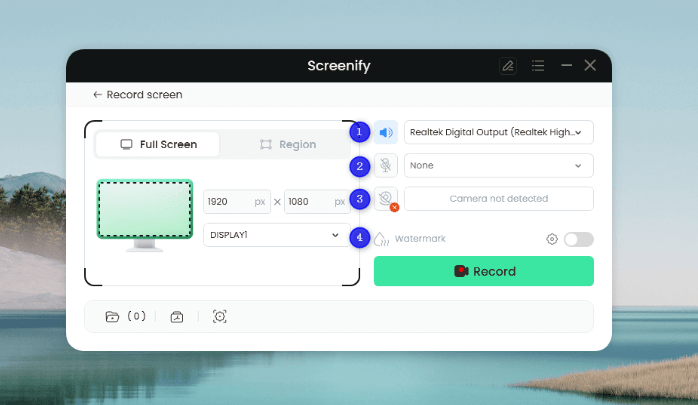
Configure the Settings and Hit the Record Button
Step 4. You can add annotations while recording the screen. You have brush, shape, text, arrow, and line options here.
Step 5. After you have finished recording, click on the Red “Stop” button. Your video will be displayed, and now you can preview and edit it.
So that’s how you record drawings on PC with Screenify. Wasn’t that easy?
Now, let’s move on to the in-built tools of Windows and Mac. The first is QuickTime Player for Mac.
Recording Drawing with QuickTime
QuickTime is a multimedia tool that Apple developed. It comes pre-installed on all Mac computers.
QuickTime is commonly used for watching videos or listening to audio files. But it also has a built-in screen recording feature. You can use this feature for recording drawings right on your Mac. There’s no need for any additional software.
Steps to Record Drawings with QuickTime
Here are the steps to record drawing using QuickTime player.
Step 1. Go to the applications search bar and search for the QuickTime Player.
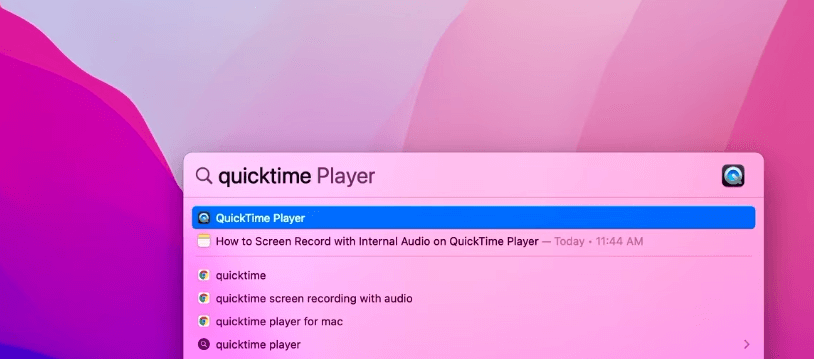
Launch QuickTime
Step 2. Now, go to “File” in the menu bar and choose “New Screen Recording” from the dropdown.
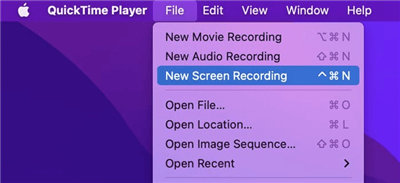
Select New Screen Recording
Step 3. Before starting the recording, click on the “Options” arrow next to the “Record” button. Here, you can adjust settings like microphone input or whether to show mouse clicks.

Set the settings for your recording
Step 4. You’ll have an option to either record the full screen or a portion of the screen. When you are set, click on the “Record” button.
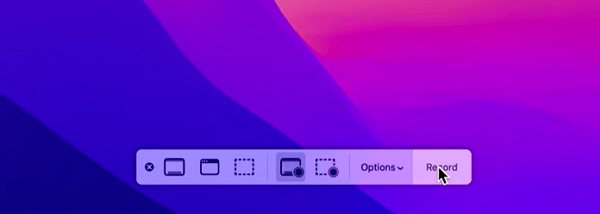
Start recording with QuickTime Player
Step 5. Once your recording starts, open your drawing app and begin your drawing session as usual.
Step 6. When you’re finished drawing, click the “Stop” button in the menu bar to end the recording. You can also use the shortcut Command+Control+Esc for this same purpose.

Click on the “Stop” button to end the recording
Step 7. The recording will automatically open in QuickTime. You can then save it by going to “File” > “Save As.” Then, choose your desired location and file name.
That’s it!!!
Let’s not forget our Windows users. They are also waiting for their turn, right?
We’ll now be recording drawings with Xbox Game Bar on Windows.
Recording Drawing with Xbox Game Bar
The Xbox Game Bar is a built-in feature on Windows 10/11 systems. It was mainly designed for recording gameplay footage. Because Xbox Game Bar also shows CPU usage and many other things.
However, it’s not limited to just games. You can also use it to record any application window. So, it’s a useful tool for recording drawing sessions on your PC.
Steps to Record Drawings with Xbox Game Bar
Here is a stepwise guide for using the Xbox Game Bar to record drawings on a PC.
Step 1. First, open the app on which you want to draw and make it active. Now, press the Window Key + G on your keyboard to bring up the Xbox Game Bar overlay.
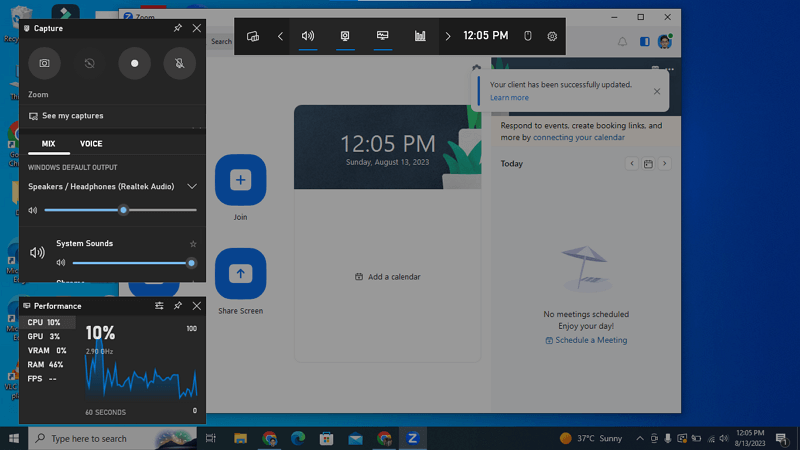
Xbox Game Bar operating interface
Step 2. In the overlay, you’ll find options for controlling the microphone and system audio. Set these settings according to your preferences.
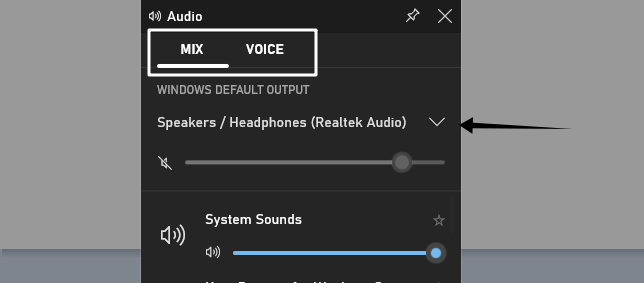
Set your microphone and system audio settings
Step 3. Click on the “Record” button in the capture widget to begin recording. It’s represented as a circle.
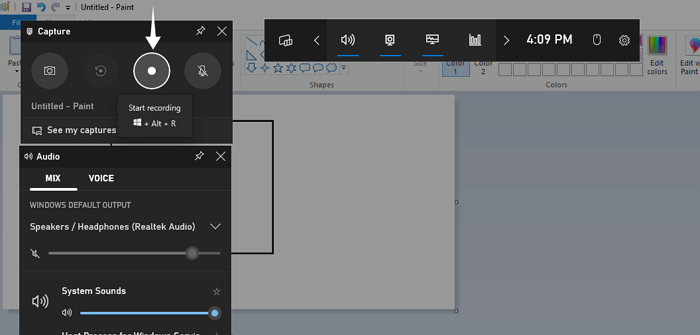
Start recording with Xbox Game Bar
Step 4. Once the recording has started, proceed with your drawing activities as planned.
Step 5. When you are done, click on the “Stop” button. It is represented as a square and is present in the top right corner of your screen.
Step 6. The clip will automatically be saved in the “Captures” folder within “Videos” on your PC. You can access this folder to view, edit, or share your drawing video.
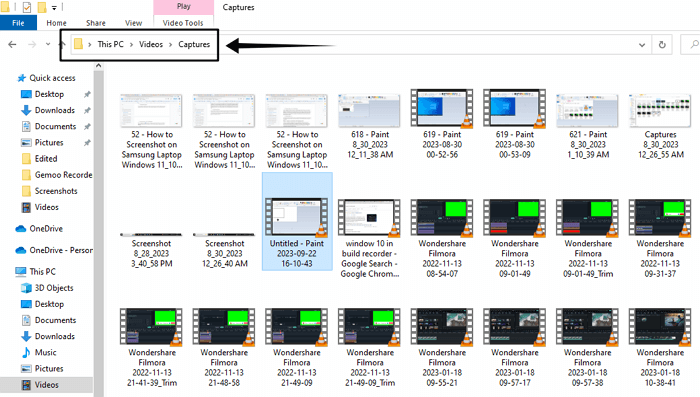
Recordings saved in Videos > Capture
We are done! Now record all your drawings and show them to your friends.
Before we end this guide, let’s see some frequently asked questions.
Frequently Asked Questions
1. Can I record audio along with my drawing?
Yes, third-party tools like Screenify can record audio along with drawing. Even built-in features such as Xbox Game Bar and QuickTime allow you to record audio.
But you need to adjust the audio settings before you start recording to include your voice.
2. Where are my recorded drawing videos saved?
The location where your videos are saved depends on the software you are using. With Screenify, you can specify the destination folder.
With built-in tools like Xbox Game Bar, videos usually go to a predefined folder. It’s mostly the “Captures” folder within the “Videos” directory on your PC.
3. Can I edit my drawings during the recording?
Yes, some tools provide real-time annotation features. For example, Screenify has an “Add Annotation” button. It allows you to insert text, shapes, and other annotations while recording.
But, Xbox Game Bar doesn’t provide this feature.
Final Words
From educational settings to professional presentations, recording your digital drawing has many benefits.
In this article, we have shown you various methods for recording drawings on a PC. You can opt for Screenify. It’s a screen recorder that can fulfill all your recording needs. It even allows you to record drawings with a webcam overlay.
Or you can take advantage of built-in tools on your Windows or Mac systems. They can also record drawings for you.
Free Download * 100% Clean & Safe

Senior writer of the iMobie team as well as an Apple fan, love to help more users solve various types of iOS & Android-related issues.
Product-related questions? Contact Our Support Team to Get Quick Solution >
