How to Screen Record on Chromebook
Want to show what’s on your Chromebook screen to others? You can! This article will help you learn how. We will explore the built-in tools of Chromebook with their step-by-step guide. We will also introduce a special app called “Screenify” that helps to screen record on Chromebook hassle-free.
Are you a Chromebook user looking for an easy way to screen record on Chromebook? If yes, then you are at the right place.
We live in a world where digital communication and content sharing have become essential. Whether it a gameplay, a funny video, a cooking recipe, etc., we want to share everything with our loved ones.
However, most Chromebook users aren’t able to do it. They don’t have any clue about how to capture the screen.
Don’t worry! In this article, we will see various methods with their step-by-step guide to screen record on Chromebook.
So, let’s get started!
Is It Possible to Record the Screen on Your Chromebook?
If you have ever wondered to capture the screen of your Chromebook, then we have good news for you. Screen recording on Chromebook is not only possible, but it is easy as well.
Chromebooks are usually known for their simplicity and streamlined design. But they have evolved beyond just being web browsing devices. They now offer a range of features.
However, the ability to screen record on Chromebook is a cherry on top. It can be useful for various purposes. The best part is it doesn’t require any technical knowledge. With a few clicks, you can share your digital experience with others.
Let’s move toward the first method to screen record on Chromebook.
Screen Recording on a Chromebook with Screencast
When it comes to screen record on Chromebook, one of the convenient ways is using Screentcast. It is a powerful tool for Chrome OS devices that allows you to record the video and audio of your screen.
Screencast offers features like drawing on the screen, generating transcripts, adding faces on the webcam, and more. It is designed for teachers and students, but everyone can use it.
Steps to screen record on Chromebook using Screencast
You can follow the instructions given below to record the screen with Screencast:
Step 1. Open the Screencast app from the app launcher of your Chromebook.
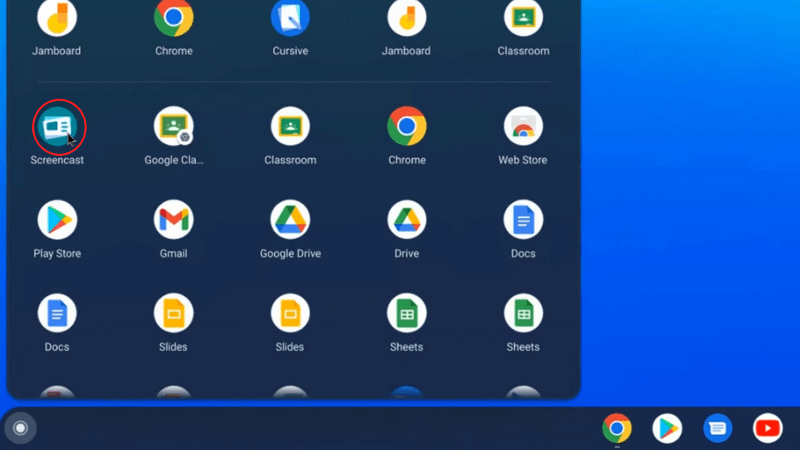
Launch the Screencast app
Step 2. After opening the app, click “New Screencast” on the top left of the screen.
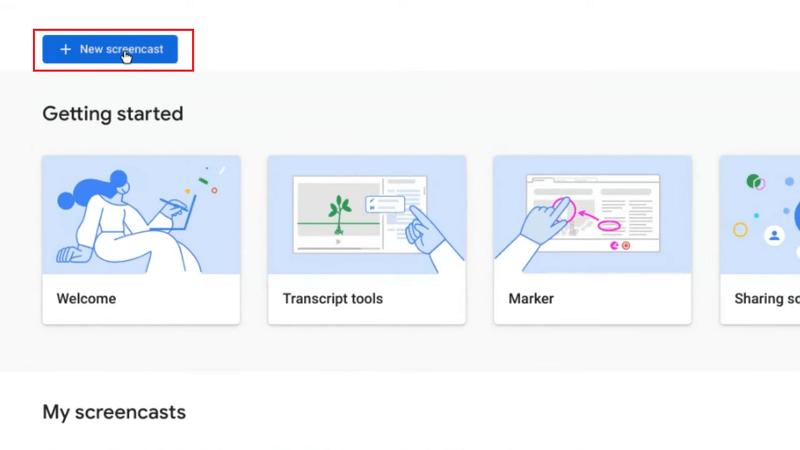
Click the New Screencast button
Step 3. Now before recording, you can select the area you want to record. It can be a full screen, window, or partial area, according to your preference.
Step 4. The microphone and webcam are enabled for the recording by default. You can turn them off from the Settings menu at the bottom if you don’t need them.
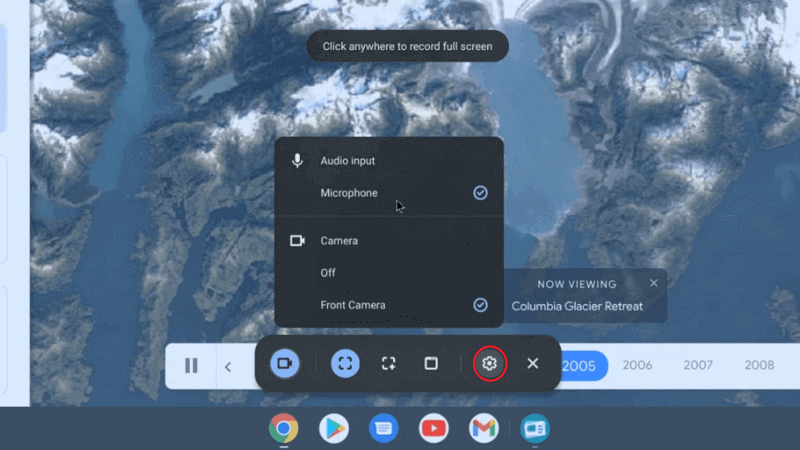
Enable/disable microphone or webcam
Step 5. When you finish the settings, click the Record button to start the recording.

Click the Record button
Step 6. You can add annotations while recording. To do that, click on the Pen icon. You can also drag the webcam view to whichever corner you want.
Step 7. When you’re done recording, click the red Stop button on the bottom right of the screen. It will be saved to the My Screencast folder of the Screencast app.

Click the stop button
You can also review and edit the transcript. However, if you don’t like this method, dont worry! We are not done yet; you can try the next one.
Screen Recording on a Chromebook with Screen Capture
If you don’t want to use the Screencast app, there’s another way. It is by using a built-in feature of Chromebook that is Screen Capture. This screen recording feature was introduced in Chrome 89 and later versions.
So, if you need a user-friendly tool to capture and record the screen of your Chromebook, Screen Capture is here! It is simple and helps you get the job done in a few simple steps.
Steps to screen record on Chromebook using Screen Capture
You can follow the instructions given below to record the screen with Screen Capture:
Step 1. Locate and open the Screen Capture tool by clicking the bottom-right corner of your screen.
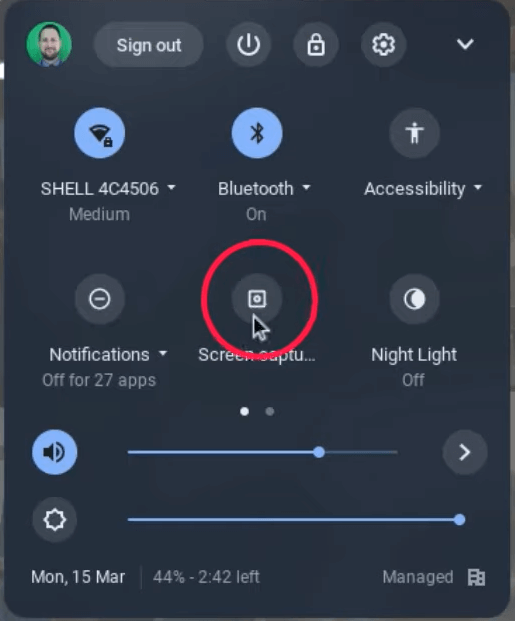
Click and open the Screen Capture tool
Step 2. You will see a toolbar with various recording options. You can also select the area you want to record. It can be a full screen, window, or partial area.
Step 3. Turn the Video icon on the left-hand side of the toolbar. It will enable you to record a video of your screen.
Enable the video icon from the toolbar
Step 4. Open Settings; if you want to include audio, then enable the microphone toggle.
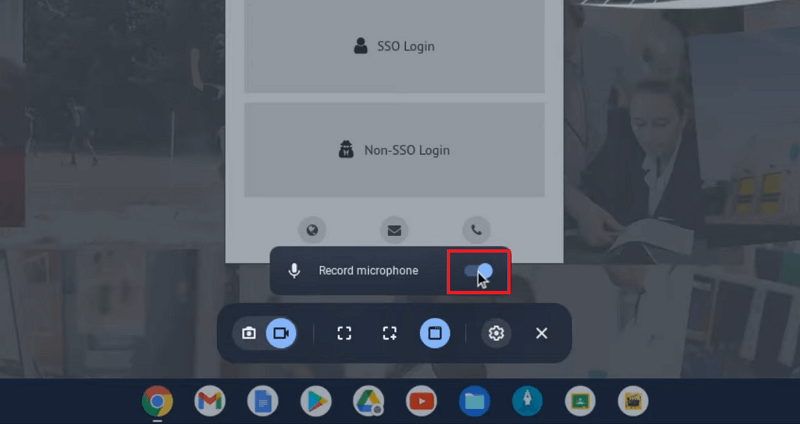
Enable the microphone toggle
Step 5. When you finish the settings, click the Record button to start the recording.
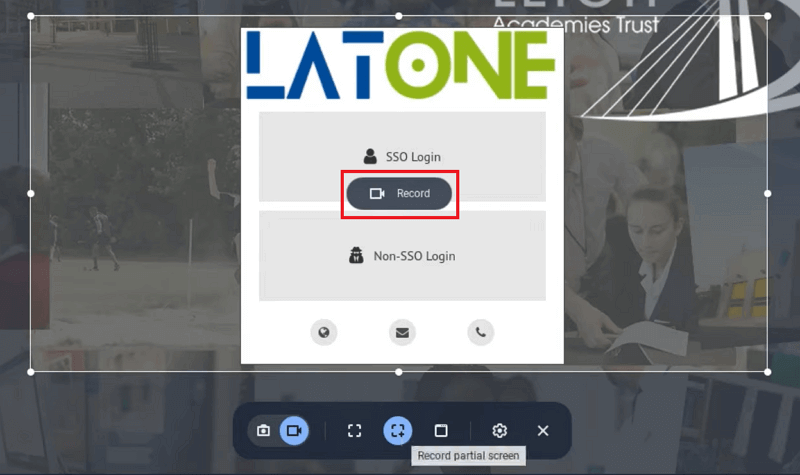
Click the record button
Step 6. When you’re done with the recording, click the Stop button to end the recording. This recording will be saved to your Downloads folder by default.

Click the stop button to end the recording
If you are not satisfied with these built-in tools of Chromebook, we have a solution for you! Let us walk you through the best screen recording app.
Screen Record on Chromebook Using Screenify[Recommend]
If you have explored Chromebook’s built-in screen recording feature but want something more. Then, let us introduce you to Screenify. It is the most handy and user-friendly tool when it comes to screen record on Chromebook.
Screenify offers many useful features to enhance your screen recording experience. The best part is that it is free and requires no technical knowledge. Anybody can download and use it to record their favorite content.
Key Features of Screenify
- Unlimited HD Videos.
It allows you to record full-screen or any part on your Chromebook’s screen in 1080p HD/4K. There’s no limit on recording. You can record unlimited videos of tutorials, lectures, and gameplays without any hassle.
- No Watermark.
Screenify is a free tool with amazing features. It allows you to screen record on Chromebook without any watermark. This handy tool can effortlessly capture any part of your screen, webcam, and audio.
- Customizations
Screenify is an innovative tool with many customization options. You can add filters and virtual backgrounds to your webcam. It also allows you to blur, remove, or change the background according to your recording theme.
- 1-Click Save Recordings
You can save unlimited recordings locally as you want. With just one tap, all recordings with audio will be automatically saved on your computer. You can playback and modify them anytime when needed.
Now that we have seen the amazing features of Screenify.
Let’s see how to use it!
Steps to Screen Record with Screenify
Before starting, download and install the Screenify tool on your PC. Then, follow the instructions given below:
Free Download * 100% Clean & Safe
Step 1. Download and Install Screenify on Computer.
Step 2. Launch Screenify on your computer, and select Record screen mode.
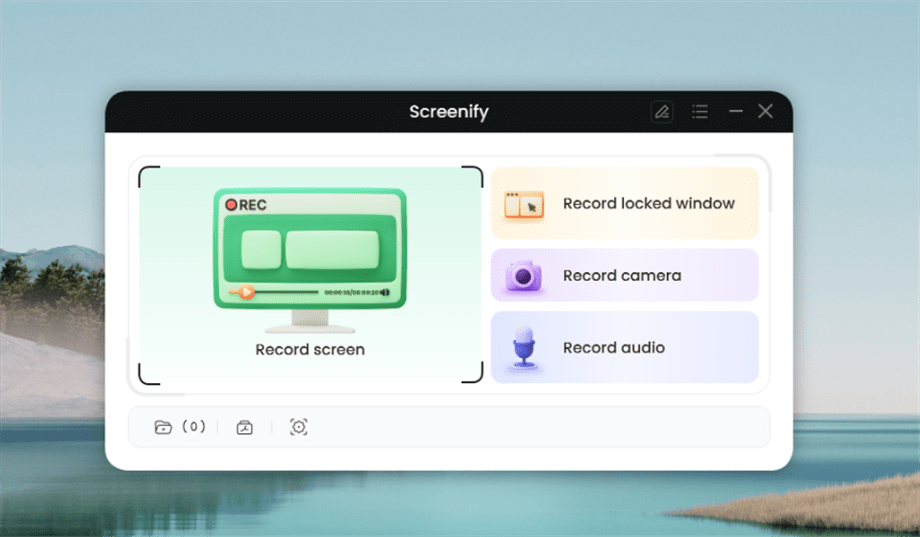
Select Record Screen Mode
Step 3. Configure Recording Settings aims to configure settings like system audio before recording.
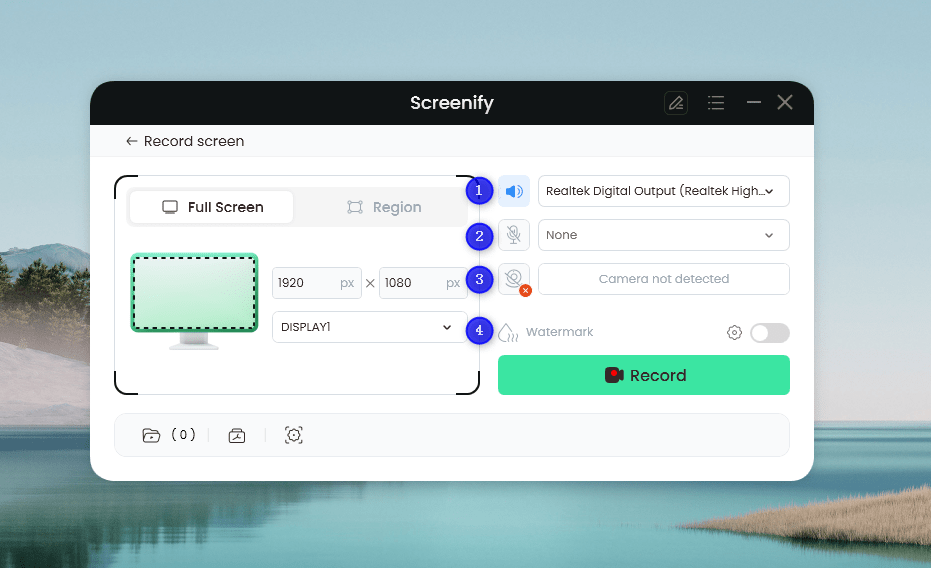
Set Configure Recording Settings
In this setting menu, you can:
1 Choose the System audio.
2 Choose the Microphone you want to record.
3 Choose the Camera you want to use.
4 Choose whether to add a watermark.
Step 4. Select Recording Screen.
Option 1. Full Screen Record
Please select Full Screen mode and choose the display you need to record. Hit Record button to initiate recording.
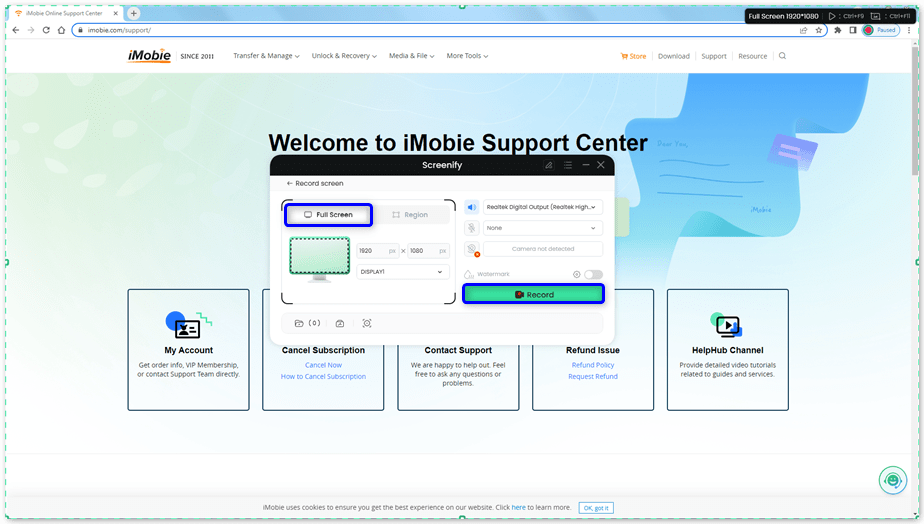
Select Full Screen
Option 2. Region Record
To record region, you need to manually select the recording area. After selection, you can still adjust the selected area. It supports customize selection, full screen, and proportional selection based on common social media dimensions.
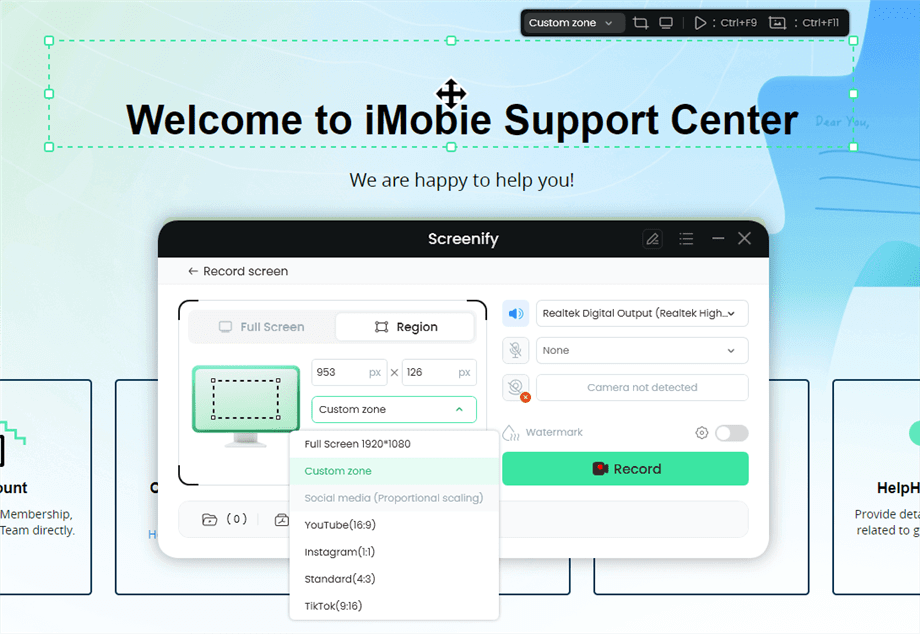
Record Region
Step 5. Wait for the Recording Countdown.
There is a 3-second countdown to help you prepare the recording after you are ready to start recording.
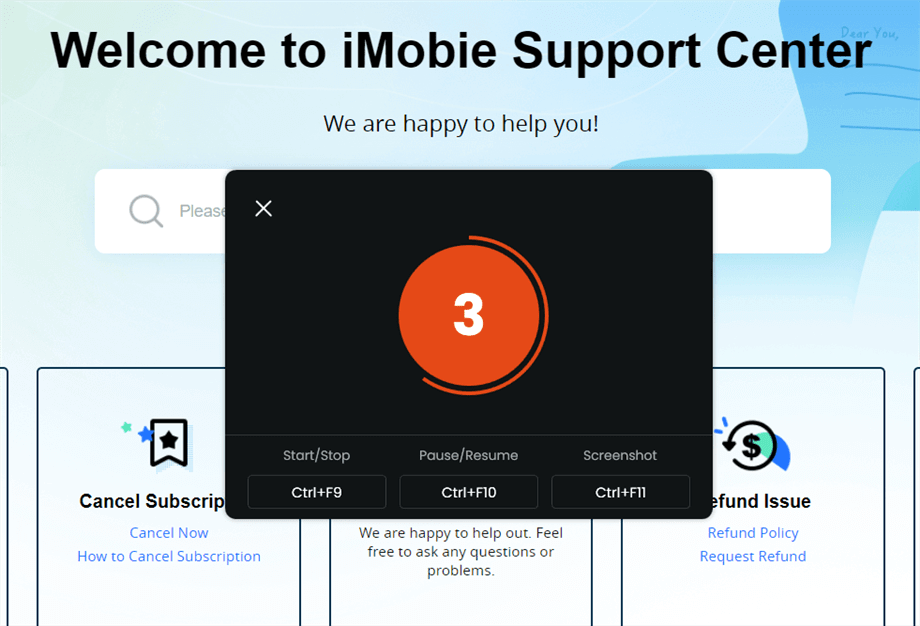
Wait for the Recording Countdown
If you would like to see a recording countdown before your recording starts, you can enable the countdown option. Or you can tap it off. View this post to know how to set the countdown option.
Step 6. Start Recording.
The recording will begin after a 3-second countdown. You can make annotations on the recording interface during the recording.
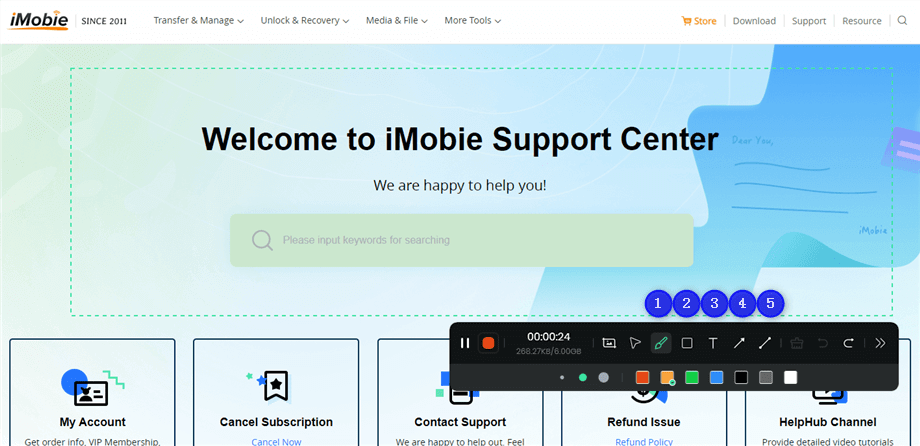
Annotate the Screen during Recording
With the toolbar, you can add the annotation in the screen:
1 Brush: Draw freehand on the screen recording interface to highlight or illustrate specific areas during the recording.
2 Rectangle: Draw rectangular shapes on the screen recording interface.
3 Text: Add written notes or labels directly onto the screen recording interface.
4 Arrow: Draw arrows on the screen recording interface to point out and emphasize specific areas.
5 Line: Draw straight lines on the screen recording interface to underline or connect specific points.
Step 7. Record Screen Process Completed.
When the recording is completed, you can click the red Stop button to end the recording. Your recorded files will be displayed. From here, you can preview and manage the recorded content as needed.
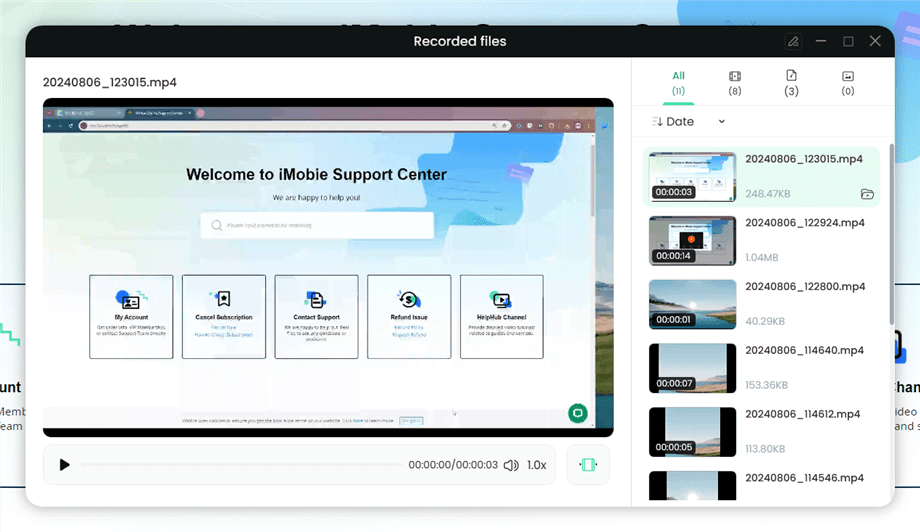
Preview the Recording
You may also want to know: How to screen record protected videos
When you end the recording, it will be automatically saved on your computer. We believe you will find this method to be more useful and easy. Now let’s explore the frequently asked questions from the users.
FAQs
1. How do you screen record on a Chromebook with sound?
You can use built-in tools like Screencast or Screen Capture or a third-party app like Screenify. These tools will allow you to record screen with audio. You just need to enable the audio toggle in settings. It will save your recordings with audio included.
2. Where can I find my screen recordings on Chromebook?
After ending a screen recording, you’ll find it saved in the “Downloads” folder. However, depending on your tool, you can also choose a specific location for saving your recordings.
3. Why I Cannot record my screen?
If you’re unable to screen record on Chromebook, consider these factors:
- Check if the recording tool has been granted screen and audio access permissions.
- Ensure the recording tool is compatible with your Chromebook’s operating system version.
- Verify that any third-party tools you’re using are properly installed and enabled.
- Some older Chromebook models might have hardware limitations that affect screen recording.
Conclusion
So there you have it! Screen record on Chromebook is simple and handy. Whether you’re new to this tech thing or know a bit, you can capture and share what’s on your screen without fuss.
Remember, you can use the tools already on your Chromebook, like Screencast or Screen Capture. However, if you want a more efficient and convenient tool, download Screenify.
With these tools, you’re all set to show your friends and family what’s happening on your Chromebook screen. The screen is your canvas. Enjoy!
Free Download * 100% Clean & Safe

Senior writer of the iMobie team as well as an Apple fan, love to help more users solve various types of iOS & Android-related issues.
Product-related questions? Contact Our Support Team to Get Quick Solution >
