5 Best Screen Record on Mac (Free & Paid)
Are you a tech enthusiast who loves creating tutorials and instructional videos regarding Mac but doesn’t know how to screen record on Mac? Get yourself equipped with the 5 Best Screen Recorders on Mac— both Free & Paid and make an informed decision after carefully examining the features, pros & cons of each tool.
Screenify – All-in-One Screen Recorder
Try Screenify for free to record screen on Windows or Mac. Whether full-screen or partial-screen recording, recording with sound or with camera, Screenify can do it with ease.
100% Clean & Safe
When it comes to capturing your screen on a Mac, having the right tool is essential for creating high-quality tutorials, recording presentations, or sharing gameplay. Whether you’re looking for a free option with basic functionality or a paid solution packed with advanced features, there are plenty of screen recording tools available. In this article, we’ll explore the 5 best screen recorders on Mac, covering both free and paid options, so you can find the perfect tool to suit your needs.
Part 1: Criteria for Choosing the Best Screen Recording Tool
The choice of the best free screen recorder for a Mac depends on various factors such as user needs, type of content you wish to record, quality of recording, audio recording capability, and more. Let’s explore each factor in detail to make an informed decision:
- Video quality: Supports high-definition recording.
- Ease of use: Is the interface intuitive and easy to operate?
- Editing function: Does it provide functions such as editing and annotation?
- Supported platforms: Compatible with operating systems such as Windows and macOS.
- Output format: Supports common formats such as MP4 and AVI.
- Audio recording: Does it support system sound and microphone audio recording?
- Live streaming function: Does it support real-time streaming recording?
- Cloud storage integration: Facilitates video uploading and sharing.
Always check how the screen recorder will perform on MacOS and how many resources it utilizes during peak performance. A lightweight screen recorder that doesn’t cause lags and slow down your system helps you achieve efficient results.
Part 2: 5 Best Mac Screen Recording Tools
There are various free screen recording software for Macs, and finding the right one depends on your needs. We have compiled the top 5 screen recorders for Mac— both free and paid. Let’s explore each one in terms of its features, pros and cons.
1. Screenify— 100% Free 4K Screen Recorder
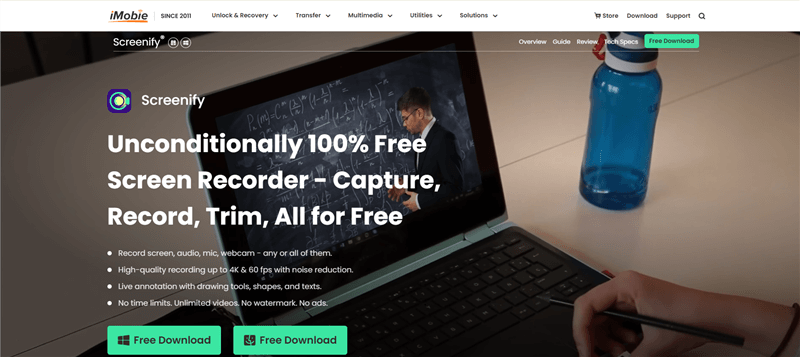
Screenify is a brilliant combination of the most sought-after features by content creators, educators, and tech influences— it is 100% free and has 4K screen recording capability. Mac users can have flexible screen recording options as the tool comes with dual recording modes. It enables you to record either full-screen content or a region/part of it. Even in the fully selected display, users can switch screens without any issues.
Screenify Website Interface
Additionally, the Lock Window recording option is a blessing, especially for influencers or content creators who need to post screen recordings on social media platforms. This option lets you lock the window, and no other contents will be recorded, ensuring safety and privacy. You can record microphone and system audio simultaneously for a more engaging experience.
Free Download * 100% Clean & Safe
Key Features
- Record Mac screen in ultra-high 4K resolution at 60 FPS without any blurriness and lags.
- You can record what’s happening on the MacBook screen without any time limit.
- Noise reduction features allow you to record crisp and clear audio without any distractions.
- You can record both system audio and microphone sound (unlike Mac’s built-in screen recorder) seamlessly.
- Adjust the volume and speed of screen recording on Mac during playback.
Pros
- No watermarks or time limits
- 4K 60 FPS screen recording
- Record dual audio on Mac
Cons
- The lock window doesn’t support camera recording
2. Camtasia
Camtasia has recently been upgraded, and the industry’s tech influencers love the new screen recorder. The super-fast speed alongside crystal-clear screen recording results have made it easier to capture screen on Mac. Camtasia is known for its versatile features packed in a simple, lightweight package, which means that the tool is easy to use even for beginners. You can even integrate webcam overlay into your screen recordings.
When it comes to audio recording, Camtasia offers sharp sound quality and dual audio recording modes such as system and microphone. Apart from the screen recording, Camtasia also helps Mac users polish their recorded video clips with basic editing functionalities. The multi-track timeline, versatile layouts, and AI-assisted background removal make this tool worth using for Mac users.

Camtasia screen recorder
Key Features
- Capture screen, webcam, system audio, and microphone on your Mac seamlessly.
- You can capture a MacBook screen in 1080p UHD at 60 FPS.
- Record, refine, and share your Mac screen recordings in a single place.
- Highlight the cursor and add effects and other engaging elements to your Mac screen recordings.
Pros
- Easy to use
- Brilliant cursor effect
- Ultra HD scene capturing and crisp audio
Cons
- Video rendering will take longer
3. QuickTime Player
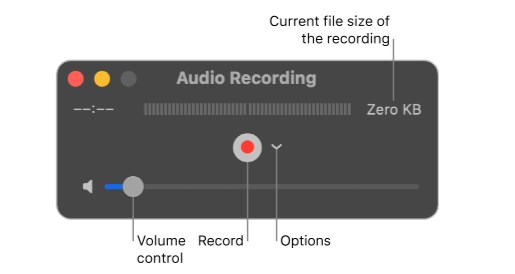
Don’t you want to install any third-party tool to screen records on Mac? No worries! QuickTime Player is a built-in screen recording tool for Mac that offers a seamless way to capture what’s happening on the screen. You can record your MacBook screen at 4K resolution at 120 FPS with no lags and interference. While previewing the video at the end, you can even export it in a lower resolution to save some space.
Apart from screen recording, QuickTime Player never disappoints even with the editing. You can trim, split, and rearrange video recording clips seamlessly right from within the tool. Although QuickTime Players offers a seamless screen and microphone sound recording ability, it cannot record the internal system sound by default, and you’ll need to install a third-party tool for this purpose.
record in quicktime player
Key Features
- Record the screen of your MacBook up to 4K with 120 Frames Rate Per Second (FPS).
- Basic editing functionalities such as trimming, splitting, and rearranging are available.
- No installation is needed, as this screen recorder is a built-in tool for Mac.
- Choose the display of the cursor movement while screen recording.
Pros
- Simple user interface
- 4K Screen recording at 120 FPS
- Basic post-production editing tools
Cons
No internal audio recording
4. OBS Studio
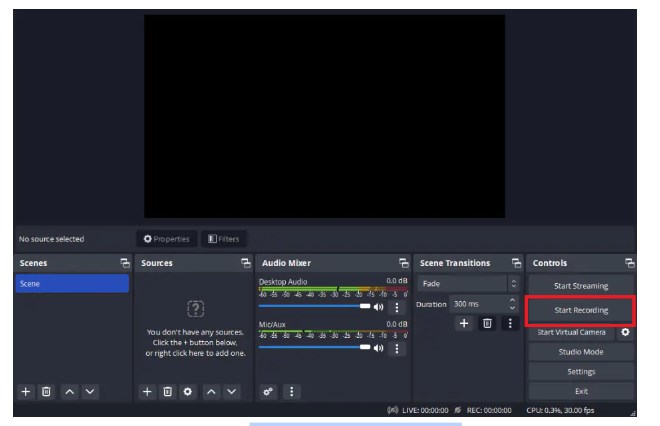
Open Broadcaster Software (OBS) Studio is an open-source screen recorder for Mac. This professional-grade screen recording tool has a bit of a complex interface but versatile features and advanced capabilities. With real-time audio and video mixing alongside perfect synchronization, you can record and refine your screen recording alongside crisp and clear audio.
One of the standout features is its ability to create scenes and switch between the sources during the screen recording. You can select to record the window content, text overlay, webcam, and more.
start recording with OBS Studio
Key Features
- Multiple plugin options are available for this Mac screen recording software to add functions.
- It supports full HD 1080P screen recording at 60 FPS— suitable even for high-motion screen recording on Mac.
- Multiple personalization and customization options are available in studio mode for screen recording and streaming for Mac.
- This open-source Mac screen recorder has an intuitive audio mixer alongside pre-source filters.
Pros
- Professional screen recording tool
- Pre-set filters and effects
- Multiple customization options
Cons
- A bit complex for beginners
5. ScreenRec
Looking for a lightweight Mac screen recording tool? ScreenRec is the ultimate choice! Get started in 60 seconds after installing the tool on your Mac— no complex settings involved. ScreenRec is a versatile tool when it comes to capturing screens, as it allows you to record HD video and excellent audio quality (both system sound and microphone). Apart from 720P screen resolution, the tool offers a pro plan with 1080P resolution and a premium plan with 4K resolution as well.
ScreenRec also offers cloud recording technology (2GB for free and 200 GB for a premium plan) for those looking for a solution to low storage. Mac users can also add annotations to the screen recording to make it more engaging.
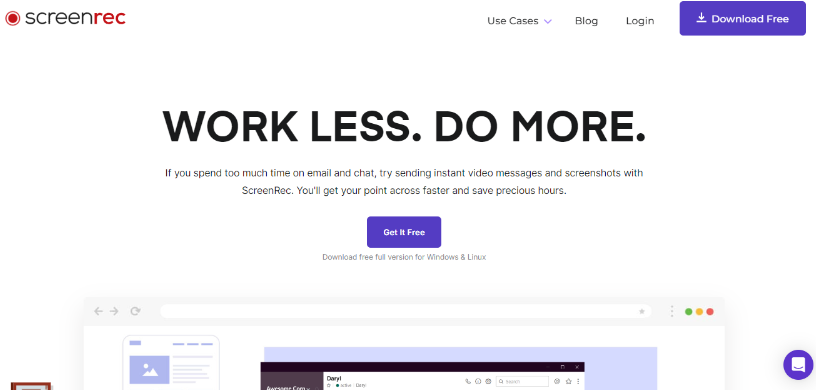
Screenrec Website Interface
Key Features
- Record Mac screen recording up to 720P quality with no watermarks in the free version.
- You can even record offline and upload the recording to the cloud once online on your Mac.
- Clean and easy-to-use interface, which makes it suitable for beginners
- Share screen recordings easily over the cloud.
Pros
- Annotations
- Up to 4K screen recording resolution (Paid)
- No watermark
- Unlimited recording time
Cons
- No marking and editing functionalities
Part 3: Frequently Asked Questions
1. What features should I look for in a screen recording tool?
Choosing the best MacBook screen recording tool can be tricky. Look for the screen recording quality (4K, 1080P, or 720P), audio recording capability (system or microphone), and editing options (annotations, trimming, and more) while choosing the screen recording tool.
2. How can I improve the quality of screen recording on Mac?
When previewing screen recording, navigate to File > Export As and then choose up to 4K screen resolution. We recommend using a Screenify screen recorder for Mac that allows 4K screen capturing at 60 FPS.
3. Is there a Mac screen recording tool that also provides editing functions?
Various tools offer editing functions on Mac. Camtasia offers to add effects, versatile layouts, and even AI background removal. OBS has pre-set audio filters for Mac users. We recommend Screenify, which offers noise reduction, video splitting, cropping, and even speed and volume adjustment.
Conclusion
Screen recording on a Mac becomes simple and easy if you have a reliable screen recording tool. Make sure to look for the desired functionalities in screen recorder tools, such as video quality, audio recording capability, and editing options before you proceed to screen record on Mac. We have compiled the top 5 best screen recorders for Mac— both free and paid. We recommend using Screenify— the best free screen recorder for Mac that offers 4K resolution at 60 FPS with no watermark and time limits.
Free Download * 100% Clean & Safe
Product-related questions? Contact Our Support Team to Get Quick Solution >

