How to Record a Screen with VLC + Best Alternatives
We need to screen record many things in our everyday lives, and the media player allows you to vlc record streams. But, of course, some individuals reject vlc and find it tough, therefore they want an alternative. We’ve collected the top alternatives to vlc record stream.
You’ll need to record the stream for a variety of reasons. Some streaming sites, such as Twitch, do not keep streaming VODs forever. VLC is a popular program for playing music and video files. It can play any sort of file and works with all major operating systems. We utilize a variety of screen recorders, some of which have restricted functionality, while others are paid or contain intrusive advertisements. So don’t worry, this article will provide you with the greatest alternative to vlc record stream that is both flawless and free.
Part 1. How to Record Stream with VLC
The VLC is strong enough to handle practically every media type. It has a ton of additional capabilities, but many people are unaware that it can also be used as record vlc stream software. Even with so many functions, individuals on many platforms complain about “VLC stream not working” and “Trying to record network stream in VLC”.
Now, let’s look at how to record a stream with vlc.
Step 1: Download and install the VLC media player; I recommend selecting “Recommended” when the install wizards prompt you to pick an installation choice to make sure that all essential components and modules for advanced capabilities are installed.
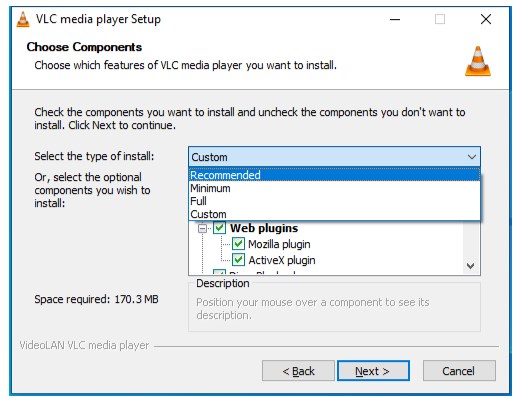
Select vlc recommended option
Step 2: Open the VLC media player, locate the “Media” button on the left upper hand menu bar, click it, and then select “Convert/Save” or “Open Capture Device” from the drop-down list; a window titled “Open Media” will appear.
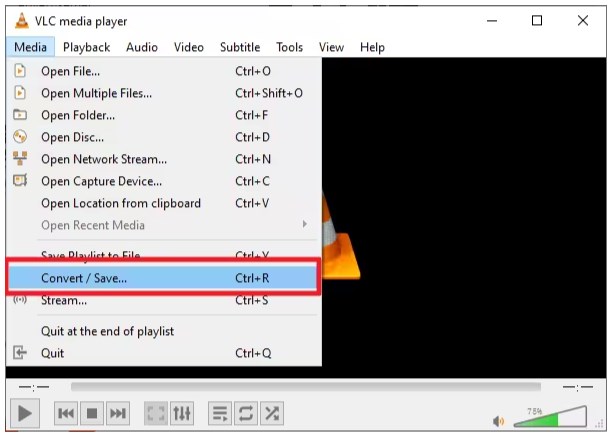
Convert and save media vlc
Step 3: Select the “Capture Device” tab. There will be various options for you to pick the capture source and basic settings. To conduct a screen recording, choose “Desktop” as the Capture mode.
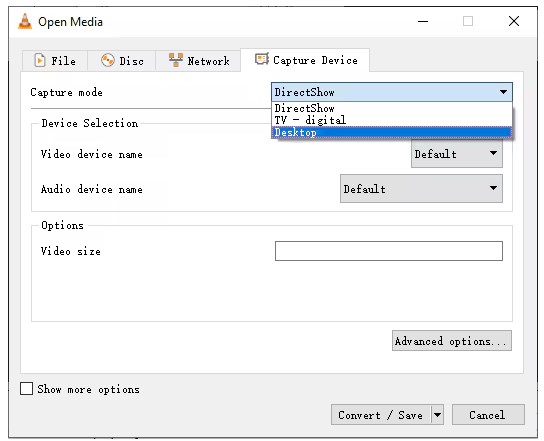
Capture device in vlc
Step 4: Change the framerate of the recording by entering various frames per second in the “Options” menu. After you’ve set everything up, click the down arrow next to the “Play” button on the right-hand bottom and pick “Convert” from the drop-down menu.
Step 5. The “Convert” window will appear. We do not need to modify anything in “Source”; simply leave it as is. Check the “Display the output” option in the “Settings” section to view the recording process in the VLC media player main interface.
Step 6: Selecting “Deinterlace” substantially reduces the visual deterioration and edge trembling of recorded video. After you’ve set up, click “Browse” in “Destination” to choose the destination folder where you want to save your recorded movies. You may also add a file name for your screen record file. Once everything is completed, click “Start”.
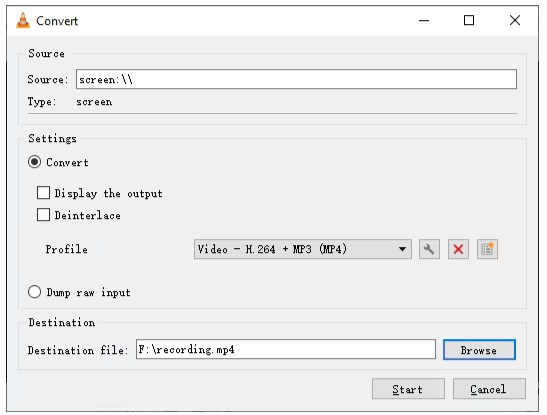
Select vlc recording destination
Step 7: Once the VLC media player is ready, click “Play” to start recording the full screen, whether it’s a YouTube live stream or a video game playthrough. Pause and stop the recording.
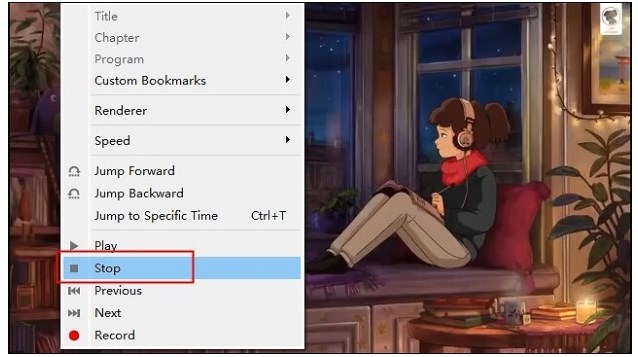
Vlc record stream
Part 2. The Best Alternative to Record Stream
After learning how to record a stream with vlc people seek alternatives because vlc is complex. It contains numerous steps, which beginners find difficult. So here’s a perfect alternate Screenify. It’s a great video recorder for most Windows and macOS users. The main function of this streaming video recorder is that it allows users to record streaming videos such as movies, variety programs, YouTube videos, and more. Screenify delivers smooth, 4K recordings. It is free, with no time limit or feature restrictions, and no watermark on the streaming video.
Features:
- 100% free.
- Record up to 4K at 60 fps.
- No time limit, no watermark, no ads.
- Add custom watermark.
Here is how to use Screenify to record streaming videos:
Step 1. Begin by downloading and installing Screenify on your computer.
Free Download * 100% Clean & Safe
Step 2. Launch Screenify and select the “Record screen” option.

Select Record Screen Mode
Step 3. Set up your recording preferences, including system audio, before you start.
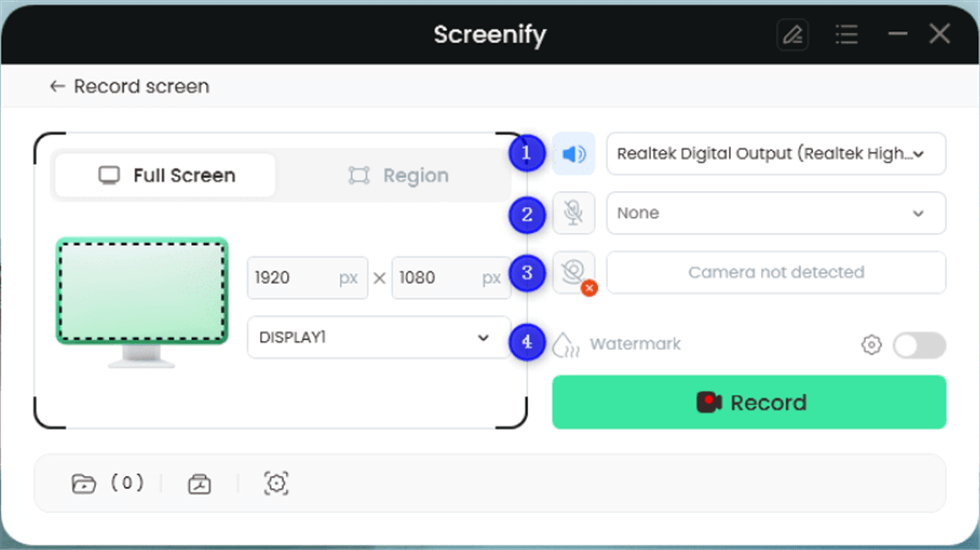
Record Setting
Step 4. Choose the recording area. Click “Full Screen” for a complete screen capture, or manually select a specific region. After that, click “Record.” You can adjust the selection to match social media sizes if needed.
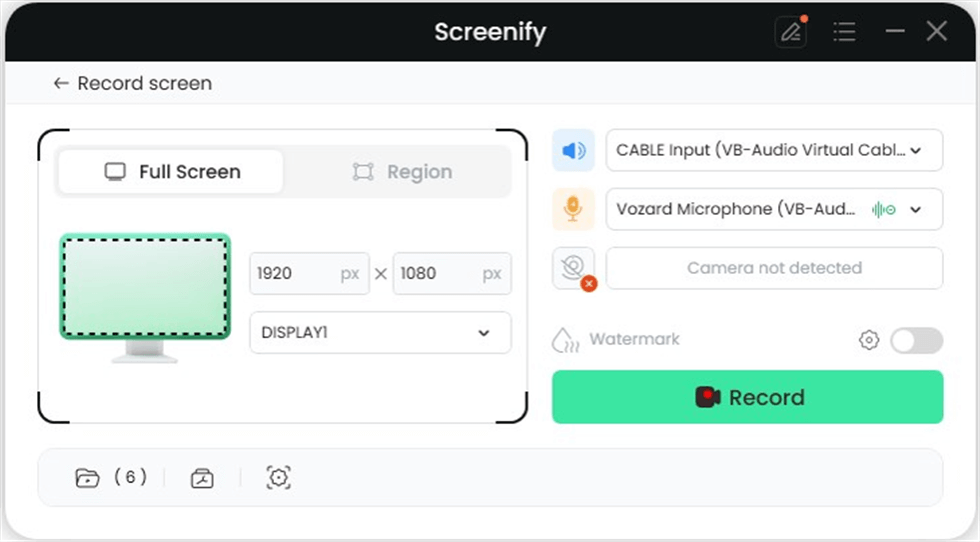
Full Screen
Step 5. Wait for the 3-second countdown to prepare for recording.
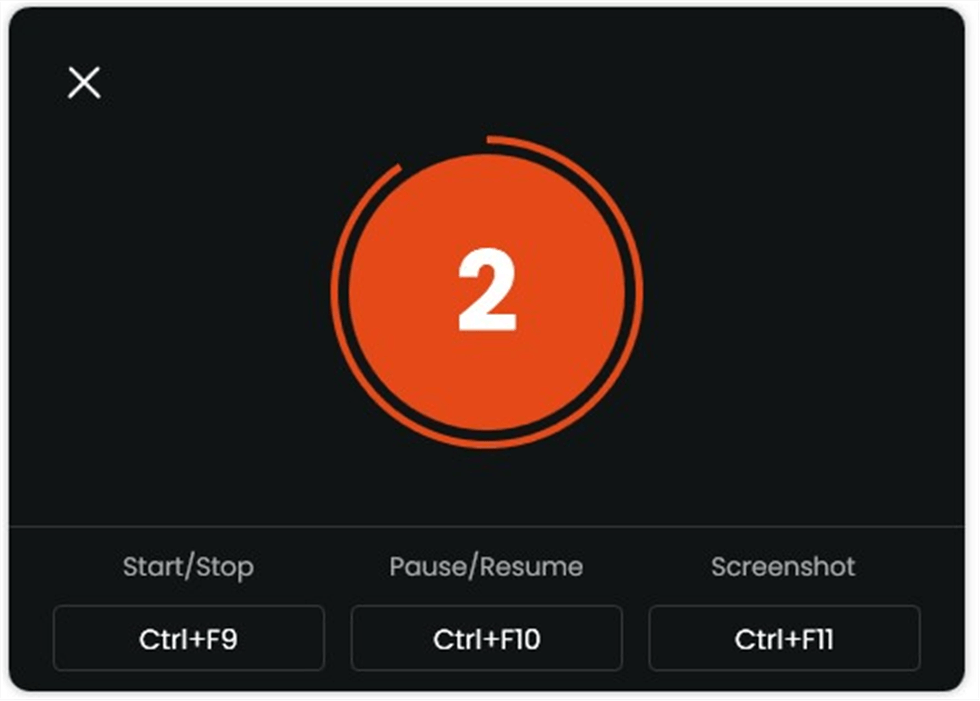
Start recording countdown
Step 6. Recording will begin after the countdown. You can add annotations during the recording if you like.
Annotate the Screen during Recording
Step 7. Click the red “Stop” button to end the recording. You can then preview and manage your saved videos.

Record Screen Process Completed
Part 3. Conclusion
This article explains how to use vlc record stream by turning on advanced options and selecting “Desktop” as the capture mode. However, VLC can be rather complex and may not suit everyone’s needs.
Do you need to record high-quality video with annotations? Do you want a more user-friendly interface? If this is the case, record vlc stream alone might not be enough. More easy solutions, such as Screenify, may be beneficial since they provide more capabilities and are easier to use.
For a more perfect experience, get Screenify today and discover how it meets your screen recording needs!
Part 4. Record Streaming Video With VLC FAQs
1. What is RTSP in VLC?
The Real-Time Streaming Protocol (RTSP) is a network control protocol designed for managing streaming media servers like IP cameras and DVRs in entertainment and communication systems.
2. What does the record button do in VLC?
VLC’s record button allows users to capture video parts or entire plays within the media player, and can also be adjusted in the Media menu.
3. Where can I find VLC recording settings?
Open the Media menu and choose Convert / Save. Under the Capture Device tab, choose a capture mode and alter advanced parameters like as frame rate and aspect ratio.

Senior writer of the iMobie team as well as an Apple fan, love to help more users solve various types of iOS & Android-related issues.
Product-related questions? Contact Our Support Team to Get Quick Solution >
