3 Proven Ways to Remove DRM from iTunes Media
What if you need to offline your audio or video playlist, but are unable to do so due to the Digital Rights Management (DRM) of apple devices. It might be impossible for you to offline your content. Here, we are providing you with some tips on how to go with itunes drm removal with the following methods.
In today’s era, there is nothing that you can’t get at the tips of your fingers on your phone. So, why not the entertainment world. People are experiencing many applications that provide access to old or newly launched music, movies, and many other web contents. These music, movies, and web contents can easily be accessed using multiple OTT platforms.
Remove DRM from iTunes Media
On an iphone, people can easily enjoy these services online, but to use them offline is a big task. As the services on iPhones are DRM protected. You may look for various options for iTunes DRM removal. Many online tools are here to remove the DRM protection, allowing you to play these files on a variety of devices and flexibly share those data with other people.
What iTunes Music Is DRM Protected?
Apple used its FairPlay DRM technology to safeguard iTunes music, but relatively few consumers are aware of this. Apple has applied DRM on iTunes to protect its data. DRM protects data from copying and didn’t let the user make or supply pirated content in the digital market. But still, there are many of the tracks that people want to use for multiple things and purposes.
The music purchased in the iTunes store was not made available for free until 2009. The songs offered on the iTunes Store now come without DRM protection. There’s a chance that any tracks you bought from the iTunes Store before 2009 are protected. For that, you can use mentioned tips and tricks for iTunes DRM removal.
Further Reading: All You Know About Apple Music >
How to Remove iTunes DRM?
It is very irritating when you find any hindrance to using any application or service of your phone. You can easily download your iTunes files into your computer using some of the tricks. There a are few ways for iTunes DRM removal that you can try and get the desired output.
Method 1. Burn Playlist to Disc
When you include any DRM-protected tracks to an iTunes playlist, you are limited to seven CD burns for iTunes DRM removal. This limitation can be annoying if you have been working on a playlist for a while only to receive a notification stating that the CD couldn’t be burned to as many CDs as you desired. However, you can either change the playlist or create a new one to get another this issue.
Follow the given steps to burn playlists to a disc:
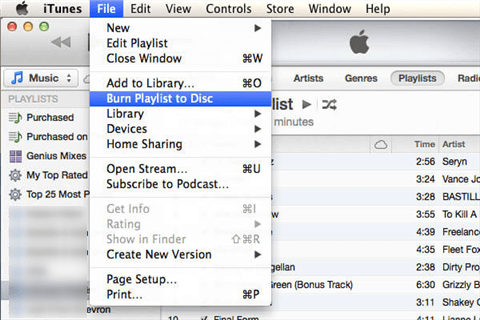
Burn Playlist to Disc
- Insert a blank disc into your computer, and create a new folder to create a playlist on it. Open iTunes on your PC or Mac, and select File and then New Playlist.
- Choose, all the files that you want to use offline and copy them to the inserted disc for iTunes DRM removal.
- After selecting all the iTunes media files and putting them on the disk, go for the option of ‘Burn Playlist to Disc’. Then, iTunes will ask you the type of disk you have inserted on your computer and want to burn. Choose the ‘Audio CD’ disk format. And after that, it will burn the playlist to the disc you have inserted.
Now, the only thing left is to import the files from the disc to the PC or Mac. Insert the disk back on your computer, and to import these files need to go to iTunes. Then, you only have to click on Edit, then on Preferences, after that click on General, and lastly, just tap on the Yes button.
Method 2. Subscribe to iTunes Match
Apple’s iCloud-based solution is a great method to official iTunes DRM removal from any audio and video file while also upgrading them. The iTunes Match feature searches your entire iTunes music library for matches. If DRM-protected music is still available in the iTunes store, they are updated to the iTunes plus format. Your original song quality will also be increased from 128Kbps to 256 kbps, virtually doubling the audio quality.
For Mac Users

Subscribe to iTunes Match
- Launch the Apple Music app on your Mac.
- Select iTunes Store from the drop-down menu.
- Click on the Subscribe button, after filling out the bill details.
For Windows Users
- On your open iTunes, select the Store option.
- Select the iTunes Match option, from the menu.
- Tap on the Subscribe button, and fill in the required information to proceed with the billing process.
Method 3. Remove iTunes DRM with a DRM Removal Tool
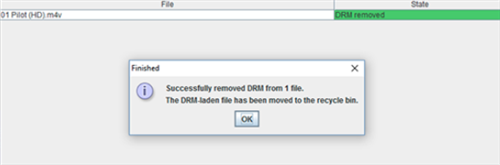
One of the other popular methods, for freely enjoying your iTunes files is to record the music tracks into non-DRM files using third-party applications or software to record music, such as TunesKit Audio Capture. This iTunes music recorder can grab iTunes media files losslessly and a great iTunes DRM removal and save the actual file in MP3 or other common audio formats.

Remove iTunes DRM via Tuneskit Audio Capture
Step 1. On your PC, start the software. Then, in the bottom right corner, select the ‘Format’ icon to define the recording options, such as output format, music quality, etc. TunesKit Audio Capture now supports the following output following MP3, AAC, WAV, etc. Pick any option you like and carry on.
Step 2. Return to the program’s main window and select iTunes from the programs list. You can then start listening to any music on iTunes. In the TunesKit Window’s record list, you will notice a new recording session has been generated. Simply, close iTunes or turn off the music to end the recording.
Step 3. If you wish to trim the audio tracks into tiny segments on average once the recording process is finished, select the ‘Edit’ icon of each track. You can also edit the ID3 tags for the music, such as the cover image, artist, song title, etc. Finally, tap on the ‘Save’ button to save the recorded iTunes music files to your desired location on your computer.
Bonus Tip. How to Download the iTunes Purchases to Computer?
You may encounter various frustrating issues, such as iTunes not working while installing iTunes purchased files via iTunes. This is why, to download products purchased from the iTunes store, you will need a solid alternative to iTunes.
In such conditions, AnyTrans is the program for iTunes fans. AnyTrans is an app that will allow you to easily transfer iTunes purchases to your computer. It can forward iTunes files to a PC efficiently and simply without destroying any data. Follow the given steps to download the iTunes purchases to your computer. It can forward iTunes files to a PC efficiently and simply without destroying any data.
Step 1. After installing AnyTrans on your computer or Mac, go to the welcome page and select the iTunes library.
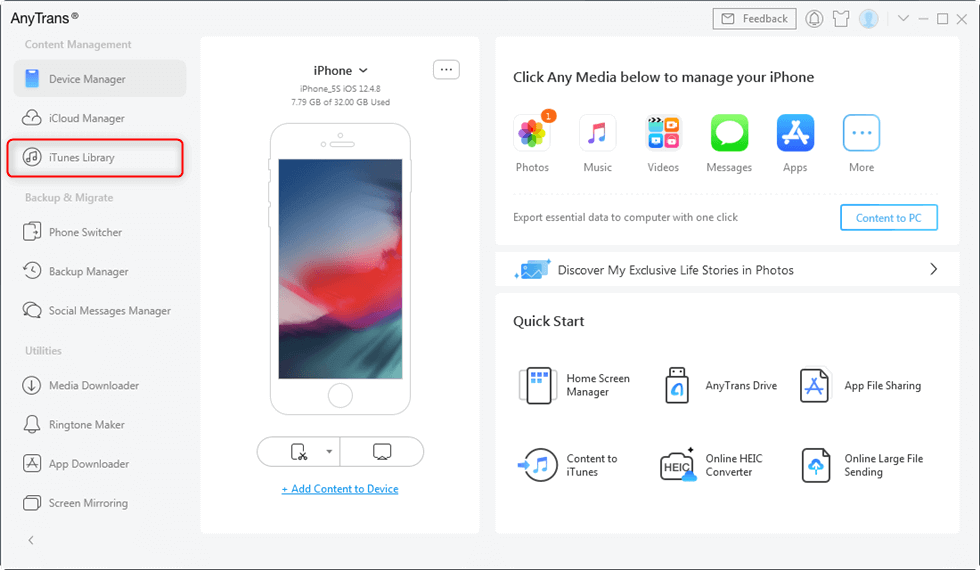
Click on iTunes Library
Step 2. On the desktop application, you will now be able to see all of your iTunes contents, including iTunes transactions. After that, select the files you want to download and then click the To PC button to save the files to your PC or Mac.
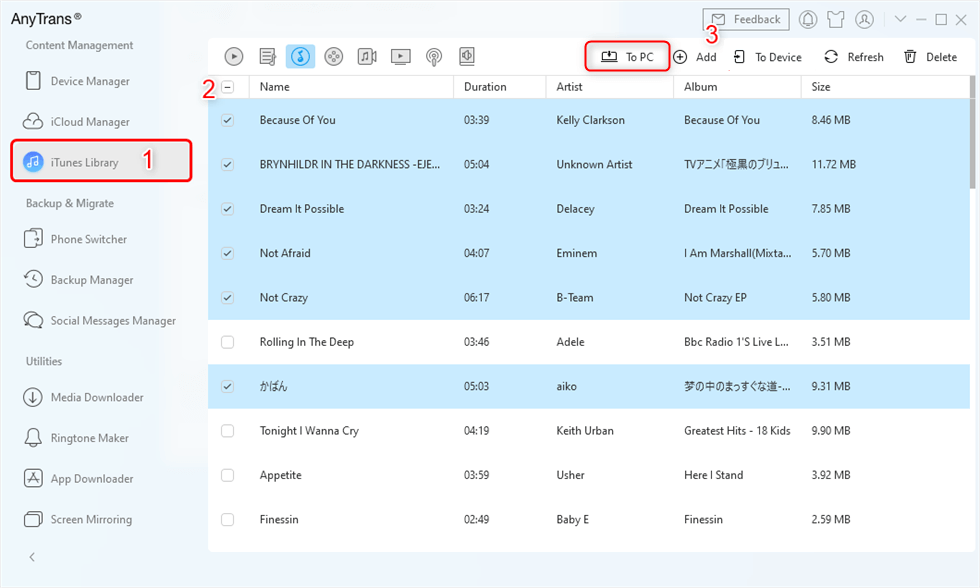
Download the iTunes Purchases to Computer
The Bottom Line
Sharing digital content over the phone or computer is the most demanded thing nowadays. For iphone users, this could be possible using iTunes DRM removal tools mentioned above to remove the DRM limitations from those files and use them simply on your computer. You can use any of the above options according to your convenience.

Member of iMobie team as well as an Apple fan, love to help more users solve various types of iOS & Android related issues.
Product-related questions? Contact Our Support Team to Get Quick Solution >
