How to Track a Dead iPhone: The Proven Device Recovery Guide
A dead iPhone stops updating location, causing panic, but Apple’s offline network can still show its last known or nearby position, helping you locate the device and recover it safely.
Losing your phone is an incredibly stressful experience, but realizing the battery has completely drained brings an immediate wave of panic. Facing a locked, unresponsive screen when you need it most feels entirely hopeless. When your phone is dead and you can’t see it moving on the map, you are likely overwhelmed by a deep fear of losing your data permanently. This often creates confusion about how the map actually works when a device drops off the grid.
Fortunately, you are not out of options. By understanding how Apple’s offline ecosystem actually functions, you can pinpoint exactly where your device was when it lost power—or even where it is right now. This guide provides a clear, tested, and realistic procedure to overcome the panic, successfully bypass login hurdles, and execute a safe physical search.
The Immediate Solution: Bypassing 2FA to Find Your Dead iPhone on iCloud
When you need to find your dead iPhone’s location in an emergency, your fastest and most reliable option is accessing iCloud from a separate web browser. However, in our real-world testing, we immediately encountered a terrifying hurdle that most guides ignore: Two-Factor Authentication (2FA).
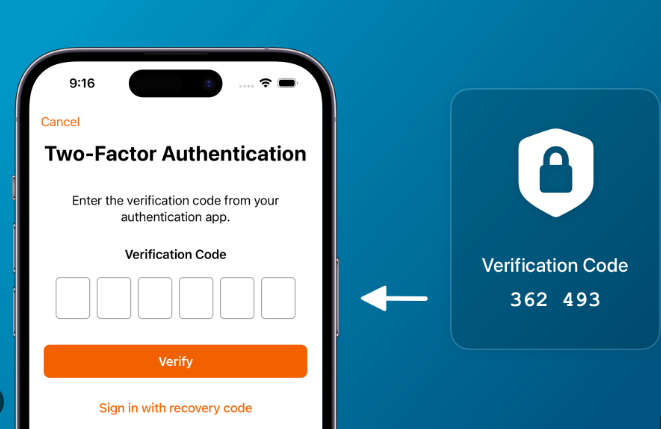
If you try to log into iCloud on a friend’s computer or a borrowed tablet, Apple will naturally try to text a 6-digit security code to your iPhone to verify your identity. But your phone is dead and missing. How do you approve the login?
Apple actually built a specific emergency bypass for this exact scenario, but it is easy to miss when you are panicking. Logging in through this specific bypass shifts your situation from helpless to actionable.
Follow this exact method to bypass 2FA and execute an effective search:
- Access the Portal: Open a secure web browser on any available computer, tablet, or smartphone and navigate to
iCloud.com/find. - Enter Your Apple ID: Type in the email address associated with your missing phone and enter your password.
- Use the 2FA Bypass: When the screen prompts you to enter the 6-digit code sent to your devices, do not panic. Look toward the bottom of the screen. You will see a quick-access button labeled “Find Devices”. Click this immediately.
- Locate Your Phone: This bypass securely drops you straight into the map interface without needing the text message code. Click on “All Devices” located at the top of the screen and choose your specific missing iPhone from the dropdown menu.
- Read the Map Accurately: Look closely at the map. A green dot means the device is online and active. A gray dot indicates the device is powered down. Crucially, I realized during testing that the gray dot isn’t a live location—it is a timestamped pin. Look underneath the device name to see the exact time and date the location was last recorded.
This browser-based tool reveals precisely where your smartphone was located right before it lost power, giving you the exact geographic data needed to begin a real-world search.
Understanding Offline Device Tracking: Compatibility and the Find My Network
To effectively execute a search, you need to understand the underlying mechanics of Apple’s ecosystem. Many users assume a drained battery means the hardware is entirely invisible, but that is no longer true for modern devices.
Here is the most important insight regarding offline tracking: iPhones can share their last known location before shutting down, and newer models continue to broadcast their location even after the screen goes black.
However, the capabilities depend entirely on which device you own and what software it runs. You need to know exactly where your phone falls:
- For iPhone 11 and Newer (iOS 15 or later): If you own an iPhone 11, 12, 13, 14, or 15 (excluding the iPhone SE 2nd generation) running iOS 15 or newer, you benefit from Apple’s advanced Find My network. Modern iPhones are equipped with a “Power Reserve” feature. Even after the battery dies and the screen powers off, the phone continues to emit a low-energy Bluetooth tracking ping for up to 24 hours. If any other Apple user walks past your dead phone, their device anonymously picks up this Bluetooth signal and securely relays the location data back to your Apple account. It essentially acts like an AirTag.
- For iPhone X, 8, and Older (or older iOS versions): These devices do not have the Bluetooth ping feature after powering down. Instead, they rely on the “Send Last Location” safety function. When your battery reaches a critically low level (usually around 5% to 1%), the device automatically pings Apple’s servers with its final GPS coordinates before it dies. Your map will show exactly where it breathed its last breath.
This crowd-sourced Bluetooth technique is a major pillar of modern security. It ensures that locating a powered-off device is highly realistic, operating securely without requiring your specific hardware to have an active Wi-Fi or cellular connection.
Real Recovery Strategies: What to Do When You Find the Location
Locating the map coordinates is only the initial phase of the recovery procedure. Once you see that gray dot, you need a safe, actionable plan. Simply deciding to travel to the pinpointed coordinates to execute a physical search is dangerously vague. You must tailor your approach based on where the map says your phone is located.
Step 1: Secure Your Data Immediately
Before you go anywhere, your foremost priority must be personal data protection.
GOLDEN RULE: Never remove the device from your Apple account. Removing the device disables the Activation Lock, making it incredibly easy for a thief to wipe and sell your phone.
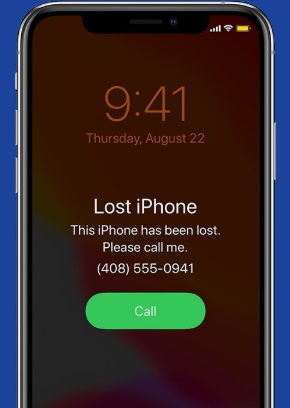
Instead, click on your device on the iCloud map and select Lost Mode. Activating Lost Mode protects your personal data while attempting recovery. It remotely queues a command to lock your hardware with a secure passcode the second it receives any power. It suspends Apple Pay and allows you to display a custom message—such as “Please call me at this number”—directly on the screen.
Step 2: Evaluate the Location Safely
Once your data is locked down, look at where the gray dot is resting.
- If the location is a familiar public place: If the map shows your phone died at the gym, a local restaurant, or your workplace, head there immediately. Speak to the manager, check the lost and found, and retrace your steps. A dead phone slipped between couch cushions at a coffee shop will simply sit there waiting for you.
- If the location is inside your own home or car: The battery died nearby. Because the phone is dead, clicking “Play Sound” on iCloud will not work immediately. However, you can still click it. The command will stay pending, and the absolute second you plug the phone into a charger—even before it fully boots up—it will begin ringing at maximum volume.
Step 3: Handling Suspected Theft
Do not confront suspected thieves or approach unfamiliar private residences.
If your map shows your dead iPhone is sitting inside a stranger’s house, an unfamiliar apartment building, or moving across the city in a way that suggests it was stolen, do not go knock on the door. Your personal safety is vastly more important than a smartphone.
Instead, take screenshots of the iCloud map showing the address and the timestamp. Locate your device’s serial number or IMEI (which you can find on your original box, your carrier billing statement, or under your device list at appleid.apple.com). Call your local police department’s non-emergency line. Provide them with the tracking data, the IMEI, and explain that you have accurate tracking information for your stolen property.
Preventative Actions for the Future
To prevent future crises from becoming total disasters, remember this vital rule: enabling all tracking features in advance significantly improves recovery chances. You cannot turn these features on remotely after the phone is lost and dead.
Take these steps right now on your active hardware:
1. Open your device Settings.
2. Tap your Apple ID name at the top .
3. Select Find My, then tap Find My iPhone.
4. Ensure the toggles for “Find My iPhone,” “Find My network,” and “Send Last Location” are all switched to the green “On” position.
Taking these proactive measures ensures that your hardware and sensitive data remain protected. It guarantees that if your battery ever runs dry again, your phone will automatically save its location and continue broadcasting its Bluetooth beacon to passersby.
Alternative Solutions: Fonelora Location Changer
As mentioned earlier, desktop-based tools are generally the most dependable option for modifying GPS location. Compared to mobile apps that rely on easily detectable “Mock Location” settings, desktop solutions tend to deliver a more stable and consistent signal.
If you’re looking for a simpler and more reliable alternative, Fonelora Location Changer is a solid option to consider.
Instead of relying on basic spoofing techniques, Fonelora changes your device’s GPS location through a computer connection. This approach helps minimize common problems like location jumping (rubber-banding) and reduces the likelihood of immediate detection.
Why Choose Fonelora Location Changer?
Fonelora focuses on stability and realistic movement—two key factors when modifying location-based apps like Uber:
- Change GPS location instantly with one click
- Compatible with both iOS and Android devices
- No need to root or jailbreak your phone
- Built-in movement simulation for more natural behavior
- Adjustable speed and customizable routes
- Helps reduce sudden location resets or “snapping”
It’s especially useful for:
- Drivers aiming to position themselves in high-demand areas
- Users testing location-based features or scenarios
- Anyone seeking a smoother alternative to mobile spoofing apps
How to Use Fonelora to Change GPS Location
Follow these simple steps to get started:
Step 1: Download and Install
Download Fonelora Location Changer from the official website and install it on your computer.

Step 2: Connect Your Device
Connect your iPhone or Android device using a USB cable.
- On iOS: Tap “Trust This Computer” when prompted
- On Android: Enable USB Debugging

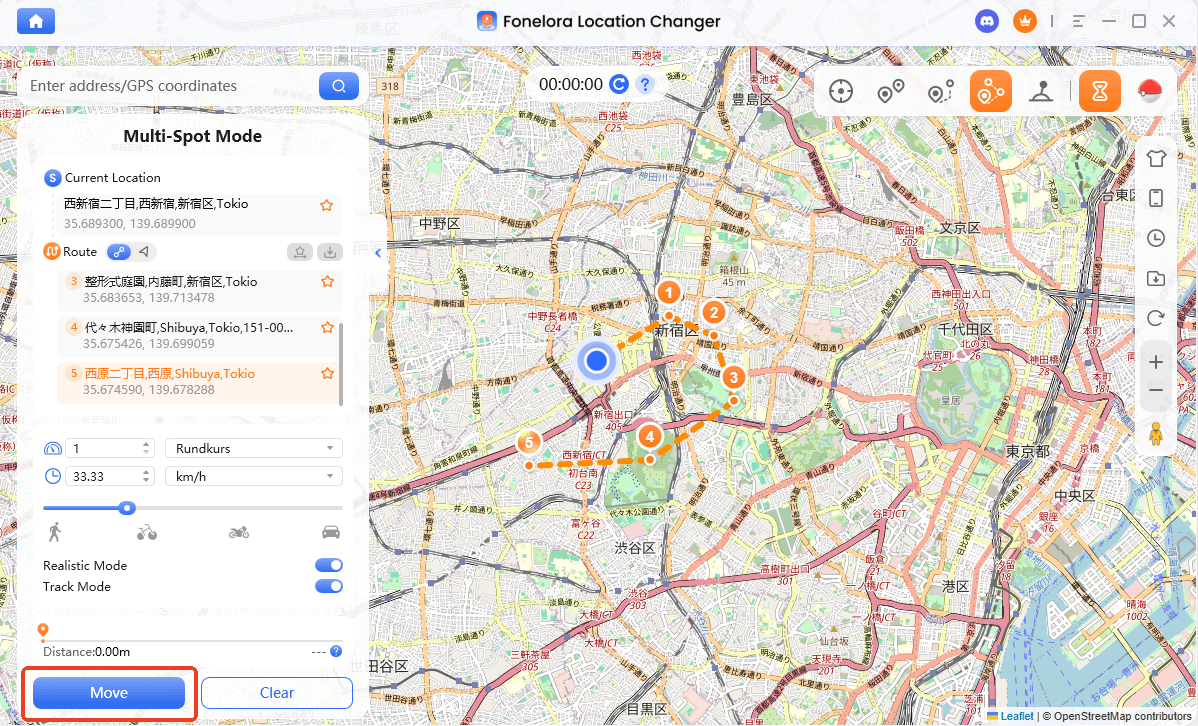
Step 3: Choose a Location
Open the map interface in the software:
- Enter a specific location (such as an airport or busy area)
- Or select a point directly on the map
FAQ: Essential iPhone Offline Tracking Guide Answers
Can you track an iPhone when it is dead?
Yes, you absolutely can track an iPhone when the battery is dead. By bypassing the 2FA prompt using the “Find Devices” link at iCloud.com, you can review the exact coordinates recorded just before the hardware lost power.
What does “Send Last Location” mean?
This is an automated safety function. When your battery drops to critical levels, the device transmits its final geographic coordinates to Apple’s secure servers right before it shuts off. This is what generates the gray dot on your map.
What should I do if the map shows my phone is at a stranger’s house?
Never confront a stranger or go to an unfamiliar private residence. Turn on Lost Mode via iCloud to lock your data, take screenshots of the location and timestamps, and contact your local police non-emergency line with your device’s IMEI number.
Regain Control of Your Situation Today
Dealing with a dead, missing phone is undeniably frustrating, but it does not mean your device is gone forever. By safely bypassing the login prompts, accurately reading your map’s timestamps, and following the precise recovery strategies detailed above, you can confidently narrow down your search area. Remember to immediately turn on Lost Mode to protect your personal data while attempting recovery. Once your hardware is safely back in your hands, ensure your Find My network settings are fully enabled, giving you total peace of mind for the future.

Joy Taylor is a seasoned technical writer with over a decade of experience in mobile technology. At iMobie, she specializes in producing in-depth content on iOS data recovery, iPhone unlocking solutions, and iOS troubleshooting.
Product-related questions? Contact Our Support Team to Get Quick Solution >
