Does Updating to Windows 11 Delete Files? A Safe Upgrade Guide (2025)
Upgrading to Windows 11 typically does not delete your personal files, and most users keep their documents, photos, and apps after the update. However, data loss can still happen in rare cases due to failed upgrades, low disk space, corrupted system files, or choosing the wrong install option. This guide explains what really happens during the Windows 11 update and how to protect your files before upgrading.
The anxiety is real. You are staring at the “Update Available” notification, but instead of excitement, you feel a knot in your stomach. Like Chris, a “Cautious Upgrader” who recently reached out to us, you might be holding off on new features because you are terrified of losing years of family photos or mistakenly deleting work documents. The confusion between technical terms like “clean install” and “update” only adds to the hesitation. You need to know: if you click that button, will your digital life disappear?
This guide exists to replace that fear with facts. We address the common panic regarding Windows 11 upgrade data loss and provide a clear, safety-first procedure. We will explain exactly how the process works, how to verify your settings, and what to do in the rare event that files seem to vanish.
The Answer: Does Updating to Windows 11 Delete Files?
When users ask, “Does updating to Windows 11 delete files?” the short answer is no. If you follow the standard procedure, your data remains safe.
When you use the official Windows Update tool or the Installation Assistant to move from Windows 10 to Windows 11, the system performs what is technically called an in-place upgrade. This process is specifically engineered to preserve your data. During the setup phase, the default option is explicitly labeled “Keep personal files and apps.” This ensures that your documents, photos, installed programs, and even your desktop background remain exactly where you left them.
However, the risk of data loss is never strictly zero. While the technology is robust, the specific method you choose dictates the outcome. The only scenarios where files are typically wiped involve specific user choices—such as intentionally selecting a “Clean Install”—or rare hardware interruptions.
To provide accurate guidance, we recently performed a hands-on verification test. We took a standard Windows 10 laptop used daily for work and upgraded it to the latest Windows 11 build.
The Result: The transition was seamless.
- Desktop Icons: Our messy arrangement of folders remained exactly the same.
- Browser: Chrome opened with all our previous tabs and bookmarks intact.
- Passwords: We did not have to sign back into Wi-Fi or our email accounts.
- Files: Every photo and document was in its original folder.
In-Place Upgrade vs. Clean Install: Will Installing Windows 11 Erase Data?
Before you begin, you must distinguish between the different installation methods. Many users who ask, “Does installing Windows 11 erase data?” are actually confusing an upgrade with a clean install. Understanding this difference is the most critical factor in ensuring the Windows 11 upgrade is safe for files.
1. In-Place Upgrade (Safe)
This is the standard procedure when you use Windows Update or the manual Windows 11 Installation Assistant. It installs the new operating system (OS) over the old one. This method is designed to keep personal files and apps intact. Your settings, browser bookmarks, and applications should appear exactly as they were.
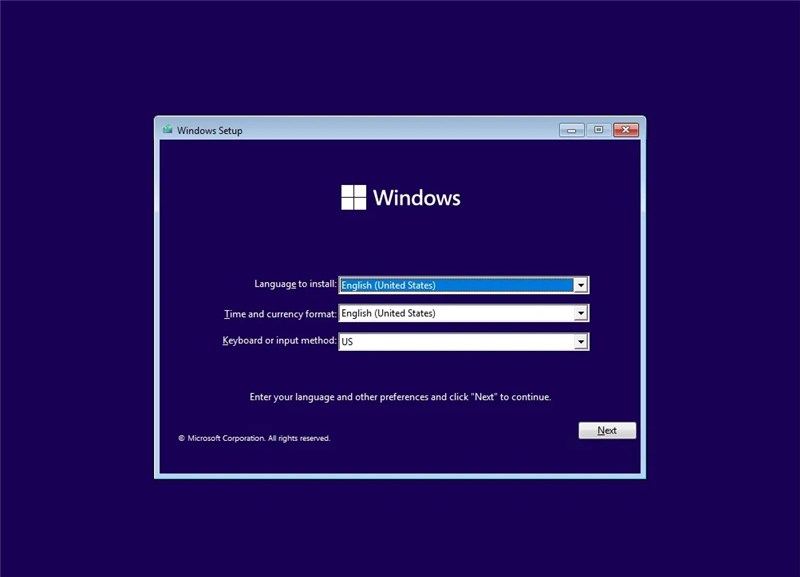
2. Clean Install Windows 11 (Destructive)
A clean install Windows 11 involves booting from a USB drive or ISO file and usually requires formatting the hard drive. This method will erase data. It is useful for fixing severe system issues, removing bloatware, or setting up a PC for a new owner, but you must manually back up everything beforehand. Also, don’t worry, it is possible to recover data from a formatted hard drive.
3. Reset This PC (Variable)
This recovery tool offers two modes: “Keep my files” (removes apps but saves data) and “Remove everything” (wipes the drive). Be extremely careful when selecting your options here.
Comparison: Which Method Suits Your Needs?
| Feature | In-Place Upgrade | Clean Install | Reset This PC (Keep Files) |
| Files Kept? | Yes | No | Yes |
| Programs Kept? | Yes | No | No (Apps Removed) |
| Settings Kept? | Yes | No | No |
| Data Loss Risk | Low | High (Intentional) | Low |
| Best For | Standard Users | Experts / Fixing Bugs | Fixing System Issues |
If your goal is simply to move to the new OS without disruption, the in-place upgrade (via Windows Update or Installation Assistant) is the correct solution. It minimizes the data loss risk while modernizing your system.
How to Ensure Your Files Are Safe Before Upgrading
Even with a safe upgrade process, technology can be unpredictable. We recommend adopting the mindset of “The Cautious Upgrader.”
Consider the experience of Chris. Chris wanted the modern interface of Windows 11 but feared losing his photo library. After searching “will upgrading to windows 11 delete my files,” he learned that the process is generally safe. However, he refused to rely on “generally.” He created a redundant backup strategy. When his upgrade completed, his files were there, but he had peace of mind knowing that even if the Windows 11 update failed and changed data, he was protected.
Follow this 3-step pre-flight checklist to secure your data.
Step 1: Physical External Backup
The most reliable safety net is a physical copy of your data. Connect an external hard drive or high-capacity USB stick.
- Open File Explorer.
- Manually copy your most critical folders—Documents, Pictures, Videos, and Desktop—to the external drive.
- Disconnect the drive before starting the update to prevent any accidental sync issues.
Step 2: Verify Cloud Sync
Ensure your OneDrive backup is active. This provides a secondary, off-site layer of protection.
- Look for the cloud icon in your taskbar (near the clock).
- Click it and ensure the status says “Up to date.”
- This ensures that even if your hard drive fails during the update, your files are accessible from any device.
Step 3: Create a System Image
For a complete safety net, you can create a snapshot of your entire environment.
- Go to Control Panel > System and Security > Backup and Restore (Windows 7).
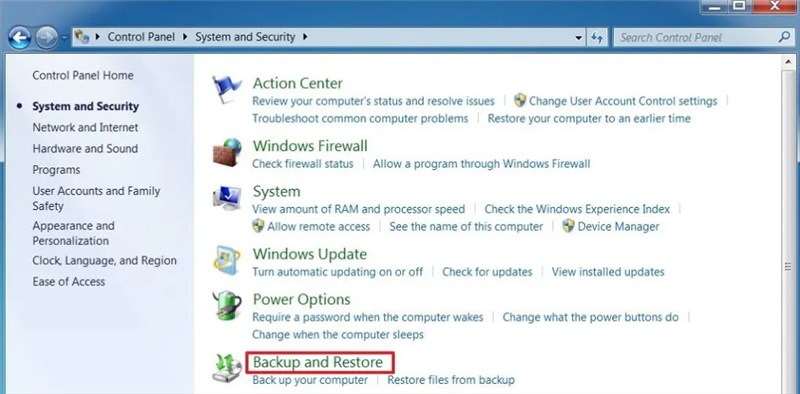
Don’t let the name confuse you. Even though it says “Windows 7,” Microsoft has kept this legacy name. It is the correct, fully functional tool for creating system images on Windows 10 and 11.)
- Select Create a system image.
- This captures installed programs and settings, allowing you to roll back completely if the upgrade to Windows 11 keep files promise holds true, but your specific applications break.
Why Files Might Disappear After the Update (And Where to Find Them)
You finished the update, logged in, and your heart sank: your Desktop is empty. Before you panic, understand that in 90% of cases, the files are not deleted. They are simply hidden or moved.
Expert analysis reveals that while the Windows 11 update does not delete files intentionally, the new OS often reorganizes how those files are displayed. Here are the two most common culprits for “missing” data.
1. OneDrive Folder Redirection
During the setup of Windows 11, the system often enables OneDrive backup by default. This changes the location of your standard library folders.
- Old Location: C:\Users\You\Documents
- New Location: C:\Users\You\OneDrive\Documents
If your documents seem missing, check the OneDrive folder in File Explorer. You will likely find your content safely stored there.
2. Temporary User Profile
Sometimes, if a glitch occurs during sign-in, Windows loads a temporary profile to allow the system to boot. You can identify this issue if:
- Your wallpaper has reverted to the default Windows image.
- Your taskbar layout is generic.
- A notification appears saying, “You are signed in with a temporary profile.”
The Solution: Restart your computer immediately. You may need to restart 3 or 4 times for the system to correct the profile association. Do not move files onto the desktop while in a temporary profile, as they will be wiped when you restart.
Troubleshooting: What to Do If Files Are Truly Missing
If checking OneDrive and restarting didn’t solve the issue, follow this step-by-step recovery path. Start with the simplest methods before moving to advanced tools.
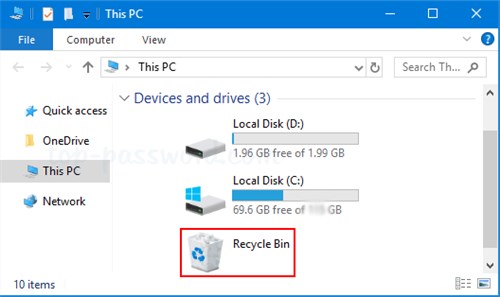
1. The Basic Search & Recycle Bin
It sounds obvious, but sometimes files are just dragged into the wrong folder by accident.
- Open the Recycle Bin on your desktop and check if your files are there.
- Open File Explorer and use the search bar in the top right corner. Type the name of a specific file you remember (e.g., “Budget 2024”).
- Click the “View” tab and make sure Hidden items is checked, just in case the files were marked as hidden during the migration.
2. Using Windows.old to Recover “Deleted” Files
When you perform an in-place upgrade, Windows creates a massive safety backup of your previous installation. This is stored in a folder named Windows.old. If standard troubleshooting does not locate your files, this folder is your best hope.
How to Access the Windows.old Folder:
- Open File Explorer and navigate to your C: drive (This PC > Local Disk (C:)).
- Look for the folder labeled Windows.old.
- Open it and navigate to Users > [Your User Name].
Here, you will often find your old Desktop, Documents, and Pictures folders intact. You can manually copy the files you need and paste them into your current Windows 11 libraries.
Important: The 10-Day Timer
This safety net is temporary. To save storage space (as this folder can be 20GB+), Windows automatically deletes the Windows.old folder 10 days after the upgrade. Once this period expires, retrieving these files becomes significantly more difficult. If you suspect data is missing, checking this folder must be your priority.
3. Advanced Search via Command Prompt
If Windows Search failed, the Command Prompt can sometimes find files that are not indexed properly. This looks technical, but it is essentially just a deeper, more direct way to search your hard drive.
- Open the Start menu, type cmd, right-click it, and select Run as Administrator.
- Type the following command exactly as shown below (replace filename.ext with the name of a missing file, like Budget.xlsx): dir /s /b C:\filename.ext
- Press Enter.
- If the file exists anywhere on the drive, this command will spit out its exact location path (e.g., C:\Users\Chris\Backup\Budget.xlsx).
4. Professional Recovery
If the files are not in the Recycle Bin, not in Windows.old, and not found via Command Prompt, they may have been deleted.
- Stop using the computer immediately. Continued use writes new data, which can overwrite the “ghosts” of your old files.
- At this stage, using professional data recovery software or consulting a data recovery specialist is the only viable method to attempt retrieval.
Windows 11 Data Safety FAQs
Q1. Does updating to Windows 11 delete my files?
No. A standard update initiated through Windows Settings is designed to preserve all your files, settings, and photos. However, you should always back up your data beforehand as a precaution against unexpected hardware failure.
Q2. What’s the difference between upgrading and clean installing Windows 11?
An upgrade moves your current data and apps to the new OS. A clean install erases the hard drive and installs a fresh copy of the operating system. Use an upgrade to keep your data; use a clean install if you want a completely fresh start and have backed up your files elsewhere.
Q3. Will upgrading to Windows 11 delete my apps and programs?
Generally, no. Most compatible apps will carry over seamlessly. However, some older software might be removed if it is incompatible with Windows 11. The setup wizard usually warns you about incompatible apps before the installation begins.
Q4. Can I recover files if they disappeared after the update?
Yes, in most cases. Files are often moved to the Windows.old folder or synced to OneDrive. Check C:\Windows.old\Users\ immediately, as this folder is automatically deleted after 10 days.
Q5. Is the Windows 11 upgrade safe for files?
Yes, the process is safe for files. Microsoft has refined the upgrade tool to be non-destructive. The vast majority of users experience no data loss, provided they do not select “Remove everything” during the setup process.
Conclusion
The fear that updating to Windows 11 deletes files is understandable, but for the vast majority of users, it is unfounded. By choosing the standard “In-Place Upgrade” method (via Windows Update or the Installation Assistant), you ensure that your documents, photos, and applications transition smoothly to the new operating system. The confusion usually stems from users accidentally selecting a “Clean Install” or panicking when files are temporarily moved to OneDrive or the Windows.old folder. If you’re mainly worried about missing media after the upgrade, you can restore deleted videos on PC by first checking Windows.old/OneDrive, then using reliable recovery methods if needed.
Don’t let anxiety leave you stuck on an outdated system. You now have the knowledge to distinguish between a safe upgrade and a destructive reset, and the tools to verify your backups before you begin. Take control of your device’s security and features today. Run your backup, check for that “Keep personal files” setting, and click “Update” with confidence.

Joy Taylor is a seasoned technical writer with over a decade of experience in mobile technology. At iMobie, she specializes in producing in-depth content on iOS data recovery, iPhone unlocking solutions, and iOS troubleshooting.
Product-related questions? Contact Our Support Team to Get Quick Solution >
