How to Delete Photos on Mac: The Complete Safe Guide (2026)
Deleting photos on a Mac isn’t always as simple as dragging them to the Trash, especially if you use the Photos app and iCloud syncing. This 2026 safe guide explains the correct ways to delete photos without losing the wrong files, freeing up storage the right way, and avoiding unexpected deletions across devices. You’ll also learn how to recover deleted photos if you change your mind.
The “Startup Disk Almost Full” notification often appears right when you are in the middle of a project or trying to save a large file. It creates instant anxiety. You check your storage settings and see that the Photos app is consuming dozens of gigabytes. The immediate instinct is to start hitting the delete button to clear space, but then you pause.
A critical question stops you: If I delete these pictures to clear space on my laptop, will they vanish from my iPhone too?
Facing a locked device when you need it most is frustrating, but making a mistake with your photo library can be heartbreaking. Many users feel stuck between a full hard drive and the risk of permanent data loss. This guide solves that specific dilemma. We will walk you through exactly how to delete photos on Mac safely, clarify the difference between the Photos app and Finder, and explain how to manage the tricky iCloud sync without losing your memories—plus what to do if you change your mind, including how to recover deleted photos after deletion.
Decision Guide: Should You Delete, Optimize, or Archive?
Before you begin removing images, you must determine your actual goal. Are you trying to destroy a photo because it is a bad shot permanently, or are you simply trying to reclaim disk space while keeping the image? This distinction is vital because the method you choose has drastic consequences for your iCloud library and other Apple devices.
Most users assume manual deletion is the only way to free up space, but macOS offers native tools that manage storage without data loss. Review the comparison below to choose the right strategy for your needs.
Photo Management Methods Compared
| Method | Space Saved | iCloud Impact | Risk Level |
| Permanent Deletion | High | Deletes from iPhone & iPad too | High (Irreversible) |
| Optimize Mac Storage | High (up to 90%) | Photos remain safe in iCloud | Low (Best for Space) |
| External Archiving | Maximum | None (if sync is off) | Medium (Manual effort) |
If your primary motivation is a full hard drive, Optimize Mac Storage is usually the superior choice over mass deletion. However, if your goal is to curate your library by removing bad shots or duplicates, manual deletion is the correct procedure. The following sections detail how to execute each method safely.
The Expert Solution: Use Optimize Storage Instead of Deleting
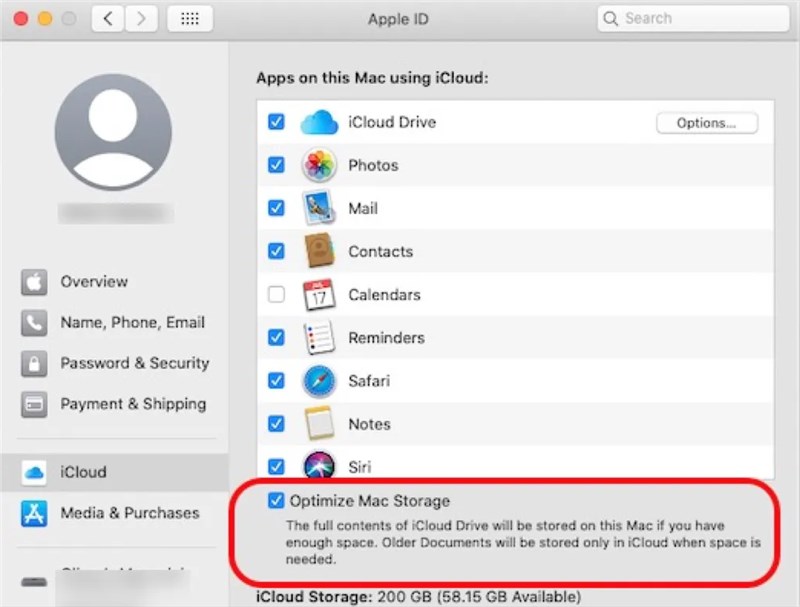
For most users, the realization that they don’t need to delete files to save space is a relief. If you want to keep your photos accessible but stop the storage warnings, the most effective solution is the “Optimize Mac Storage” feature.
When enabled, this feature fundamentally changes how your Mac handles image data. Your Mac keeps full-resolution photos in iCloud but replaces them on your hard drive with smaller, device-sized versions (thumbnails). These thumbnails take up a fraction of the space. When you open a photo to edit or share it, the Mac instantly downloads the full-quality version from the cloud.
How to Enable Optimize Mac Storage
1. Open the Photos app on Mac.
2. Click Photos in the menu bar and select Settings (or Preferences on older macOS versions).
3. Select the iCloud tab.
4. Check the box for iCloud Photos.
5. Select Optimize Mac Storage.
Once activated, macOS will automatically manage your library size. It acts dynamically; it will only offload full-resolution images when you are low on storage, ensuring you always have maximum free space without manually deleting a single memory.
How to Delete Multiple Photos on Mac (The Right Way)
If you have decided that specific images are unwanted—perhaps blurry shots, accidental screenshots, or irrelevant memes—you need to know how to delete multiple photos on Mac efficiently, because it is posiible to recover deleted photos moved to the Trash, and they aren’t truly erased yet.
Crucial Warning: Do Not Use Finder
Many users try to find their photos by clicking through folders in Finder, looking for JPEG files. Do not do this. Your Mac stores photos inside a complex package called the “Photos Library.” If you attempt to delete files directly from the Finder library package, you risk corrupting your entire database, making even the photos you wanted to keep unreadable. Always perform deletions inside the Photos app interface.
Step-by-Step Deletion Process
1. Launch the Photos App: Open your library where all your images are stored.
2. Select Your Photos:
- Single Photo: Click once on the image.
- Multiple Specific Photos: Hold down the Command (Cmd) key and click on each photo you want to remove.
- A Range of Photos: Click the first photo, hold Shift, and click the last photo in the sequence.
3. Execute the Deletion:
- Right-click (or Control-click) on any selected photo and choose Delete Photos.
- Alternatively, press the Delete key on your keyboard.
4. The Warning Popup:
- If iCloud is enabled, you will see a popup warning: “This photo will be deleted from iCloud Photos on all your devices.”
- This is your confirmation that the sync is working. If you proceed, the image is gone from your phone, too.
When you perform this action, the photos are moved to the “Recently Deleted” album. They are not immediately removed from your hard drive, meaning your storage count may not change instantly.
The Danger Zone: How to Delete Photos from Mac But Keep in iCloud
This is the most common source of confusion and anxiety. Users want to know: “How can I delete photos ONLY from my Mac to save space, but keep them safe on my iPhone and iCloud?”
To do this, you must break the sync connection. However, this method comes with significant risks and side effects that you must understand before proceeding.
Step 1: Disabling the Sync
1. Open Photos > Settings > iCloud.
2. Uncheck iCloud Photos.
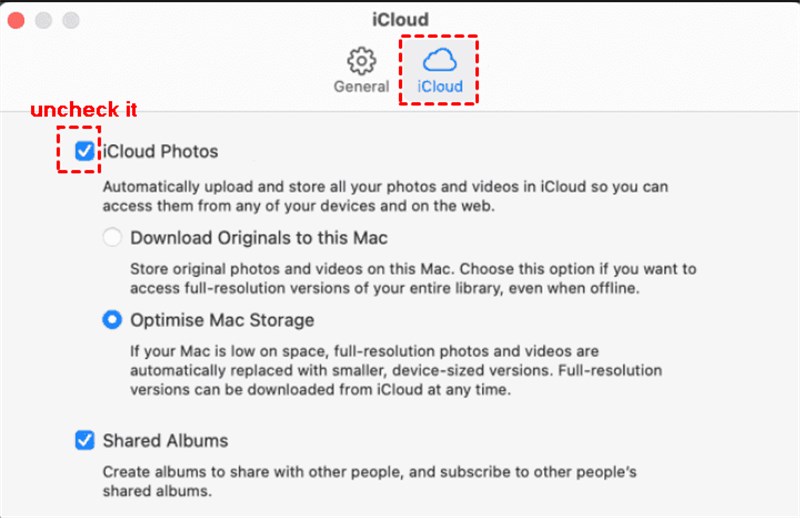
Step 2: Handling the System Warning (Critical Step)
As soon as you uncheck that box, macOS will present you with a popup menu asking what to do with the photos currently on your Mac. You will usually see options similar to:
- Download Originals to this Mac: If you choose this, your Mac will attempt to download every single photo from iCloud in full resolution. If your disk is already full, do not choose this. It will fill your storage completely and potentially freeze the machine.
- Remove from Mac: If you choose this, the photos that are synced with iCloud will be wiped from your computer. They remain safe in iCloud, but your Mac library will be empty (or significantly smaller).
Step 3: The Consequences
If you chose “Remove from Mac,” you have successfully cleared the space. However, your Mac is now disconnected from your digital life.
- No New Photos: Photos you take on your iPhone will no longer appear on your Mac.
- The Re-Syncing Trap: If you decide to turn iCloud Photos back ON in the future, the system will attempt to merge your libraries. This can result in duplicates, or in rare cases, if the system thinks the Mac’s “empty” state is the most recent change, it could confuse the sync logic.
Our Advice: For 90% of users, the “Optimize Mac Storage” method (discussed in the previous section) is safer and more convenient than disabling iCloud entirely. Only use this “Disable iCloud” method if you intend to keep your Mac completely offline regarding photos permanently.
How to Permanently Delete Photos on Mac (Recently Deleted)
A common point of frustration occurs when a user deletes hundreds of images but sees no increase in available disk space. This happens because macOS moves deleted items to a holding area rather than erasing them instantly, similar to how a permanently deleted email may still linger in a Trash or recoverable folder for a limited time. To clear the space immediately, you must know how to permanently delete photos on Mac via the “Recently Deleted” album.
Permanent deletion requires emptying the Recently Deleted album; otherwise, photos remain recoverable for up to 30 days. This safety mechanism is designed to help you recover accidental deletions, but it effectively holds your storage hostage until the timer runs out or you manually intervene.
Steps to Permanently Clear Storage
1. Locate the Album: In the Photos app sidebar, look for Recently Deleted. (You may need to use Touch ID or your password to unlock it).
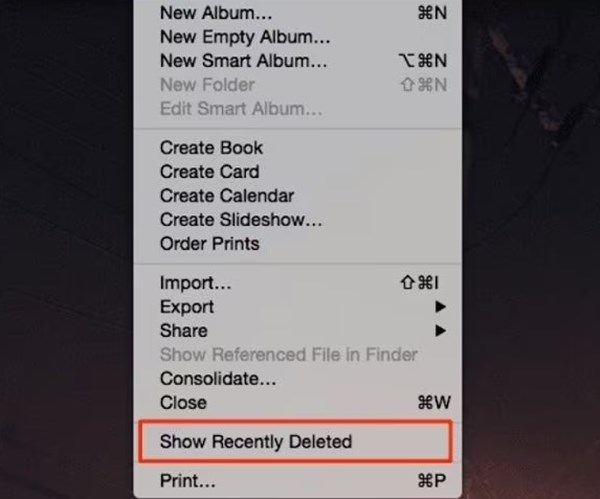
2. Review the Images: This is your final chance to recover any photos deleted by mistake. To restore, select the photo and click Recover.
3. Delete All: To purge everything and free up space immediately, click the Delete All button in the top right corner.
4. Final Confirmation: Confirm that you want to permanently delete photos on Mac. This action is irreversible.
Once this step is complete, the photo library storage is officially reclaimed by the operating system.
Bonus: How to Delete Duplicates in Photos Mac (Native Tool)
Finding and removing duplicate images was historically a tedious manual task. However, with the release of macOS Ventura and Sonoma, Apple integrated a powerful duplicate detection tool directly into the Photos app. This allows you to delete duplicates in photos mac quickly and safely.
This feature doesn’t just delete; it smart-merges. It combines the highest quality image with all relevant metadata (like captions, keywords, and favorites) from the duplicate copies into a single file, ensuring you lose no information while reducing clutter.
Using the Native Duplicates Tool
1. Open Duplicates Album: In the Photos sidebar, click on Duplicates. (Note: If you recently imported many photos, this album may take time to appear while your Mac indexes the library).
2. Review Matches: The app will display exact copies and highly similar photos side-by-side.
3. Merge Items: You can select individual sets and click Merge 2 Items, or select all items (Cmd+A) and click Merge [X] Items at the top right.
4. Confirm Merge: Select Merge [X] Exact Copies to finalize the process.
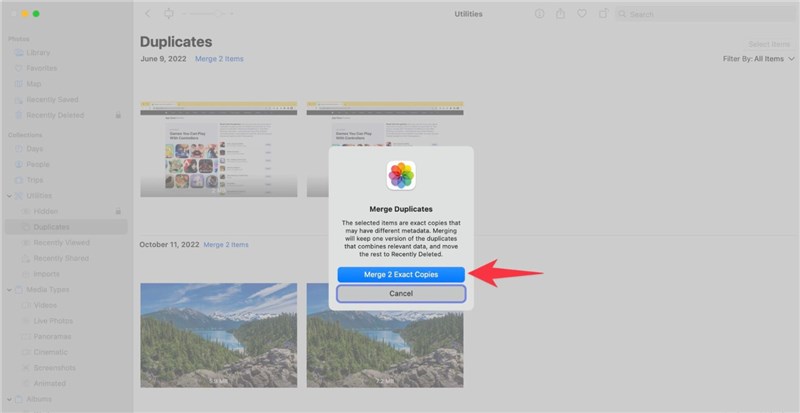
The redundant copies are moved to the Recently Deleted album, where they can be permanently removed to save space.
Frequently Asked Questions About Mac Photo Storage
Managing photo library storage can raise specific technical questions even after you know the basics. Here are answers to the most common queries regarding how to remove photos from mac libraries and manage iCloud behavior.
Q1. Why do deleted photos come back on Mac?
This usually happens because of a sync loop. If you disable iCloud, delete photos, and then re-enable iCloud, the server may treat the photos on the cloud as “missing” from your Mac and download them again. To prevent this, always delete the photo while iCloud is active (to delete it everywhere) or understand that re-enabling iCloud will likely merge your libraries back together.
Q2. How do I delete pictures on Mac if the delete key isn’t working?
If photos app delete not working mac is your issue, ensure you are not browsing a “Smart Album” or a “Shared Album.” You generally cannot delete photos directly from a Smart Album (you must delete them from the main Library). Similarly, you cannot delete photos from a Shared Album if you were not the person who posted them.
Q3. Can I recover photos after emptying the Recently Deleted folder?
Generally, no. Once the Recently Deleted album is emptied, the file pointers are removed. While expensive professional data recovery services might retrieve fragments, you should consider these photos permanently gone. Always check your backups (like Time Machine) before performing a permanent delete.
Q4. What happens if I delete the Photos Library file in Finder?
Deleting the Photos Library.photoslibrary file in your Pictures folder will delete every single photo on your Mac. If iCloud Photos was enabled, those photos should theoretically remain in iCloud, but your Mac will lose all local access, albums, and facial recognition data. Do not do this unless you have verified your photos are safe on iCloud website or another backup.
Conclusion
Reclaiming your storage space shouldn’t require you to sacrifice your digital history or live in fear of the delete key. By now, you should understand that the solution to a full hard drive isn’t always to destroy your photos, but to manage how they are stored—and keep a fallback option like recovery software for Mac in mind if something is removed by mistake.
Whether you choose to enable “Optimize Mac Storage” to keep your thumbnails accessible or perform a manual cleanup of duplicates, you are now in control of your device’s capacity. We strongly recommend starting with the Optimize Storage feature and the Duplicates album. These two tools alone can often free up the gigabytes you need without the risks associated with disabling iCloud sync. Take ten minutes today to review your settings—your startup disk (and your peace of mind) will thank you.

Joy Taylor is a seasoned technical writer with over a decade of experience in mobile technology. At iMobie, she specializes in producing in-depth content on iOS data recovery, iPhone unlocking solutions, and iOS troubleshooting.
Product-related questions? Contact Our Support Team to Get Quick Solution >
