Causes & Fixes for OBS Not Recording Audio Issue
This post is explaining why OBS not recording audio and introducing 7 proven solutions to enable the audio recording in OBS Studio as normal.
OBS Studio, as one of the most popular software for video recording and live streaming, has gained an increasing number of users around the world. Unfortunately, some users discuss that OBS not recording audio such as game audio, mic audio or desktop audio, which frustrates the users a lot.
“It doesn’t record my mic or my video sound (but I do see the soundbars going up and down visually). I’ve checked all of the above things and all seem fine according to the suggestions”. A forum user said.
Take it easy, here we are explaining the causes of OBS mic audio recording failure and introducing 7 tested methods to fix the OBS audio recording issue.
You May Also Like: Top 11 Mac Video Recording Software
Causes of OBS Not Recording Audio
The OBS not recording audio issue varies on different devices. Based on several users’ feedback, the common causes for this audio issue are shown in the following:
- Wrong OBS audio settings.
- Outdated sound drivers on PC.
- Outdated OBS version.
- Incompatible with other programs on audio recording.
Having known these possible reasons, you can try the following solutions to get OBS live audio to work.
7 Methods to Fix OBS Not Recording Audio
Method 1. Update OBS Studio.
Sometimes, the functions of the old software may be influenced after a new version is available, just as the case with OBS not recording desktop audio. Go to your OBS dashboard and select Help > Check For Updates. Then update to the latest OBS version and check if the audio recording is back to normal.
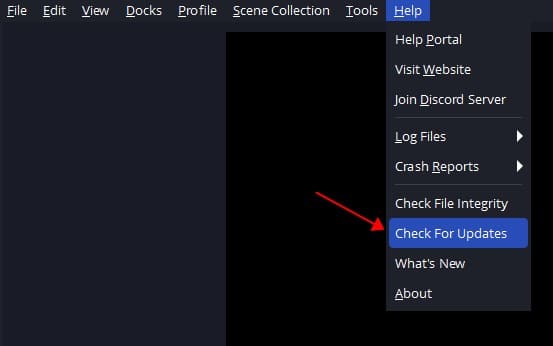
OBS Check for Updates
Or you can go to OBS Studio’s official website and download the latest version accordingly.
Method 2. Check OBS Audio Settings
If the audio recording failure is caused by the wrong OBS settings, then you should check all related settings and make it run correctly. Sometimes, your OBS fails to record audio due to the disabled audio settings without notice. Follow the steps and ensure your OBS audio settings are just perfect for recording games.
Step 1. Open OBS Studio and go to settings.
Step 2. Select Audio and make sure all audio types are set as Default rather than Disabled, including Desktop audio and Mic/Auxiliary audio. By switching all devices to default, the audio will be recorded correctly in OBS.
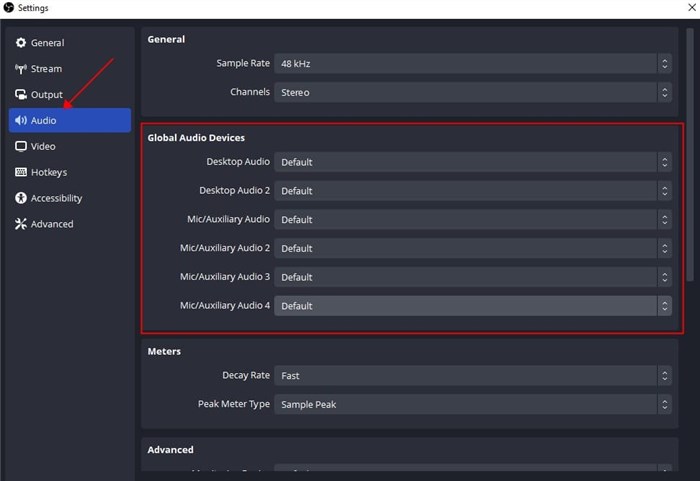
OBS Audio Recording Settings
Step 3. Apply the settings.
Step 4. Restart OBS.
Method 3. Verify OBS Audio Track Settings
Improper output settings can also cause OBS not recording audio. To set proper output settings in OBS, you can refer to the following:
Step 1. Open OBS Studio and go to settings and select Output.
Step 1. Find out Audio Bitrate and set it as 128, type 3500 kbps in the Video Bitrate box.
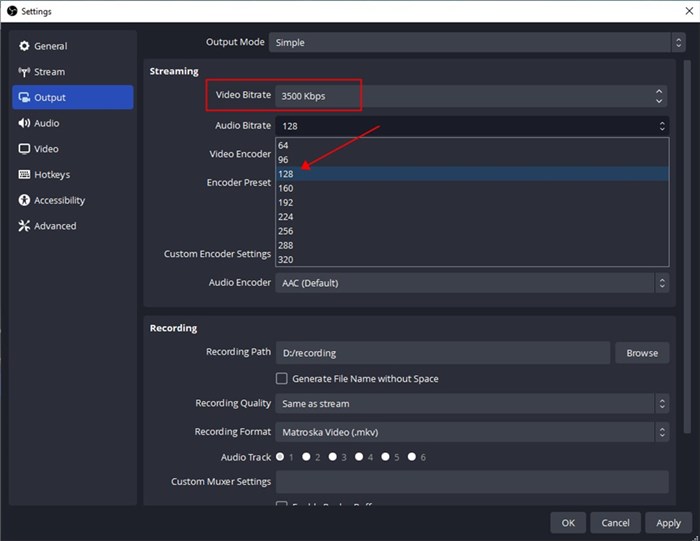
OBS Output Settings
Step 2. Scroll down to Recordings and check if the audio track is correct.
Step 3. Apply the settings and restart OBS.
To make sure the setting changes are workable, you’d better run a recording test after restarting OBS Studio.
Method 4. End Unnecessary Processes
Multiple processes running in the backstage will also cause conflicts in some cases. If OBS is conflicted with another recording or sound program, it may not work. Stop any of the other programs, especially recording ones, give OBS the privilege of recording game audio without incompatibility.
Method 5. Update the Audio Driver
The outdated audio driver can not only influence the recording function of OBS but also some other recording programs. To solve OBS not recording mic audio with the outdated driver, you can simply check and update the audio driver with a few steps.
Step 1. Open Device Manager, and unfold “Sound, video and game controllers”;
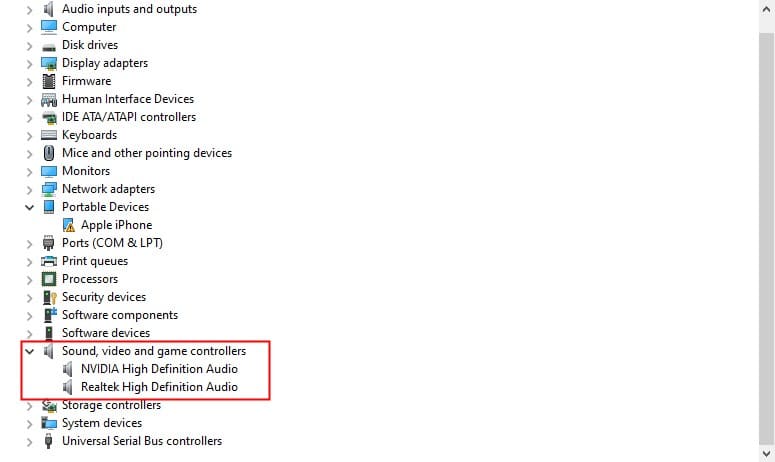
Device Manager Sound Driver
Step 2. Right-click the audio driver and update;
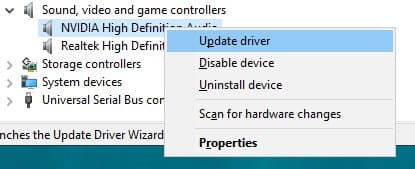
Sound Driver Update
Step 3. Click search automatically for drivers.
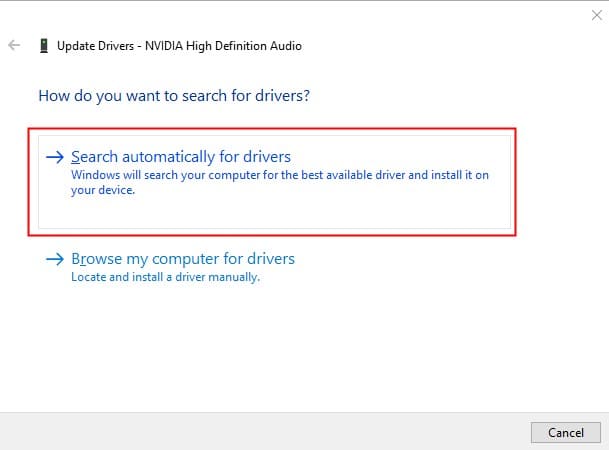
Search Automatically for Drivers
Wait for the updating process and restart your computer.
Method 6. Reinstall OBS Desktop
Some users may notice that there is no updates for OBS Studio or the audio drivers. If this is the case, you can try reinstalling OBS and solve the audio recording issue. Simply uninstall OBS studio with the systematic way or use a third-party uninstaller to remove it first, then visit the OBS site to download and install the latest version.
Method 7. Record with the Best Free Screen Recorder
The worst thing is that all methods above don’t really solve the OBS not recording audio issue, but you are urgent for recording a fantastic live streaming or gameplay. Be bright! The best OBS alternative software Screenify is handy to use. No more settings, no audio recording failure and 100% efficient.
Screenify is born for recording audio on PC and Mac. To make things easier, it has divided the important functions into parts so that a greenhand can even record high-quality clips! The main features of Screenify are quickly scanned as:
- Record screen, webcam, and microphone with high quality.
- No time limit, and no watermark on the recordings.
- Customize the recording screen on your computer.
- Exclusive audio setting to ensure smooth audio recording.
- Totally free for you to use.
According to the OBS not recording audio issue, you can choose your preferred way to record gameplay or live streaming. Free download Screenify and start a wonderful recording journey!
Free Download * 100% Clean & Safe
Step 1. Download and Install Screenify on Computer.
Step 2. Launch Screenify on your computer, and select Record screen mode.
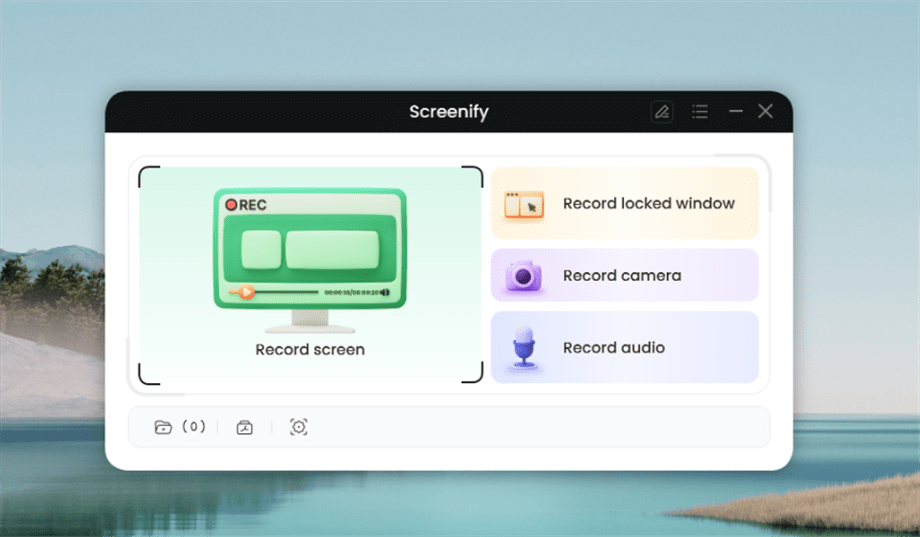
Select Record Screen Mode
Step 3. Configure Recording Settings aims to configure settings like system audio before recording.
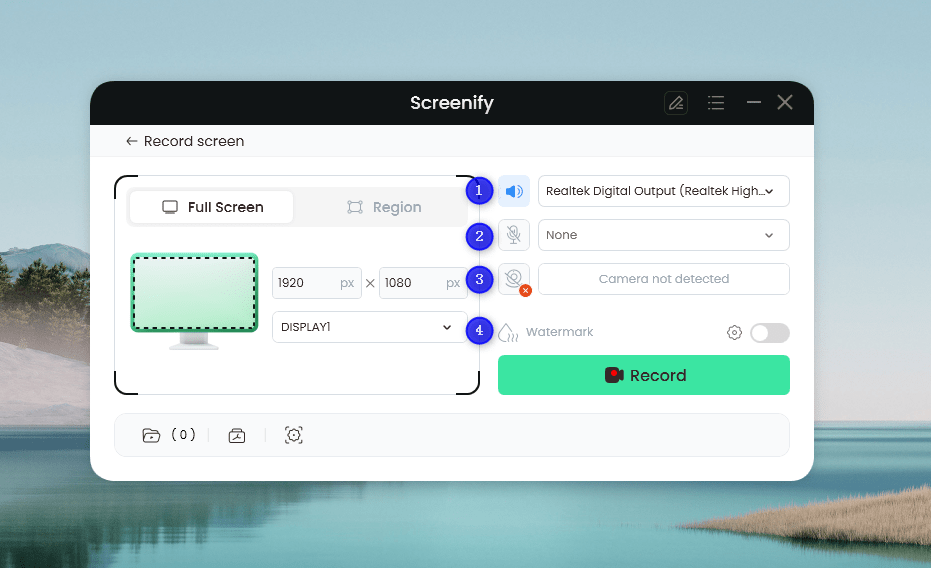
Set Configure Recording Settings
In this setting menu, you can:
1 Choose the System audio.
2 Choose the Microphone you want to record.
3 Choose the Camera you want to use.
4 Choose whether to add a watermark.
Step 4. Select Recording Screen.
Option 1. Full Screen Record
Please select Full Screen mode and choose the display you need to record. Hit Record button to initiate recording.
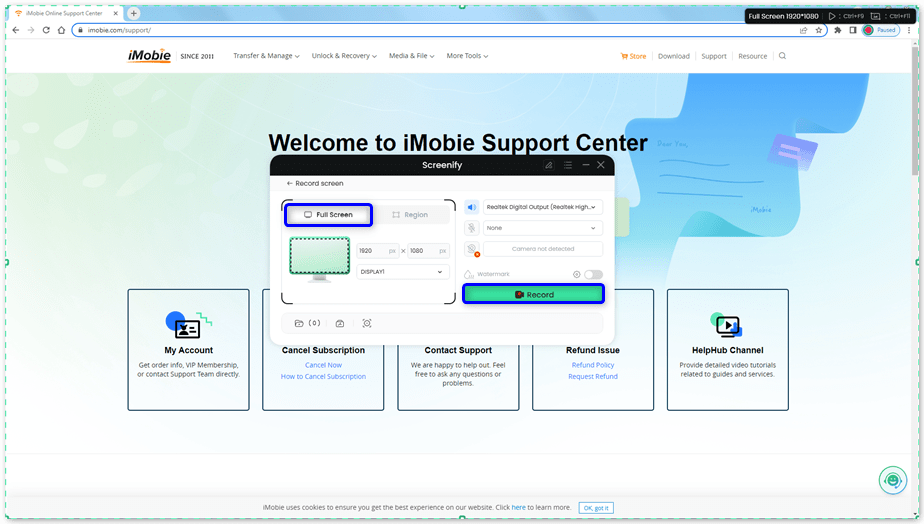
Select Full Screen
Option 2. Region Record
To record region, you need to manually select the recording area. After selection, you can still adjust the selected area. It supports customize selection, full screen, and proportional selection based on common social media dimensions.
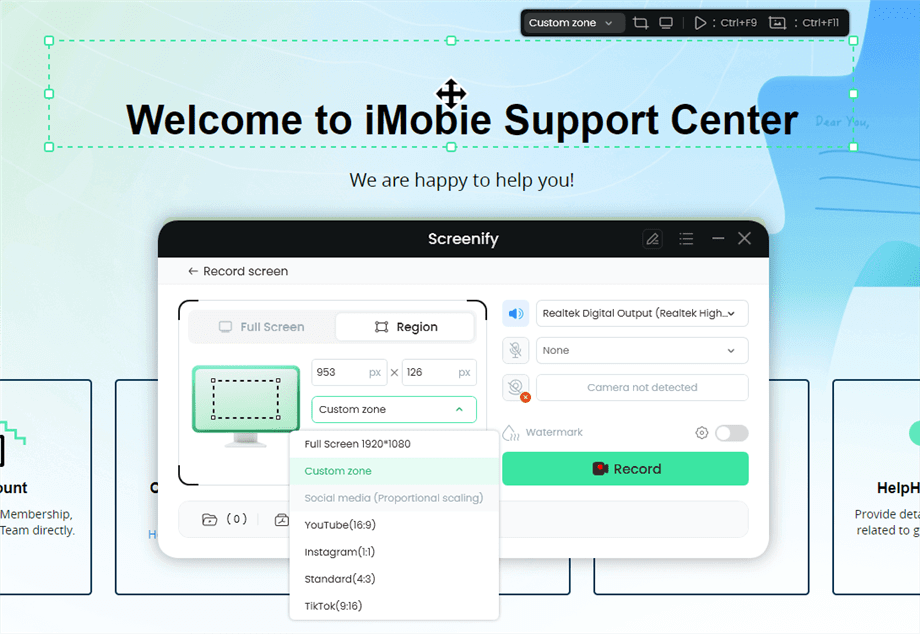
Record Region
Step 5. Wait for the Recording Countdown.
There is a 3-second countdown to help you prepare the recording after you are ready to start recording.
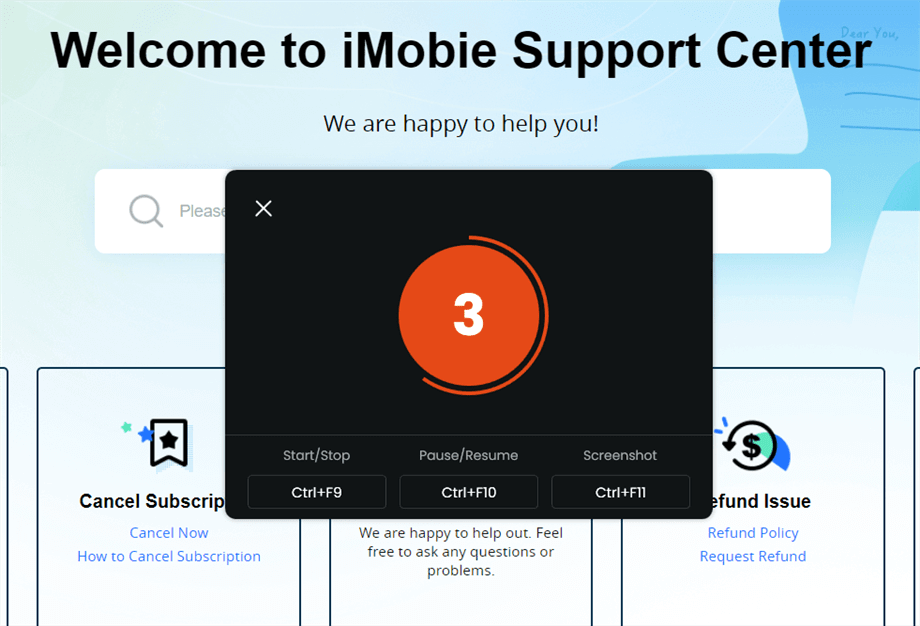
Wait for the Recording Countdown
If you would like to see a recording countdown before your recording starts, you can enable the countdown option. Or you can tap it off. View this post to know how to set the countdown option.
Step 6. Start Recording.
The recording will begin after a 3-second countdown. You can make annotations on the recording interface during the recording.
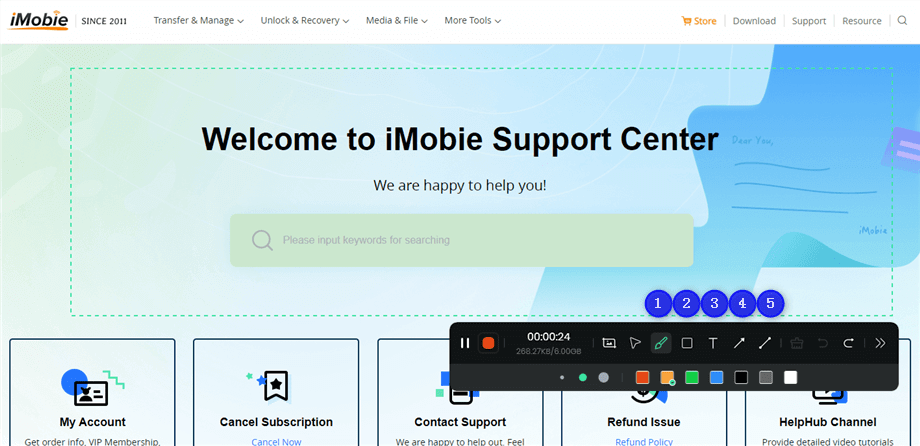
Annotate the Screen during Recording
With the toolbar, you can add the annotation in the screen:
1 Brush: Draw freehand on the screen recording interface to highlight or illustrate specific areas during the recording.
2 Rectangle: Draw rectangular shapes on the screen recording interface.
3 Text: Add written notes or labels directly onto the screen recording interface.
4 Arrow: Draw arrows on the screen recording interface to point out and emphasize specific areas.
5 Line: Draw straight lines on the screen recording interface to underline or connect specific points.
Step 7. Record Screen Process Completed.
When the recording is completed, you can click the red Stop button to end the recording. Your recorded files will be displayed. From here, you can preview and manage the recorded content as needed.
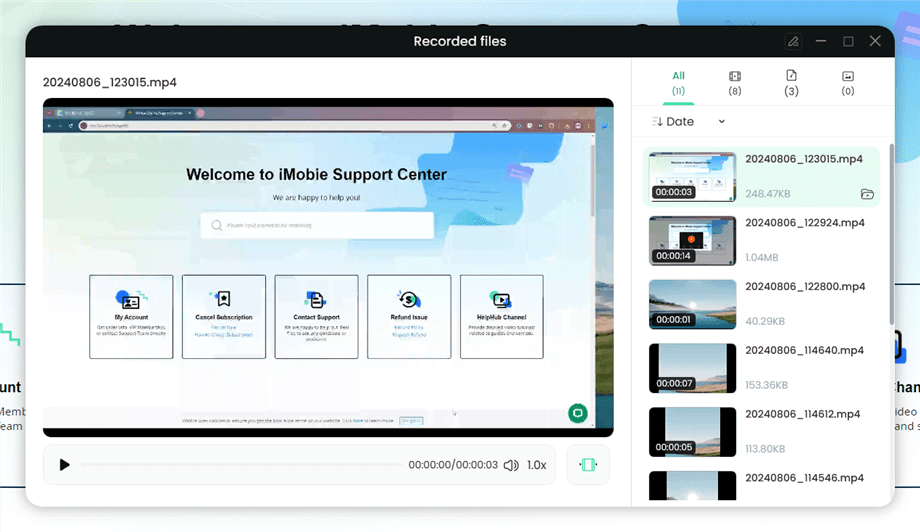
Preview the Recording
You may also want to know: How to screen record protected videos
The Bottom Line
In a word, the OBS not recording audio issue is annoying but can be solved with some settings or changes. Among all the solutions to OBS’s record mic audio problem, Screenify is strongly recommended to try as an alternative to OBS Studio. It’s a must-have tool for gamers to record Discord in easy steps. Download now and start your wonderful recording!
Free Download * 100% Clean & Safe

Senior writer of the iMobie team as well as an Apple fan, love to help more users solve various types of iOS & Android-related issues.
Product-related questions? Contact Our Support Team to Get Quick Solution >
