How to Transfer Files from Android to PC using USB Cable
Moving your Android files to a PC is a safe way to store and protect them from the potential risks associated with mobile devices. There are several ways to do that, but we will look at the best 4 ways here in this post.

DroidKit – Android Files Transfer to PC
Easily to transfer Android files to PC with a USB cable, whether you want to transfer the entire phone data at once or transfer Android files in different categories.
Android file transfer comes in handy, especially when you need to expand space on the corresponding device, or create an external storage media to keep your files safe offline. However, the process involved can be quite challenging if you don’t have the experience.
For this reason, we’ve decided to create a guide to help you out. This article will focus on how to transfer Android files to a PC via a USB cord. Read on to discover the various ways to migrate files from Android to PC.
Table of ContentsHide
How to Transfer Files from Android to PC with USB by DroidKit
A simple yet effective way to migrate or transfer files from an Android device to PC is via USB cable requires the use of a professional data transfer software. There are lots of software that supports this feature, but our best pick is DroidKit – a multipurpose data transfer tool designed for both novices and experts to move files between Android and PC without hassles.
DroidKit – Transfer Android Files to PC in 1 click
- Choose to move the whole Android phone data or move them in categories.
- Support to move over 13+ Android files, including photos, videos, music, and several others.
- Only need to click buttons. No root requirement. As simple as possible.
- Android 6-13 is supported.
Free Download
for all windows & 100% safe
Free Download
for all mac & 100% safe
Free Download 100% Clean & Safe
Step 1. Free download DroidKit on your computer > Click on Data Manager.
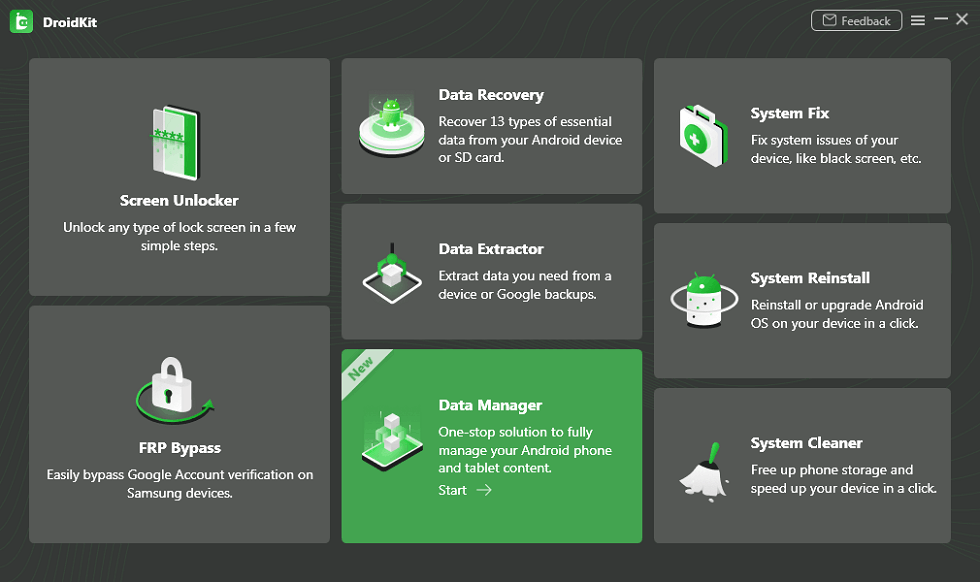
Choose Data Manager
Step 2. Connect your Android phone to the computer via a USB cable > Choose any data category you’d like to transfer.
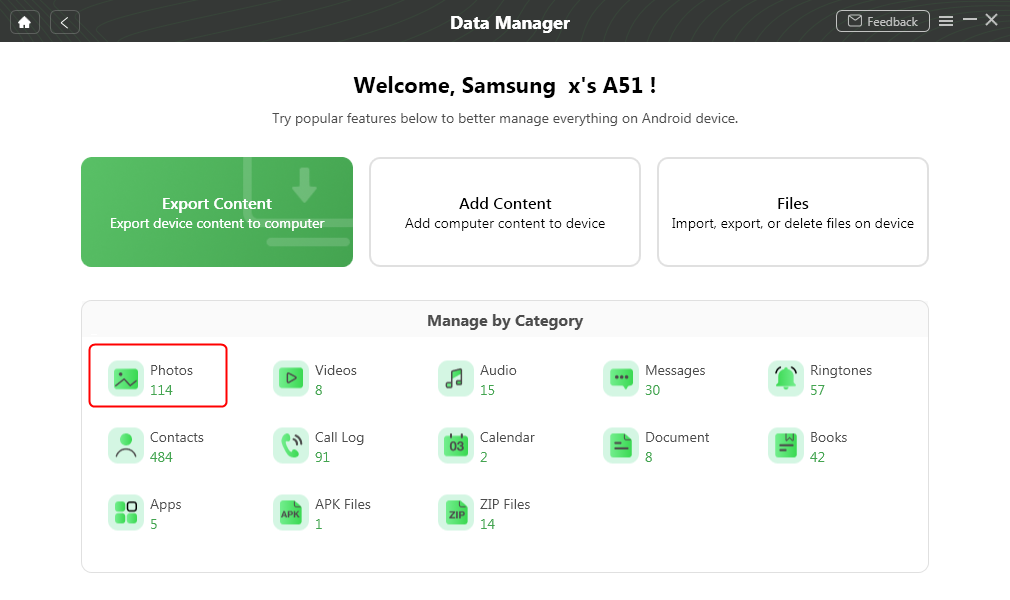
Select Photos to Manage
Step 3. Select the photos you want to transfer and select all photos at once > Click on the To PC button on the top right corner to transfer photos from your Android phone to your computer now.
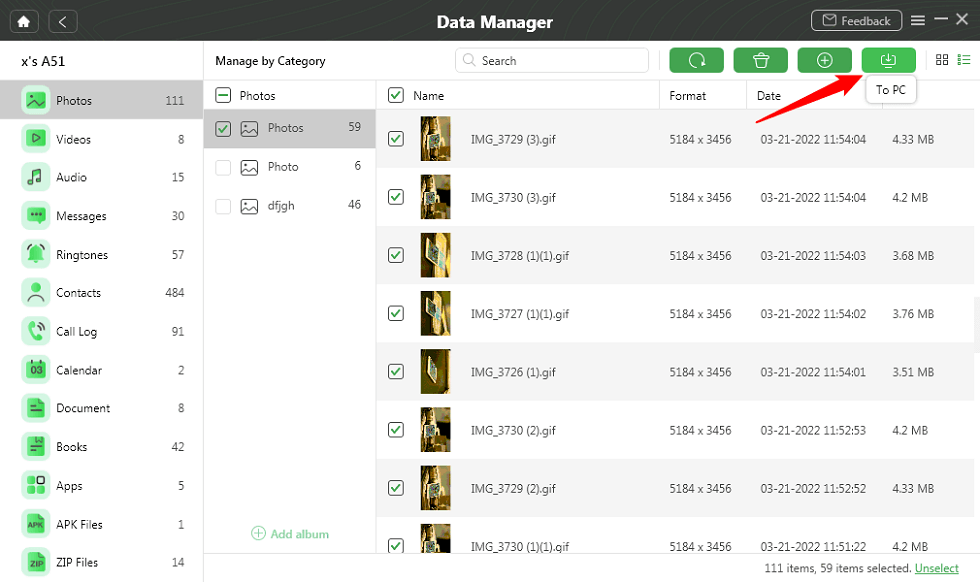
Transfer Photos to PC
Transfer Files from Android to PC using USB Cable for Free
Although the first approach introduced in this article is the ultimate technique available for you to transfer data from Android to PC, we also have other procedures you can apply, which will be shared in this section. Mind you, you may or may not require software to use this procedure. But ensure your USB cable, Android device, plus computer are available.
Check, and apply the appropriate steps for the computer operating system you own.
How to Transfer Android File To PC
For Windows PC owners, follow the instructions below to transfer Android data to PC with USB cable.
Step 1: Boot your computer, and get ready the appropriate chord to connect your Android to it. Once the computer comes up, proceed to fix the cord to the right ports (the small USB connector is for your phone, while the larger one is for your computer).
Step 2: Once done, you have to choose what the USB connection is for. Kindly select Transfer Files as your preferred connection option.
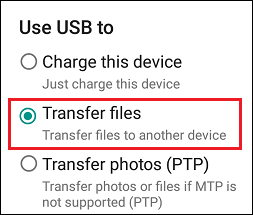
Select Transfer Files on the Phone
Step 3: Next, head to the lower left corner of your screen, and click on the Quick Start icon on your computer.
Step 4: Enter This PC in the search bar (for some PC, it’s My Computer), and click on the corresponding icon.
Step 5: Once done, your Android device will appear underneath the Devices and drives section. Click on your Android name to proceed (in this case, our Android is).
Step 6: When the next screen appears, drag and drop the file you want to transfer in your desired folder. Better yet, you can use the hotkeys Ctrl + C to copy the files, and paste to your preferred destination path by holding Ctrl + V.
How to Transfer Android File To Mac
If you use a macOS device, the approach to transfer Android files is different. You need an Android Transfer tool to accomplish this. Here’s the simple instructions you need to follow to move files to Mac from Android.
Step 1: Install Android Transfer Tool from the official website. Run the software after the successful installation, then connect the Android phone to your Mac computer using the appropriate USB cable.
Step 2: Select File Transfer as your preferred USB preference when the prompt comes up.
Step 3: Once done, a new screen showing all transferable files will come up. Select the files you want to move to macOS, and paste to a destination folder.
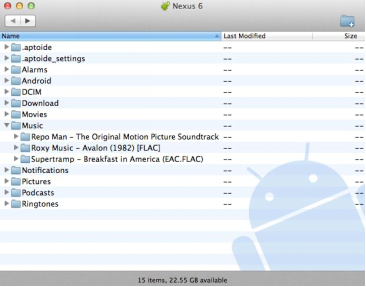
Transfer Files from Android to Mac
Step 4: Wait for the transfer to complete, then disconnect the phone from macOS.
How to Transfer Android File To Chromebook
Like macOS and Windows, Chromebook is capable of transferring Android files via USB. The approach is simple, so you don’t need so much effort to execute it. Follow the step-by-step instructions below to move Android files to Chromebook via USB:
Step 1: Connect your Android device to Chromebook via a lightning cord, and select File Transfer as your desired USB Preference when the prompt appears on your phone.
Step 2: Next, the File Transfer app will immediately pop up on your Chromebook computer system. Kindly use the drag-and-drop option to move your Android files.
Step 3: Wait for the transfer to finish then disconnect the phone from the Chromebook computer system.
How to Transfer files from Android to PC with Windows File Explorer
Via the Windows File Explorer app page, you can also transfer Android files to your PC. This approach lets you transfer data in bits. Should you use it for large data-size files, you may have to wait several hours of days for the transfer to complete. Another dark side of using this method is the support for limited data types, such as photos, videos and audio.
If you still wish to proceed with transferring your Android files to PC via Windows Files Explorer, follow the step-by-step guide below.
Step 1: Start your computer system, connect your Android phone to it using a USB cable. A prompt requesting you to choose USB Preference will come up on your phone screen. Kindly select Transfer Files to proceed.
Step 2: Next, navigate to the Windows File Explorer panel on your computer system and select your phone from the options appearing on the left sidebar. Browse through the files stored on your phone, then select the ones you want to move to your computer.
Step 3: Now right-click and select Copy. Alternatively, you can click on the Copy To icon at the top of the page. Once done, paste the copied files to your desired destination folder.
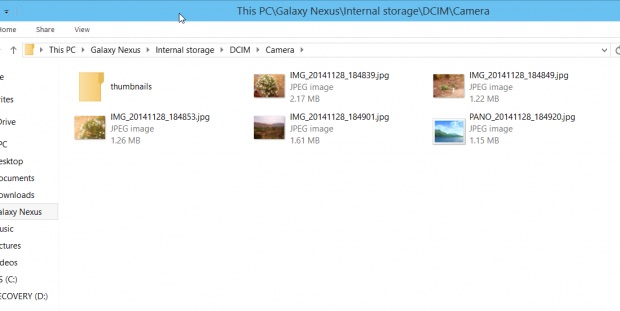
How to Download Photos from Android to PC via File Explorer
How to Transfer Android Files to PC without USB
For folks who don’t have a USB cord at their disposal, you can also transfer Android files to PC. There are different ways to do this, via Bluetooth, or Google Drive. We will look at the procedure for Google Drive here.
Step 1: On the Android device, launch the Google Drive app, and follow the steps given below to transfer files to your PC.
Step 1: When Google Drive opens, click on the + and click Upload to import your Android files. Select the files you will like to migrate to your PC, and wait a while for the upload to complete.

Add New Items to Google Drive
Step 2: Next, head to drive.google.com on your PC, and login the same Google account you have on your Android device.
Step 3: Browse through the files you imported, then click on the appropriate keys to download.
Downloads can take a while to complete depending on your network speed. So we advise that you keep patient until the download is completed before disconnecting from the internet.
FAQs
Where is USB settings on Android?
On your Android device, you can always manipulate the USB settings to either transfer files, or any related services. There are two ways to do this. Check apply the steps below:
From Status Bar
- When you connect your Android phone to PC, swipe down your screen to access the status bar.
- Tap on the USB Preference notification bar, and the page below will come up:
- Choose which device you want to control the USB cable.
- Once done, go down and select what the USB is used for.
From Settings
- Tap on the gear icon to open the Settings pane on your Android phone.
- Scroll down and select System > Developer Settings. If you don’t have developer settings icon you can click on the Build Number icon seven times.
- When the developer settings page opens, find the USB Debugging button and set it up.
Where is File Transfer or MTP mode on Android?
Most Android devices select the charge only mode when connected to a PC. If you wish to transfer data or communicate with your computer via a USB cable, you need to enable MTP, also known as Media Transfer Protocol. To do this, follow the steps below:
- Kindly swipe down your Android screen after connecting it to a computer.
- Click on the notification bar icon titled Tap for more USB options.
- Next, a new screen requesting you to choose your desired connection mode will appear. Tap on MTP (on some Android devices, it’s labeled File Transfer).
- Wait for your device to reconnect to the selected option, then carry out any action you need to.
Final Words
Transferring files from Android to PC via a USB cable is pretty easy with our guide. We introduced four (4) simple ways to transfer data from your Android phone to Windows, Mac, or Chromebook. Our best option involves the use of DroidKit. The software moves Android files to PC at a remarkably high speed with zero data loss incurred. DroidKit is worth trying!
Product-related questions? Contact Our Support Team to Get Quick Solution >
