How to Remove a Previously Synced Google Account After Factory Reset
If Android asks for a previously synced Google account after a factory reset, the immediate problem is Google verification—not simply deleting an account from Settings. First identify whether the account is yours, belongs to a previous owner, or can no longer be recovered. Then use the appropriate recovery, support, device-specific, or FRP route instead of repeating another factory reset.
If your Android phone asks for a previously synced Google account after a factory reset, you cannot simply delete that old account from Settings yet. The phone is still at the Google verification stage, so the first task is to identify which account it wants and whether that account can still be recovered.
There are three common situations. The account may be yours but you forgot the password, it may belong to the previous owner of a second-hand phone, or the original account may no longer be recoverable even though you own the device. Each situation has a different next step.
Another factory reset does not solve that distinction. Before trying keyboard, TalkBack, APK, or PC-based FRP routes, work out whether this is primarily an account-recovery problem, a previous-owner problem, or a device-specific FRP problem.
If your issue is broader than the previously synced account itself, use the Google account verification after reset guide. This page stays focused on what the previous Google account means and what to do with that account.
Table of ContentsHide
Previously Synced Google Account After Reset: What Should You Do?
What Does “Previously Synced Google Account” Mean?
Which Account Situation Are You In?
Recover the Previously Synced Google Account First
If the Google Account Belongs to the Previous Owner
Can You Get Past Google Verification Without a PC?
Google Keyboard Route: Does the Old Settings Path Still Exist?
TalkBack Route: Which Checkpoints Must Still Be Available?
Use a Device-Specific FRP Guide When the Generic Route Stops
When a Guided PC FRP Workflow Makes Sense
Manufacturer Support and Proof of Ownership
Remove Your Google Account Before the Next Factory Reset
Previously Synced Google Account FAQ
Resolve the Account Problem Before Trying Another Reset
Previously Synced Google Account After Reset: What Should You Do?
Start with the account situation, not with a bypass method. The screen is asking for an account that Android associates with the device from before the reset.
| Your Situation | What It Means | Best First Step |
| You know the previous Google account and password | The requested account is still accessible. | Sign in with that account and complete setup normally. |
| The account is yours but you forgot the password | This is primarily an account-recovery problem. | Recover the Google account before trying FRP shortcuts. |
| You do not remember which Google account was on the phone | You first need to identify the account associated with the device. | Check your Google accounts, recovery information, old receipts, email records, and other devices you own. |
| The phone was purchased second-hand | The requested account may belong to the seller or previous owner. | Ask that person to remove the account or help complete verification. |
| You recently changed the Google password | Account access and the reset-device verification flow may not be synchronized immediately. | Complete account recovery and follow any waiting or verification instructions Google presents. |
| Older keyboard, TalkBack, or browser instructions do not match your phone | The manual route does not match the current setup environment. | Stop that route and use a device/version-specific guide. |
| The account cannot be recovered and you own the phone | You need another authorized recovery path. | Compare manufacturer support or a compatible FRP workflow. |
What Does “Previously Synced Google Account” Mean?
After a factory reset, Android may ask you to verify the phone with a Google account that was previously used on the device. This is part of Factory Reset Protection (FRP). The phone is not asking you to create a new account first; it is asking for evidence that the reset device is still being set up by an authorized user.
This is why the phrase remove previously synced Google account can be confusing. While the phone is still on the verification screen, you normally cannot open Android Settings and simply remove that old account. You first have to resolve the verification requirement and regain normal access to the device.
After setup is complete, you can manage Google accounts from Android Settings and remove an account before a future reset.
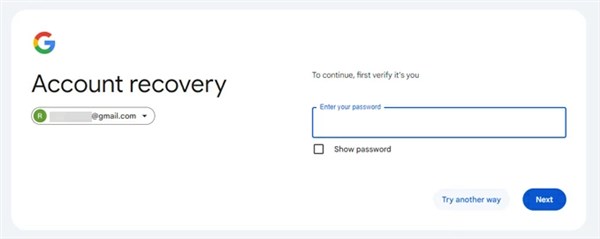
The verification screen may require the Google account associated with the device before the reset.
Which Account Situation Are You In?
The distinction below prevents two common mistakes: trying FRP software when the Google account can still be recovered, or repeatedly resetting a second-hand phone whose real problem is the previous owner’s account.
| Account Situation | Route to Prioritize | Do Not Start With |
| The account is yours and accessible | Normal Google sign-in | APK files, TalkBack tricks, or FRP software |
| The account is yours but the password is forgotten | Google account recovery | Creating another Google account and hoping it replaces the old one |
| The account belongs to the seller | Previous-owner removal or seller assistance | Repeated factory resets |
| The account cannot be recovered but ownership is clear | Device-specific support or compatible FRP route | Random guides for another brand or Android version |
| The setup method stops at a missing menu | Diagnose the missing checkpoint | Repeating earlier steps indefinitely |
Recover the Previously Synced Google Account First
If the requested Google account belongs to you, account recovery is the most direct route because it addresses the credential the phone is actually requesting.
Step 1. Identify the Google email address previously used on the Android device.
Step 2. On another phone or computer, use Google’s account-recovery process and complete the verification options available to you.
Step 3. Create or confirm a password you can use to sign in.
Step 4. If Google presents a waiting period or another verification requirement after a recent account change, follow the instructions shown for that account.
Step 5. Return to the reset Android phone and enter the recovered account when the Google verification screen requests it.
Step 6. After setup succeeds, review the Google accounts attached to the phone and update your recovery email, phone number, and password information if needed.
The important point is that recovering the account and removing an account are different operations. Recovery gets you through the verification stage; account removal can happen later when Android Settings is accessible again.
If the Google Account Belongs to the Previous Owner
A second-hand Android phone can reach the same verification screen even though you never used the Google account it is requesting. In that case, the problem is not that you forgot your own password—the device is still associated with the previous owner’s setup.
Step 1. Contact the seller or previous owner and explain that the phone still requests their previously synced Google account.
Step 2. Ask them to help remove their account association or complete the verification process as appropriate for the device.
Step 3. When possible, have the seller confirm that the device can complete setup before the transaction is considered finished.
Step 4. After you regain normal access, remove accounts that should no longer remain on the device and add your own Google account.
Step 5. Before any future factory reset, remove accounts while the device is still unlocked and accessible.
Second-hand phone checkpoint: Another reset does not prove ownership or make the seller’s account irrelevant. Resolve the previous-owner account situation before spending time on unrelated FRP files or tools.
Can You Get Past Google Verification Without a PC?
Older no-PC FRP guides usually depend on temporary access from the setup wizard into another part of Android. The route may involve a keyboard settings screen, accessibility features, a help page, browser access, a share menu, or another setup shortcut.
The useful question is not whether a guide is labeled “without PC.” Check whether its required entry point still exists on your exact phone.
| No-PC Route | What Must Still Be Available | Stop If |
| Google Keyboard route | Keyboard Settings, Help & Feedback, and the next setup path | Any required menu is missing or opens a different interface. |
| TalkBack / accessibility route | The accessibility shortcut and the next action required by the exact device guide | The gesture, menu, search, or Settings path no longer matches. |
| Browser-based route | A browser or web action that can actually open during setup | The setup wizard blocks external browser access. |
| APK route | Browser/file access, package installation, and the required Settings path | The APK cannot install or does not reach the required screen. |
If one of these checkpoints is missing, treat it as a method mismatch. Do not assume that enabling an unrelated developer or bootloader setting will automatically remove Google verification.
Google Keyboard Route: Does the Old Settings Path Still Exist?
Some older FRP tutorials use the keyboard on the verification screen as an entry point into Keyboard Settings, Help & Feedback, search, or Android Settings. This section keeps that search intent while treating the route as a compatibility check rather than a universal bypass process.
Checkpoint 1. Tap the account field and check whether the keyboard used by the old tutorial appears.
Checkpoint 2. Check whether the keyboard exposes the Settings option required by that guide.
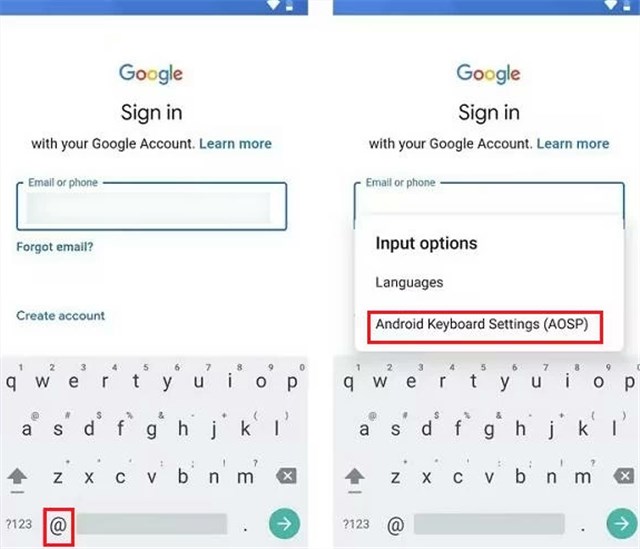
Older keyboard-based routes depend on Settings options that may not exist on every Android setup screen.
Checkpoint 3. If Keyboard Settings opens, check whether Help & Feedback or the next screen shown by the guide is still present.
Checkpoint 4. Continue only if the search or Settings path on your phone matches the guide you are following.
Checkpoint 5. Stop when the required menu disappears or the setup screen behaves differently. That means the route no longer matches the current device state.
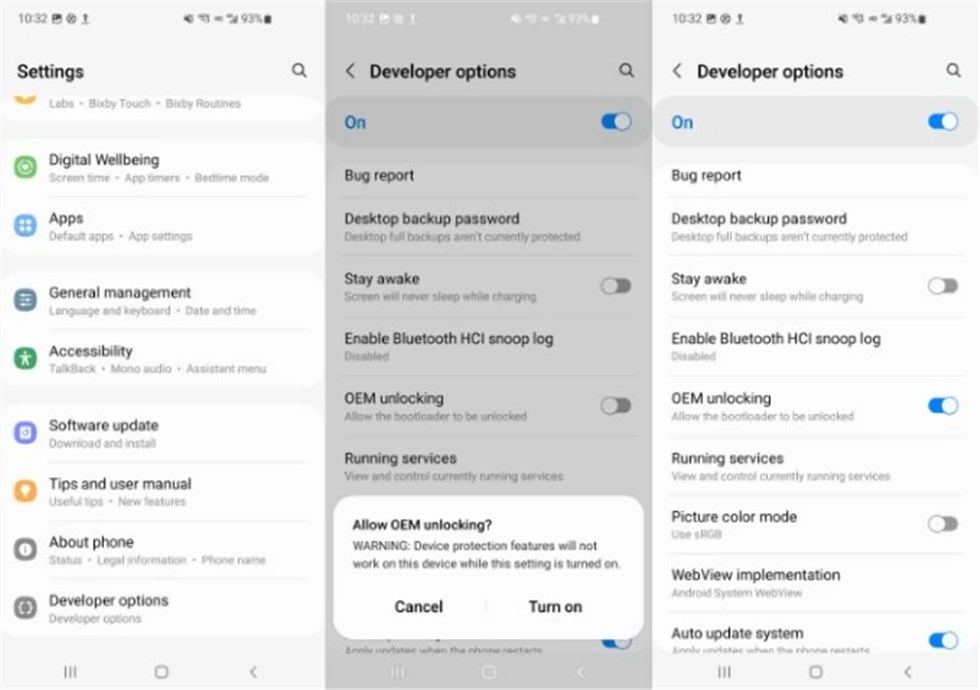
OEM unlocking is a separate device setting and should not be treated as a universal way to remove Google FRP.
Important distinction: Reaching Developer Options or finding OEM unlocking does not by itself prove that the previously synced Google account requirement has been removed. Do not use OEM unlocking as a universal FRP-removal instruction.
TalkBack Route: Which Checkpoints Must Still Be Available?
TalkBack appears in many older FRP tutorials because accessibility features could sometimes expose another setup action. However, the exact menus and actions vary by Android version, phone brand, and setup environment.
Rather than following one long generic sequence, check these stages in order:
| TalkBack Checkpoint | Continue Only If |
| TalkBack can be started during setup | The accessibility shortcut works on the current phone. |
| The expected gesture or action menu appears | The interface matches the device/version guide you are using. |
| A search, Assistant, help, or other next action is available | The old route can still leave the immediate accessibility screen. |
| The route reaches Android Settings or another required page | The same next checkpoint shown in the exact guide is present. |
| The phone begins showing different screens | Stop instead of combining steps from unrelated tutorials. |
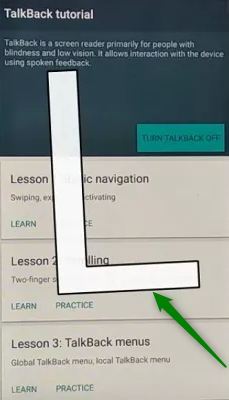
Older TalkBack tutorials may show gesture-based shortcuts, but the available route depends on the device setup environment.
If TalkBack cannot expose the next screen required by the guide, move to a route written for your exact brand or Android version rather than mixing accessibility instructions from several devices.
Use a Device-Specific FRP Guide When the Generic Route Stops
Google verification is shared across Android, but the setup wizard around it can vary by manufacturer and Android version. A generic keyboard or TalkBack route may therefore stop at a different point on Samsung, Xiaomi, Redmi, Pixel, Motorola, or another device.
If the locked phone is Samsung, use the Samsung FRP bypass guide rather than repeating Samsung-specific keyboard instructions inside this account-focused page.
If the phone is running Android 14, compare the current setup behavior with the Android 14 FRP guide. That keeps Android-version-specific compatibility questions separate from the previously synced account problem covered here.
The purpose of this page is to identify what to do with the old Google account. Once the blocker becomes a Samsung menu, Android-version limitation, APK installation issue, or another device-specific problem, the narrower guide is the better place to continue.
When a Guided PC FRP Workflow Makes Sense
A PC-based FRP workflow becomes relevant only after the account-first options have been checked. Typical triggers are that the account cannot be recovered, the previous owner cannot help, and the manual setup path shown by an older tutorial no longer exists on the device.
DroidKit FRP Bypass provides an on-screen FRP workflow for supported Android device scenarios. It should be evaluated by the actual brand, Android/device state, and workflow shown by the software rather than treated as a universal option for every reset phone.
This route is most relevant when:
- the previously synced Google account cannot be recovered;
- a legitimate previous-owner route is unavailable;
- the keyboard, TalkBack, browser, or APK path required by a manual guide does not match the phone;
- you have a Windows or Mac computer and a data-capable USB cable; and
- the workflow presented by DroidKit applies to the connected device.
Start the FRP Workflow in DroidKit
Step 1. Install DroidKit on the computer and choose FRP Bypass.
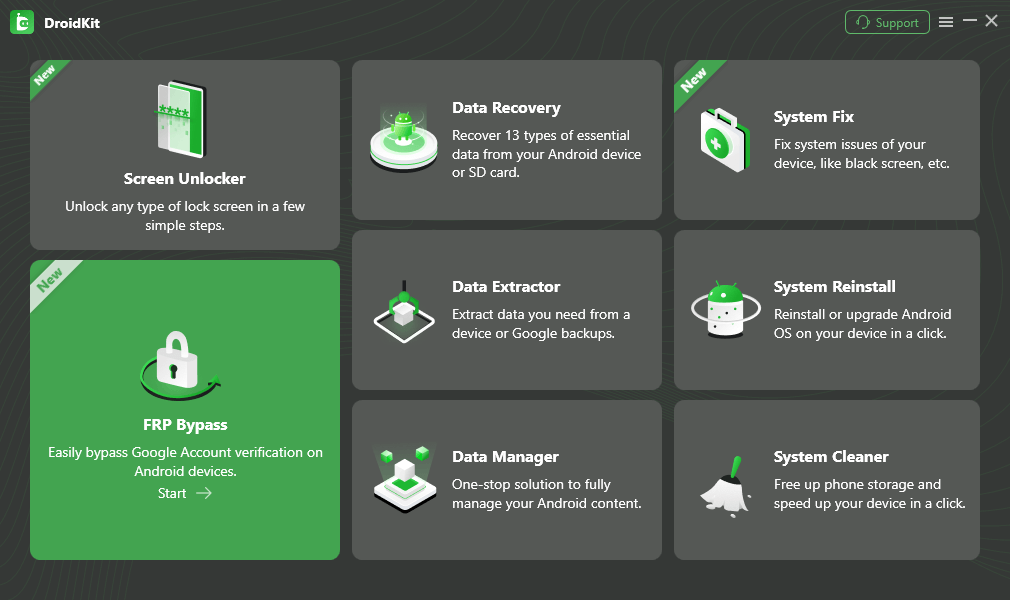
Choose FRP Bypass from the DroidKit interface.
Step 2. Connect the Android phone using a stable data-capable USB cable and click Start.
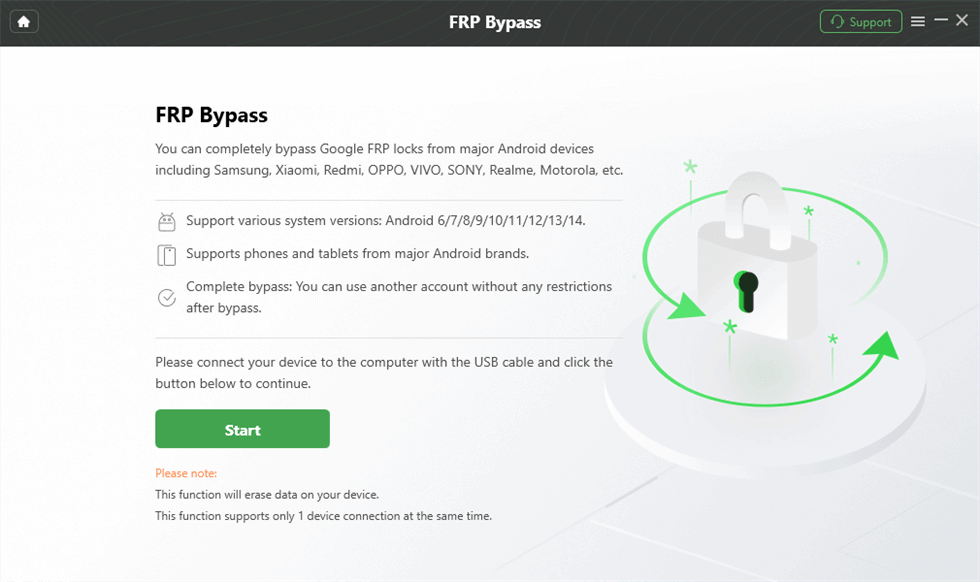
Connect the phone and start the FRP workflow.
Step 3. Follow the device-selection and Android-version prompts displayed by the software. Do not choose a version simply because an older tutorial uses it.
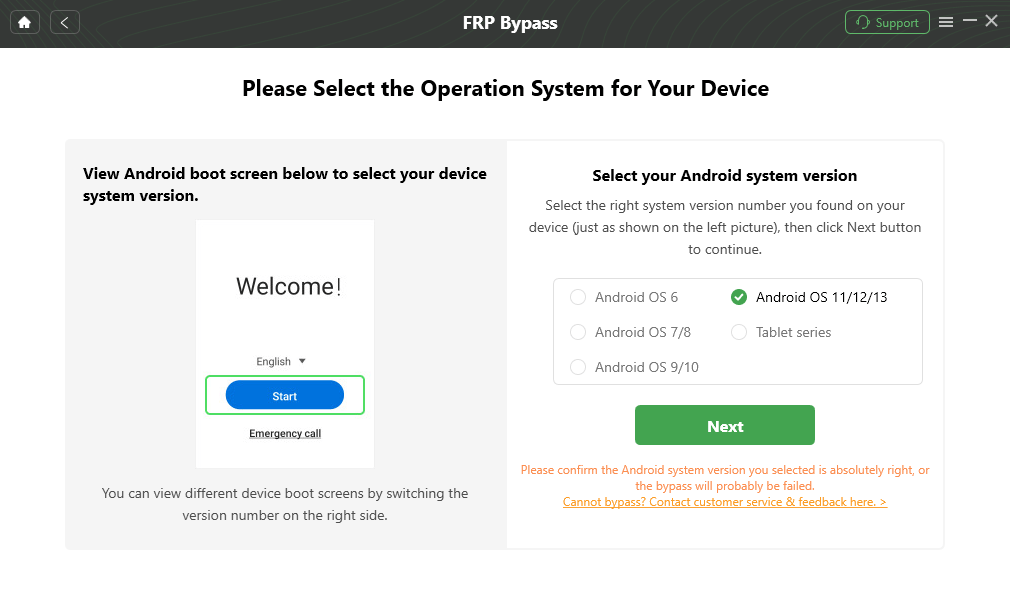
Use the system and device options required by the applicable workflow.
Step 4. Complete the on-screen device steps that apply to the connected phone and keep it connected while the workflow is running.
Step 5. When the software reaches its completion screen, follow the setup instructions shown for the device.
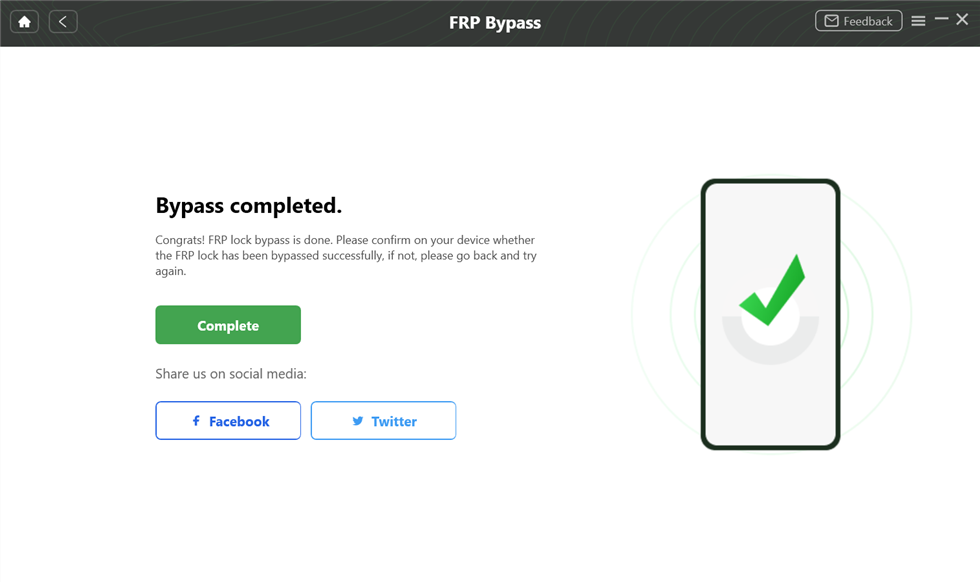
DroidKit FRP workflow completion screen.
Compatibility note: A guided workflow can be easier to follow than an old setup shortcut, but compatibility still matters. Stop if the connected phone, Android version, or instructions shown by the software do not match your device situation.
Manufacturer Support and Proof of Ownership
If you own the device but cannot recover the old Google account, the manufacturer or an authorized service channel may be able to explain the recovery or service options available for that device. Requirements vary by brand and region, so do not assume every manufacturer or carrier follows the same procedure.
Before contacting support, prepare information that can help establish the device and ownership, such as the exact model, serial or IMEI information where available, purchase receipt, invoice, order confirmation, and the Google account situation shown on the setup screen.
Describe the problem accurately: the phone was factory reset and now requests a previously synced Google account. This is clearer than simply asking support to “remove a Google account,” because the device is still at the verification stage.
Remove Your Google Account Before the Next Factory Reset
The easiest time to remove a Google account is before the device is reset, while Android Settings is still accessible.
Step 1. Open Settings on the unlocked Android device.
Step 2. Open the account section. The exact name can vary by Android version and manufacturer.
Step 3. Select the Google account that should no longer remain on the phone.
Step 4. Choose Remove account and confirm the action.
Step 5. Confirm that the account intended for removal no longer appears in the account list before beginning the factory reset.
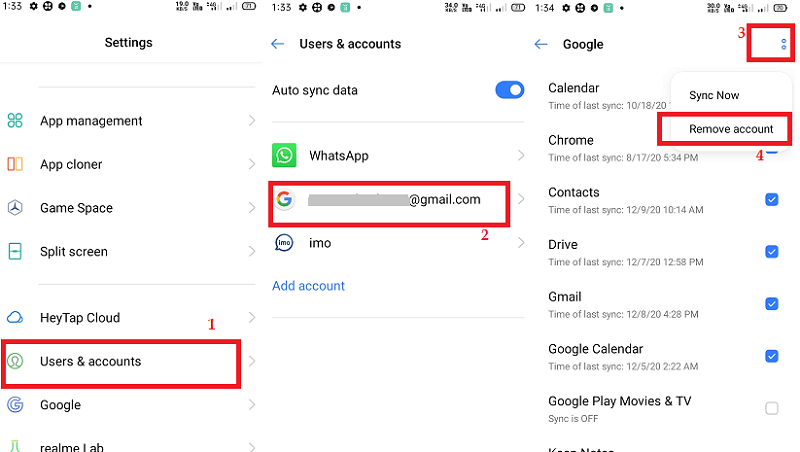
This prevention step is different from removing an account after the device has already reached FRP verification. Once the phone is locked at setup, resolve verification first.
Previously Synced Google Account FAQ
What does “previously synced Google account” mean?
It refers to a Google account Android recognizes as having been associated with the device before the factory reset. During protected setup, the phone may request that account before normal setup can continue.
Can I remove the old Google account before passing the verification screen?
Not in the same way you would remove an account from normal Android Settings. While the phone is still at Google verification, you first need to resolve the verification requirement. Account removal from Settings becomes relevant after normal device access is restored.
What if I forgot which Google account was previously synced?
Check the Google accounts you commonly use, recovery email or phone information, other Android devices you own, old email records, app receipts, and account notifications that may help identify which address was associated with the phone.
Can I use a different Google account at the verification screen?
If the setup screen specifically requests an account previously associated with the device, creating a new Google account does not necessarily satisfy that requirement. Identify or recover the requested account first.
What if the previous Google account belongs to the seller?
Contact the seller or previous owner and ask them to resolve their account association with the device. A second factory reset does not replace previous-owner verification.
Can another factory reset remove the previously synced Google account requirement?
No additional reset should be expected to resolve the account-verification requirement by itself. If the phone returns to the same Google verification screen, address the account or use another appropriate recovery route.
Does enabling OEM unlocking remove FRP?
Do not treat OEM unlocking as a universal FRP-removal method. It is a separate device setting, and reaching or enabling that option does not by itself prove that Google account verification has been removed.
Does the Google Keyboard FRP method still work?
It depends on whether the required setup checkpoints still exist on the device. If Keyboard Settings, Help & Feedback, search, or the next Settings path is missing, the older route does not match the current setup.
Can TalkBack bypass a previously synced Google account?
TalkBack is only an entry point in some older device-specific tutorials. If the accessibility route cannot reach the next screen required by the exact guide, stop rather than combining steps from unrelated Android versions or brands.
When should I consider a PC FRP tool?
A PC workflow is relevant after account recovery and previous-owner options are unavailable, the manual setup path does not match the phone, and the selected software supports the connected device scenario.
How can I avoid this problem before selling or resetting a phone?
While the phone is still unlocked, remove Google accounts that should no longer remain on the device and confirm their removal before starting the factory reset.
Resolve the Account Problem Before Trying Another Reset
A previously synced Google account after factory reset is first an account-verification problem. If the account is yours, recover it. If it belongs to a previous owner, resolve that ownership path. If a generic keyboard or TalkBack route no longer matches the phone, move to the relevant device or Android-version guide instead of forcing outdated steps.
Only after those paths are exhausted does a compatible PC-based FRP workflow become a useful next option. Once you regain normal device access, remove accounts you no longer need before the next factory reset so the same verification problem is less likely to recur.
More Related Articles


Roger Smith is a senior technical writer with years of experience in providing Android solutions. He loves to help users solve various problems such as Android unlock, Android data recovery, and Android system repair.
Product-related questions? Contact Our Support Team to Get Quick Solution >
