User Guide of Gemoo Recorder Lite
Learn how to record screen, webcam & audio
with annotating the screen or adding camera effects. Download  and try it now.
Learn how to record screen, webcam & audio with annotating the screen or adding camera effects. Download and try it now.
Free DownloadFor Win & Mac | 100% Clean & Secure
Configure Recording Settings
Configure Recording Settings aims to configure settings like recording storage path and other settings before recording. This guide is to help you know more about recording elements, please refer to the detailed instructions below.
Part 1. Preference Setting.
Preference is to adjust multiple recording parameters or settings before the recording. The Preference setting is on the top right of Gemoo Recorder Lite. Please click the Menu tab “···” on the upper right of the screen, then you will see it, like the screenshot below:
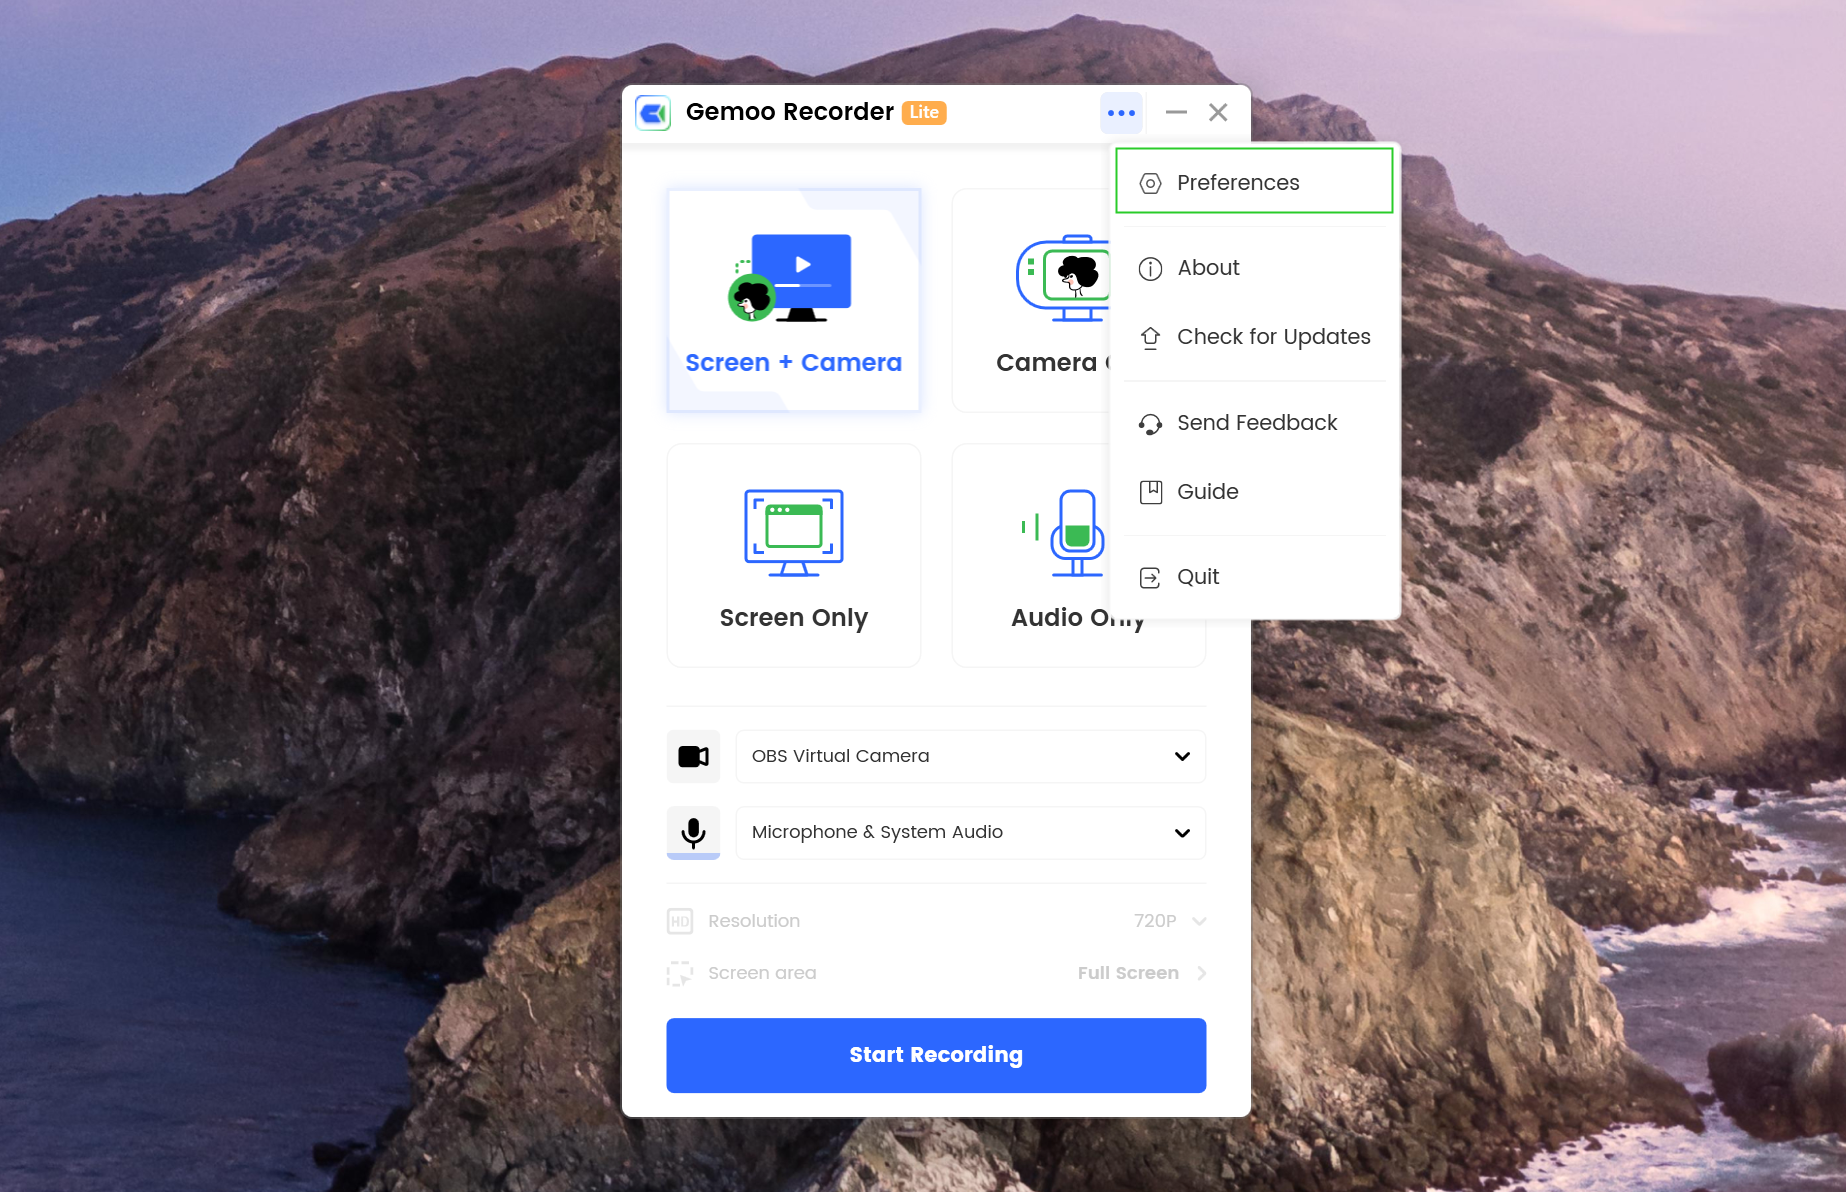
Click Menu Tab to Find Preference Settings
Then, you will see the Preferences in the menu, and please click the Preferences. And you will see the interface below:
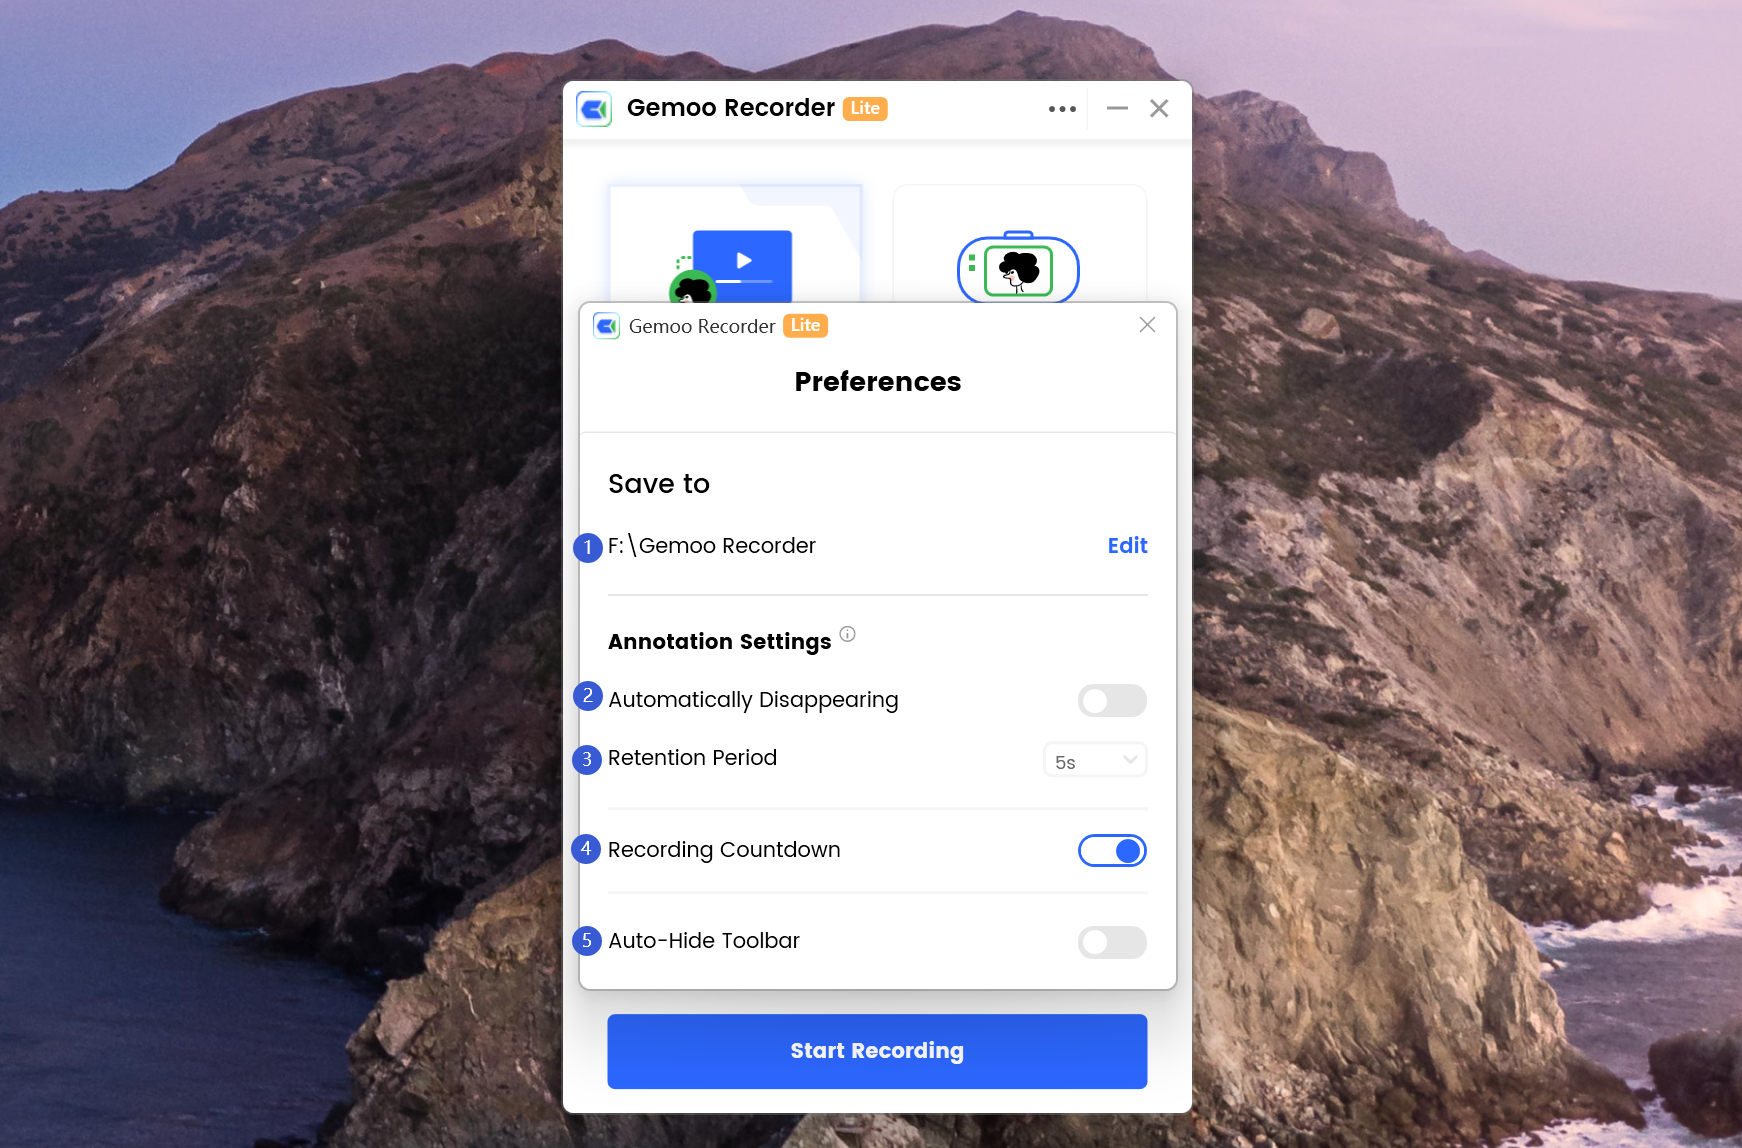
The Interface of the Preference Setting
In this setting menu, you can:
1
Set storage path.
2
Turn on/off annotations disappear after retention period function.
3
Set reserved display time of the annotations.
4
Turn on/off recording countdown when you start to record.
5
Turn on/off auto-hide toolbar.
Part 2. Recording Settings.
You can complete the recording settings under the function section. Please refer to the screenshot below.
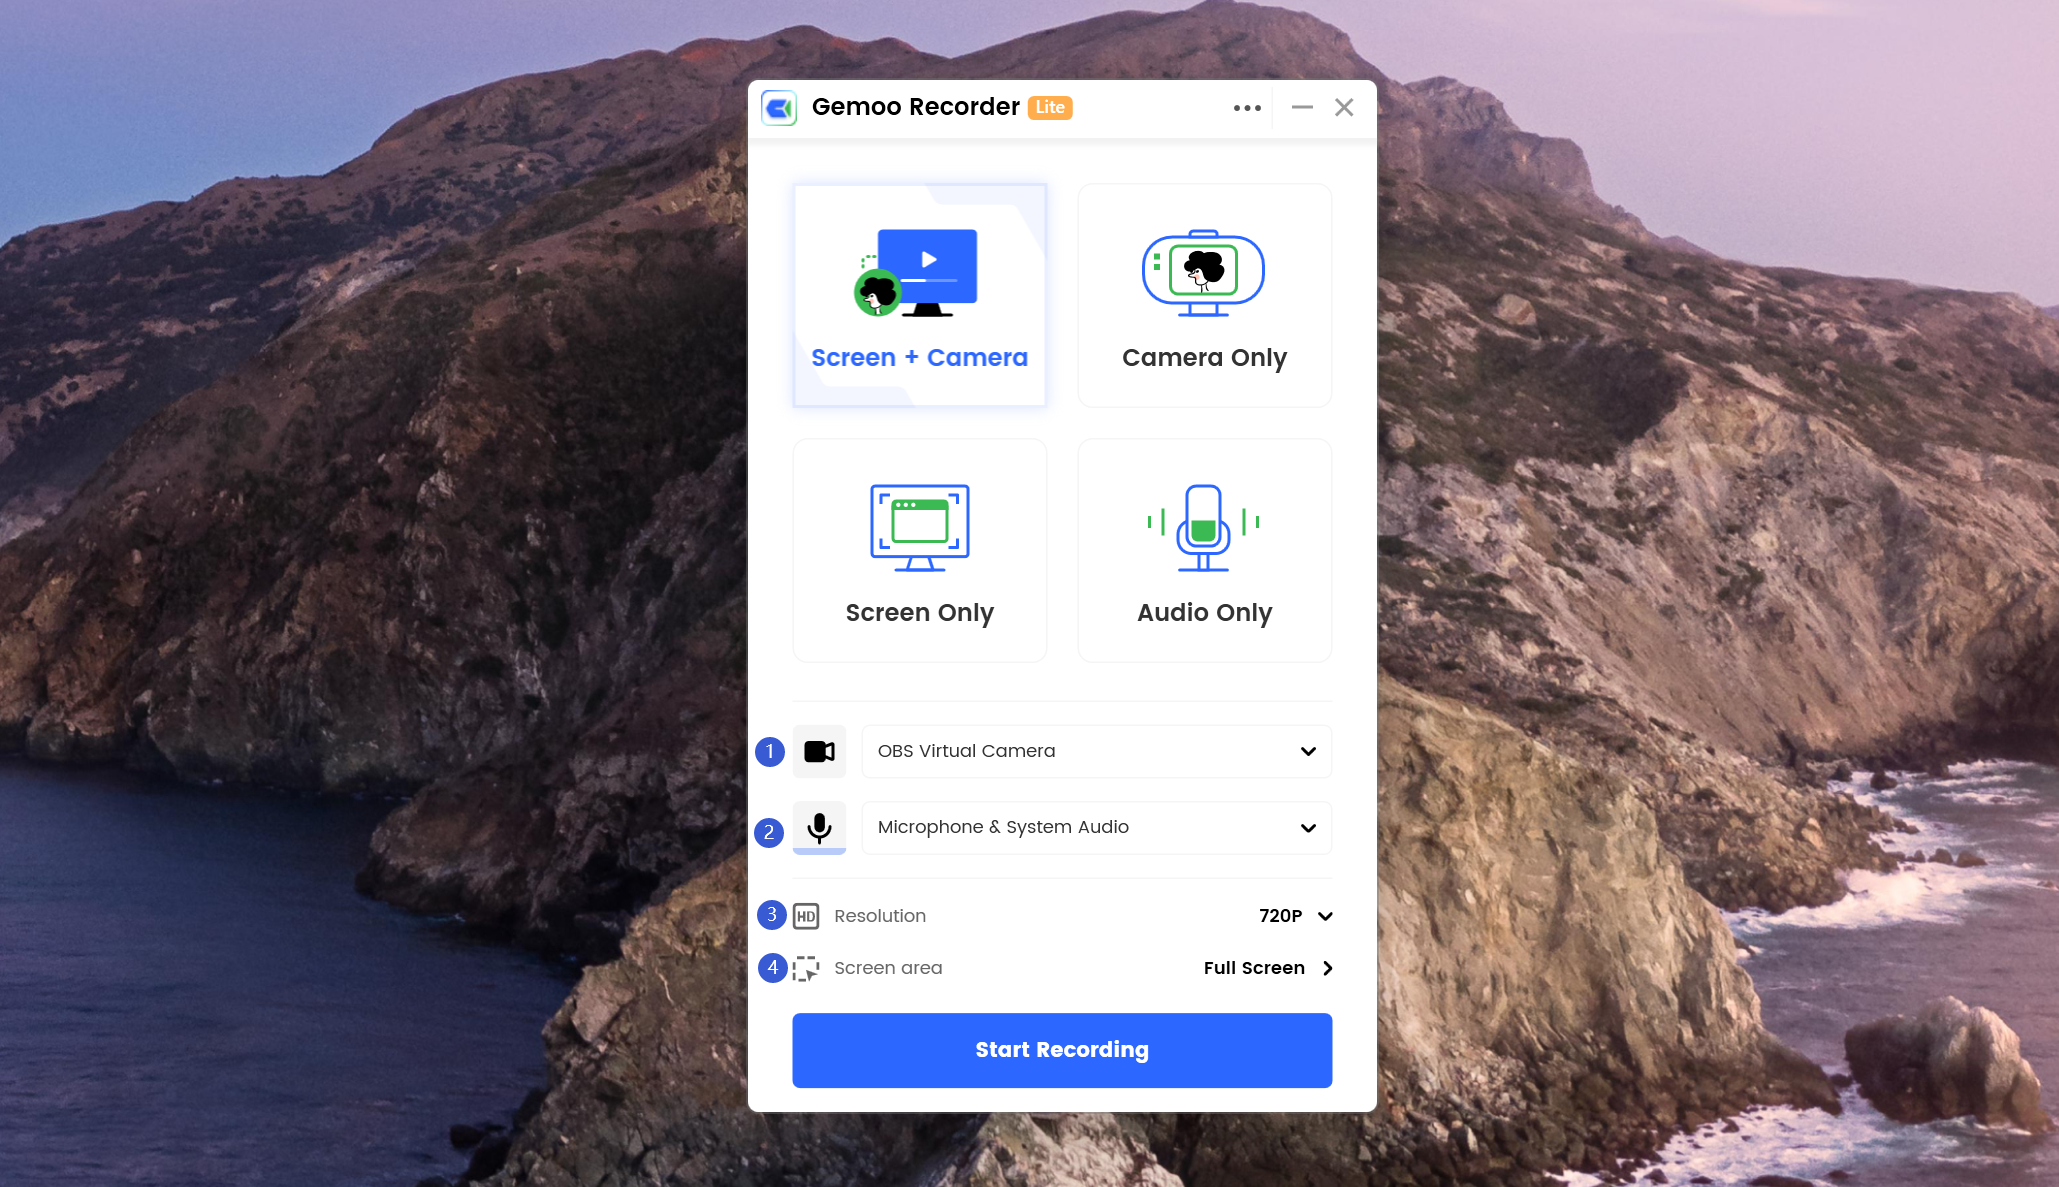
The Interface of the Settings Details
In recording settings, you can:
1
Choose the camera you want to use.
2
Choose the microphone you want to record.
3
Set the resolution.
4
Set custom size to record screen, or choose the full screen.
Part 3. Camera Setting.
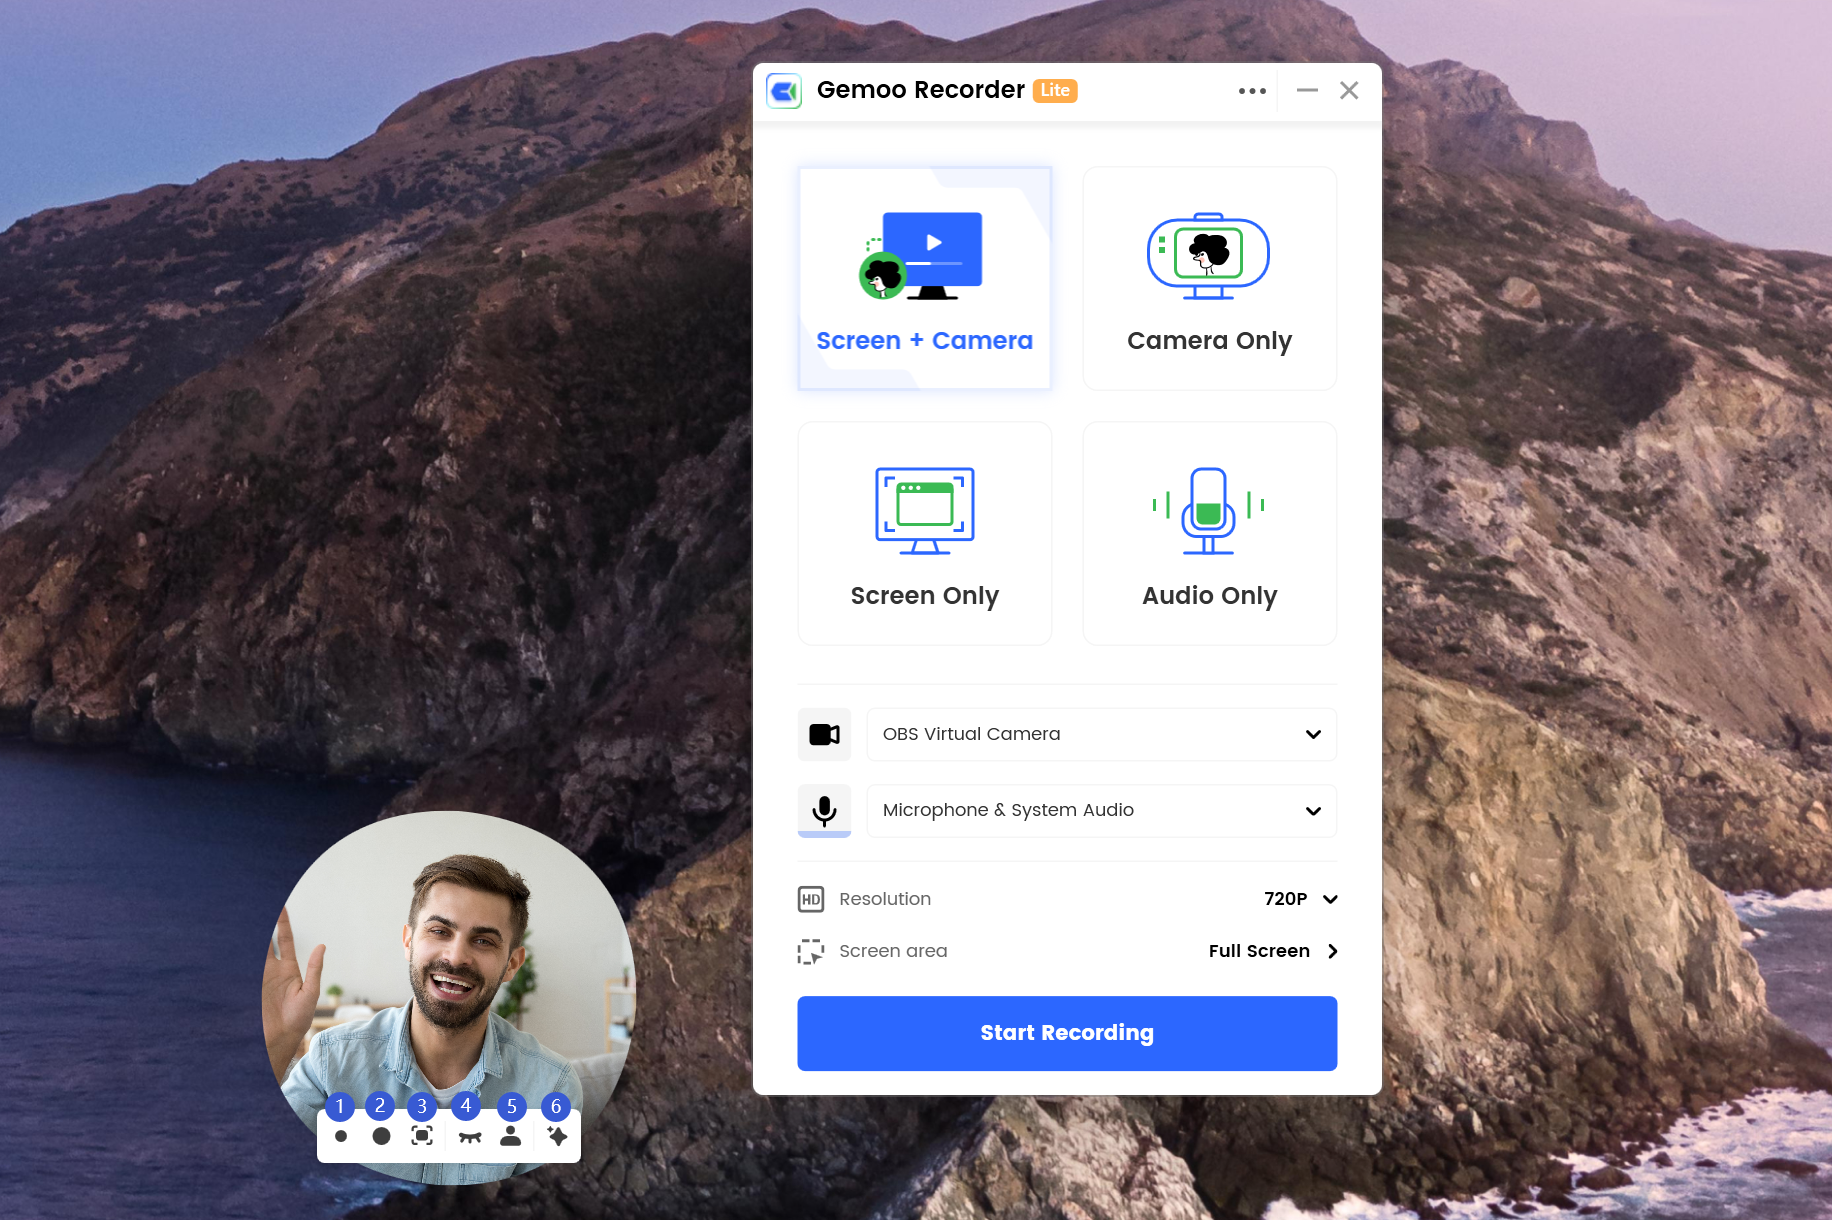
You can make some settings on Camera when you are using the “Screen + Camera” or “Camera Only” function. Please click the camera avatar, then, you will see the camera settings interface below:
Camera Setting Interface
In the bottom menu bar, you can:
1
Select small camera.
2
Choose default camera.
3
Choose full screen.
4
Hidden camera.
5
Change camera avatar.
6
Choose camera effects settings.
In the Camera Effects Settings, you can make portrait filter settings, virtual background settings and avatar frame settings. When finished, please click Apply to save the settings. You can choose an avatar of round style or rectangle style in the avatar frame settings. And you can also choose the bubble frame you preferred.
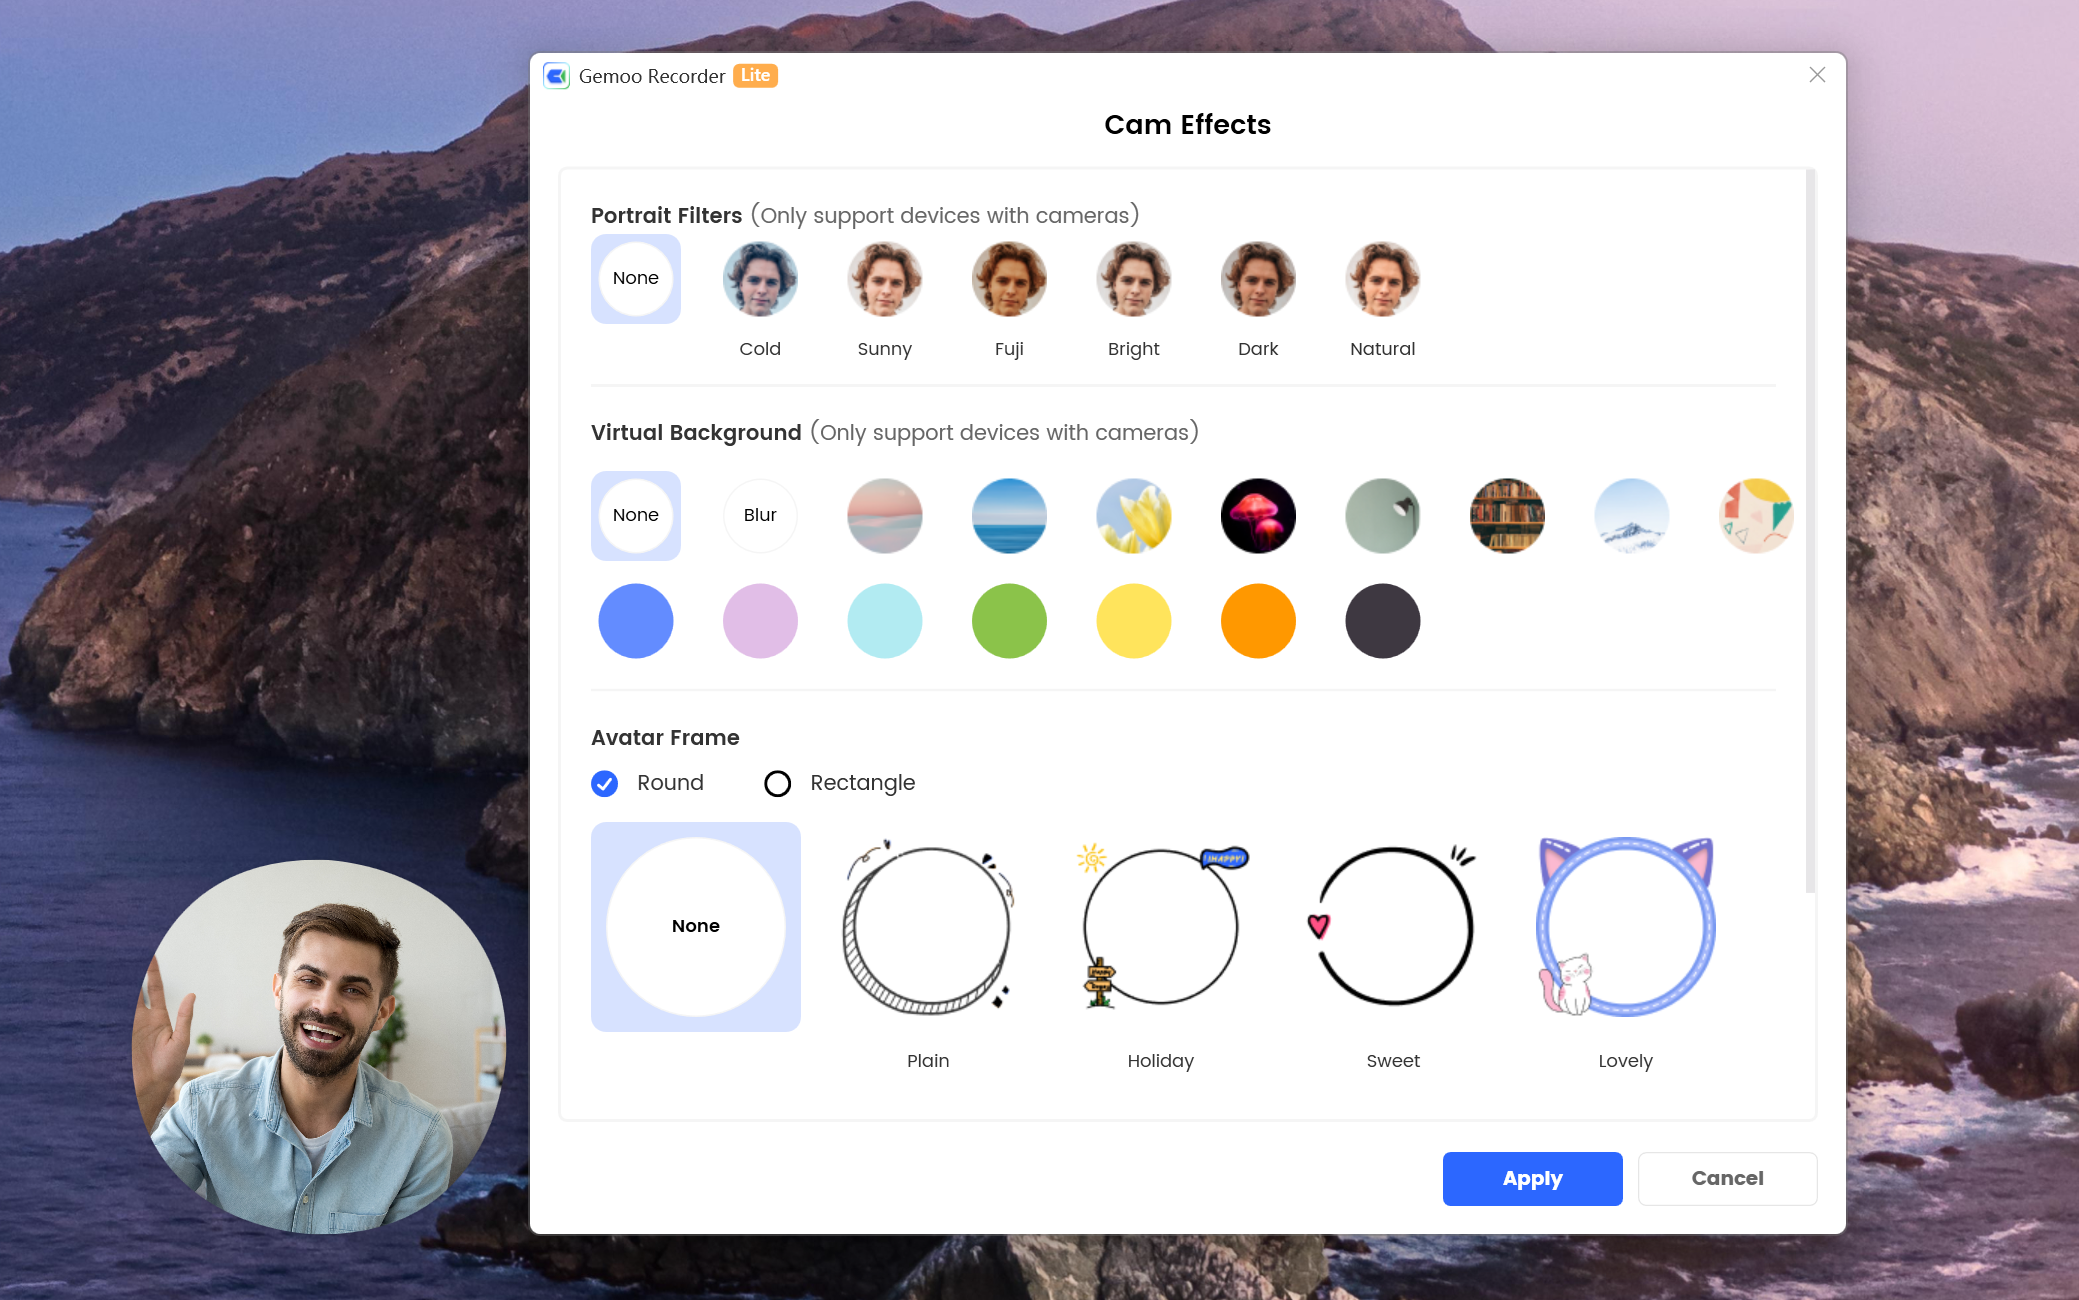
The Camera Effects Settings
If you still have questions after reading this guide, please contact our Support Team to get further help. We are always here to help you!