User Guide of Gemoo Recorder Lite
Learn how to record screen, webcam & audio
with annotating the screen or adding camera effects. Download  and try it now.
Learn how to record screen, webcam & audio with annotating the screen or adding camera effects. Download and try it now.
Free DownloadFor Win & Mac | 100% Clean & Secure
Record Screen and Camera
Whether you encounter the similar situations below?
“I wonder if there is a way to capture the screen of the computer and the camera to make videos.”
“How can I record myself and my screen at the same time?”
If you encounter the similar situations above, don’t worry. “Record Screen and Camera” function can help you record screen and camera/webcam on computer. “Record Screen and Camera” mode grants you to record anything (presentation, video, tutorial, etc.) on the screen, camera, as well as audio on your computer. Please refer to the detailed instructions to begin recording.
Step 1. Select Screen & Camera Recording Mode.
To start with, please download and install Gemoo Recorder Lite on your computer. Launch the Recorder on your computer, and select “Screen + Camera” mode.
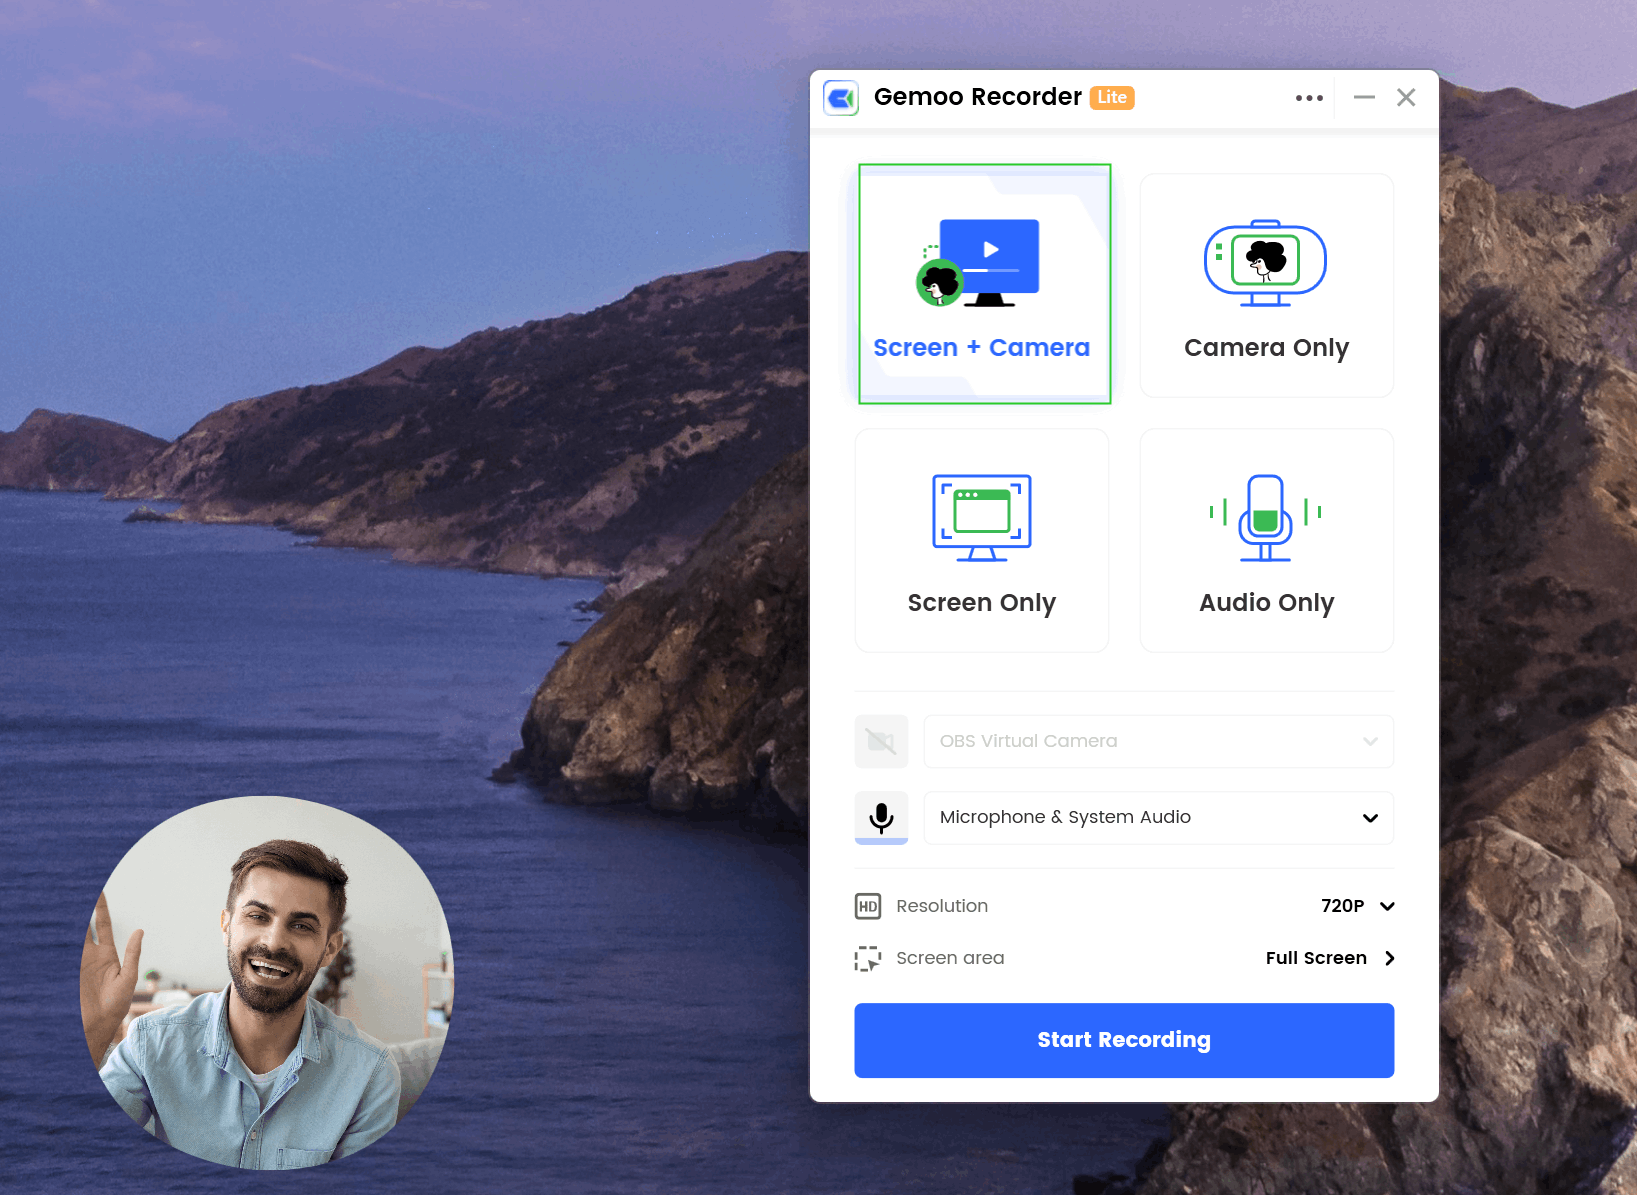
Select Screen & Camera Recording Mode
You can customize the settings before recording by referring to Configure Recording Settings guide. You can also set your camera bubble size and edit the camera effect as you preferred.
Step 2. Initiate Recording Process.
After choosing the recording mode, please hit the “Start Recording” button to initiate recording.

Hit the “Start Recording” Button
Step 3. Wait for the Recording Countdown.
Once you are ready to start recording, it will pop out a countdown to help you prepare the recording.

Wait for the Recording Countdown
If you would like to see a recording countdown before your recording starts, you can enable the countdown option. Or you can tap it off. Click here to know how to set the countdown option.
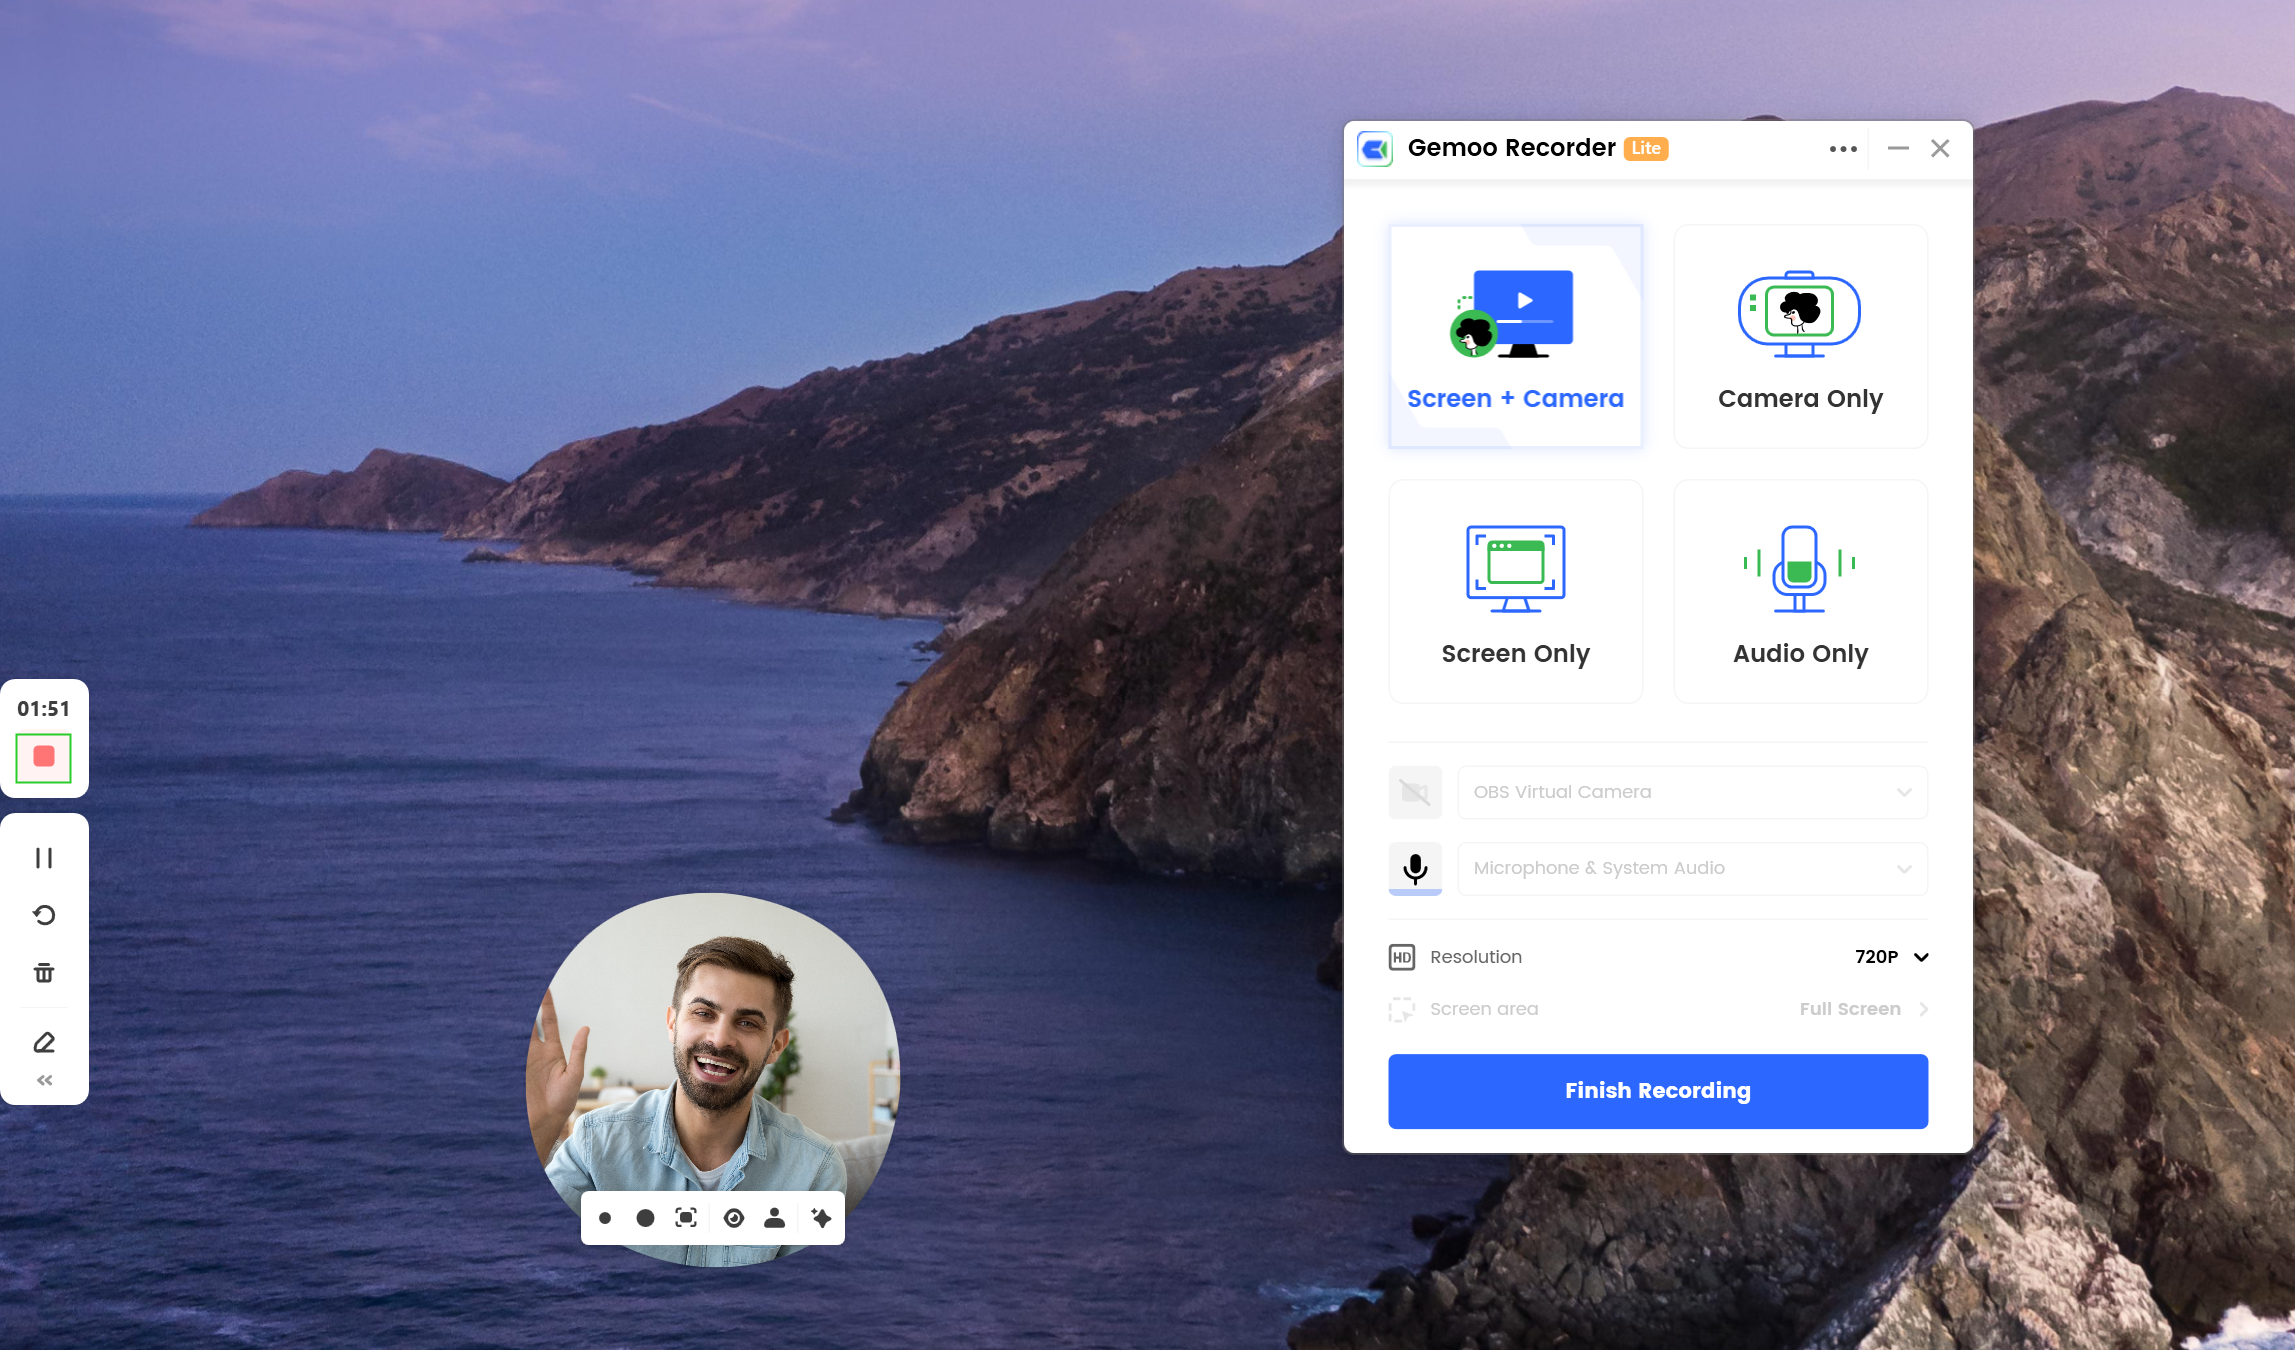
Step 4. Record Your Video.
After a 3-second countdown, the recording will begin. Now, you can record your presentation, video, tutorial etc.
Record Video
In the left sidebar, you can:
1
View recording consuming time.
2
Finish recording.
3
Pause/resume recording.
4
Restart recording.
5
Delete recording.
6
Add annotations.
Step 5. Annotate Screen during Recording.
Gemoo Recorder Lite allows you to edit the screen during the recording, too. To access the editing options, you just need to click the “Add Annotation” button directly.

Annotate the Screen
To annotate the screen, you can add
1
Mouse Cursor Effects
![]()
2
Drawing
![]()
3
Text
![]()
4
Shape
![]()
5
Numbers
![]()
6
Stylus
![]()
7
Stickers
![]()
Under the annotating toolbar, you can also click the Undo “↶ “ button to revert to the last edit, Redo “↷” button to the forward step, and the “Broom” button to clear the annotations.
Step 6. Finish Recording.
Once the recording is done, you can hit the red “Stop” button or the “Finish Recording” button to finish it.
Finish Recording
A window will pop out to show where the video is saved. Now, you can view the recorded video on your computer.
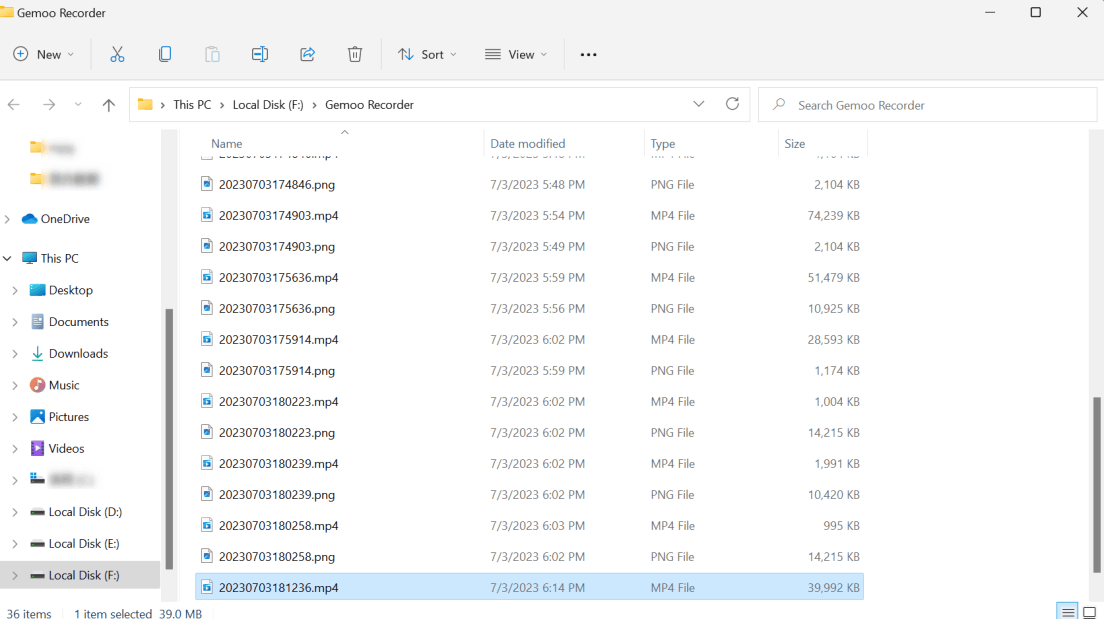
Recording Saved
If you still have questions after reading this guide, please contact our Support Team to get further help. We are always here to help you!