How to Recover Notes from iCloud
Have you prepared notes for some important thing in the Notes app of your iOS device but accidentally deleted it? If yes, you don’t need to worry, as here you will learn how to restore notes from iCloud and multiple other methods. So, read on and get your hands on the method of your choice.
The Notes app on your iOS device is one of the most convenient ways to take notes on just about anything. You can use it to write up the lyrics of the songs that you like, grocery lists, and much more. The Notes that you create can easily be shared with other iOS devices, but they can be lost as well. So, if you are stuck in the same situation where you have lost some of your essential Notes and now hunting for recover notes from iCloud methods, then this guide is for you.
Here, you will learn three effective methods on how to restore notes from iCloud and the Notes app. Make sure to continue reading the article till the end in order to get a complete understanding of how each method works.
Let’s start then!
Further Reading: How to Sync Notes between iCloud and iPhone >
How to Restore Notes from iCloud – Easiest Way
If you don’t want to spend too much time trying to restore notes from iCloud, you can choose PhoneRescue for iOS – iPhone Data Recovery, which is the easiest way to restore notes from iCloud to your iOS device with backup and without backup. You can just restore notes from iCloud to your iPhone instead of having to restore all data at the same time like restoring data directly from iCloud. What’s more, all your existing data on your iPhone will not lose, which means that all your old notes on your iPhone will not be overwritten.
Part 1. How to Restore Notes on iPhone from iCloud Backup
How do I get my Notes from iCloud to my iPhone? PhoneRescue for iOS can help you to download only notes from iCloud backup and you can first preview what notes are included in your iCloud backup. Now, just follow us to scan your iCloud backup and see if it has the notes you want to retrieve without restoring your iPhone.
PhoneRescue for iOS – iOS Data Recovery
- Recover notes from iPhone even without backup.
- No harm to the existing data and no need to restore your iPhone.
- Preview and select the notes that you want to recover.
- Support all iPhones, iOS 18 and iPhone 16 supported.
Free Download100% Clean & Safe
Free Download100% Clean & Safe
Free Download * 100% Clean & Safe
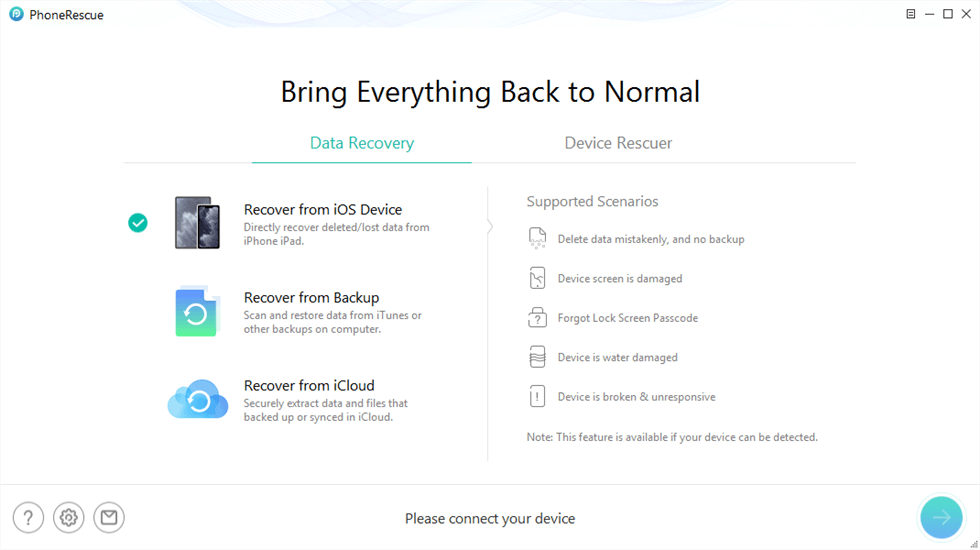
Step 1. Free download PhoneRescue for iOS on your computer > Connect your iPhone to the computer with a USB cable > Select Recover from iCloud.

Choose Recover from iCloud
Step 2. Sign in to your iCloud Account > Select the iCloud backup that contains the notes you want to retrieve > Click the Download button > Select the type of data you want to download from data > Click OK button.
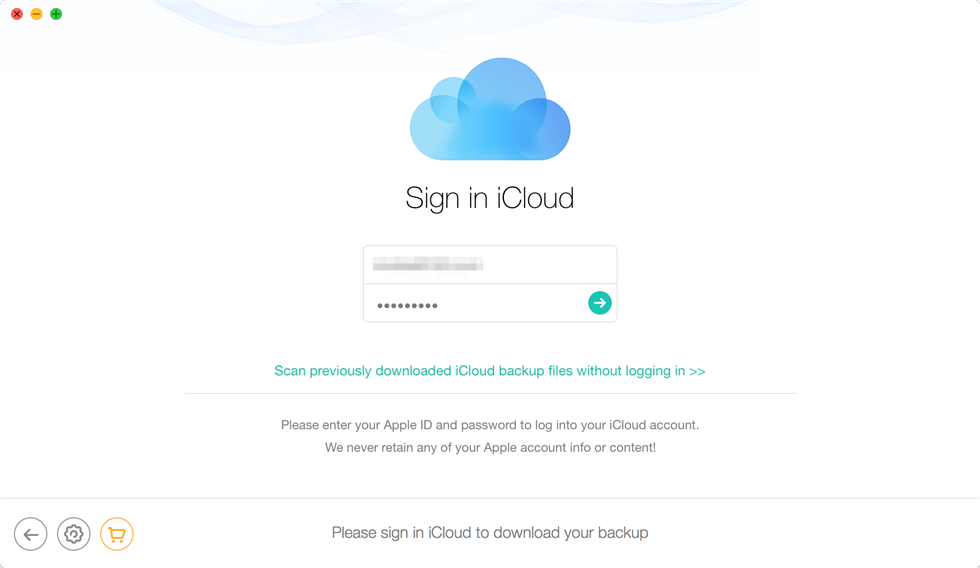
Enter Apple ID and Password to Sign in
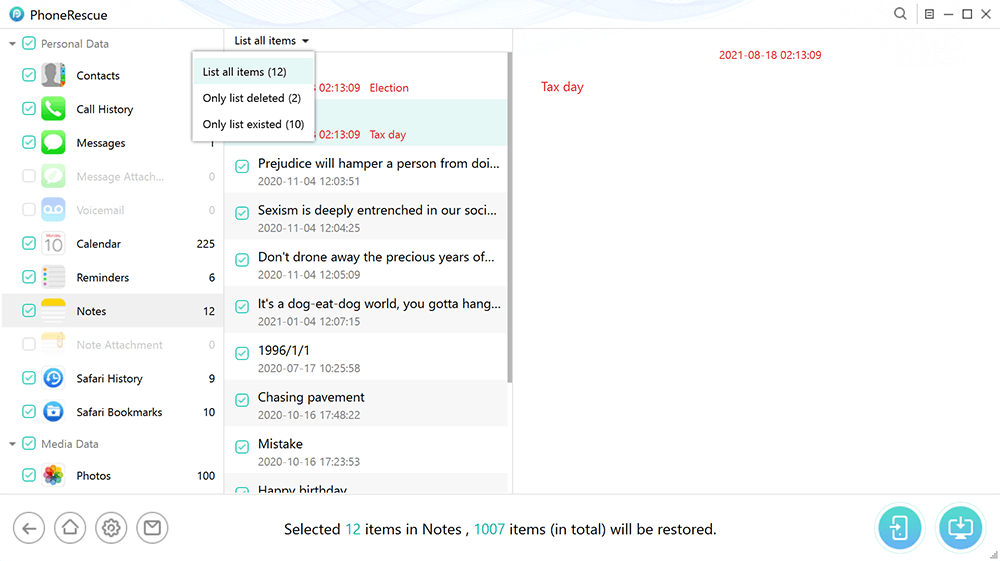
Step 3. Preview the notes in iCloud backup > Select the notes or note attachments you want to retrieve > Click To iPhone button to recover deleted iPhone notes back to iPhone’s Notes App.
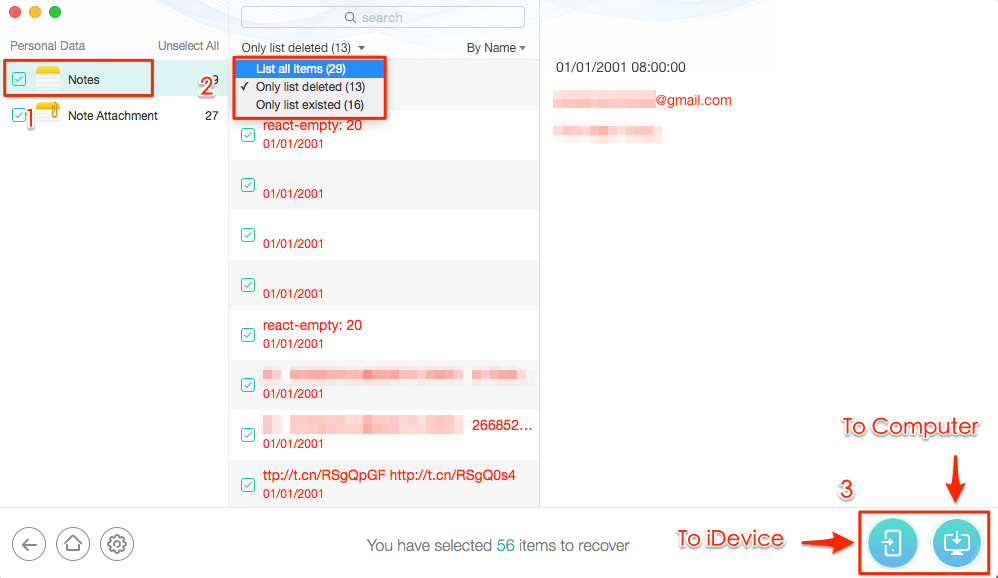
You can Recover Notes to Device or Computer
Part 2. How to Recover Deleted Notes on iPhone without Backup
If there are no recently deleted notes in the notes app, or you want to recover notes on iPhone without iCloud, then, PhoneRescue for iOS can also help you do that. Please follow the steps below to recover deleted notes on iPhone without backup or without iCloud.
Step 1. Free download PhoneRescue for iOS on your computer and launch it. Then, connect your iPhone to the computer > Choose Recover from iOS Device.
Free Download * 100% Clean & Safe
Recover from iOS Device without Backup
Step 2. You can see all types of data that you can recover, select Notes only and tap on the OK button to continue.
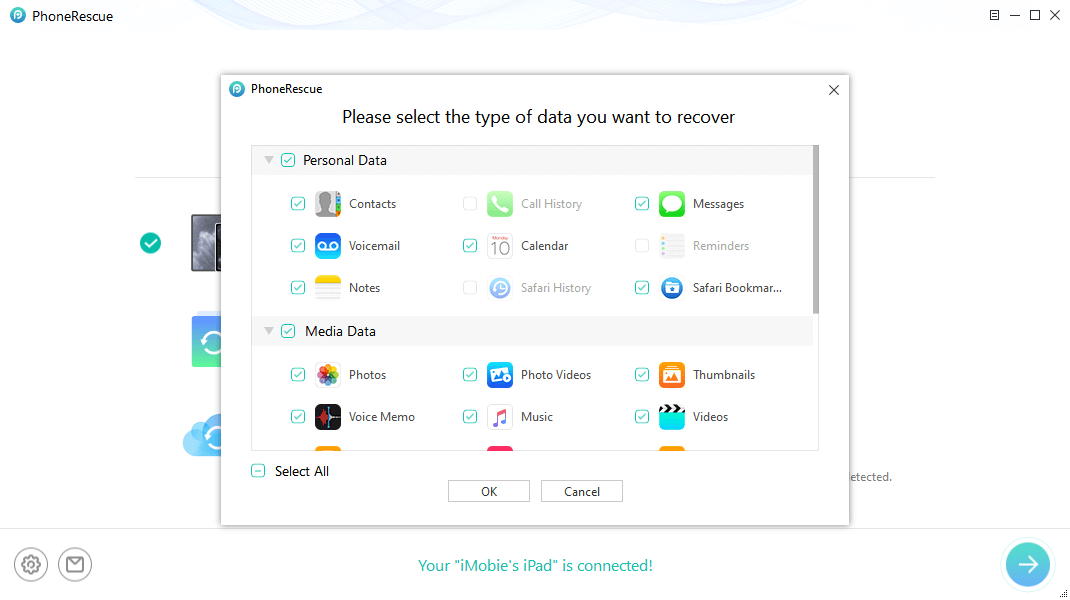
Select Data You Want Recover from iPad
Step 3. PhoneRescue for iOS will scan your iPhone notes to enable you to preview. Select the notes that you want to recover. Click To iDevice button.
Choose Specific Notes to Recover
Recovering from the Recently Deleted Folder in Notes App
The first and the most basic way to recover the lost or deleted Notes on your iOS device is by recovering them from the Recently Deleted folder in the Notes app. Whenever you mistakenly delete a Note in the Notes app on any iPhone model, it does not get removed permanently from your iOS device. It simply moves to the Recently Deleted folder in the Notes app of your iOS device.
So, if you wish to recover the lost or deleted Notes from the Recently Deleted folder of the Notes app, you have to follow the steps below:
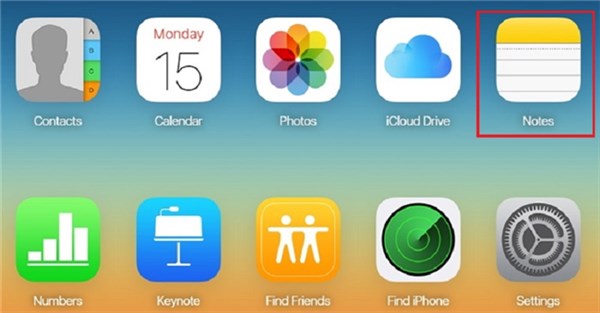
Step 1. Launch the Notes app on your iPhone and click on Recently Deleted.
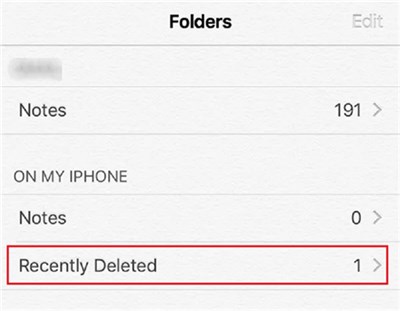
Find the Recently Deleted Folder
Step 2. On the next screen, click on the Edit button at the top right corner of the screen and select the Notes that you want to recover.
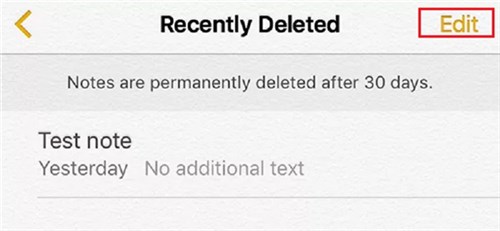
Tap on the Edit Button
Step 3. Here, check-mark the Notes that you want to restore and tap on the option that says Move To at the bottom left corner of the screen.
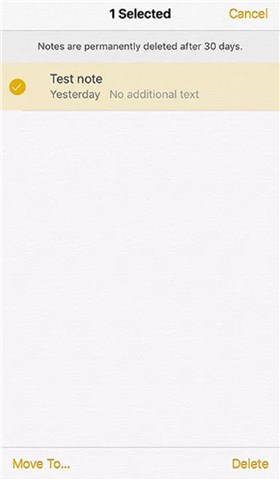
Select One Note
Step 4. Now, choose the folder where you would like to save your Restored Notes.
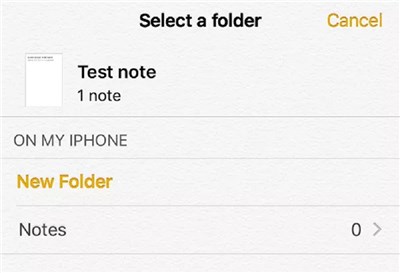
Choose the Folder to Save
That’s it! Your deleted or lost notes will now be successfully recovered on your iOS device.
Restore the Notes on iCloud
If iCloud notes disappear and you are wondering about how to restore notes from iCloud, then this method is for you. Although it is not a widely famous solution, but you can easily recover the deleted or lost Notes from iCloud.com. But remember that, by using this method, you can only find the Notes that have been deleted or lost in the last 30 days.
Here’s how it works:
Step 1. Go to iCloud.com on any browser of your PC and log in with your Apple ID.
Step 2. Here, click on the Notes option and then choose the Notes that you wish to recover.
Tap on Notes in iCloud
Step 3. Next, click on the Email button and enter your Email ID as the recipient to send the Notes to yourself.
Step 4. Finally, open your email on your iPhone and download the attached Notes.
And it’s done! You have successfully restored the Notes from iCloud within just a few minutes.
Restore iPhone from iCloud Backup
Last but not least, the final way to restore the Notes on your iOS device is by restoring your iPhone from iCloud backup. Follow the steps below to get started:
Step 1. Navigate to the Settings of your iOS device and click on General > Reset > Erase All Contents and Settings. This will take your iPhone back to the set-up screen.
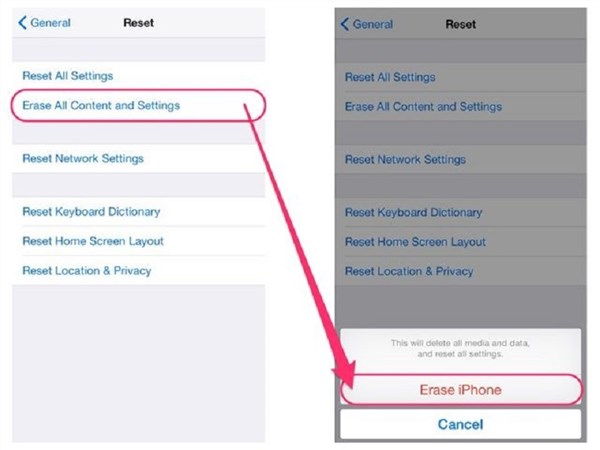
Erase All Contents and Settings on iPhone
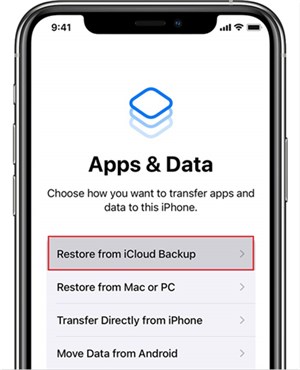
Step 2. Now, follow the prompts on the set-up screen until you get to the App & Data screen. Here, choose Restore from iCloud Backup option.
Restore from iCloud Backup
Step 3. Next, sign in to your iCloud account, agree to the terms and conditions and then choose the appropriate backup.
After waiting for a few minutes, your iPhone will reboot, and you will see the deleted Notes in the Notes app of your iOS device. But this method comes with the limitation that you may lose your important data while erasing the content and settings. So, opt for the method wisely.
The Bottom Line
By the end of this technical guide, we hope you are now able to recover notes from iCloud and get them back on your iOS device. No matter which way you opt for, you are always in safe hands. So, without having any second thought, choose PhoneRescue for iOS and get started with restoring the lost or deleted Notes quickly without much hassle.
Free Download * 100% Clean & Safe

Senior writer of the iMobie team as well as an Apple fan, love to help more users solve various types of iOS & Android-related issues.
Product-related questions? Contact Our Support Team to Get Quick Solution >
