How to Extract Audio Clips from Video on iPhone/Mac
If you only want the audio part of a video, you can extract the audio from your video file on your iPhone. It is a pretty easy task to do on both iOS as well as Mac-based machines and the following guide covers methods for both of these platforms for you.
There are times when you only need the audio part of a video file. Maybe someone was singing a great song in the video but the video itself was not that great. Or maybe you have downloaded a video and the quality is really bad but the sound is good. Regardless of the reason, you can always extract the audio part of a video file and save the audio as an independent file on your system.
If you have an iPhone or a Mac, the task is even easier to do. It is because both of these platforms have some really great apps to help you separate music from videos on your devices. Also, there is nothing you need to pay to get the task done as the apps you need to use are available for free.
The following should teach you how to extract sound from video on iOS and Mac machines.
Part 1: Extract Audio from a Video on iPhone or iPad
If you want to extract the audio from video on an iOS-based device such as an iPhone or iPad, you will need to first get an app from the App Store to do the task. Although you have some great built-in editing tools on your phone, these do not let you play around with the sound part of a video.
You will find a number of apps helping you extract audio on the App Store but you will want to install the one we recommend below to ensure you can get the task done without any difficulties or hassle.
Step 1. Search the app named Audio Converter – Extract MP3 in App Store, tap on it, and install it on your device.
Step 2. When the app is installed, launch it from the springboard on your device.
Step 3. First, add the video you want to extract audio from. To do it, tap on the + (plus) sign at the top and select the option that says Import videos.

Import iPhone videos into the app
Step 4. Browse your albums and find and select your video. You will be able to choose from any of the available videos on your device.
Step 5. Once you see the video in the app, tap on the i icon next to the video file. It will open a new menu on your screen.
Step 6. From the newly opened menu, select the option that says Extract Audio. It lets you detach the audio part from your video file.
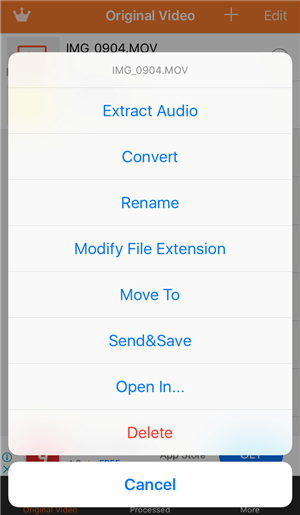
Extract Audio
Step 7. The following screen lets you trim the audio part if you want. This is useful if you only want a certain time period of audio from the video. Tap on Start to start the extraction process.
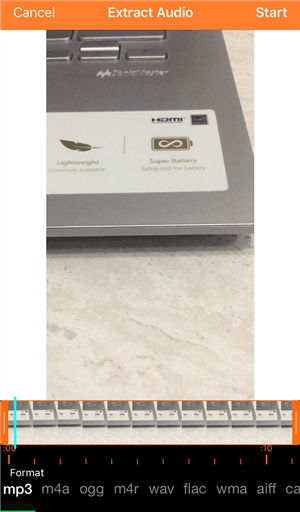
Edit Audio File
Step 8. When the audio is fully extracted, you will find it in the Processed tab of the app. You can then play around with it however you want.
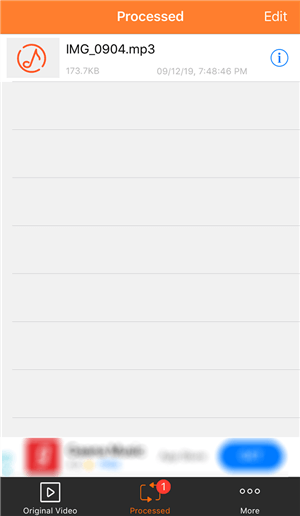
Audio File is Edited
Although taking the audio part out of a video on an iPhone may sound daunting at first, it is not actually as you can clearly see for yourself in the above steps.
Part 2: Extract Audio from a Video on Mac
Extracting sound from video on a Mac is also fairly easy. Unlike the iPhone method, you do not need any apps on your Mac to do the extraction process and it is because your Mac already has the app to do the task.
QuickTime Player comes preloaded on all the Macs and you can use it to extract audio from a video on your machine.
Step 1. Locate the video you want to extract audio from using the Finder on your Mac. When it is found, right-click on the file and select Open With followed by QuickTime Player.
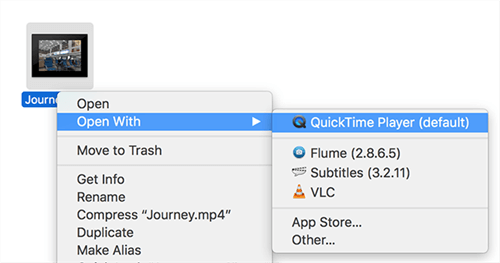
Launch Video with QuickTime Player
Step 2. Your chosen video will launch in the QuickTime Player app on your Mac. From here, you need to click on the File menu at the top and select the option that says Export As followed by Audio Only.
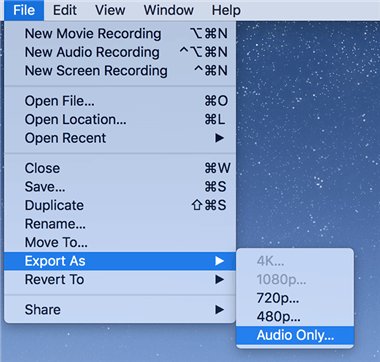
Export as Audio Only
Step 3. Enter a name for your new audio file, choose a location where you want to save it, and click on the Save button.
It will extract the audio from your video and save it in your chosen folder.
Most of you will find that extracting sound from video on a Mac is easier than on an iPhone.
Bonus Tip: How to Transfer Audio from Computer to iPhone
When you extract audio from a video on your Mac, the extracted audio file still remains on your Mac and it does not get transferred to your iPhone. If you need that file on your iPhone or iPad, you will need to transfer it as a music file to your device from your machine.
One of the ways to do it is to sync it with iTunes. However, you will not want to do it because it then syncs all other music files as well. A more efficient method would be to use an app like AnyTrans to transfer your file.
It provides you with an easy way to add music as well as various other files to your iPhone from any of your computers. It is also pretty easy to use and is way better than iTunes.
AnyTrans – iPhone Data Transfer
- Transfer music and songs from computer to iPhone with no effort.
- Transfer all audio files like songs, voice memos, ringtones, etc.
- No harm to audio files and will be kept in original quality.
- Work well with all iPhone models as well as iOS systems.
Free Download100% Clean & Safe
Free Download100% Clean & Safe
Free Download * 100% Clean & Safe
The following is how you use AnyTrans on your Mac or Windows computers.
Step 1. Download the AnyTrans app and install it on your computer.
Step 2. Connect your iPhone or iPad to your computer, launch the app, select Device Manager in the app, and finally click on the + (plus) sign to add an item to your phone.
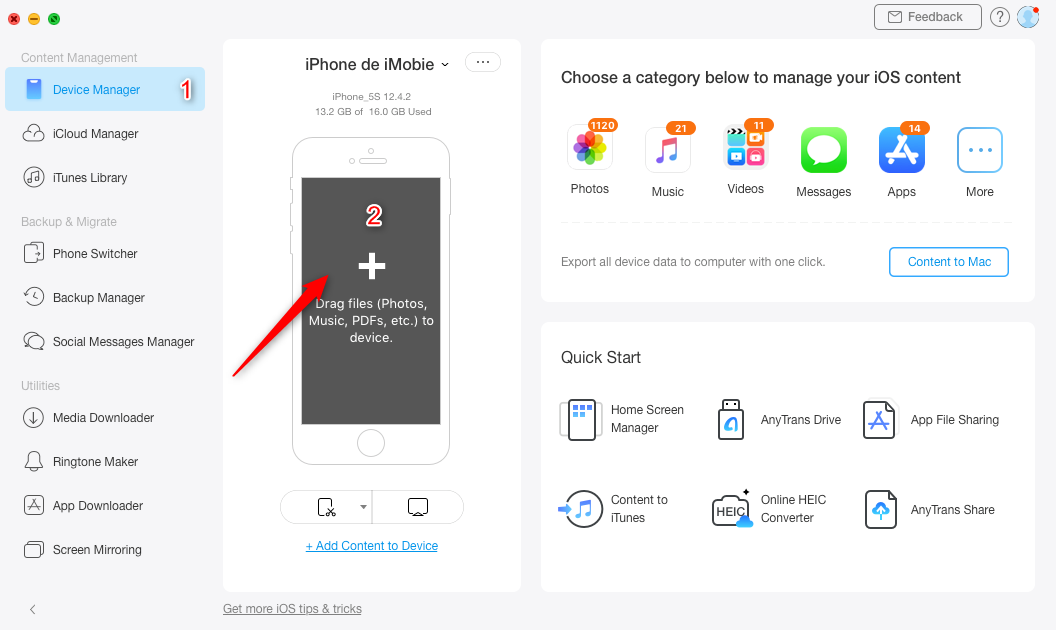
Add new items to the iPhone
Step 3. Your file manager will open letting you select the files you want to transfer to your device. Select the music file or files you want to transfer and click on Open.
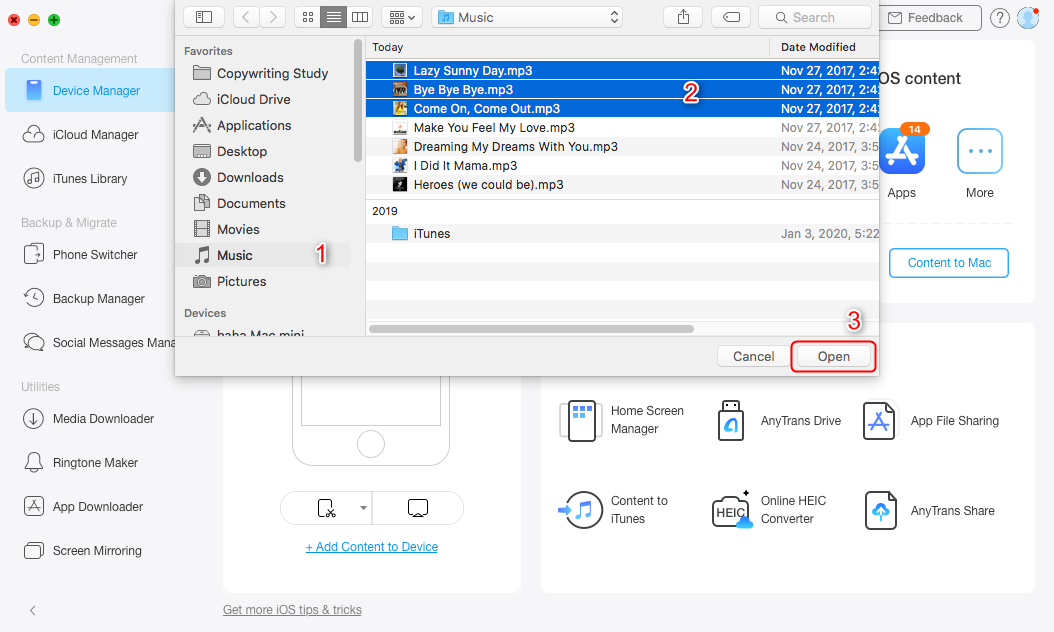
Select audio files to add to the iPhone
Step 4. Verify the details on the following screen and then click on the Next button to continue.
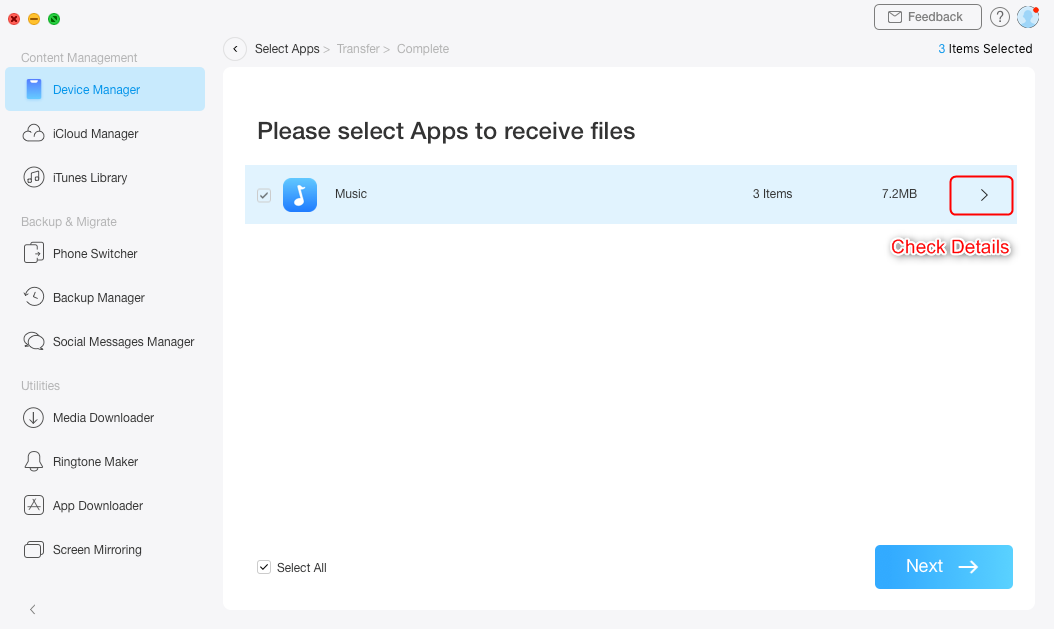
Send music files to the iPhone
Your chosen files will be transferred to your iPhone or iPad.
The Bottom Line
Extracting audio from a video on the iPhone is actually easier than you think. It is even easier on a Mac thanks to the built-in QuickTime Player app. Our guide above should teach you how to do the extraction part and then how to get the resulting music file on your iOS device.
More Related Articles

Member of iMobie team as well as an Apple fan, love to help more users solve various types of iOS & Android related issues.
Product-related questions? Contact Our Support Team to Get Quick Solution >
