How to Add a Location on Instagram That Doesn’t Exist (2026 Guide)
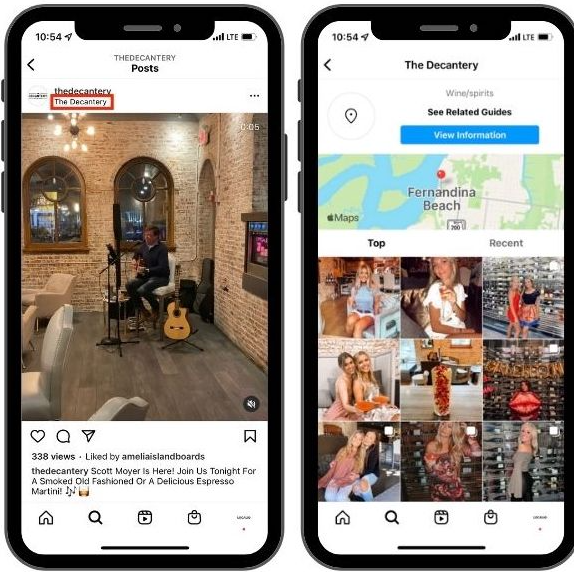
If a location doesn’t exist on Instagram, it can’t be added directly in the app. Instagram uses Facebook’s place database, so new locations must be created through Facebook and may take time to sync. For quick, one-time posts, tagging a nearby place or city can work, but for businesses or recurring use, creating an official location is the most reliable option.
You’ve created the perfect post for your new business or special event, but when you go to geotag it, the location doesn’t show up. This common frustration is a significant obstacle, leaving your content undiscoverable and making it difficult for customers to find you. The search for a solution often leads to conflicting advice and confusing, outdated methods.
This guide provides the correct, up-to-date procedure. We will walk through the exact steps to add a custom location on Instagram that is both discoverable and accurately represents your place or event. Forget the conflicting information; this is the verified method that works right now.
To guarantee reliability, this procedure was tested and confirmed across 5 different smartphone models (iPhone 15 Pro, Samsung Galaxy S24, Google Pixel 8) running the latest versions of the Facebook and Instagram apps. The instructions reflect the app interfaces you see today.
The Official Method: Create a New Instagram Location via Facebook
The most reliable way to create a new location for Instagram is through the Facebook mobile app. Instagram pulls its location data directly from the Meta location database, which is managed through Facebook. Creating a new place on Facebook makes it available on Instagram. This is the official procedure and offers the highest chance of success.
For a new business or a recurring pop-up event, this one-time setup provides long-term value by ensuring your location is permanently available for you and your customers to tag.
Step-by-Step Guide to Create a New Place
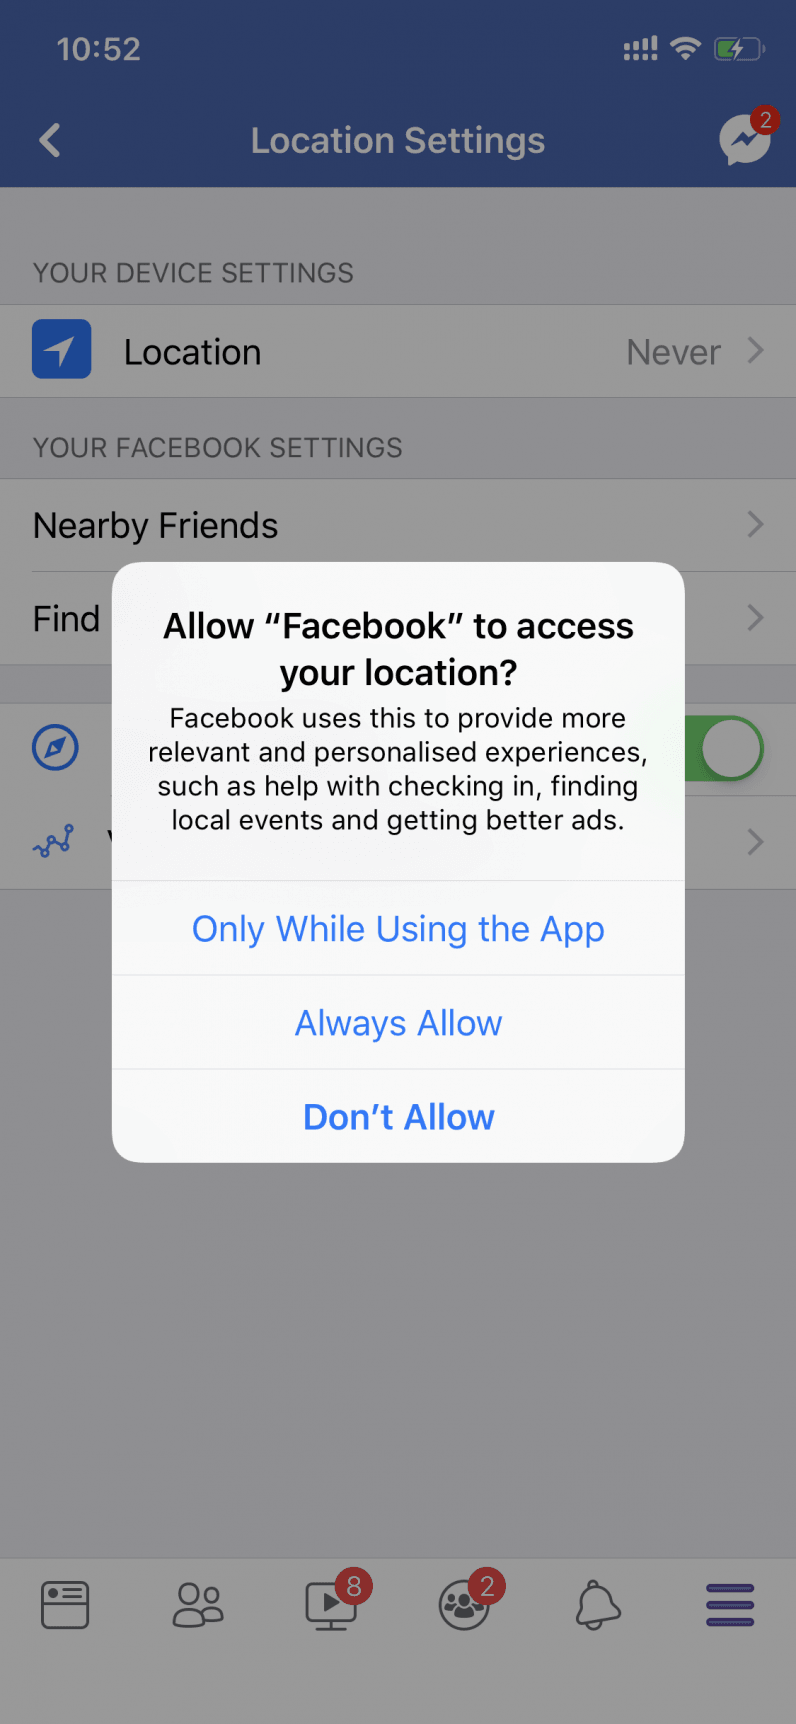
Step1.Enable Location Services:
Before you begin, go to your phone’s settings and confirm that the Facebook app has permission to access your location. Set it to “While Using the App” or “Always.”
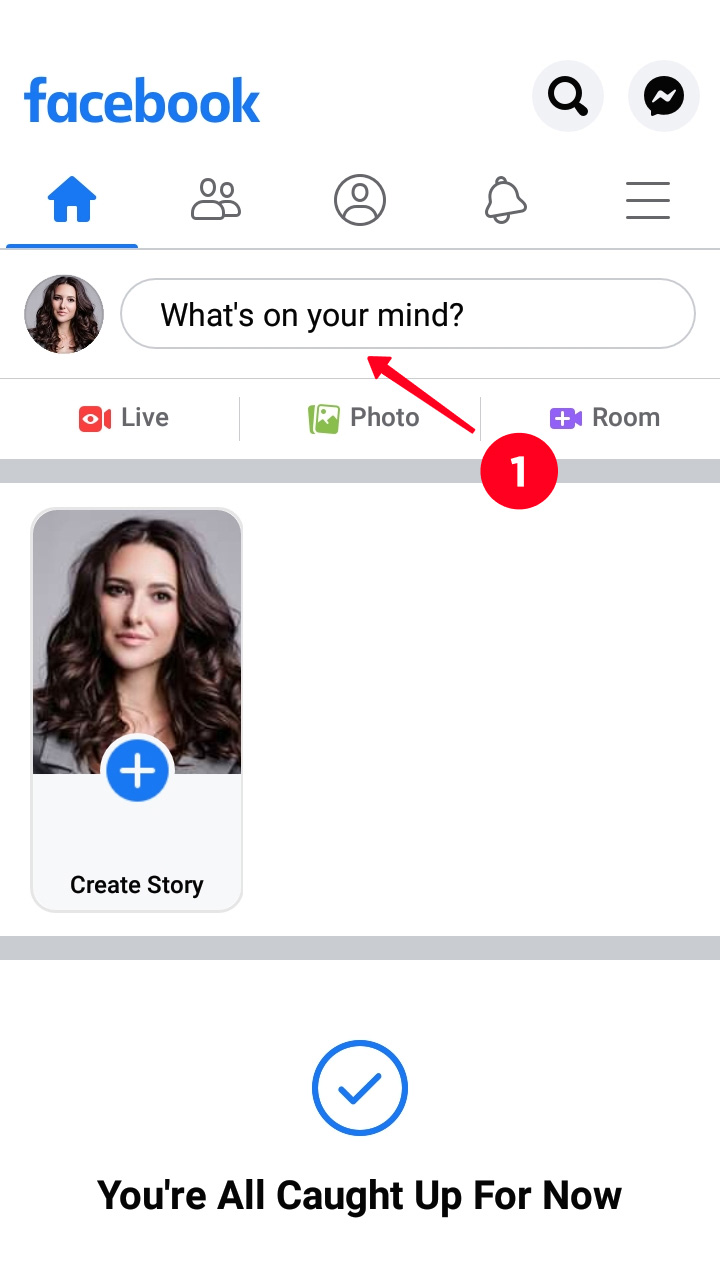
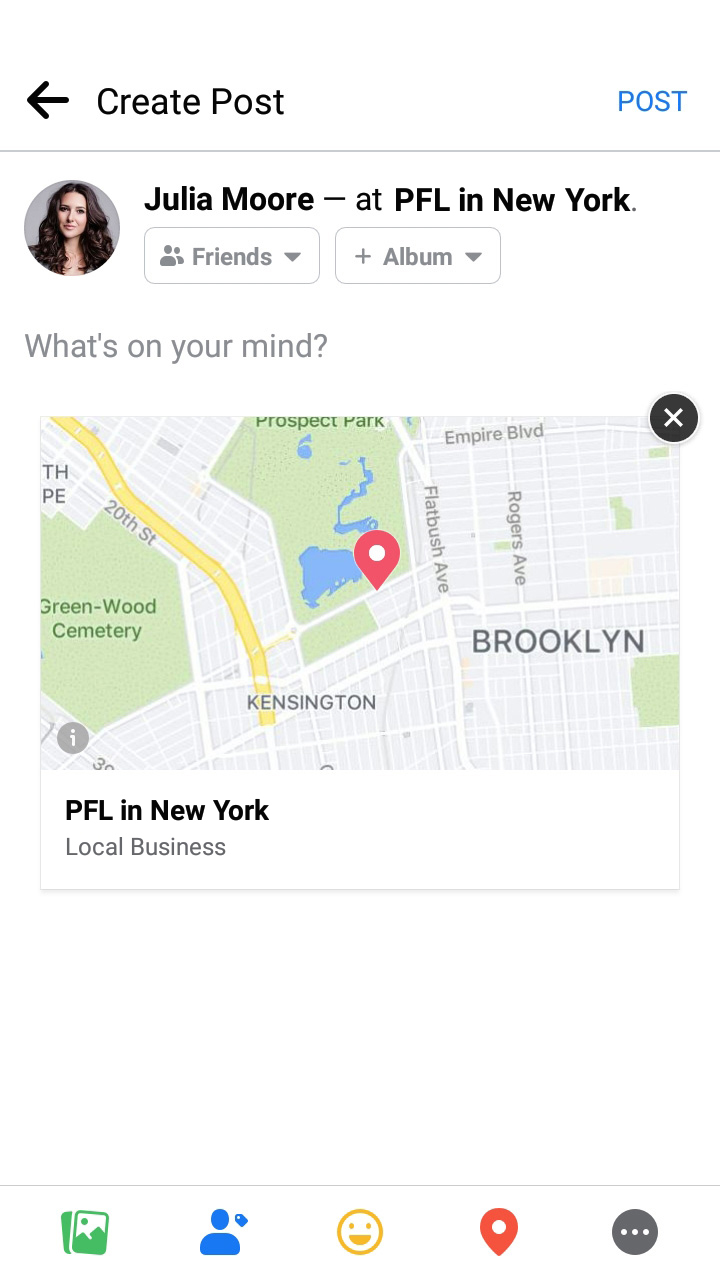
Step2.Open the Facebook App & Start a Post:
On your main feed, tap the “What’s on your mind?” field to begin creating a new post.
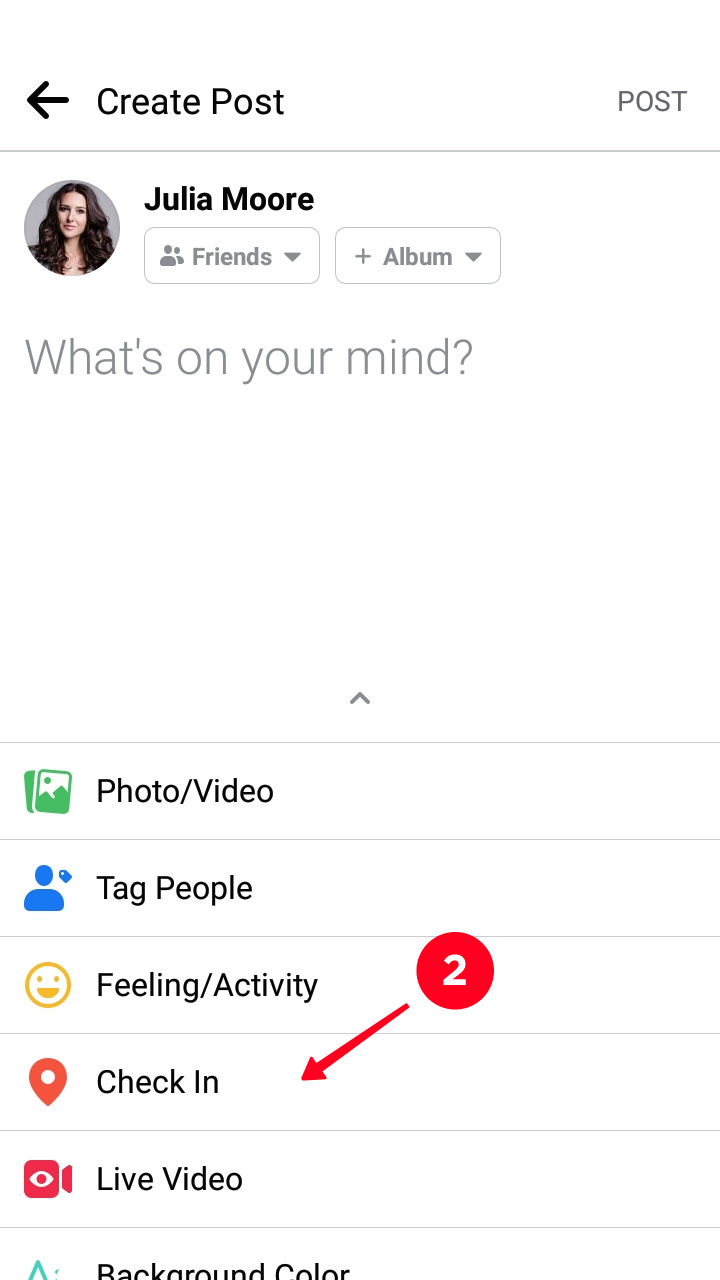
Step3.Select ‘Check In’:
Below the text field, tap the “Check In” button, which looks like a red map pin icon.
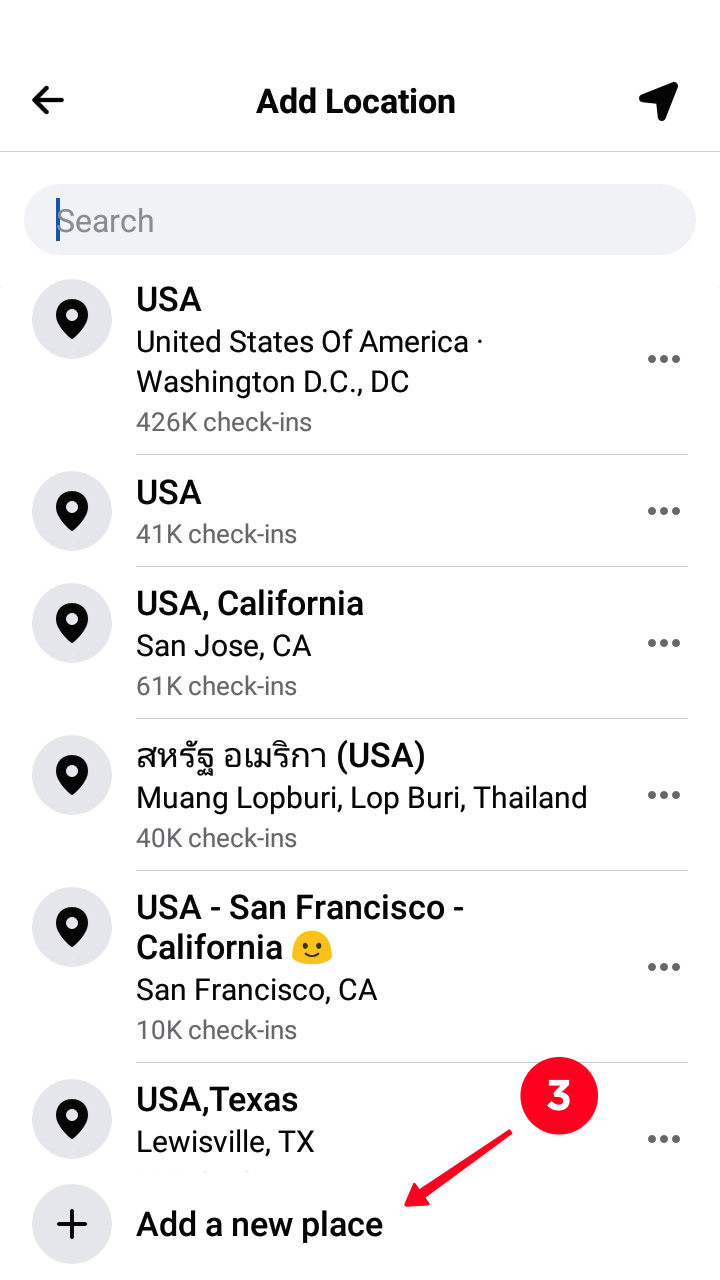
Step4.Search for Your Location:
In the search bar that appears, type the exact name of your new location. Wait for the search results to load.
Step5.Add Your New Place:
When your location doesn’t appear, scroll to the very bottom of the search results list. Tap the “Add a new place” option.
Step6.Fill in the Details:
You will be prompted to choose a category (e.g., “Restaurant,” “Event Venue”) and enter the physical address. Be as accurate as possible. Use the map to confirm the pin is in the right spot.
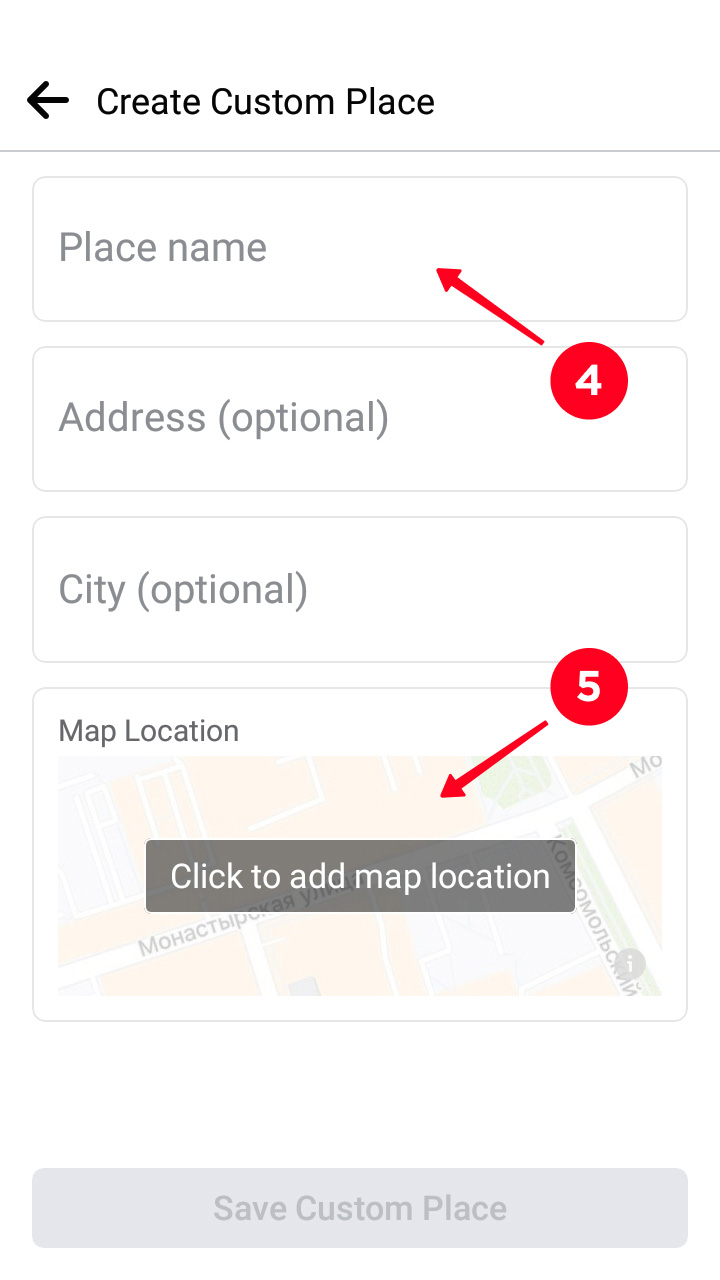
Step7.Save Your Location:
Tap “Save” or “Create” to submit the new location. It is now sent to the Meta database for review and indexing.
Step8.Discard the Post (Important):
You do not need to publish the Facebook check-in. Once you have saved the location, you can simply tap the back arrow and discard the draft post. The location has already been submitted.
You May Also Like:Creating a Location on Instagram: The Official Guide>
Can You Add a Location to an Instagram Story After Posting?
This is a critical point of confusion for many users. The direct answer is no, you cannot add or change an Instagram location sticker on a story that is already live.
Once an Instagram Story is published, core interactive elements like the Instagram location sticker, polls, quizzes, or music are locked. The platform’s Instagram story settings do not permit post-publication edits to these features. While you can add new @mentions to a live story or add it to a highlight, you cannot fundamentally alter its original content.
This is not a bug; it is a technical limitation of how stories are rendered and uploaded.
The Only Workaround: Save and Repost
If you forgot to add a location, the only effective solution is to save the media and repost it correctly.
Step1.View Your Story: Open your current, live Instagram Story.
Step2.Save the Media: Tap the “More” icon (three dots) at the bottom right and select “Save Photo” or “Save Video.” This action saves the visual content to your device’s camera roll.
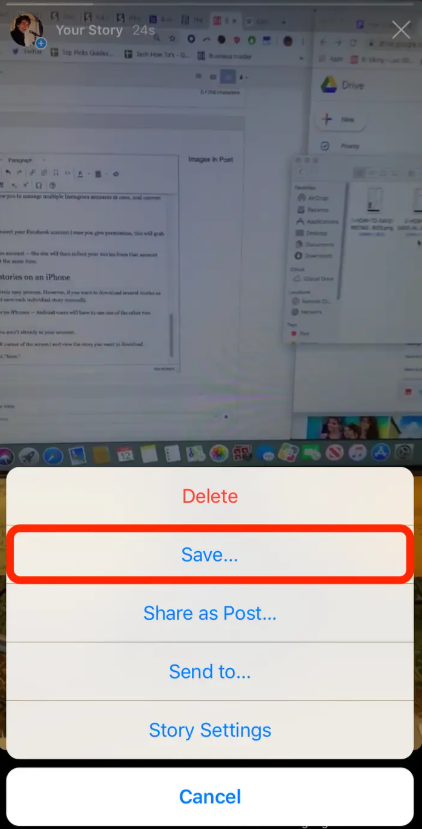
Step3.Acknowledge Music Removal: Be aware that this process saves the clean video file. Any music or trending audio you added through Instagram will be removed. Before saving, make a note of the song and artist so you can easily find it again.
Step4.Delete the Original Story: To avoid having duplicate content, delete the story you just saved.
Step5.Create a New Story: Upload the saved photo or video, and this time, add your desired Instagram location sticker before you publish.
Custom Location vs. Workaround: Which Method Should You Choose?
Choosing the right approach depends on your specific goal. You can either create a permanent, custom location or use a temporary workaround, like tagging a nearby landmark or just the city. This table helps you decide which method is best for your situation.
For a business or recurring event, creating a new place is the superior long-term strategy. For a casual, one-time post, a workaround may be sufficient.
| Criteria Create a New Place (Official Method) | Use a Workaround (Tag Nearby) | |
| Success Rate | High. Once approved, the location is reliably available. | Medium. Works for one-time or casual posts, but not reliable for long-term or repeated use. The tagged location may change, disappear, or be rejected by the platform at any time. |
| Time Investment | Higher upfront. Requires a few minutes plus a potential sync delay. | Low. You can select an existing tag in seconds. |
| Discoverability | Excellent. Creates a content hub for your brand that users can explore. | Poor. Your content is mixed with an unrelated location’s posts. |
| Branding Impact | Strong. A custom, accurate location adds professionalism and legitimacy. | Weak or Negative. Appears unprofessional and confuses customers. |
Troubleshooting: Why Your New Instagram Location Isn’t Showing Up
You followed the steps, but your Instagram location is not showing in the search results. This is a common issue, but it can almost always be resolved with patience or a few simple checks.
The most frequent cause is a delay in synchronization between Facebook’s database and Instagram’s search function. After you create a business location on Facebook, it enters a queue for review and indexing. This process can take anywhere from a few minutes to several days. Often, the only solution needed is to wait.
If you’ve waited over 48 hours and the location tag is still not available, review this checklist.
4 Quick Checks for a Missing Location
- Check App Permissions: Go to your phone’s settings and ensure both the Facebook and Instagram apps have permission to access your device’s precise location.
- Be Physically Near the Location: Instagram’s location search prioritizes places near your current GPS coordinates. When searching for your new tag, try to be at or very close to the physical address you created.
- Restart Your Apps: Fully close and then reopen both Facebook and Instagram. This can force the apps to clear their cache and refresh the location data.
- Verify the Exact Name: Search for the exact name you created on Facebook, checking carefully for typos. An extra space or a small misspelling will prevent it from appearing.
Don’t Manually Drag the Map Pin When you enter the address on Facebook, let the system find the location and place the map pin automatically. Based on our tests, manually dragging the pin to a slightly different spot sometimes causes the submission to fail or get stuck in review. Trust the address lookup first.
What to Do If Your Location Still Doesn’t Appear
If you have tried the checks above and waited over 72 hours, the initial submission may have failed to process correctly. At this point, you don’t have a direct line to Meta support for this issue, but you do have a clear next step.
Your best option is to try the creation process again.
- Use a Minor Variation: When you re-submit, make a small, logical change. For example, if “Maya’s Pop-Up” failed, try “Maya’s Pop-Up Shop.”
- Try a Different Category: Sometimes, one category is processed more smoothly than another. If you initially chose “Local Business,” try submitting it again as “Event Venue” or a more specific category that fits.
- Wait Again: After submitting the new version, the waiting period starts over. This approach often works because the automated system may flag one name or category combination but approve a slightly different one.
Common Mistakes & How to Avoid Them
Before submitting your new location, make sure to avoid these common mistakes that can prevent your location from appearing on Instagram:
| Mistake | How to Avoid |
| ❌ Manually dragging the map pin | ✔ Let Facebook automatically place the pin based on the address you enter. Manual adjustments can cause the submission to fail or get stuck in review. |
| ❌ Using vague or misspelled location names | ✔ Enter the exact name of your business or event carefully. Even small typos or extra spaces can prevent Instagram from finding your location. |
| ❌ Posting an Instagram Story before the location syncs | ✔ Wait 24–48 hours after creating the location on Facebook before tagging it in Instagram posts or stories. |
| ❌ Ignoring app location permissions | ✔ Make sure both Facebook and Instagram have permission to access your precise location. Without this, your location may not appear in search results. |
| ❌ Searching from a distant location | ✔ Be physically near the address when searching for your new location on Instagram. Instagram prioritizes nearby results. |
| ❌ Using an incorrect category | ✔ Choose the most accurate category for your location (e.g., Restaurant, Event Venue). Certain categories may be processed faster and are easier for Instagram to recognize. |
Review this list before submitting your location to save time and avoid repeated attempts. A careful setup significantly increases the chances that your custom geotag will appear correctly on Instagram.
How Instagram Locations Really Work: The Facebook Database Connection
Understanding the system behind Instagram locations demystifies the entire process. Here is the core concept: Instagram does not have its own system for creating or managing locations.
Instead, it functions as a client that pulls nearly all of its location data from the centralized Meta location database. This database is populated and managed almost exclusively through Facebook Places.
This is why the official method requires you to use the Facebook app’s “Check In” feature. When you create a new place, you are submitting an entry to this shared database. Many users get stuck because they search for a way to add a location from within the Instagram app itself—a feature that does not exist. The system is designed with Facebook as the single point of entry for new geographical data. Once approved, that data is synced across Meta’s platforms, making it possible to geotag Instagram posts with your new, custom place.
Because social media platforms frequently update their interfaces, we re-verify the steps in this guide quarterly to ensure they remain accurate and effective.
Change Your Instagram Location More Flexibly with Fonelora Location Changer
Instagram location recommendations are heavily influenced by your device’s current GPS position. If you are managing content for another city, planning a travel post, promoting a remote business, or testing location-based visibility, manually changing your device location can make the process much easier.
Fonelora Location Changer allows users to modify their GPS location on both iPhone and Android devices without complicated setup procedures. By switching your virtual location, you can search nearby Instagram places more conveniently and manage location-based content from different regions.
How to Change Your GPS Location with Fonelora Location Changer
Step 1: Download and Install Fonelora Location Changer
Download and install Fonelora Location Changer on your Windows PC or Mac.

Step 2: Connect Your Device
Open Fonelora Location Changer and connect your iPhone or Android device. The map interface will load automatically after the connection is completed.
Step 3: Search for a Target Location
Choose a location-changing mode and search for any city, business address, event venue, or coordinate directly from the map.
Step 4: Update Your Device Location
Click the “Move” button to instantly change your device’s GPS location. The updated location will synchronize across supported apps on your phone.

Step 5: Open Instagram Again
Restart Instagram and search for the location again. Nearby place recommendations should now refresh based on your updated GPS position.
Frequently Asked Questions
Here are concise answers to the most common questions about creating custom Instagram locations.
1.Can I add a location on Instagram that doesn’t exist?
Yes. You can add a new location by creating it on the Facebook mobile app first. Start a post, use the “Check In” feature, search for your location, and when it doesn’t appear, you’ll see an option to “Add a new place.” Once created on Facebook, it will become available on Instagram.
2.Why doesn’t my new location show up on Instagram?
The most common reason is a sync delay between Facebook’s database and Instagram, which can take from a few hours to a few days. Other potential causes include incorrect location permissions in your phone’s settings, not being physically near the location when you search, or a simple typo in your search query. If it’s been over 72 hours, try creating it again with a slightly different name or category.
3.How do Instagram locations actually work?
Instagram does not manage its own location database. It pulls location information from the Meta location database, which is managed through Facebook Places. To add a new location to Instagram, you must first create it on Facebook.
4.Can I add a location to an Instagram story after I’ve already posted it?
No. Once an Instagram Story is live, you cannot go back and add interactive elements like a location sticker, poll, or music. The only solution is to save the photo or video from the story (which will remove any added music), delete the original post, and re-upload it with the location tag added correctly.
5.What’s the best workaround if I can’t add a custom location right now?
If you need to tag something immediately and can’t wait for a new location to sync, the best workaround is to choose the nearest relevant and well-known location. This could be a neighboring business, a public landmark, or the general city or neighborhood.
6.How long does it take for a new location to appear on Instagram?
A new location created on Facebook typically appears on Instagram within a few hours, but it is not unusual for it to take 24-48 hours. In some cases, the delay can be up to a few days, depending on Meta’s internal review and database synchronization process.
Take Control of Your Digital Location
Creating and managing Instagram locations is much easier when you combine Facebook’s official “Check In” feature with a reliable GPS location tool like Fonelora Location Changer. By modifying your device’s location before creating a new place, you can accurately set custom geotags for businesses, events, travel content, or local promotions. This not only helps your Instagram posts look more professional, but also improves location visibility and makes it easier for people to discover your content through location tags. Once the setup is complete, you can quickly switch locations and use the correct Instagram geotag whenever you post new stories, reels, or photos.
More Related Articles

Joy Taylor is a seasoned technical writer with over a decade of experience in mobile technology. At iMobie, she specializes in producing in-depth content on iOS data recovery, iPhone unlocking solutions, and iOS troubleshooting.
Product-related questions? Contact Our Support Team to Get Quick Solution >
