You are on your daily walk, feeling confident as you tap a 6-star Diablos on the map. You dodge, you swipe, you land your combos—but the 75-second timer runs out while the monster still has a quarter of its health left. You are not alone. Many players hit this frustrating mid-game wall. Despite constantly spending precious mats and Zenny to upgrade weapons, the fights still take too long. This leads to a deep fear of wasting your severely limited resources on the wrong gear.
Instead of digging through fragmented Reddit threads or throwing Zenny at random upgrades, you need a reliable progression roadmap. This guide breaks down exactly how Monster Hunter Now equipment builds work in the real world. We will resolve your confusion about armor skill thresholds—specifically, the exact Grades you need to reach to unlock powerful skills. By combining specific weapons and armor sets, you can stop running out of time and start dominating tougher hunts.
Table of ContentsHide
The Expert Method: Early Game Builds (HR 20-40)
When transitioning from the tutorial stages to the mid-game, you will experience a severe difficulty spike. For players struggling against 4-star and 5-star monsters, understanding the foundation of a good build is an absolute necessity.
Here is an expert insight that serves as the foundation for our procedure: Many players focus solely on brute-forcing their weapon’s rarity, but the real damage optimization in Monster Hunter Now comes from armor skill synergy. Combining skills like Weakness Exploit, Attack Boost, or Element Attack can increase effective damage far more than upgrading a weapon alone. Players who prioritize skill synergy across armor pieces consistently outperform players with higher-rarity weapons but poor skill combinations.
To build an optimized early-game framework, follow this step-by-step equipment guide. Note: Skills do not activate just by crafting the item. You must reach the specific Grade threshold listed below.
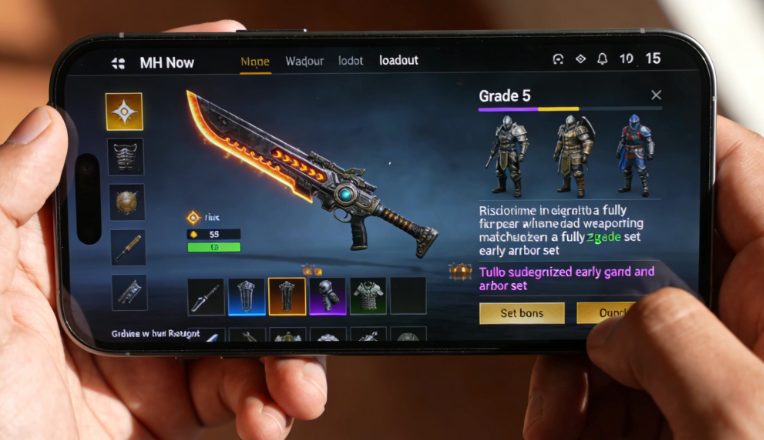
- Headgear (Kulu Headpiece): Crafting this provides Lock-On at Grade 2, an absolute must-have tool for melee players to target specific monster weak points. Pushing it to Grade 4 unlocks Critical Eye, increasing your affinity (critical hit chance).
- Chest (Pukei Mail or Leather Mail): The Pukei Mail is an excellent choice for ranged weapons because it unlocks Focus at Grade 2, speeding up your charge times. Alternatively, Leather Mail offers a flat Attack Boost right out of the gate.
- Gloves (Kulu Vambraces or Rathian Vambraces): Use the Kulu gloves to stack additional Critical Eye (Grade 4), or Rathian gloves for Burst (Grade 4), which increases attack power upon landing consecutive hits.
- Waist (Jagras Coil): This piece offers the Rising Tide skill at Grade 2, increasing your attack power and defense as the hunt timer counts down. This is perfect for securing a kill in the final 15 seconds.
- Legs (Kulu Greaves): Round out the build with more Critical Eye, which unlocks at Grade 4, to guarantee frequent critical strikes.
This beginner method relies entirely on easily farmable monsters, ensuring your armor sets synergize perfectly to clear hunts without requiring rare sub-species materials.
Learn More:How to Find Someone’s Location on Instagram: A Realistic Guide for 2026 >
Decision Guide: Weapon Rarity Brute Force vs. Armor Skill Synergy
To improve your damage output against stronger monsters, you must choose a strategic progression method. Understanding damage optimization means comparing two distinct approaches: the inefficient manual method of forcing weapon upgrades, and the optimal solution of armor skill synergy.
| Metric | Weapon Rarity Brute Force (Inefficient) | Armor Skill Synergy (Optimal Solution) |
|---|---|---|
| Success Rate | Low. Damage plateaus quickly, leading to timer failures. | High. Multipliers stack to drastically reduce hunt times. |
| Resource Cost | Extremely High. Drains your Zenny and rare node materials fast. | Moderate. Excellent skills are available on Grade 2 and Grade 4 armor. |
| Hunt Safety Risk | High. Fights drag on, increasing the chance of taking fatal damage. | Low. Faster kills mean fewer opportunities for the monster to attack. |
| Technical Skill | High. Requires perfect dodging to compensate for low damage. | Moderate. Tools like Lock-On make targeting weak points easy. |
Relying exclusively on weapon rarity limits your peak damage. Without defensive skills, your hunt safety risk also remains high. Conversely, stacking the best armor skills will multiply your base weapon damage. This allows you to comfortably beat the clock, proving that skill synergy is the smartest gear progression choice available.
Top Weapon Builds: Bow, Long Sword, and Great Sword
Which weapon is strongest? Currently, the Bow is widely considered the top-tier weapon type due to its ability to deal massive sustained damage from a safe distance, drastically minimizing potion usage. The Long Sword follows closely behind, offering unparalleled counter-attack potential for players who master its timing.
Here are the step-by-step gear combinations for the three most popular weapons in the current meta, including the mandatory Grade thresholds required to make them function.
The Optimized Bow Build
For Bow users, charge speed is the most vital metric. This solution prioritizes the Focus skill to reduce charge times, allowing you to fire maximum-damage arrows faster while maintaining your mobility. To reach Focus 5, you need this exact setup:
- Head: Pukei Hood (Focus unlocks at Grade 2)
- Chest: Pukei Mail (Focus upgrades to Level 2 at Grade 4)
- Gloves: Rathian Vambraces (Burst unlocks at Grade 4 for extra combo damage)
- Waist: Rathalos Coil (Focus unlocks at Grade 5)
- Legs: Jyura Greaves (Focus upgrades to Level 2 at Grade 6)
The Critical Long Sword Build
The Long Sword relies on continuous, fluid strikes to maintain the Spirit Gauge. This build maximizes Affinity (critical hit rate) and targets weak zones. We’ve purposefully excluded rare event monsters so you can actually farm this gear consistently.
- Head: Kulu Headpiece (Lock-On at Grade 2, Critical Eye at Grade 4)
- Chest: Rathalos Mail (Weakness Exploit unlocks at Grade 6 — Do not craft this expecting a boost at Grade 5!)
- Gloves: Kulu Vambraces (Critical Eye at Grade 4)
- Waist: Rathian Coil (Burst unlocks at Grade 2)
- Legs: Kulu Greaves (Critical Eye at Grade 4)
The Raw Great Sword Build
Great Sword mechanics involve absorbing hits via shoulder tackles and unleashing devastating charged slashes. This build focuses on pure attack multipliers to ensure every landed hit takes massive chunks of health.
- Head: Rathalos Helm (Attack Boost at Grade 2)
- Chest: Rathalos Mail (Weakness Exploit at Grade 6)
- Gloves: Anjanath Vambraces (Attack Boost at Grade 2)
- Waist: Diablos Coil (Partbreaker at Grade 2)
- Legs: Jyura Greaves (Focus at Grade 6 to charge slashes faster)
Learn More:How to Stop Sharing Location Without Notifying on iMessage >

Demystifying the Meta: Elemental Damage & Driftmelting
A frequent point of confusion among players is whether to focus on raw damage or elemental builds. Should you stick with your trusty Diablos weapon forever? The short answer is no. Understanding elemental damage mechanics is essential for scaling into 6-star hunts and beyond.
Elemental builds function by adding a flat damage number to your weapon’s base attack—but only if the monster is weak to that specific element. If a monster is not weak to Fire, your Fire weapon will only deal its base raw physical damage.
From a mathematical standpoint, adding Element Attack armor skills (such as Fire Attack or Water Attack) is vastly superior in the mid-to-late game. Upgrading an armor piece to unlock Level 3 Water Attack adds a massive 200 points of water damage. Trying to get 200 base attack on a raw weapon requires multiple rarity upgrades, costing hundreds of rare node materials.
Furthermore, once you push into 8-star monsters, the meta introduces Driftmelting. This mechanic allows you to add random, powerful skill decorations to armor pieces that have been upgraded to Grade 8. Stacking elemental attack skills on top of Driftmelted Critical Eye or Aggressive Dodger stats is currently the only way to push your damage high enough to conquer the toughest endgame timers.
Learn More:Monster Hunter Now Joystick: The Ultimate Guide to Playing Without Walking >
The Grade 6 Transition and Zenny Bankruptcy: Do not over-invest Zenny in raw damage weapons past Grade 7! When you transition to elemental builds for the endgame, you will hit massive resource walls. Upgrading a single piece of armor to Grade 6 to unlock vital skills (like the Rathalos Mail) costs thousands of Zenny. Pushing weapons higher requires dozens of Earth Crystals, navigating the abysmal drop rates of Tier 2 bugs (like Carpenterbugs), and eventually farming the dreaded Grade 8 Wyvern Gem Shards (WGS). Hoard your Zenny early on, and focus your upgrades strictly on the armor pieces that unlock your most critical skills.
Endgame Builds & Smart Material Farming
Transitioning to Hunter Rank 50+ introduces 6-star and 7-star monsters, requiring a highly optimized gear setup. Because resources are severely limited, players often experience anxiety about investing Zenny into the wrong equipment.
To prevent squandering valuable mats, you must align your targeted endgame builds with a strategic material gathering routine. The endgame requires four distinct builds. You need a dedicated Water build (Jyuratodus gear), Fire build (Anjanath/Rathalos gear), Thunder build (Tobi-Kadachi/Zinogre gear), and Ice build (Legiana/Barioth gear) to exploit monster weaknesses perfectly.
Identify exactly which biome drops your needed materials. Use the game’s map tool to plan a walking route that intersects with as many of those specific large gathering nodes as possible, ignoring irrelevant biomes to save time. Follow this strict upgrade path to ensure efficient resource management:
- Swamp Biomes (Mining Nodes): Target Earth Crystals and Machalite Ore. You will need hundreds of these to upgrade elemental weapons (like the Jyuratodus Water weapons) past Grade 6. This is one of the most notorious bottlenecks in the game.
- Forest Biomes (Vegetation Nodes): Farm Carpenterbugs relentlessly. Their drop rates can feel punishingly low, and they are the primary bottleneck for nearly all standard armor sets, particularly the highly valued Rathian gloves and Rathalos chest pieces.
- Desert Biomes (Bone Nodes): Focus your farming here to collect Monster Bone+. These are critical for crafting the Diablos Bow or upgrading the Barroth armor pieces, which provide essential endgame defense.
By matching your daily gathering routes directly to the specific armor requirements of your chosen weapon, you avoid wasting resources on dead-end gear, establishing a highly efficient progression loop.
Learn More:iAnyGo Not Working? The Real Fix for iOS 17 & Android >
Farm Monster Hunter Now Materials More Efficiently with Fonelora Location Changer
One of the biggest endgame bottlenecks in Monster Hunter Now is not monster difficulty — it’s resource farming. Materials like Earth Crystals, Carpenterbugs, and Monster Bone+ are heavily tied to biome-specific gathering nodes, forcing players to spend hours walking repetitive routes just to upgrade a single armor piece.
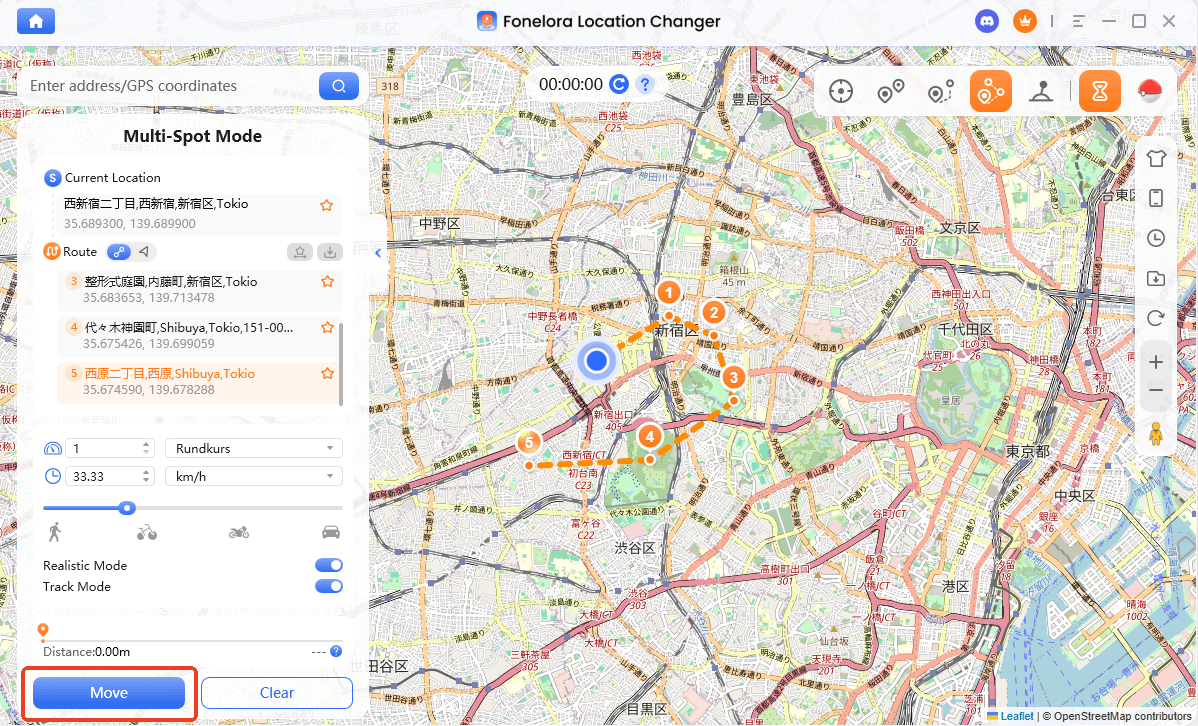
For players struggling with limited farming routes or inaccessible gathering areas, tools like Fonelora Location Changer can help simulate movement and optimize biome farming more efficiently.
Compared with basic GPS spoofing apps, Fonelora supports route simulation, movement speed adjustment, and multi-spot navigation, which makes long farming sessions feel more natural and stable during gameplay.
It can be especially useful for:
- Farming biome-specific materials faster
- Reaching remote gathering nodes
- Simulating walking routes in Monster Hunter Now
- Reducing repetitive travel during resource grinding
- Managing long farming sessions more efficiently
Here’s how to use Fonelora Location Changer for Monster Hunter Now farming:
Step 1: Install Fonelora Location Changer on your Windows or Mac computer.
Step 2: Connect your iPhone or Android device and launch the software.

Step 3: Select “Multi-spot Mode” or “Joystick Mode” to create a custom farming route.
Step 4: Set your movement speed to simulate realistic walking behavior.
Step 5: Open Monster Hunter Now and follow your planned biome route for gathering nodes and monster spawns.
To reduce account risks, avoid unrealistic teleporting between distant regions and keep movement patterns consistent with normal gameplay.
Conclusion
Progression walls in Monster Hunter Now are rarely caused by a lack of player skill. More often, they happen because of inefficient upgrade paths, weak armor skill synergy, or poor resource management. Once you understand how Grade thresholds, elemental builds, and armor skills interact, your hunts become dramatically smoother and more efficient.
From early-game survival builds to optimized elemental endgame setups, having a structured farming and upgrade strategy prevents wasted Zenny, unnecessary upgrades, and frustrating timer failures. And because endgame progression depends heavily on biome farming and gathering routes, tools like Fonelora Location Changer can also help players manage long farming sessions and optimize material collection more efficiently.
With the right build planning, smarter resource usage, and efficient farming routes, you can steadily push into tougher hunts while making every upgrade count.


Hot Topics
