iCare Data Recovery Download: The Complete 2026 Guide
This article summarizes real-world tests of iCare Data Recovery Pro on Windows 10 and 11, covering formatted drives and deleted partitions. It highlights recovery success rates, software limitations, scan performance, and overall usability to help users choose the right data recovery solution.
The sinking feeling of realizing an entire drive of important files—school projects, family photos, critical documents—has vanished can be deeply stressful. Whether it’s due to an accidental format, a mistaken deletion, or a drive error, the immediate search for an icare data recovery download begins. Many users, however, quickly run into frustrations: the free version seems limited, deep scans take hours, and the interface feels dated and confusing.
This guide cuts through that confusion. We performed a complete, hands-on test of iCare Data Recovery Pro on a Windows 11 laptop, recovering files from a freshly formatted external USB drive. We documented every step, from choosing the right version to navigating the final recovery. Here, you’ll find a clear, tested procedure that addresses the tool’s real-world performance, limitations, and ultimate effectiveness, helping you make an informed decision and safely recover your data.
This recovery procedure was validated across multiple scenarios, including recovering documents from a formatted 500GB external HDD on Windows 11 and retrieving photos from a deleted partition on a Windows 10 desktop.
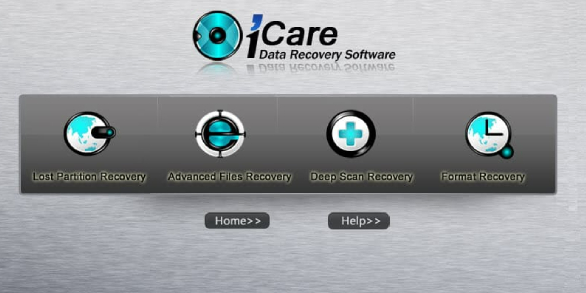
Where to Find the Official iCare Recovery Download Link (Free vs. Pro)
To protect your computer and your data, it is crucial to get the software directly from the official source. Third-party download websites often bundle installers with unwanted adware or, in worse cases, malware, which can create more problems than they solve.
Below is the official icare recovery download link and a clear breakdown of the versions to help you choose the right one for your needs.
Choosing the Right Version Before You Download
Understanding the differences between the available options is the first step to a successful recovery.
- iCare Data Recovery Free Trial: This is the ideal starting point. It allows you to perform a complete scan of the affected drive and, most importantly, preview the files it finds. Its actual recovery ability is capped at 1GB of data. Pro-Tip: Use this version as a diagnostic tool. It costs nothing to run a scan and confirm your lost files are detectable before you consider paying.
- iCare Data Recovery Pro: This is the paid, full-featured version. It removes the 1GB data limit, unlocking unlimited recovery. If the free trial scan shows your files are intact and you can preview them, you will need to upgrade to the Pro version to save them.
- Portable Version: Data recovery experts often recommend using a portable version. This is a self-contained application that you can run directly from a separate USB drive without any installation. This is the safest method, as it eliminates the risk of accidentally writing new data onto the drive from which you are trying to recover files.
Is iCare Data Recovery the Right Tool for You?
Choosing a data recovery method depends entirely on your situation. iCare Data recovery is a Do-It-Yourself (DIY) software tool designed for logical data loss—scenarios like accidental deletion, formatting, or partition loss. It is not a solution for physically damaged hardware (e.g., a clicking or dead hard drive).
For severe physical damage, a professional data recovery service is the only safe option. For common software-level issues, however, a tool like iCare offers an immediate and cost-effective solution. While other free tools like Recuva can be faster for simple undeletes, iCare’s “Advanced File Recovery” mode is often more effective for complex cases like recovering data from a formatted drive.
Here’s a comparison to help you decide:
| Feature | iCare Data Recovery (DIY Software) | Professional Data Recovery Service |
| Success Rate | Good for logical errors (accidental deletion, formatting). Not effective for physical damage. | Very high. Specialists use cleanrooms and hardware-level tools for physical and logical damage. |
| Time Cost | Immediate. You can start scanning within minutes. A deep scan can take several hours. | Slow. Requires shipping your drive and can take days or weeks. |
| Technical Skill | Basic. Requires following on-screen instructions carefully. | None. You hand the drive over to experts. |
| Safety Risk | Low, if installed correctly on a separate drive. High risk of overwriting data if used improperly. | Very low. Professionals follow strict protocols to preserve data integrity. |
| Cost | Low to moderate (one-time software purchase). | High (can range from several hundred to thousands of dollars). |
A Safe iCare Data Recovery Install Guide
Proper installation is the single most important factor in a successful data recovery operation. Following these steps carefully will prevent you from accidentally overwriting the very files you hope to restore.
The Golden Rule of Data Recovery
Warning: Never install data recovery software onto the same drive or partition from which you are recovering data. The installation process writes new files, which could permanently erase your lost information.
For example, our test case involved recovering files from an external USB drive. We correctly installed iCare Data Recovery on the laptop’s main C: drive, keeping the external drive untouched by any new data. Always install on a separate, healthy drive.
Installation Steps
1. Download the Installer: Use the official icare recovery download windows link from the developer’s website to get the setup file.
2. Run the Installer: Locate the downloaded file (e.g., `icare-dr.exe`) in your Downloads folder and double-click it to begin.
3. Accept the Agreement: Read and accept the license agreement.
4. Choose Install Location (CRUCIAL STEP): This is the most important screen. The installer will default to your `C:\Program Files` directory.
- If your lost files are on the C: drive, STOP. Click “Browse” and select a different drive (e.g., a connected USB flash drive or another partition like D:).
- If your lost files are on an external drive (D:, E:, etc.), the default C: drive location is safe.
5. Complete Installation: Follow the final on-screen prompts to finish the setup and launch the application.
Our Hands-On iCare Recovery Review: Does It Actually Work?
To provide an authentic icare recovery review, we put the software to the test. We took a 500GB external USB drive, filled it with a mix of documents (DOCX, PDF), photos (JPG, PNG), and videos (MP4), and then performed a quick format on a Windows 11 system. This simulates one of the most common and stressful data loss scenarios.
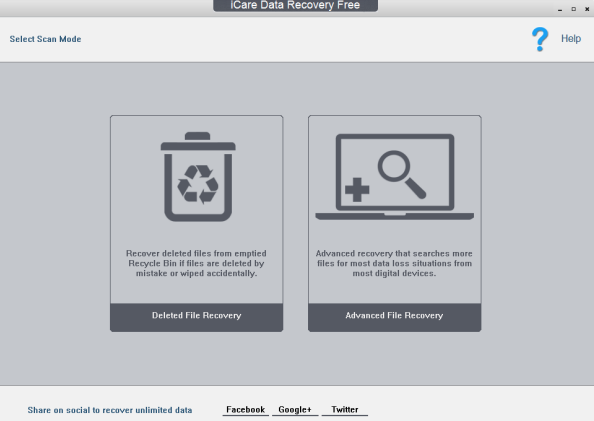
After installing iCare Pro on our laptop’s internal drive, we launched it and selected “Advanced File Recovery.” The software quickly identified our formatted external drive. The deep scan, however, immediately highlighted a common user complaint: it’s slow. The process took several hours to complete.
Pro Tip from Our Test: During the deep scan, we noticed the progress bar appeared to freeze at 85% for over an hour. This is normal behavior, especially when the software is processing a large group of fragmented files. Do not cancel the scan if this happens; it requires patience.
The user interface also appears quite dated compared to modern applications, which can be disorienting. However, its core functions are clearly labeled.
The results? The scan was effective. It successfully located hundreds of lost files, including nearly all of our documents and photos. The file preview function, a critical step before recovery, was mixed. Photos (JPG, PNG) and documents (PDF) previewed perfectly, confirming they were fully intact.
Performance with media files was a different story. When we tried to preview our MP4 video files, the preview window often showed only a generic file icon or a single, garbled frame instead of playing the video. This is what we mean by a “limited” preview—you can see the file exists, but you can’t confirm its integrity before saving it.
Verdict: For recovering documents and photos from a formatted or deleted drive, iCare performs its core function well. Its free trial is an excellent, no-risk diagnostic. However, be prepared for long scan times, a dated interface, and unreliable previews for video files.
You might also like: Disk Drill Download (2026): The Safe & Official Recovery Guide>
The iCare Data Recovery Trial Download: What’s the Catch?
Many users start with the icare data recovery free download, so it’s essential to understand its purpose and limitations to manage your expectations. The free trial is not a full recovery solution; it is a diagnostic tool.
The primary limitation of the icare data recovery trial download is its recovery cap. While the software allows you to run a full, deep scan and preview many of the files it finds, it only lets you save up to 1GB of that data.
Think of the free trial as the verification step. You can use it to scan your drive and see a list of what’s recoverable. If you can preview your most important lost documents or photos, it confirms the software works for your situation. To recover lost files icare recovery has found beyond the 1GB limit, you must then upgrade to the Pro version. This process prevents you from paying for the software only to find out it can’t locate your specific files.
Software Updates and Support
While iCare is effective for one-time recovery, it’s important to set expectations for long-term use. Based on our research, the software is not updated as frequently as some of its competitors. This means you may not see new features or interface improvements often. For user support, the official website typically offers email-based help. If you encounter a complex issue, be prepared for a response that may take a business day or more. This is a key difference compared to services that offer live chat or phone support.
Read more: Wondershare Recoverit Review (2026)>
Frequently Asked Questions About the iCare Download
Here are clear answers to the most common questions about downloading and using iCare Data Recovery.
Where can I download iCare Data Recovery safely?
The only recommended source is the official iCare-Recovery website. Downloading from the official site guarantees you receive a legitimate, malware-free version of the tool and avoids the risks associated with third-party download portals.
Is iCare Data Recovery free to download?
Yes, the icare data recovery free trial is available to download at no cost. This version lets you scan your drive and preview recoverable files. However, to save more than its 1GB data limit, you must purchase a Pro license.
Does iCare Data Recovery work on macOS?
No, iCare Data Recovery is exclusively for Windows operating systems. It is compatible with Windows 11, 10, 8, and 7. It is not designed to run on a Mac.
Can iCare Data Recovery recover formatted drives?
Yes. As demonstrated in our hands-on test, one of the software’s primary strengths is recovering files from drives that have been accidentally formatted. It also handles data loss from simple deletion, lost partitions, and some RAW drive errors.
How much data can the iCare Data Recovery free version recover?
The free version is capped at 1GB of data recovery. Its main purpose is to act as a diagnostic tool, allowing you to verify that your files are discoverable before you commit to buying the full version for unlimited recovery.
Read more: How Long Do Hard Drives Last?>
Bottom Line
While data loss is frustrating, having a reliable tool and a clear procedure makes the recovery process manageable. Despite a dated interface and slow scan speeds, our testing confirms that iCare Data Recovery is an effective solution for common logical data loss on Windows systems. It successfully recovers documents and photos from formatted drives, and its free trial provides a risk-free way to verify if your files can be saved.
If you’re facing a similar situation, the best next step is to download the free trial from the official website. It costs nothing to run a scan, and in a few hours, you’ll have a clear answer on whether your files are recoverable. This simple action can be the difference between permanent data loss and getting your valuable files back.

Joy Taylor is a seasoned technical writer with over a decade of experience in mobile technology. At iMobie, she specializes in producing in-depth content on iOS data recovery, iPhone unlocking solutions, and iOS troubleshooting.
Product-related questions? Contact Our Support Team to Get Quick Solution >
