All the Details about Screen Record on iPhone 13 [2026 Updated]
The screen recording function in all iPhone models is almost the same. However, there are a few differences in screen recording using an iPhone 13 compared to previous models. Therefore, if you own an iPhone 13, here’s everything you need to know about how to screen record on iPhone 13.
Exciting news! You no longer need to use a separate app for screen recording on your smartphone! With the iPhone 13, you can record everything that happens on your screen easily.
Imagine the possibilities: Capture your gameplay or show off a new app to your buddies! Plus, screen recording is a fantastic tool for those who love teaching or helping others. You can create videos that showcase how to do specific tasks on your iPhone 13, such as setting it up or fixing problems.
This feature is perfect for teachers, tech experts, or anyone who wants to explain things clearly.
In this article, we will tell you different ways how to screen record on iPhone 13, complete with some tips, tricks, and solutions to common screen recording issues.
How to Record Screen on iPhone 13 with App
As we mentioned earlier that the iPhone 13 comes with a built-in screen recording feature. However, if you would like to explore more options with advanced features, we recommend using DU Recorder.
It is a screen recording app that enables you to record your screen and stream it directly to renowned streaming platforms. However, the best part about DU Recorder is its editing features, like adding music and filters to your recordings to give them a professional touch.
Steps to Use DU Recorder
Let us tell you how to record screen on iPhone 13 with DU Recorder:
Step 1. Download and install DU Recorder on your iPhone 13 from the App Store.
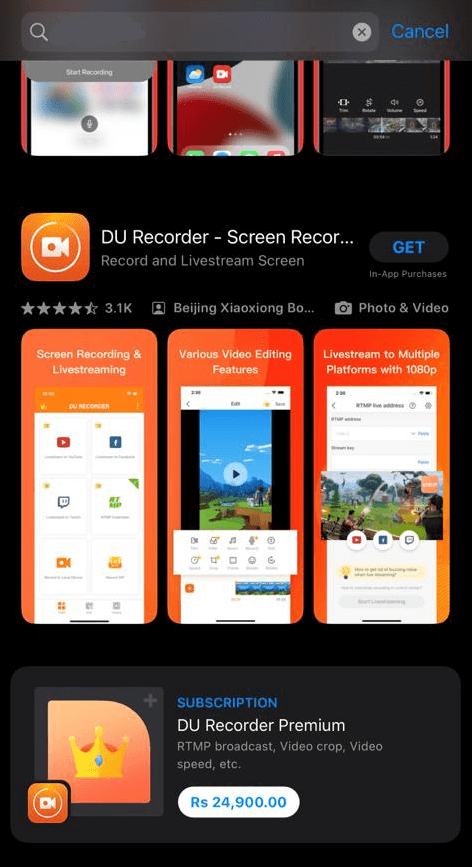
Download DU Recorder from App Store
Step 2. Launch DU Recorder and choose “Record to Local Device” to screen record your iPhone. You can also choose “Livestream to YouTube” or other options if you wish to stream your screen to online platforms.
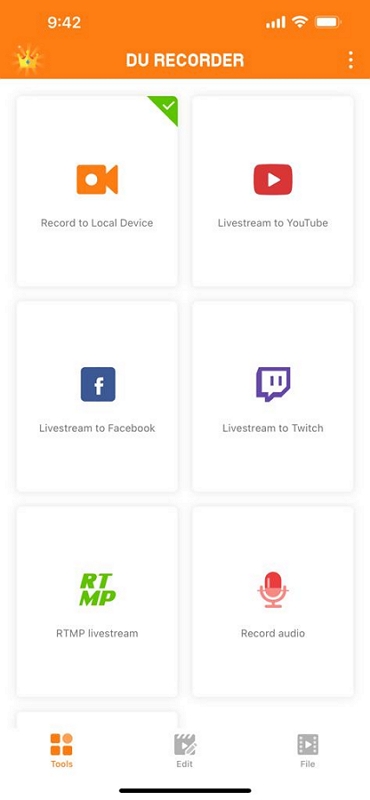
Choose Record to Local Device from Interface
Step 3. Tap on “Start” to start recording your iPhone 13 screen.
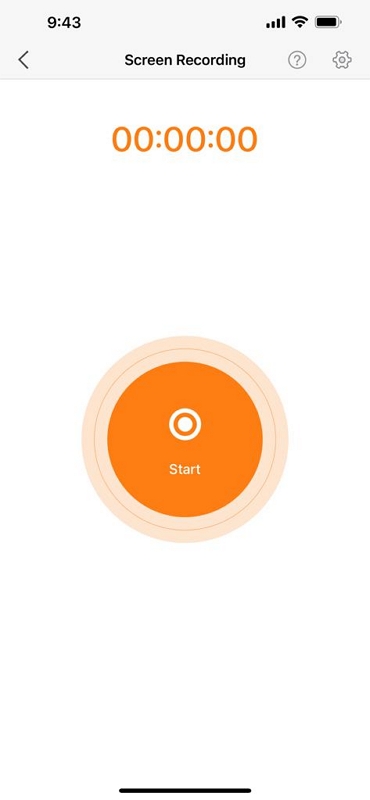
Tap Start to Initiate Screen Recording
DU Recorder is free to download; however, you must go premium ($13/month) to record or stream your screen.
Screen Record iPhone 13 Using Computer
If you would like to record your iPhone screen using a bigger display, like your PC, you can easily do so by screen mirroring your iPhone 13 on your PC and recording it. However, the steps for mirroring iPhone to Mac and Windows PC might differ due to compatibility issues.
Therefore, here are the steps to screen record iPhone 13 using Mac and Windows PC.
For Mac
If you have a Mac, you can mirror your iPhone 13 to it via the AirPlay feature. This is a built-in feature in Apple devices that connects your iPhone and Mac wirelessly.
Here’s what to do:
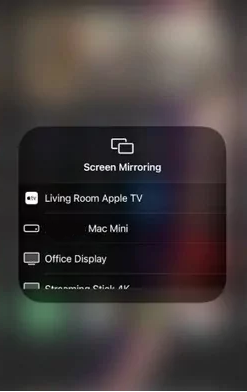
Step 1. Open the Control Center on your iPhone 13, and tap the icon with two boxes to enable screen mirroring via AirPlay.

Enable Screen Mirroring on iPhone 13
Step 2. Select your MacBook from the list of available devices.
Select MacBook from Available Devices
Once both devices are paired, you’ll be able to see your iPhone screen on your Mac. Now you can either record it or directly stream it to online platforms without an issue.
For Windows
Screenify offers many useful features to enhance your screen recording experience.
Step 1. Download and install Screenify on your PC.
Free Download * 100% Clean & Safe
Step 2. Once the installation is completed, launch the recorder and select “Screen only” mode.
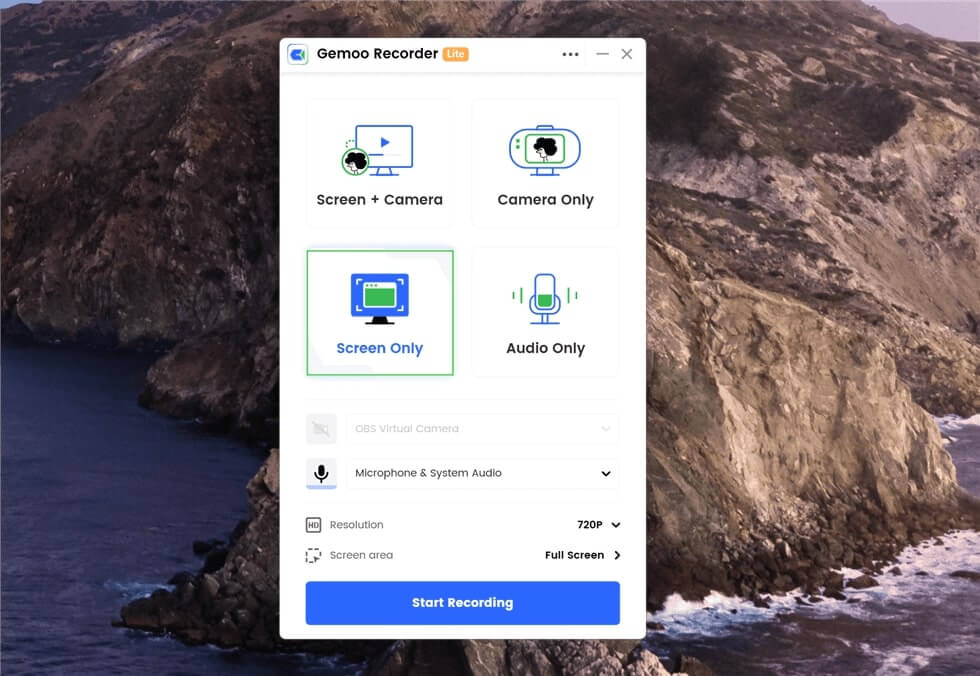
Choose the Recording Mode
Step 3. Click the “Start Recording” button to initiate recording. Wait until the 3-second countdown is completed. After that, your recording will be started.

Start Screen Recording
Step 4. You can click the “Add Annotation” button directly. It enables you to edit the screen during recording. You can use tools from the left sidebar.
Annotate the Screen
Step 5. Once the recording is finished, click the red “Stop” button or the “Finish Recording” button to end the recording.
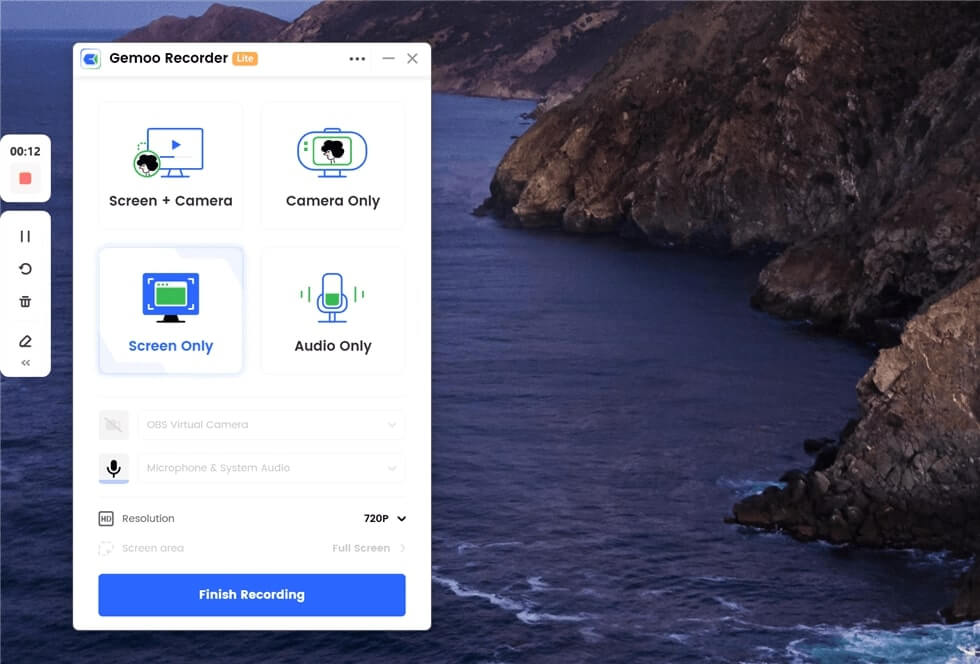
Finish the Screen Recording
What Are the Differences for Recording iPhone 11/12/13/14?
The iPhone 11, 12, 13, and 14 all have screen recording capabilities, but there are some differences between them:
For iPhone 11 and 12
- You need to manually add the “Screen Recording” button to the Control Center from the settings.
- You can only screen record in landscape mode at 30 fps.
- You cannot record your microphone audio while screen recording on iPhones 11 and 12.
For iPhone 13 and 14
- The “Screen Recording” option is already present in the Control Center.
- You can screen record in landscape and portrait mode at 60 fps.
- You can record your microphone audio when screen recording with iPhones 13 and 14.
Now that you know how to screen record on iPhone 13 and the difference in screen recording on different iPhone models, let us give you some helpful tips.
Tips & Tricks to Record iPhone Screen
When screen recording, we all want the process to be as smooth as possible without any interruptions or distractions. Therefore, here are some valuable tips to help you record your screen easily:
1. Enable Do Not Disturb
If you’re tired of notifications and calls showing up on your screen during screen recording, it is best to enable the “Do Not Disturb” mode on your iPhone.
For this, go to “Settings > Focus > Do Not Disturb” and adjust the settings to your liking.
2. Lock Screen Orientation
Whether you’re screen recording a game or a tutorial, it’s pretty annoying if your iPhone keeps going from landscape to portrait and vice versa. Therefore, always lock your screen orientation before you start recording your screen.
To lock screen orientation, swipe down from the top-right corner to open the Control Center and tap on the padlock icon.
3. Use a Tripod
If you want to keep your iPhone steady while you are recording, you can use a tripod. This will help to prevent your videos from being shaky.
4. Use Guided Access
If you’re recording sensitive information or private apps, use Guided Access to restrict the recording to a specific app and disable certain touch functions.
To enable Guided Access, go to “Settings > Accessibility > Guided Access” and turn on its toggle.
What Causes iPhone to Stop Screen Recording
Enabling screen recording on iPhone 13 is just a tap away; however, sometimes, you are unable to record your screen. What causes iPhone to stop screen recording? Let’s have a look:
Low Battery
Screen recording can use a lot of battery power, so if your iPhone’s battery is low, it may stop screen recording to conserve power.
Low Storage Space
If your iPhone runs out of available storage space while recording, the screen recording might stop abruptly. Make sure you have enough free space on your device before you start recording.
Software Bug
There may be a software bug that is causing your iPhone to stop screen recording. If you have updated to the latest version of iOS, try restarting your iPhone. If that doesn’t work, you can contact Apple support for help.
Third-party App
A third-party app may be interfering with the screen recording feature. If you have recently installed any new apps, try uninstalling them one by one to see if that fixes the problem.
Screen Lock
If your iPhone’s screen locks during recording (due to inactivity), the recording might stop. To prevent this, adjust your Auto-Lock settings to a longer time or keep interacting with the screen during recording.
Hardware Issue
If you have tried all of the above and your iPhone is still stopping screen recording, it may be a hardware issue. You can take your iPhone to a nearby Apple Authorized Service Provider for diagnosis and repair.
If you’re still with us, you’re in for a surprise! Below we have discussed a bonus tip on how to take a screenshot on iPhone 13.
Bonus Tip: How to Take a Screenshot on iPhone 13?
While screen recording is also pretty essential for avid gamers and people eager to make tutorials, one feature that we use on a daily basis, multiple times, is taking screenshots.
Did you come across an important piece of information and want to save it? Take a screenshot!
Found the name of an interesting book or movie and want to note it down? Take a screenshot instead!
But how you ask?
Let us take you through the steps of taking a screenshot on iPhone 13:
Take a Regular Screenshot
- Press the power and volume up buttons simultaneously on your iPhone 13 to take a regular screenshot.
Take a Scrolling Screenshot
- Press the power and volume up button to take a regular screenshot.
- Tap on the preview to open the screenshot, and tap on “Full Page.”
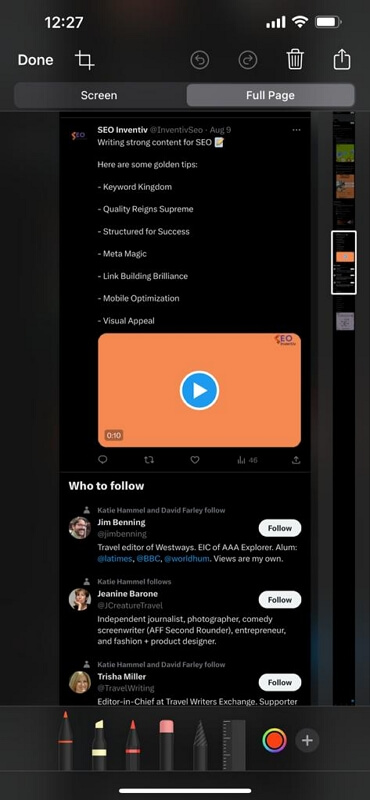
Tap Full Page to Scroll Through Screenshot
- This will give you a view of the whole page, and you can scroll up or down to view the content.
Conclusion
Whether you’re a gamer, sharing fun moments, or a tech whiz, helping others understand their iPhone better, screen recording on the iPhone 13 is like your digital camera for everything happening on your phone’s screen.
In this article, we have put together several ways how to screen record on iPhone 13 using a third-party app and using a computer. We have also discussed the differences between screen recording in various iPhone models and some valuable tips for a smooth screen recording experience.
So, if you ever need to use the screen recording feature on your iPhone 13, you know where to look!
Free Download * 100% Clean & Safe

Senior writer of the iMobie team as well as an Apple fan, love to help more users solve various types of iOS & Android-related issues.
Product-related questions? Contact Our Support Team to Get Quick Solution >
