3 Easy Ways to Screen Record on Windows with Audio
This post is structured to enlighten you on the four simple ways to record your Windows screen with audio effortlessly.
Recording your screen activity is one of the simplest yet affordable techniques available for you to share ideas, describe a situation, advertise your products, and even conserve those special memories you find noteworthy for later viewing. Regardless of the device you are using, the approach required is straightforward but can be complex when you have to include audio.
If you use a Windows computer system and need to capture your screen activity with the corresponding audio narration, this post is for you. Here, we explore the various ways to include audio while recording your Windows computer. Continue reading!
Use Screenify to Screen Record on Windows with Audio
Screenify is a professional screen recording suite capable of recording your Windows screen with high-end results. The software helps you capture every detail you find on your screen with the corresponding audio narration. You are allowed to record content such as gameplay, meetings, webinars, live streams, YouTube clips, and many more.
With Screenify, you have full control over everything displayed on your Windows screen. It comes with customizable recording dimensions, as you are allowed to select your recording range, whether full-screen, specific tab, or portion. This software also features basic editing tools like markup tools, shapes, numbers, stylus, GIFs, and others that you can choose from to polish your recording, so it’s more engaging and creative.
Another big pro of this screen recording software is the sleek UI. Screenify is built with laymen in mind so your tech proficiency doesn’t matter when using it. This software is not only compatible with Windows, Mac users are also welcome to use it.
Key Features
- 1-Click to record your screen and audio simultaneously on both Windows and Mac.
- Easily enhance your recordings within Screenify by selecting from the basic editing tools tucked into it.
- Captures your screen in multiple dimensions and saves the resulting content in Full HD, 4K, or 8K, depending on your resolution choice.
Free Download * 100% Clean & Safe
Steps to Use Screenify to Screen Record on Windows with Audio
Step 1. On your PC, free download Screenify, and then run it. Choose the Record Screen mode from its main page.
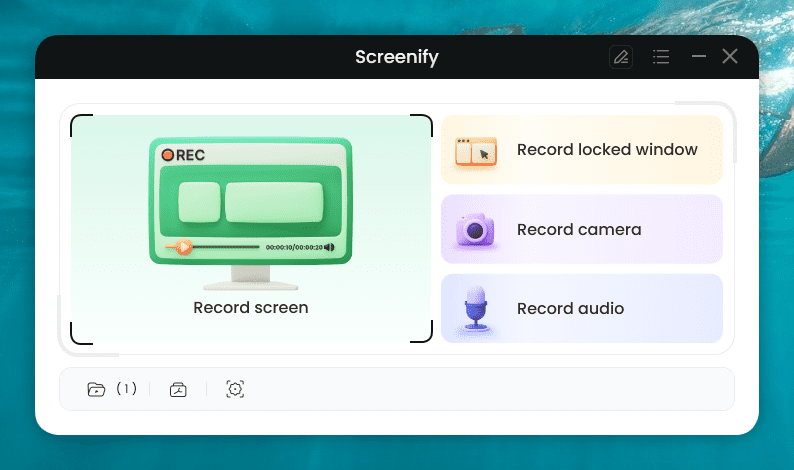
Screenify Main Screen
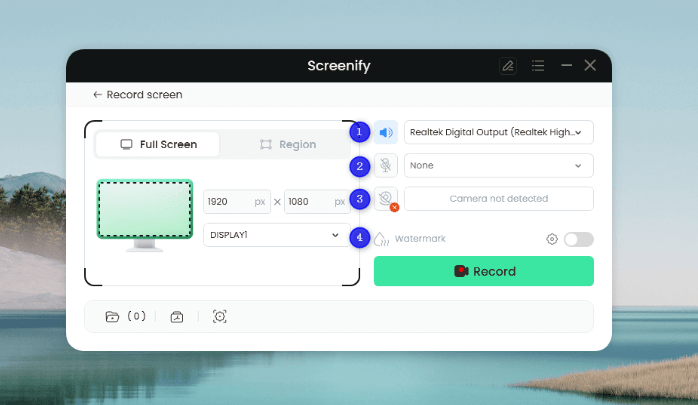
Navigate to the section where you have Screen area, Resolution, and System Audio, and enter your preferred settings to proceed.
Step 2: Once it’s all set, hit the Record button and wait patiently for Screenify to finish the 3-second timer. In no time screen recording will commence.
Hit the Record Button
Step 3: Tap Finish Recording to end the screen recording. Choose your desired destination path to store the recording, then enter a name to complete the process.
Record Windows 10 Screen with Audio Using VLC
VLC Media Player is a well-known video streaming service suitable for recording your Windows 10 screen with the corresponding audio narration. This app captures your entire screen and stores the resulting content directly to your local storage. VLC is super simple to install and the recording feature is easy to operate.
Use the stepwise guide below to record your Windows 10 screen with audio via VLC Media Player:
- Install and launch VLC Media Player on your Windows 10, then head to the top menu bar and hit the View icon.
- A menu of options will automatically fly out. Tap the box next to the Advanced Control icon to include some additional features.
- Navigate to the top menu bar again and click on Media > Open Capture Device.
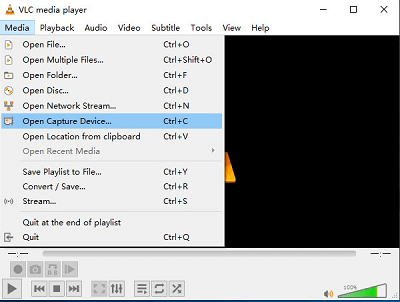
click on Media > Open Capture Device
- Next, the Open Media dialogue will automatically come up. Click Capture Device at the top and choose Desktop underneath the Capture Mode tab.
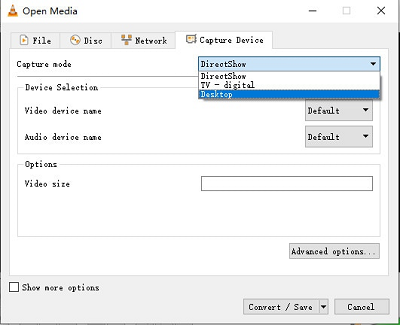
choose Desktop underneath the Capture Mode tab
- Now, enter your preferred frame rate by clicking on the Desired frame rate for capture button. Once done, locate and tap on Show more options, then check the Play another media synchronously button to proceed.
- Head to where you have the Browser icon, and click on it to import a pre-recorded audio file.
- Tap the drop-down icon beside Play and hit the Convert button. A new dialogue box labeled Convert will come up. Tap Create a New Profile and ensure the Encapsulation box is checked.
- Proceed to enter your desired profile name and MP4/MOV from the output format displayed. Adjust the video codecs too.
- Once you’ve finished the above, hit the Play icon to start recording your Windows screen and audio. Click Stop when the recording ends.
Limitations
- You cannot record your screen and audio simultaneously.
- Lengthy stepwise guide.
- You have to convert the pre-recorded audio file before using it.
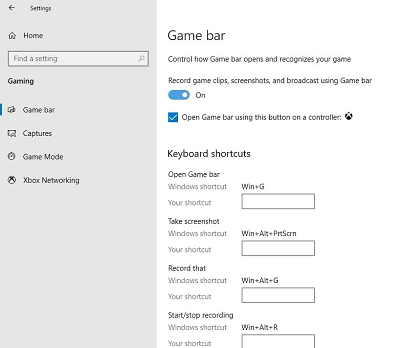
How to Screen Record on Windows 10 & 11 with Game Bar
You cannot talk about capturing your Windows 10 & 11 screen without mentioning the Xbox Game Bar, a preinstalled app designed to take screenshots and screen recordings. This app records a number of on-screen activities, such as games and videos with no time limit.
Game Bar is a free screen recorder with a straightforward interface that anyone can understand. It lets you record your screen using hotkeys or by clicking on the corresponding buttons.
Use the steps below to record your Windows 10 & 11 screen with audio via Game Bar:
Step 1: Launch the Game Bar screen recording app on your Windows 10 or 11 computer using the Windows + G buttons simultaneously. Better yet, you can navigate to the quick taskbar and enter Xbox Game Bar in the search field, and click the appropriate icon.
Navigate to the Quick Taskbar and Enter Xbox Game Bar
Step 2: Once the Game Bar app comes up, you will find the recording buttons at the top left corner of your screen with the label Capture on it.
Click on he Microphone icon
Launch the video or game you want to capture to start recording it. To add audio, proceed to where you have the Microphone icon in the Game Bar and click on it.
Step 3: Wait until the screen recording is finished, then click on the Stop button to end the recording immediately. You can find the recorded file underneath the videos folder labeled Captures.
Limitations
- The recording feature can be difficult to spot when you launch Game Bar.
- Record your screen with poor quality.
- Games and videos are the only supported content you can capture with this screen record app.
Record Your Audio with Adobe Audition
Designed by Adobe, the Adobe Audition software is a powerful audio recording utility built for both amateurs and professionals to capture sounds on Windows. It records your audio in high quality. This software is among the superior choices for capturing your audio because of the powerful features it supports.
Like Screenify, Adobe Audition comes with a host of editing features that you can use to enhance your audio recordings. There’s no limit to the type of content you can capture via this software, as it often records podcasts and music smoothly,
Apply the following instructions to record your audio on Windows via Adobe Audition:
- Add Adobe Audition to your app list on your Windows 10. Launch the software and hit the File icon at the top of your screen. Tap New > Audio File and Adobe Audition will open a new screen to create a new project.
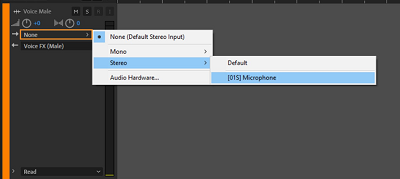
- Connect your microphone and ensure your Windows computer detects it. Once done, head to where you have Edit, click on it and choose Preferences from the options shown.
- Select Audio Hardware, then proceed to choose your audio input and output devices. After that, make the necessary adjustments in the settings tab.
- Next, in the Multitrack Editor panel, select your preferred track where you would like to record the audio. Hit the Arm for Record button beside the track, then try speaking into the microphone to confirm everything is fine. If not, try adjusting the settings again.
Record Your Audio with Adobe Audition
- Now that you are fully set, hit the Record button to start capturing audio on your Windows. Adobe Audition will initiate the audio recording. To end the process, tap on the Stop icon.
- Click Files > Save As and enter a name for the recorded file. Once done, choose a destination path to save the file and select the output format.
FAQs Screen Record on Windows
Q1. Can I record my Windows 10 screen with audio simultaneously?
Yes, you can record your Windows 10 screen with audio simultaneously. Though Windows 10 comes with a built-in recorder, the app has big cons. Game Bar does not support external microphones. You can only record internal audio with it. However, Screenify has worked on this giving you the chance to record both internal and external audio.
Q2. What’s the best screen recorder to record my Windows screen with audio?
The internet is loaded with tons of screen recording tools, which makes selection tough. You might have to test-run each screen recorder you come across to know which is the best one to record your screen with audio.
However, as experts, we’ve handpicked the best 5 screen recorders you can invest in. Find them below:
- Gentoo Recorder Lite
- Loom
- Camtasia
- OBS
- Bandicam
Final Words
Having introduced the 4 proven ways to record your Windows screen with corresponding audio narration, select the procedure that’s best for you. Screenify is by far the most reliable screen recording technique from the guide. The software captures your screen with high precision and accuracy. It supports some editing tools you need to manipulate your recordings so they come out with a professional touch.
Free Download * 100% Clean & Safe

Senior writer of the iMobie team as well as an Apple fan, love to help more users solve various types of iOS & Android-related issues.
Product-related questions? Contact Our Support Team to Get Quick Solution >
