Try PhoneRescue to Retrieve Your Lost Important Data Back!
View the most comprehensive guides to Recover Lost Data from iOS Device, iTunes Backup (even encrypted), iCloud Account, iCloud Backup, and Repair iOS System, Remove Lock Screen Passcode and Recover Screen Time Passcode. Download and try it now.
Free Download For Win & Mac | 100% Clean & Secure


Recover Lost Data from iOS Device
Whether you encounter the similar situations below?
“I want to restore the text thread I mistakenly deleted on my iPhone. Can help?”
“I am trying to recover some of my deleted messages from my whatsapp on iPhone.”
“ I would like to recover my photos, videos and contacts on my iPhone deleted by accident. ”
If you just encounter the similar issue above (lost iPhone data), don't worry. You can try “Recover from iOS Device” mode to recover lost data with a few clicks. The following instructions will help you complete that easily.
Tech Specs
| Windows | Windows 11, 10, 8, 7, Vista, both 32bit and 64bit |
| Mac | 14 (macOS Sonoma), 13 (macOS Ventura), 12 (macOS Monterey), 11 (macOS Big Sur), 10.15 (macOS Catalina), 10.14 (macOS Mojave), Mac OS X 10.13 (High Sierra), 10.12(macOS Sierra), 10.11(El Capitan), 10.10 (Yosemite), 10.9 (Mavericks) |
| iOS | All iOS Devices with iOS Version 5 and above |
| Hard Disk Space | 100 MB and above free space |
| RAM | 512MB system memory |
| CPU | Pentium IV 2.4 GHz or above |
| Others | Apple Device Driver (iTunes) |
1. Before running PhoneRescue, you're supposed to download the newest version of iTunes to help detect iPhone/iPad/iPod touch.
2. To avoid the automatic sync, please don't launch iTunes while running PhoneRescue. We also suggest you to disable the automatic sync in iTunes beforehand: Launch iTunes > Preferences > Devices, check “Prevent iPods, iPhones, and iPads from syncing automatically”.
Supported Device Models
| iPhone Series | iPhone, iPhone 3G, iPhone 3GS, iPhone 4, iPhone 4s, iPhone 5, iPhone 5s, iPhone 5c, iPhone 6 (Plus), iPhone 6s (Plus), iPhone SE, iPhone SE (2nd Generation), iPhone 7 (Plus), iPhone 8 (Plus), iPhone X, iPhone Xs (Max), iPhone XR, iPhone 11, iPhone 11 Pro (Max), iPhone 12 mini, iPhone 12, iPhone 12 Pro, iPhone 12 Pro Max, iPhone 13 mini, iPhone 13, iPhone 13 Pro, iPhone 13 Pro Max, iPhone 14, iPhone 14 Plus, iPhone 14 Pro, iPhone 14 Pro Max, iPhone 15, iPhone 15 Plus, iPhone 15 Pro, iPhone 15 Pro Max, etc. |
| iPad Series | iPad, iPad 2, iPad 3, iPad mini, iPad 4, iPad mini 2, iPad Air, iPad Air 2, iPad mini 3, iPad mini 4, iPad Pro, iPad 5, iPad Pro (2nd Generation), iPad 6, iPad Pro (3rd Generation), iPad mini 5, iPad 7, iPad Air 3, iPad Pro (4th Generation), iPad Air 4, iPad 8, iPad mini 6, iPad 9, etc. |
| iPod touch Series | iPod touch 1, iPod touch 2, iPod touch 3, iPod touch 4, iPod touch 5, iPod touch 6, iPod touch 7, etc. |
All devices with iOS version 5 and above.
Supported File Types
iMobie takes your satisfaction in priority. We sincerely hope you would have a happy experience with PhoneRescue. Thus, we highly recommend you to read the detailed instructions before choosing PhoneRescue.
| Personal Data | Contacts, Call History, Messages, Message Attachment, Voicemail, Calendar, Reminders, Notes, Note Attachment, Safari History, Safari Bookmarks |
| Media Data | Photos, Photo Videos, Thumbnails, Music, Videos, AudioBooks, Playlists, Ringtones, iBooks, Voice Memo |
| App Data | App Documents, App Photos, App Audios, App Videos, WhatsApp, WhatsApp Attachment, Line, Line Attachment, Kik, Kik Attachment |
Differences between Free & Registered Version
| Benefits | Free Version | Registered Version |
| Scan & Preview device data | ||
| Recover data |
If the trial version is unable to locate the data you lost, please do not purchase the full version. If the trial version luckily finds the data you lost, you can See Pricing to get the most suitable plan.
Step 1. Download PhoneRescue on Your Computer.
Before you start iOS data recovery, get the tool downloaded onto your computer. Please make sure the network is stable while downloading and installing PhoneRescue on your computer.
Step 2. Connect Your iOS Device to the Computer with the USB Cable.
After downloading and install PhoneRescue on your computer successfully. Then, launch PhoneRescue on your computer and choose “Recover from iOS Device” mode.
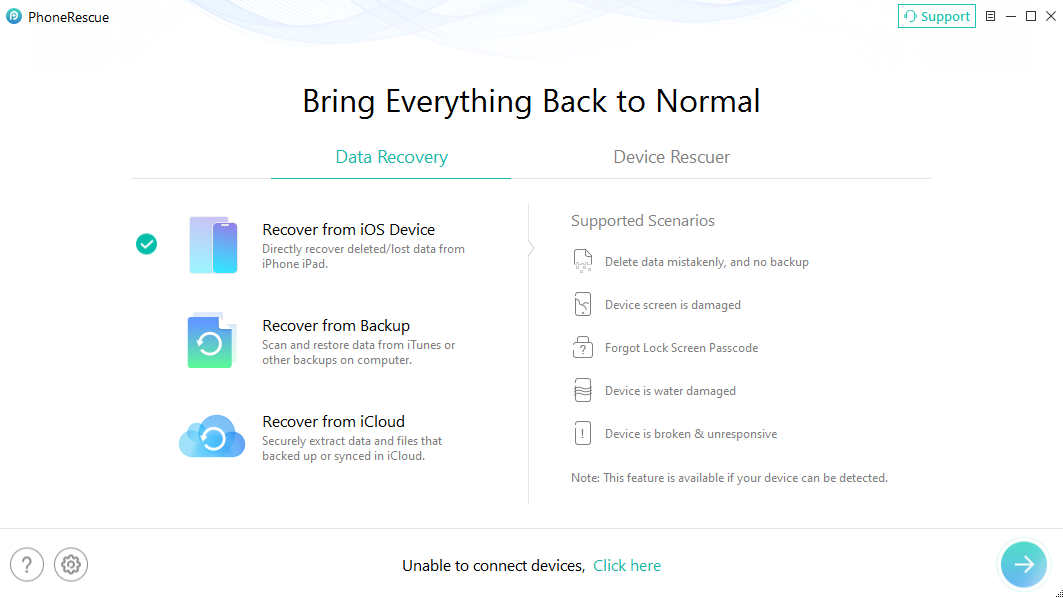
Select “Recover from iOS Device” Mode
Once your device is detected, you will see the interface below.
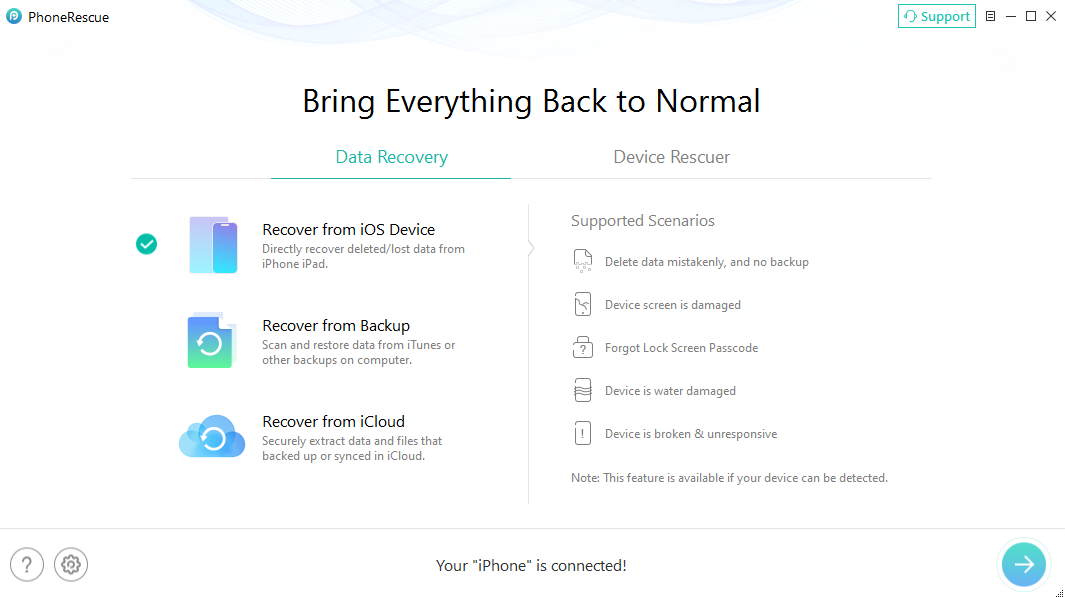
Your Device is Detected by PhoneRescue
If PhoneRescue is unable to recognize your iOS device, you can try to fix this issue by following troubleshooting steps:
① Please download the latest version of PhoneRescue for iOS.
② Check whether your USB cable is loose. If it is, please reconnect it. If USB cable is broken, please give new one a try.
③ Reinstall iTunes.
④ Please log in your computer as Administrator account (For Windows Computer Only).
⑤ If problem persists, please contact our Support Team for further help.
Step 3. Scan out the Lost Data from Your iPhone/iPad/iPod touch.
Please click the Arrow button in the lower right corner to analyze your device. By default, all categories will be selected. If you only want to recover some certain categories, please uncheck “Select All” option and then choose the data based on your needs.
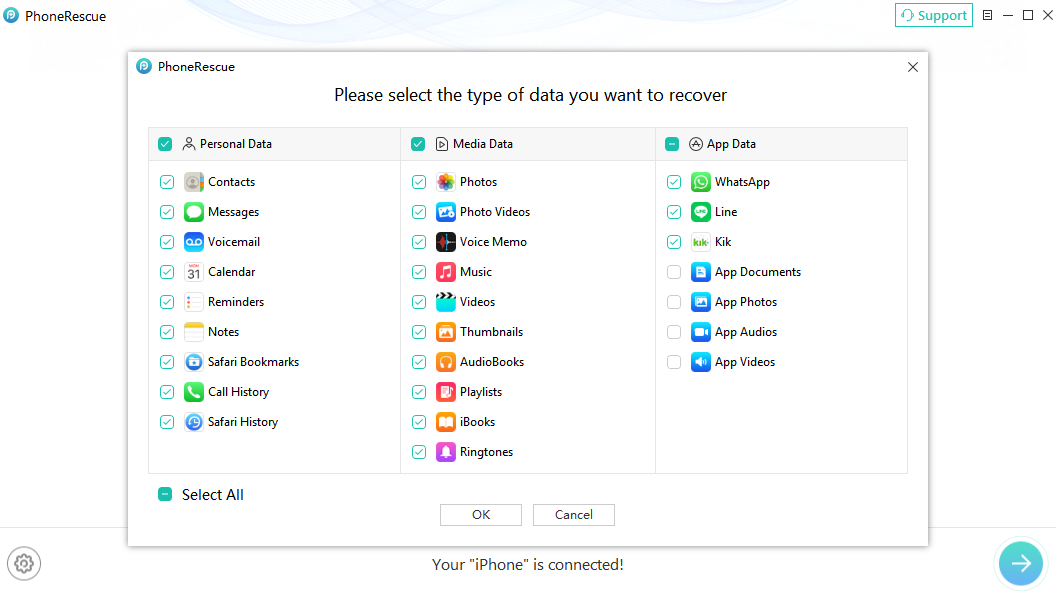
Select the Type of Data to Scan
You can do a selective recovery of data, which does not overwrite your exitsing data.
The scanning process may last a few minutes based on the amount of data on your device. Please keep patient.
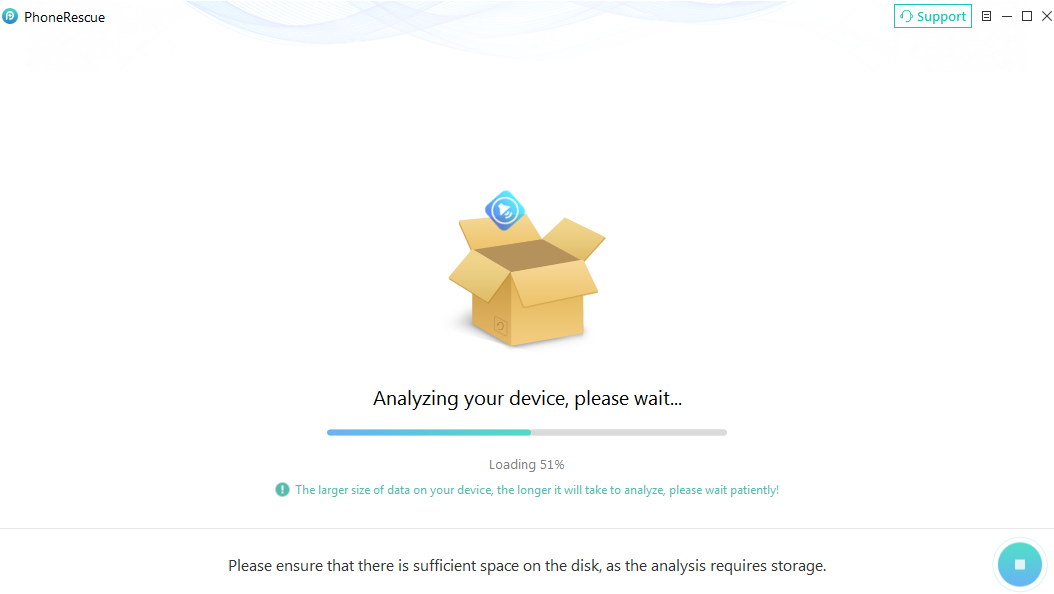
Wait for the Analyzing Device Process
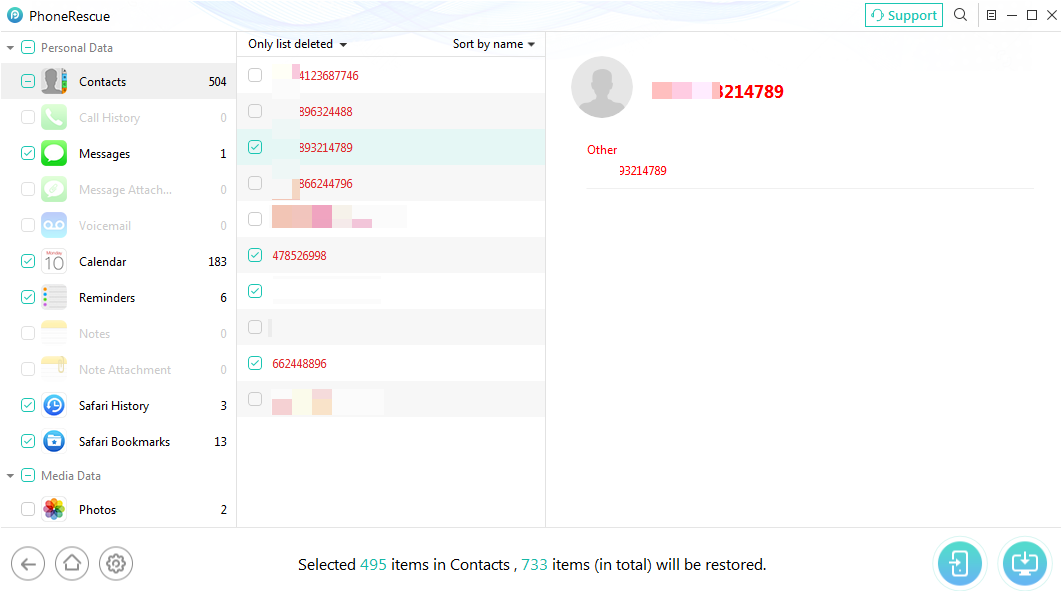
Step 4. Preview and Select the Scanned Data to Recover.
After completing the scanning process, you can preview the scanned data. Both lost and existing data on your device are displayed in categories. To filter out the existed data on your iOS device, you can choose the option "Only list deleted" instead of "List all items". And you can search data by typing key words in search box on the upper middle of the window.

The Scanning Result of “Recover from iOS”
Step 5. Restore the Lost Data to Device or Computer.
If you find the data you need, please put the check mark in front of the box to select them. And you can choose the data scanned out to restore “To Device” or “To Computer”.
Choose the Data You Want to Recover
1. PhoneRescue currently can support to restore the personal data (messages/contacts/notes), photos, app audios and app videos to both device and computer. For other data, PhoneRescue for iOS can only recover them to computer.
2. Please turn off Find My iPhone/iPad/iPod touch and keep device connected when recovering data to device.
Once the recovery process completes, you will see the interface below.
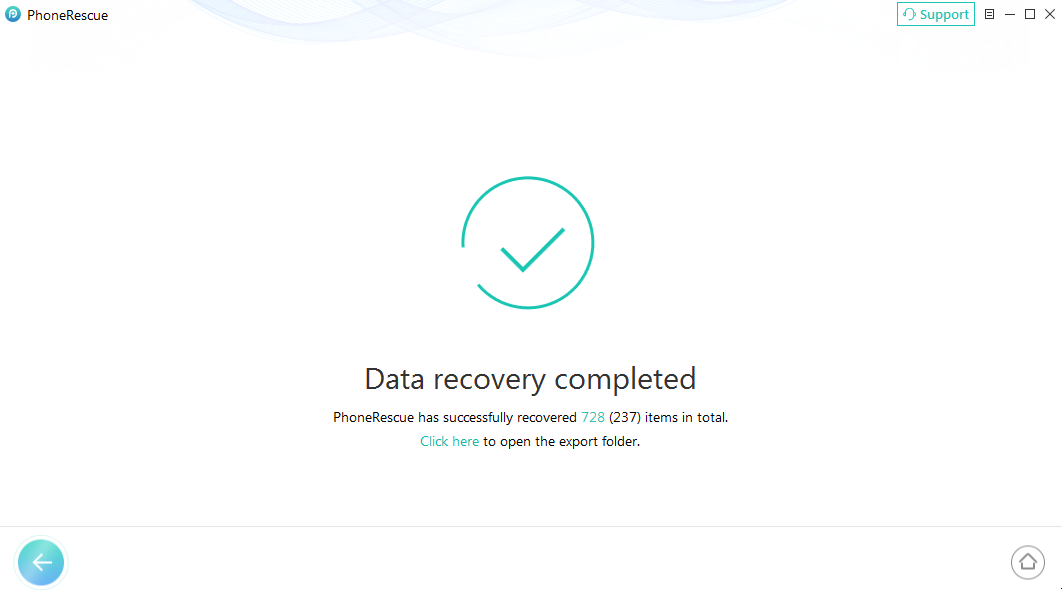
Data Recovery Completed
1. If you unfortunately fail to recover lost data with “Recover from iOS Device” mode, you can also try “Recover from Backup” or “Recover from iCloud” to recover lost data back.
2. Given the importance of data, it’s necessary to back up device data periodically. We would like to recommend you to give the free backup function a try.