Download AnyTrans to Start Your iOS Contents Management Experience!
View the most comprehensive guides to transfer and manage Music, Photos, Messages, WhatsApp or other data, safely back up any iOS device data, manage iTunes & iCloud data and backups, move data to new iPhone, arrange home screen, customize ringtones, search & download apps for iOS device and mirror iPhone screen to computer. Download and try it now.
Free Download For Win & Mac | 100% Clean & Secure
 Basic Information
 One-Click Quick Transfer
 Photos
 Audio
Audio
 Videos
 Personal Data
 iCloud Manager
 iTunes Library
 Phone Switcher
 Backup Manager
-
 Social Messages Manager
-
 Image Converter
 -
 Ringtone Maker
 -
 App Downloader
 -
 Screen Mirroring
 FAQs
FAQs Need Further Help
Back Up Data
Whether you encounter the similar situations below?
“Can I use AnyTrans to back up my iPhone?”
“I want to backup my iPad Air. Can AnyTrans help me?”
If you encounter the similar situations above, don’t worry. “Back Up” mode can help you. With AnyTrans, you are able to fully/incrementally/wirelessly back up the device data with few clicks. The following instructions will help you do it.
Compatibility of Computer System
| Windows OS | Windows 11, 10, 8, 7, Vista (both 32bit and 64bit) |
| macOS | macOS 10.13 (High Sierra) and above |
Supported Device Models
| iOS | All iOS Devices with iOS Version 5 and above |
1. When using the Windows version of AnyTrans, you're supposed to download the iTunes on your computer to help detect iPhone/iPad/iPod touch. (iTunes 9.0 or above, including the latest iTunes.)
2. If you want to get more info about the tech specs, please refer to this page.
Differences between Trial Version & Activated Version
| Benefits | Trial Version | Activated Version |
| Back Up Device Data |
Differences of Three Backup Modes
| Type | Definition |
| Full Backup | Making a copy of all data on the iOS device. |
| Incremental Backup | Copying only the data that has changed since the last backup operation of any type. |
| Air Backup | Automatically backing up iOS device data as your scheduled frequency once the device has been connected to the computer via same Wi-Fi. |
Differences between iTunes/iCloud Backup & Air Backup
| Function | iTunes | iCloud | Air Backup |
| Schedule | No | No | Yes |
| Choose Location | No | No | Yes |
| Backup History | No | No | Yes |
| Automatic Backup | No | Yes | Yes |
Step 1. Download AnyTrans on Your Computer.
Before you start to back up data, please downloaded AnyTrans on your computer. Please make sure the network is stable while downloading and installing AnyTrans on your computer.
Step 2. Connect iOS Device to Your Computer.
Please launch AnyTrans at first. AnyTrans will detect your iOS device automatically. If you don’t connect iOS device to computer or your iOS device is not recognized, the interface below will display.
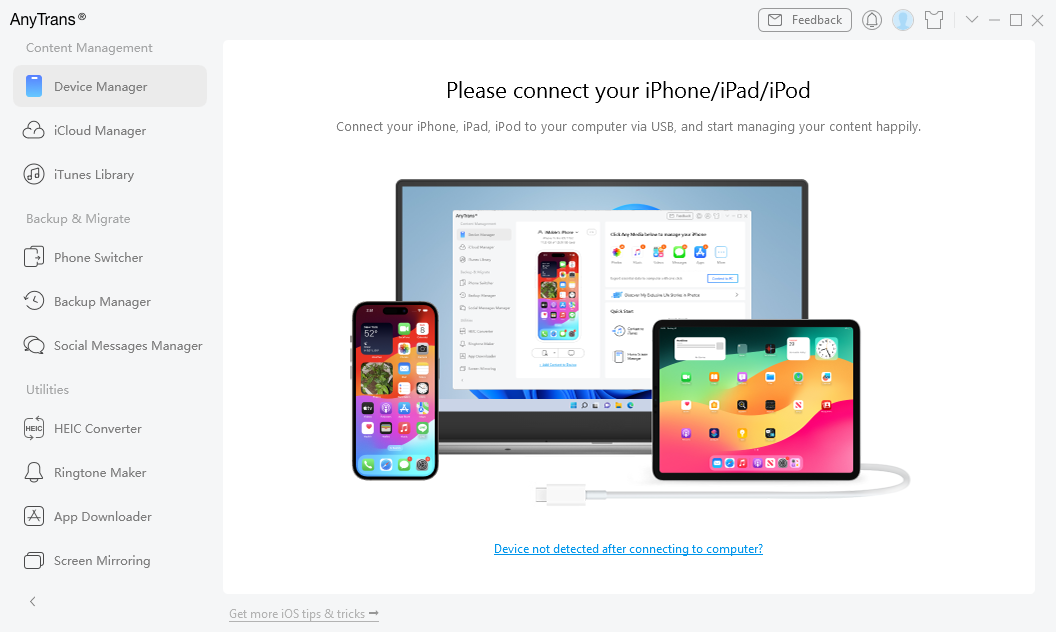
Device Disconnected Interface
Once your deviceis detected by AnyTrans successfully, you will see the main interface as below.
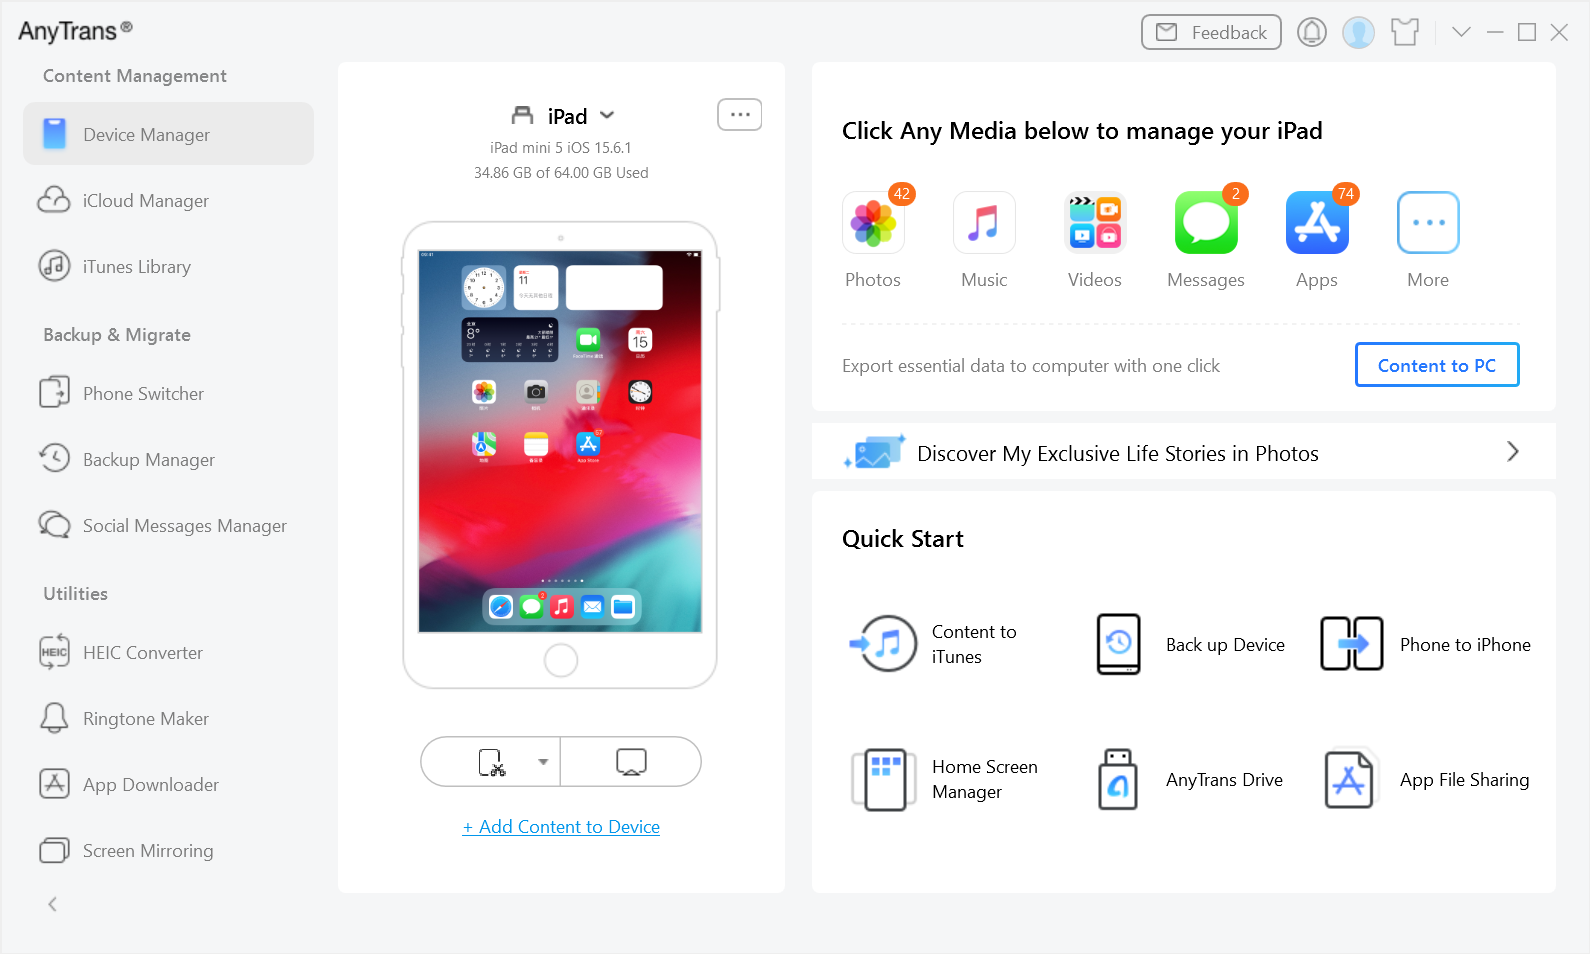
Device Connected Interface
If AnyTrans is unable to recognize iOS device, you may try these troubleshooting steps to solve this problem.
Step 3. Start to Back Up Your Device.
Please click Backup Manager option. And you will see the interface below:
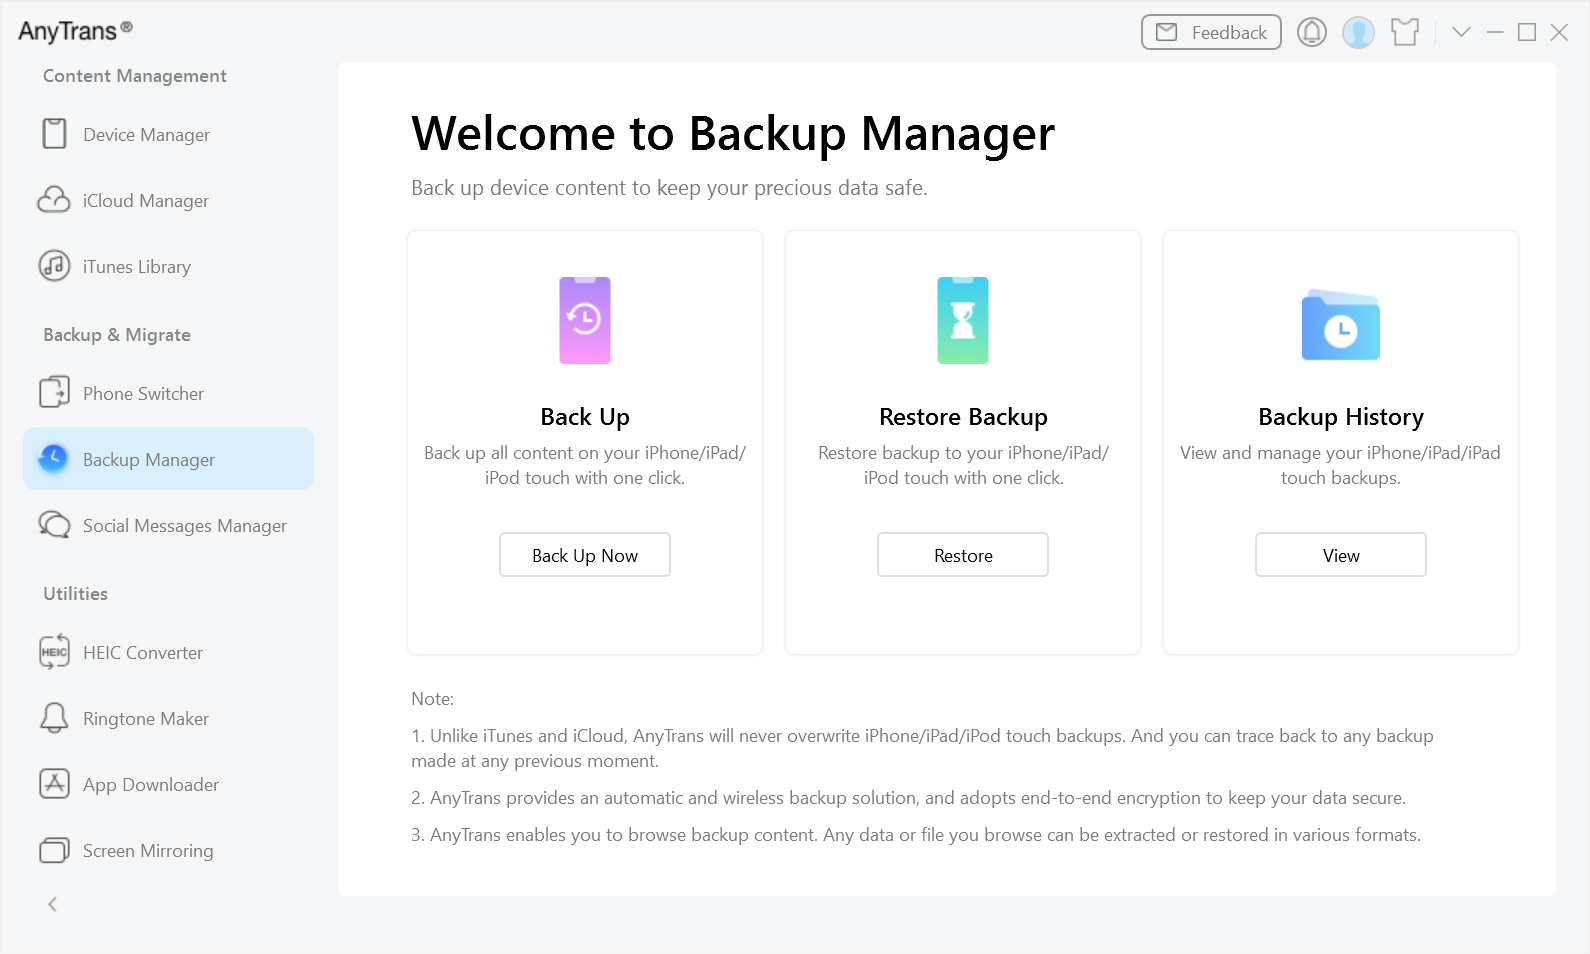
Choose Backup Manager Option
Then, please click Back Up option.
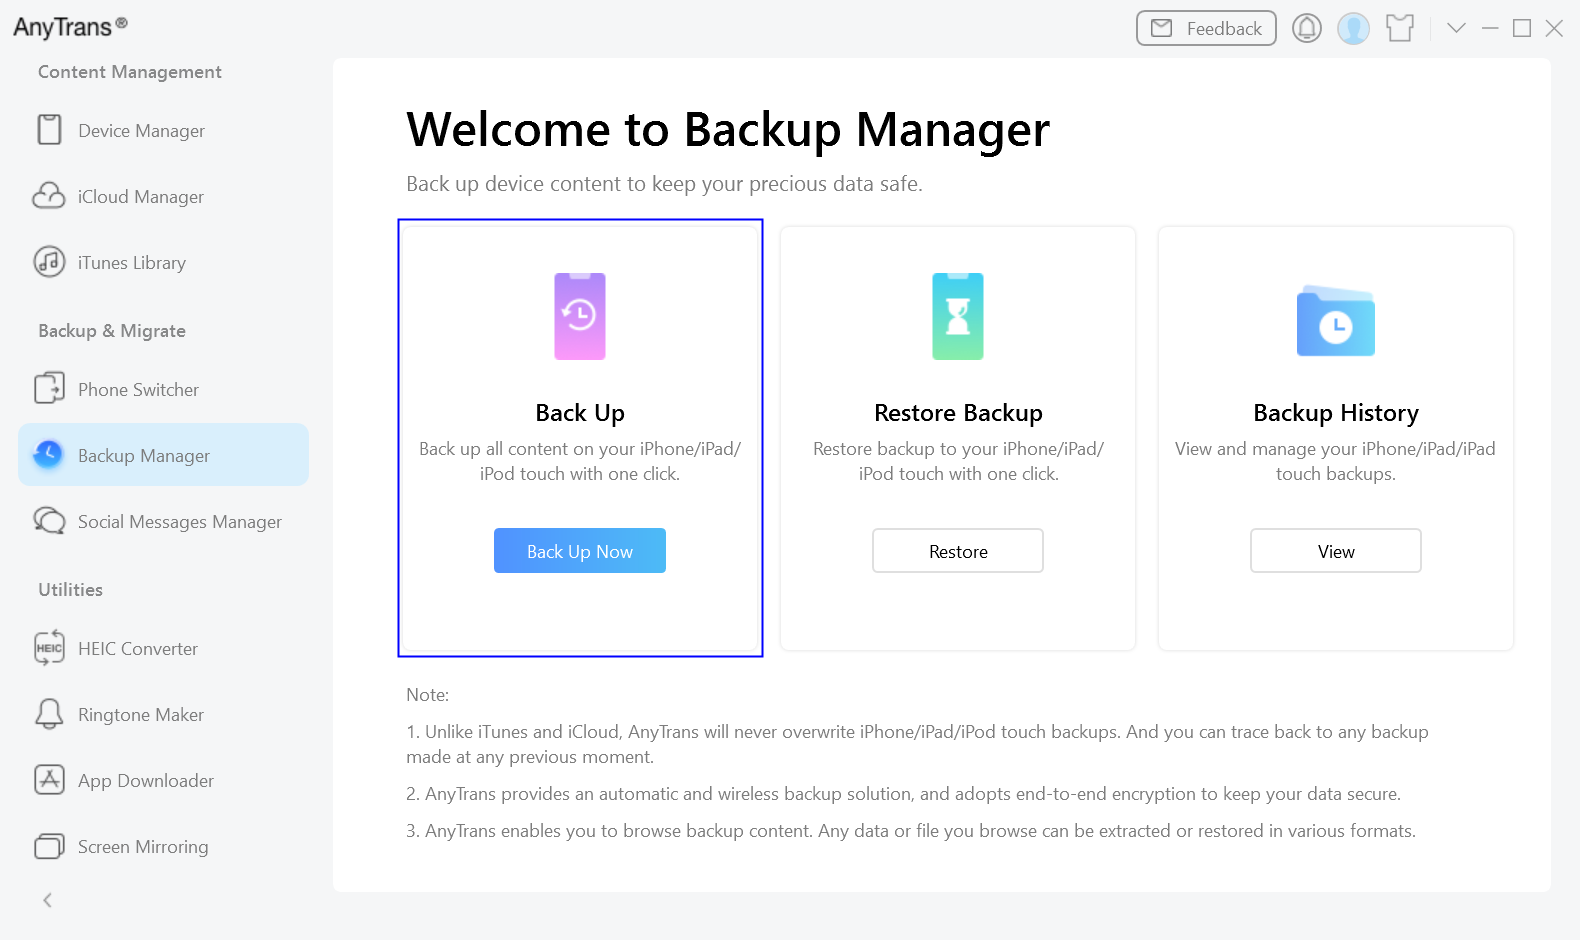
Select Back Up Option
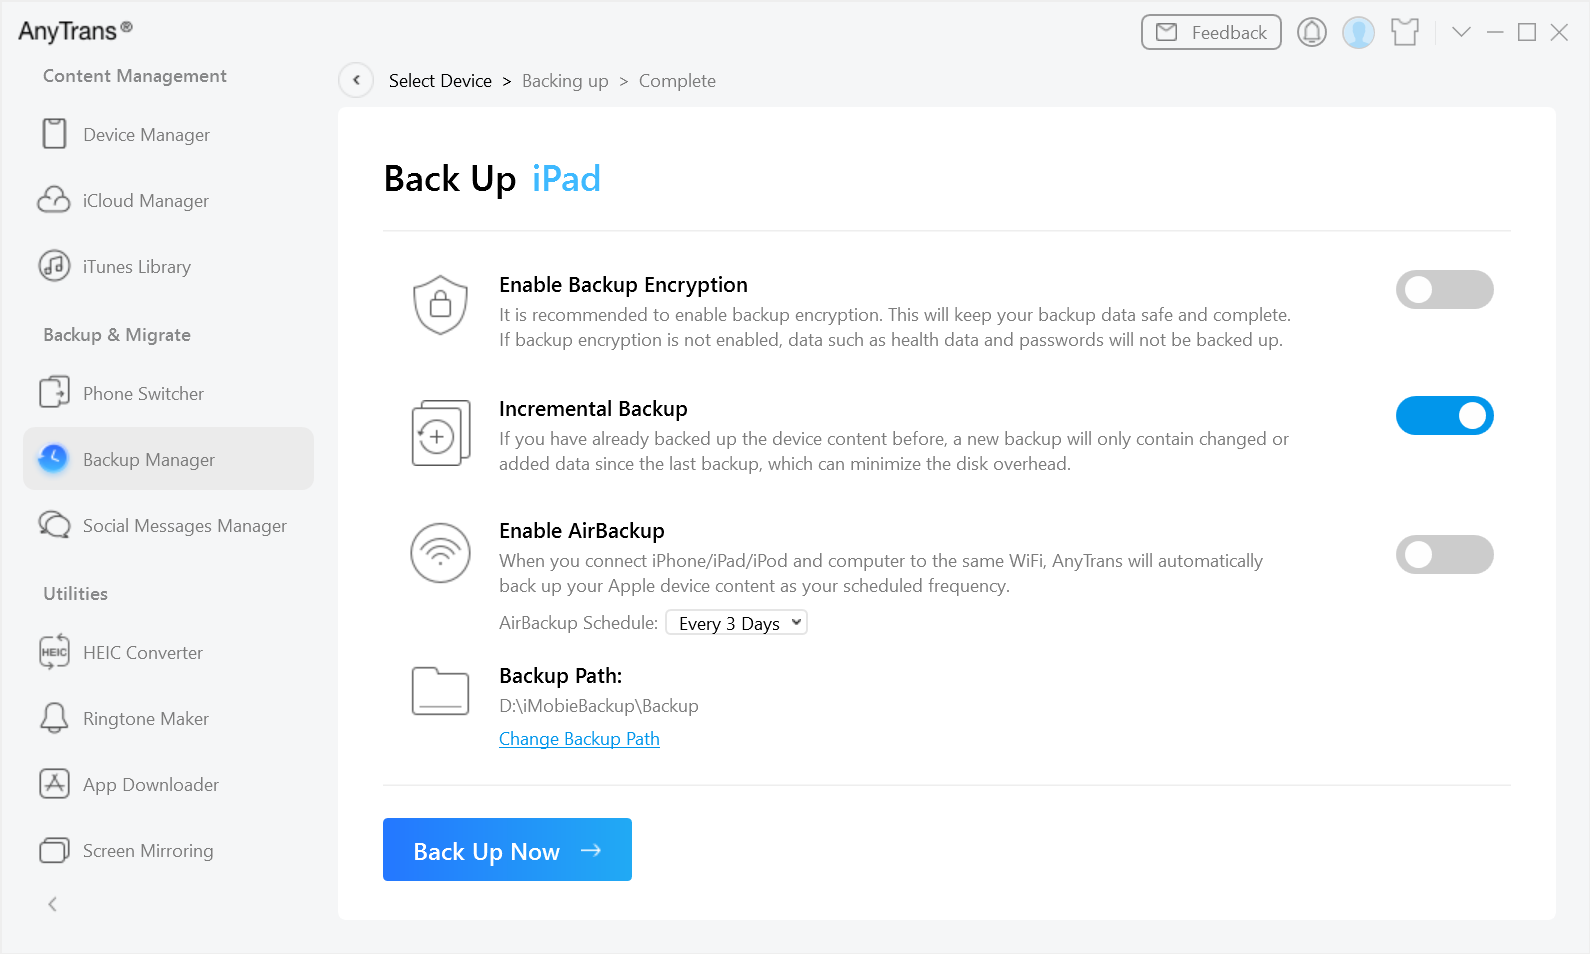
After choosing the function, you will see the screen below. To protect your data safe and private, you can turn on the Enable Backup Encryption option and set the password. If you do not want to encrypt the backup, please ignore it and click Back Up Now button directly.
Back Up Now
1. If you want to back up only the data that has changed since the last backup operation, please turn on the Incremental Backup option.
2. If you want to back up iOS device data as your scheduled frequency once the device has been connected to the computer via same Wi-Fi, please turn on Enable AirBackup option. And you can also set up the schedule for Air Backup (from one day to a month).
The backup process will be started automatically. It may take some time to complete the backup process based on the amount of device data. Please keep patient.
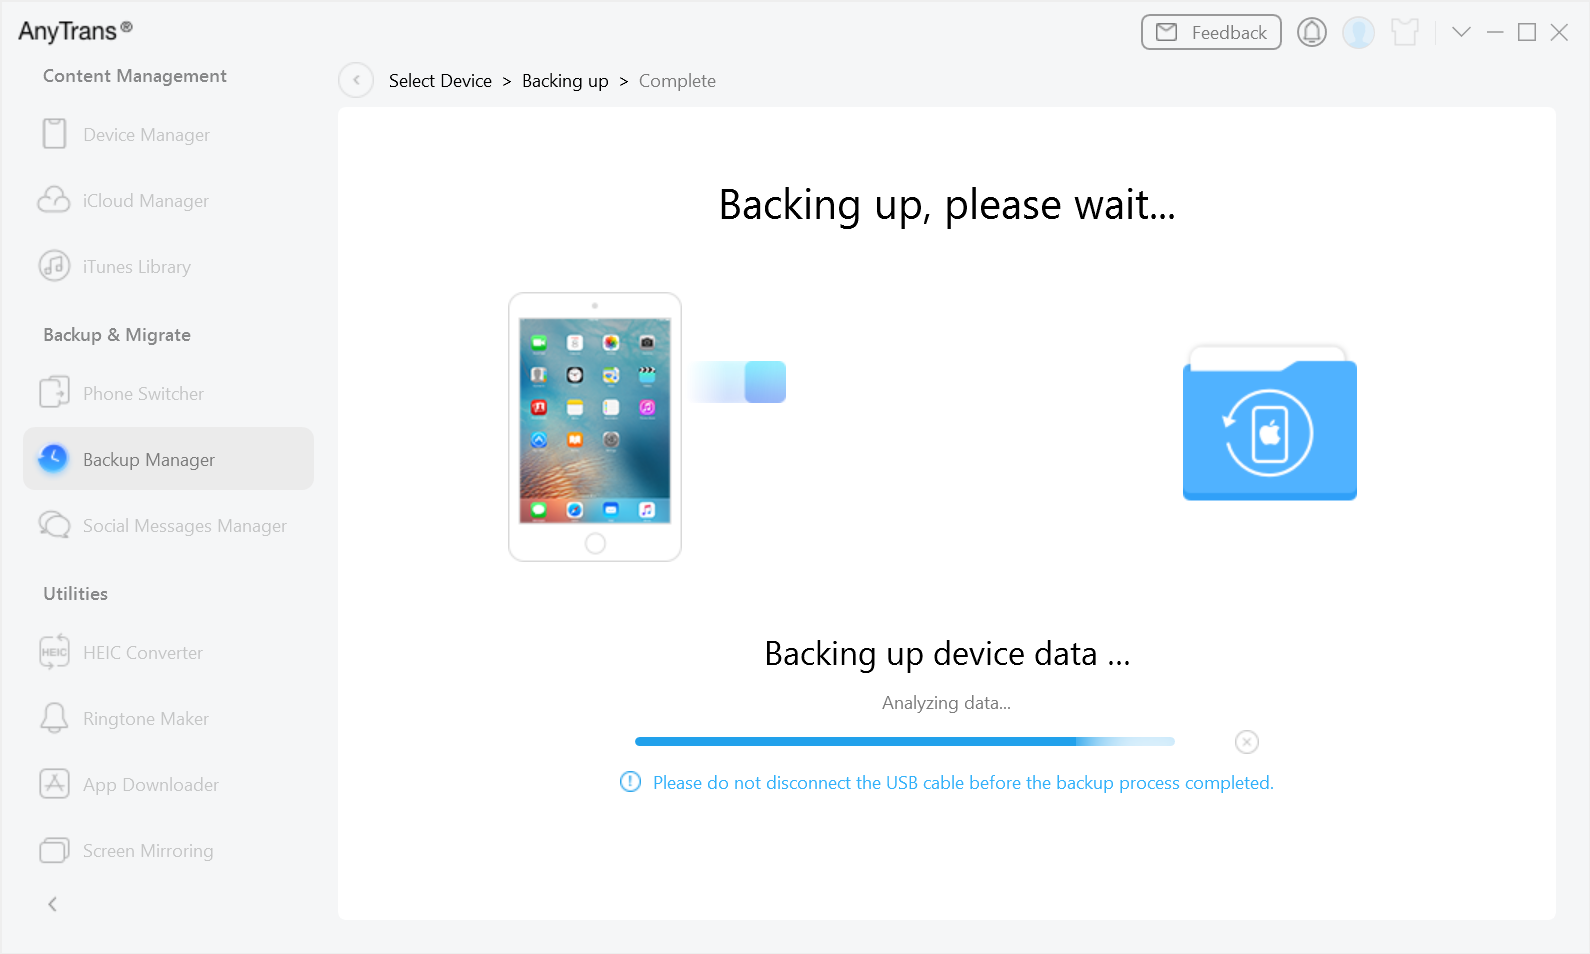
Wait for Back-up Process
Step 4. Backup Completed.
After the backup process completes, the interface “Backup Completed” below will display. You can also check the size of the Full Backup. If you want to check the detail, please click View option.
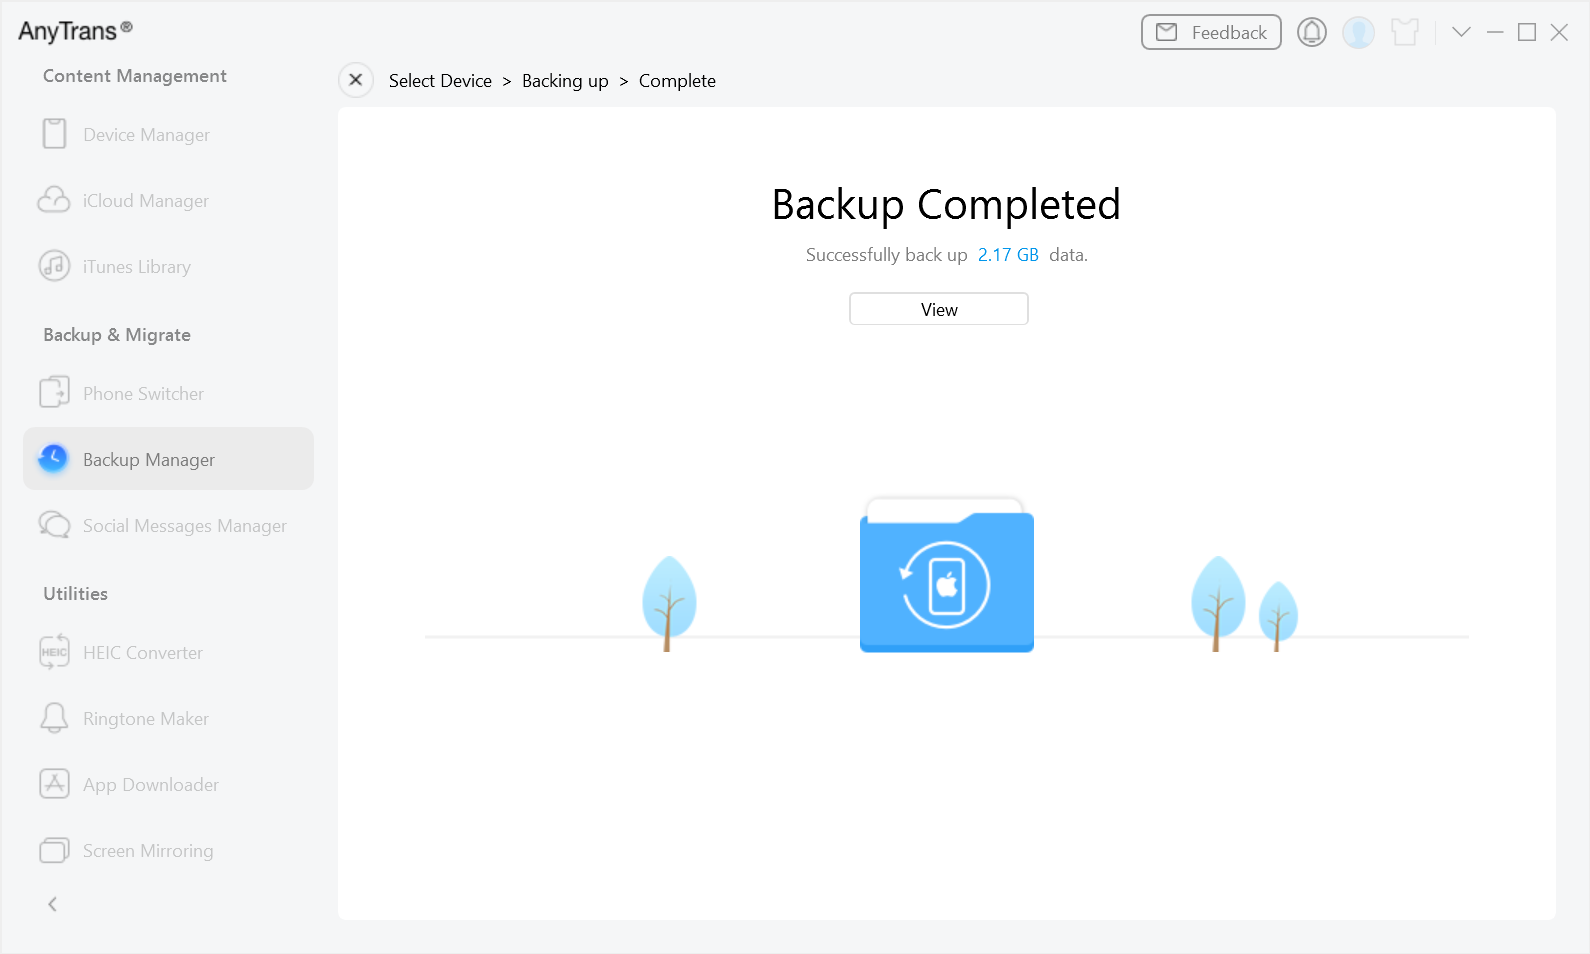
Backup Process Completed
If you still have questions after reading this guide, please refer to FAQs page to check more solutions. Or you can contact our Support Team to get further help. We are here to help you!

Try It Out & Share Your Feedback!

We'd love to hear how AnyTrans is working for you.
Give it a try and share your thoughts—your feedback helps us keep improving.
If you're enjoying AnyTrans, we'd be so grateful if you could leave us a review on Trustpilot. Your support helps others discover AnyTrans and motivates our team!
Thank you for being part of the iMobie community — we couldn’t do it without you!
Try It Out & Share Your Feedback!
We'd love to hear how AnyTrans is working for you.
Give it a try and share your thoughts—your feedback helps us keep improving.
If you're enjoying AnyTrans, we'd be so grateful if you could leave us a review on Trustpilot. Your support helps others discover AnyTrans and motivates our team!
Thank you for being part of the iMobie community — we couldn’t do it without you!