Unlock the Secrets to Recovering Data from a Corrupted SD Card
Explore expert strategies for recovering data from corrupted SD cards, including the use of specialized tools like DroidKit, to safeguard your digital memories and important files.
In today’s digital age, the convenience of using SD cards for storage is undeniable. However, the nightmare of a corrupted SD card can strike anyone, leading to a frantic search for solutions in corrupted SD card recovery. From photographers losing precious photos of a once-in-a-lifetime event, to students who might lose vital research or projects, or even individuals who risk losing personal memories and important documents, the scenarios are as varied as they are distressing.
Thankfully, this article aims to be your guiding light in these dark times. By exploring various methods and tips, you will find effective ways to salvage your valuable data from the clutches of a corrupted SD card. So, take a deep breath, help is at hand.
Corrupted SD Card Recovery
Part 1. Can A Corrupted SD Card Be Recovered?
Yes, a corrupted SD card can often be recovered. While the success rate depends on the extent of the corruption and the type of damage, many scenarios allow for the retrieval of lost data. Utilizing the right tools and methods, you can often restore your important files from a seemingly inaccessible SD card.
Part 2. How to Recover Data from Corrupted SD Card
Way 1. Try Another Card Reader
A straightforward yet often overlooked step in corrupted SD card recovery is to use a different card reader. This method addresses potential compatibility issues or faults with the original reader, providing an alternative pathway to access and recover data from the corrupted SD card. This easy fix can sometimes make all the difference in retrieving your valuable files.
Way 2. Use Professional SD Card Recovery Tool – DroidKit
DroidKit is a comprehensive tool designed for Android users, offering a robust solution for corrupted SD card recovery. Its intuitive interface and advanced technology make it a reliable option for retrieving lost data.
Let’s check DroidKit’s important features:
- Deep Recovery mode to unearth hard-to-find files.
- Recovery of diverse file types, including multimedia and documents.
- High success rate in data retrieval.
- Intuitive interface, accessible for users of all technical levels.
- Broad compatibility with various SD card brands.
Why not download DroidKit and have a try!
Free Download * 100% Clean & Safe
Now, please follow the instructions below to get started with recovering your SD card.
Step 1. Download and install DroidKit on your computer. Launch DroidKit and choose Data Recovery from SD Card mode.
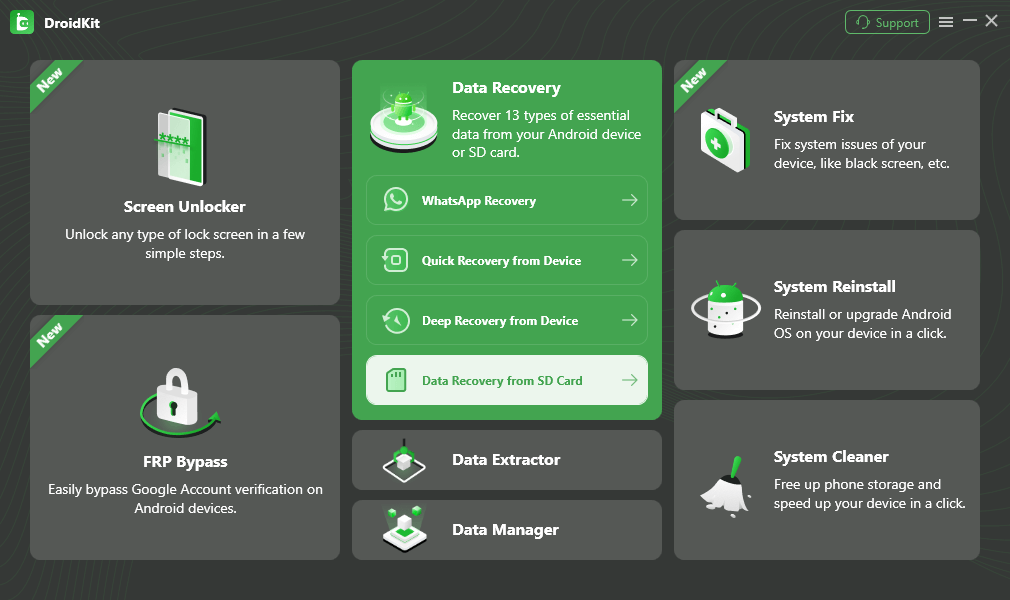
Choose Data Recovery from SD Card Mode
Step 2. There are two modes for SD card recovery:
- Standard Recovery: Allows you to scan only deleted files or scan all files on the SD card.
- Advanced Recovery: This mode can help you find more complete files.
Just choose one mode that meets your needs and tap on the Next button.
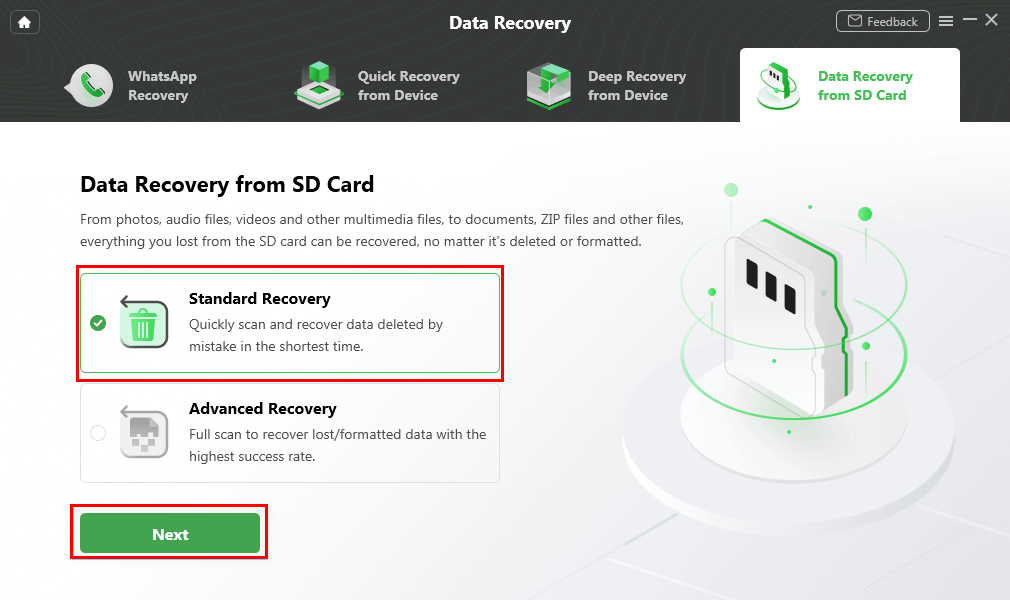
Select a Recovery Mode to Scan Your SD Card
Step 3. Once the scan is complete, selectively choose the files you want to recover and click To PC to start the SD card recovery.
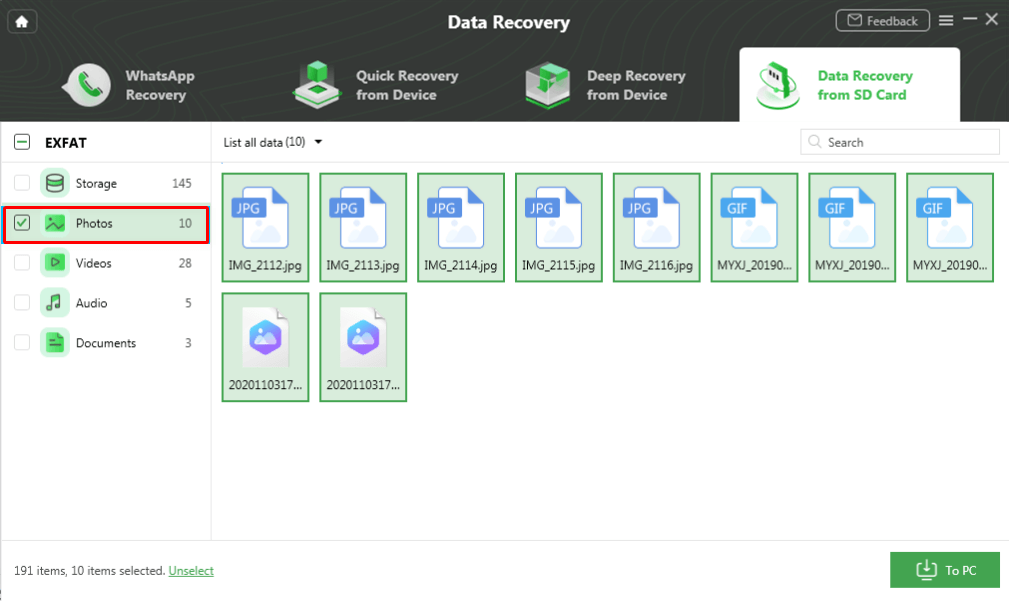
Preview And Recover Data from Your SD Card
Way 3. Use Windows File Recovery
Windows File Recovery is a command-line software utility provided by Microsoft, offering a reliable method for corrupted SD card recovery directly within the Windows operating system.
- Download Windows File Recovery from the Microsoft Store and install it on your Windows PC.
- Open Command Prompt as an administrator.
- Type the command winfr source-drive: destination-drive: [/mode] [/switches], replacing source-drive with your SD card’s drive letter and destination-drive with the drive where you want to save the recovered files. Choose the appropriate mode and switches for your situation.
- Press Enter to initiate the recovery process. Follow any on-screen instructions to complete the recovery.
Way 4. Contact a Data Recovery Service
If the above methods fail, consider contacting a professional data recovery service. These services specialize in corrupted SD card recovery, often using advanced techniques and equipment.
- Research and select a reputable data recovery service.
- Contact the service provider to discuss your situation and recovery options.
- Follow their instructions to safely send your SD card to their facility.
- The service will perform the recovery process and inform you of the results.
- Upon successful recovery, arrange to receive your recovered data, usually transferred to a new storage medium.
Way 5. Recover with Backups
If you regularly back up your SD card data, corrupted SD card recovery can be as simple as restoring from these backups.
- Locate your most recent backup of the SD card data. This could be on your computer, cloud storage, or another backup device.
- Connect the backup device to your computer, or log in to your cloud storage account.
- Navigate to the backup folder and select the files you need to restore.
- Copy these files and paste them into a new location on your computer or a new SD card.
Part 3. How to Fix Corrupted SD Card
Fix 1. Reconnect and Repair SD Card Using CHKDSK
Using the CHKDSK command in Windows is a straightforward way to attempt fixing a corrupted SD card, as it checks the file system integrity and fixes logical file system errors.
- Connect your SD card to your computer using a card reader.
- Open Command Prompt as an administrator.
- Type chkdsk E: /f /r /x (replace ‘E’ with your SD card’s drive letter) and press Enter. This command locates and repairs any issues found on the card.
- Wait for the process to complete, then safely eject your SD card.
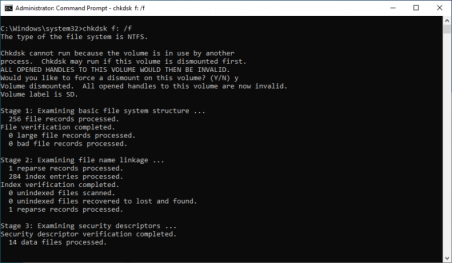
Enter the Command Line
Fix 2. Assign a New Drive Letter
Sometimes, a corrupted SD card is simply not recognized due to a drive letter conflict or omission, and assigning a new drive letter can resolve this issue.
- Connect the SD card to your computer.
- Right-click on ‘This PC‘ or ‘My Computer‘, and select ‘Manage‘. Go to ‘Disk Management‘.
- Right-click on your SD card and choose ‘Change Drive Letter and Paths‘.
- Click ‘Change‘, select a new drive letter, and click ‘OK‘.
Fix 3. Format SD Card
Formatting an SD card erases all data but can often fix corruption issues. This should be a last resort, especially if you haven’t backed up your data.
- Insert the SD card into your computer.
- Open ‘This PC‘ or ‘My Computer‘, right-click on the SD card, and select ‘Format‘.
- Choose the desired file system (FAT32 for cards up to 32 GB, exFAT for larger cards) and uncheck ‘Quick Format‘.
- Click ‘Start’ and wait for the format to complete. Ensure you have backed up important data before proceeding, as this will erase all files on the card.
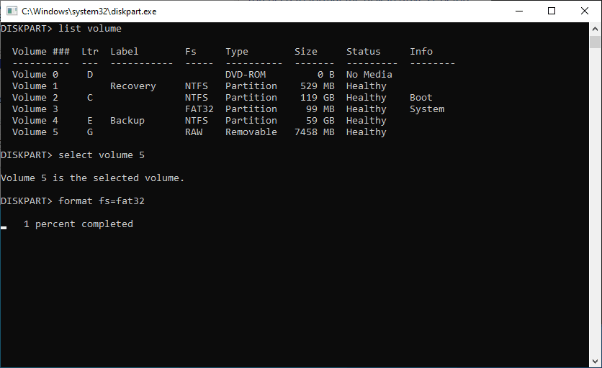
Enter format fs=fat32 and Press the Enter key
Fix 4. Reinstall SD Card Drivers
Corrupted or outdated drivers can prevent an SD card from functioning properly. Reinstalling the drivers can refresh the connection between the card and your computer.
- Connect your SD card to the computer.
- Right-click on the Start button and select ‘Device Manager‘.
- Find ‘Disk Drives’ and expand it to see your SD card. Right-click on your SD card and select ‘Uninstall device‘.
- After the uninstallation, remove the SD card and restart your computer.
- Reconnect the SD card. Your computer will automatically reinstall the drivers.
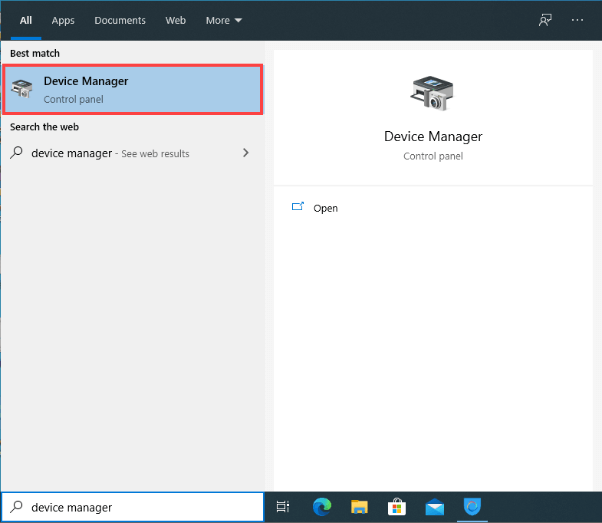
Enter Device Manager
Fix 5. Use An External SD Card Drive
If your computer’s built-in card reader is not functioning properly, using an external SD card reader can bypass the issue and possibly allow access to the SD card.
- Obtaian external SD card reader compatible with your computer.
- Insert the corrupted SD card into the external reader.
- Connect the reader to your computer via a USB port.
- Wait for your computer to recognize the external reader, then check if you can access the files on the SD card.
- If the card is accessible, back up your data immediately.
Part 4. Tips to Avoid SD Card Corruption
To ensure the longevity and reliability of your SD card, it’s important to adopt certain practices that help prevent data corruption. Here’s a quick guide to maintaining the health of your SD card:
- Regularly back up your SD card data to another storage device or cloud storage, creating a reliable safety net for your files.
- Use your SD card properly by safely ejecting it from devices, avoiding its use across multiple gadgets without proper formatting, and protecting it from physical harm like extreme temperatures or moisture.
- Regularly scan your SD card for errors using your computer’s built-in tools, and address any corruption warnings immediately to prevent further damage.
Final Words
In conclusion, while there are multiple approaches to tackle corrupted SD card recovery, each method has its unique application depending on the nature of the corruption. Among these, DroidKit stands out for its user-friendly interface and high success rate, making it a preferred choice for many. As a call to action, consider downloading DroidKit for a streamlined and effective recovery process, ensuring you’re well-equipped to handle any SD card troubles that may arise.

Senior writer of the iMobie team as well as an Apple fan, love to help more users solve various types of iOS & Android-related issues.
Product-related questions? Contact Our Support Team to Get Quick Solution >
