What Are Android Developer Options & How to Enable
Developer Options on Android can be enabled by tapping your device’s build number several times. Once the settings are enabled, you can make some changes and test how they work. When the settings are done, simply toggle off the Developer Options and disable it. Check the detailed guide and steps in this article.
Your Android phone is packed with various features, of which you may never know after years of use. Android Developer Options, a powerful toolkit that unlocks new control on your device, is hidden below the surface. This comprehensive guide will walk you through everything you need to know about this hidden feature. We’ll explain what Android Developer Options are and provide a step-by-step tutorial on how to enable them on Android devices. By the end, you’ll be able to confidently access and utilize these advanced settings to customize your Android experience like a pro.
Android Developer Options
Further reading: How to turn on Android safe mode
What Does Android Developer Options Do?
For the average user, Android Developer Options can significantly enhance the user experience. By enabling Developer Options, you gain access to functionalities that are not available in the standard settings menu. While some options are highly technical, many are straightforward and can provide tangible benefits.
Here are some of the most popular and useful settings found within Android Developer Options:
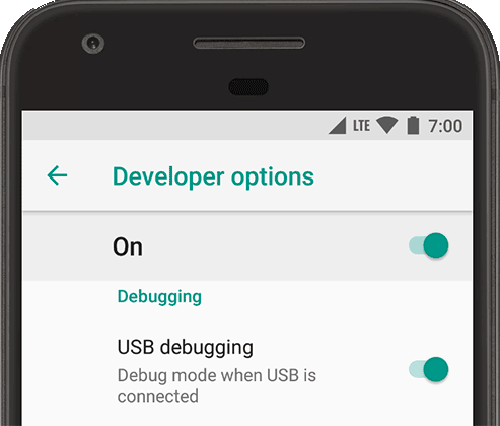
- USB Debugging: Establishes a direct communication channel between your Android device and a computer via a USB cable. It’s essential to use advanced software like the Android Debug Bridge (ADB) for manual app installation or to enable USB debugging on locked Android.
- Animation Speed Scales: Android uses animations for opening apps, switching between screens, and closing windows. By default, these are set to a 1x scale. In Developer Options, you can change this to 0.5x to make the animations twice as fast, or turn them off completely.
- Mock Location: This allows you to manually set the GPS location of your device. It’s a critical tool for developers testing location-aware apps, but can also be used with third-party apps for various purposes.
- Show Taps: This feature provides visual feedback on the screen for every touch you make. It’s incredibly useful for creating screen recordings or demonstrating how to perform a task on your device.
How to Enable Developer Options on Android
To enable Android Developer Options on your device, you need to find the Build Number in your settings and tap it seven times, which is a universal secret handshake across all Android devices. However, the exact path to this Build Number can vary depending on your phone’s manufacturer and the version of Android it’s running. Below are detailed, step-by-step instructions for the most popular Android brands.
1. For Stock Android (Google Pixel, Nokia, Motorola)
Devices running a stock or near-stock version of Android have the most straightforward process.
- Open the Settings app on your phone. Then scroll down and tap on About phone.
- Scroll to the bottom of the next screen until you find Build number.
- Tap on the Build number field seven times consecutively. After a few taps, you’ll see a small pop-up message saying, “You are now X steps away from being a developer.”
- On the seventh tap, you will be prompted to enter your device’s PIN, password, or pattern for verification.
- Once you authenticate, a message will appear: “You are now a developer!”
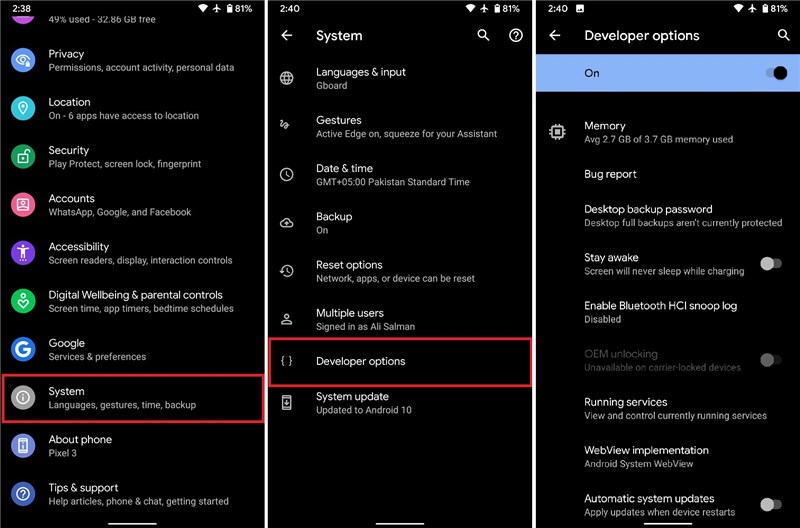
- To find the newly unlocked menu, go back to the main Settings page, tap on System, and you will now see Developer options listed.
Enable Android Developer Options
That’s how you can enable Android Developer Options on Google Pixel, Nokia, Motorola, and more.
2. For Samsung Devices (One UI)
Samsung’s One UI skin moves the Build Number into a sub-menu.
- Navigate to Settings on your Samsung Galaxy device. Scroll down and tap on About phone.
- On the next screen, tap Software information and locate the Build number in this list.
- Tap the Build number seven times. You will see the countdown prompts as you tap.
- Enter your PIN, password, or pattern when prompted.
- You will see the “Developer mode has been turned on” confirmation.
- To access the menu, return to the main Settings screen. Developer options will now appear as the very last item on the list.
3. For OnePlus Devices (OxygenOS)
OnePlus also places the Build Number within a couple of sub-menus.
- Open the Settings app. Scroll down and tap About device.
- Tap on the Version menu. Here, you will find the Build number. Tap it seven times.
- Enter your device password or PIN to confirm.
- Once enabled, navigate back to the main Settings menu, tap Additional settings, and you will find Developer options there.
4. For Xiaomi Devices (MIUI)
Xiaomi takes a slightly different approach, using the MIUI version instead of the Build Number.
- Launch the Settings app. Tap on the first option, About phone.
- Find the field labeled MIUI version. Then tap on the MIUI version seven times in a row until you see the “You are now a developer!” message.
- To access the menu, go back to the main Settings page, scroll down and tap on Additional settings, and you’ll find Developer options inside.
How to Disable Developer Options:
If you ever want to hide the menu, simply open Developer Options and look for the master toggle switch at the very top of the screen. Disabling this option will immediately remove the Developer Options menu from your settings.
Is It Safe to Enable Developer Options?
Some users wonder if it’s safe to enable Android Developer Options. Yes, it is completely safe to enable the Developer Options menu. The act of tapping the build number seven times does nothing more than make a hidden menu visible. It does not change any system settings, void your warranty, or compromise your device’s security on its own.
However, some tips should be paid attention to when you change the settings under Android Developer Options:
- Don’t Change What You Don’t Understand: The menu contains many highly technical settings related to networking, rendering, and processing. It’s best to leave these at their default values unless you are following a trusted guide for a specific purpose.
- Stick to Known Tweaks: Changes like adjusting animation speeds, enabling USB Debugging, or setting the default USB configuration are widely used and generally safe.
- Some Settings Are Temporary: Many settings revert to their default state after a device restart, providing a simple way to undo an unwanted change.
- You Can Always Turn It Off: If you’re worried you’ve changed something that is causing instability, you can simply go into Developer Options and use the main toggle switch at the top to turn it all off. This will reset most settings to their defaults.
In summary, feel free to enable the menu and explore. Just be mindful and cautious about the settings you modify.
Bonus Tip. How to Fix System Issues on Android
There are users who want to fix some Android system issues by enabling Developer Options. While Developer Options can help you tweak performance, they are not designed for system-level problems. If your Android device is suffering from issues like being stuck on the manufacturer logo, constant app crashes, a black screen, or being trapped in a boot loop, you need a more powerful solution.
DroidKit is a comprehensive, all-in-one Android toolkit designed to solve a wide array of problems, from data loss to system failures. Its System Fix module is specifically built to repair Android OS issues without requiring you to have any technical expertise.
How DroidKit Can Help:
- Resolve common Android system problems, including a frozen screen, an unresponsive device, system crashes, and more.
- No rooting your device, keeping your warranty intact and secure.
- A higher success rate compared with other Android system repair tools.
- Clear and step-by-step on-screen instructions for non-technical users.
Steps to repair Android system issues with DroidKit:
Step 1. Download and install DroidKit on a Windows or Mac computer.
Free Download * 100% Clean & Safe
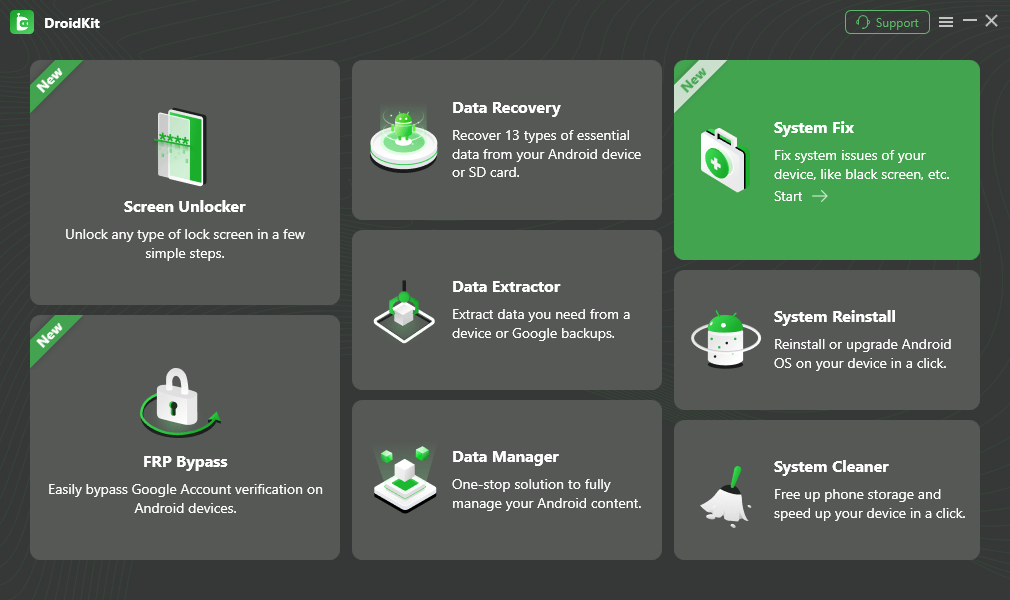
Step 2. Open the software and choose System Fix from the homepage.
Choose System Fix Mode
Step 3. Connect your phone with a USB cable, then follow the instructions to finish the Android system repair in DroidKit.
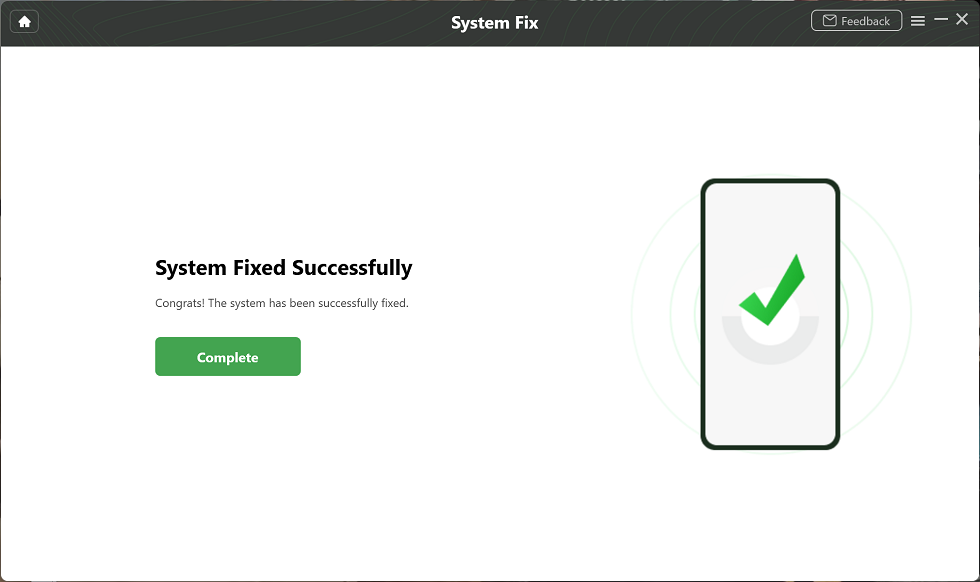
System Fixed Successfully
Step 4. After repairing, restart your device and the problems will be fixed.
Conclusion
Unlocking Android Developer Options is like discovering a secret level in a game, giving you access to a host of new capabilities. Enabling the menu is a safe and simple process that allows you to fine-tune your device’s performance, especially by adjusting animation speeds and enabling USB Debugging. While it’s important to be cautious when changing advanced settings, exploring the well-known tweaks can greatly enhance your user experience. Go ahead and unlock your device’s full potential, but always proceed with curiosity and caution.
Free Download * 100% Clean & Safe

Senior writer of the iMobie team as well as an Apple fan, love to help more users solve various types of iOS & Android-related issues.
Product-related questions? Contact Our Support Team to Get Quick Solution >
