How to Enable USB Debugging on a Locked Android Phone
Enabling USB debugging when the phone is locked is a challenge for many Android users, but it is essential for recovering data or performing advanced operations. This article details how to enable USB debugging when the phone is locked.
Android Unlock Tips
Android Pattern Unlock
Android Fingerprint Unlock
Android Factory Reset
- Factory Reset Samsung Galaxy S8 without Password
- Factory Reset Samsung Galaxy S9 without Password
- Factory Reset Samsung S10 without Password
- Factory Reset Samsung A10 without password
- Factory Reset Samsung J7 without password
- Factory Reset ZTE without Password
- Factory Reset Huawei When Locked
- Factory Reset LG Phone without Password
Have you ever encountered such a dilemma: you need to enable USB debugging on a locked phone, but find that you can’t bypass the lock screen password? According to the latest research, more than 30% of smartphone users have experienced forgetting the lock screen password in their daily lives.
How to enable USB debugging in this situation has become an urgent need for many users. Whether it is because the phone is accidentally damaged and needs data recovery, or because you can’t unlock it because you forgot the password, it is crucial to find a quick and effective solution. In this guide, we will walk you through different ways to enable USB debugging on a locked Android phone, explain when each method works, and help you choose the right solution.
Quick Answer: Can You Enable USB Debugging on a Locked Android Phone?
In most cases, you cannot directly enable USB debugging on a locked Android phone unless you can access the device or USB debugging was already enabled before.
Here is a quick overview:
| Situation | Can You Enable USB Debugging? | Recommended Solution |
| You remember the phone password | Yes | Unlock the phone and enable USB debugging in Settings |
| You forgot the screen lock | Not directly | Remove the screen lock first, then enable USB debugging |
| USB debugging was already enabled before | Possibly yes | Try ADB commands from a trusted computer |
| The touch screen is broken but the display works | Possibly yes | Use USB OTG and a mouse |
| The screen is black or completely unresponsive | Usually no | Try Android data recovery or professional repair |
| Your computer was never authorized for ADB | Usually no | Regain access to the phone first |
If your goal is to recover data from a locked or broken phone, you may not always need to force USB debugging. In some cases, using an Android unlock or data recovery solution is a more practical path.
What Can you Do with USB Debugging?
USB debugging is a developer feature that allows an Android phone to communicate with a computer through Android Debug Bridge, also known as ADB.
When USB debugging is enabled on the phone, all information that is stored on the phone including log files, contacts, or personal documents can be accessed from a computer.
And, USB debugging is commonly used to root the device or create a debugging bridge, so there are many practical applications for it.
However, USB debugging also comes with security risks. If it is enabled and your phone is connected to an untrusted computer, someone may be able to access sensitive information or control parts of your device. That is why Android does not allow USB debugging to be turned on freely from a locked phone.
So, the safest rule is: Only enable USB debugging when you need it, and turn it off after you finish the operation.
How to Enable USB Debugging on a Locked Phone?
When dealing with an Android device, enabling USB debugging is often one of the key steps for data recovery, troubleshooting, or advanced Android operations.
But when the device is locked, the process becomes more complicated. The method you should choose depends on whether you can unlock the phone, whether the screen is broken, and whether USB debugging was enabled before. Below are 6 possible methods you can try.
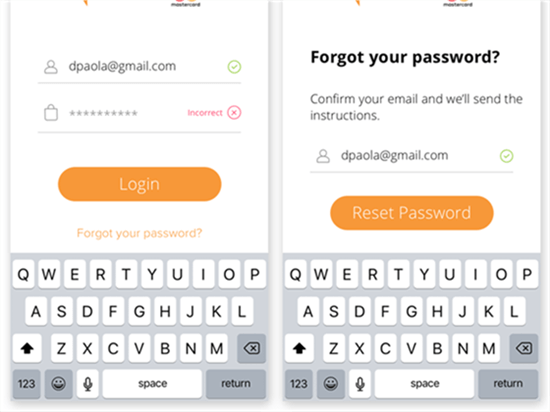
Method 1. Enable USB Debugging on Android Phone through “Forgot Password”
This method is suitable when your phone provides a “Forgot password” option or another official way to verify your identity and regain access to the device. The idea is simple: unlock the phone first, then enable USB debugging manually from Settings.
Step 1. Unlock your Phone
Perhaps the easiest way to get around the lock is to use the Forgot password feature, which can be activated in the following way:
- Try entering an incorrect password into the lock screen several times.
- When Forgot password button appears, tap on it.
- Use Google credentials associated with the phone to log in.
- Follow the on-screen instructions to unlock the device.
Unlock your Phone
After you regain access to the phone, you can turn on USB debugging manually.
This method may not be available on many newer Android versions. Modern Android devices often remove or limit the old “Forgot password” option for security reasons. If you cannot unlock the phone this way, you may need another unlock method.
Step 2. Turn on Enable USB Debugging on Android
Once you gain access to the phone and enter the main menu, you need to manually check the option to enable USB debugging. Here is how to do it;
- Open the Settings menu on your phone.
- Navigate through the menu by choosing System, then Advanced, and then Developer Mode.
- In Developer Mode, toggle the slider next to the USB debugging option.
Turn on USB Debugging
When This Method Works Best
This method is best for users who:
- Still have a way to unlock the phone.
- Can access the Settings app.
- Can operate the phone screen normally.
- Need USB debugging for ADB, data transfer, or troubleshooting.
When This Method May Not Work
This method may not work if:
- The phone does not show the “Forgot password” option.
- You do not remember the Google account.
- The touch screen is broken.
- The screen is black.
- The phone is locked by FRP after a factory reset.
If you cannot get into the phone, continue with the following methods.
Method 2. Use ADB Command to Enable USB Debugging on Android Phone
ADB commands can be helpful when USB debugging was enabled before. However, this method has an important limitation:
ADB cannot enable USB debugging on a locked phone unless the phone already allows ADB access.
That means this method usually works only when:
- USB debugging was already enabled before the phone was locked.
- Your computer was previously authorized on this phone.
- The device can still connect to the computer normally.
If USB debugging was never enabled, ADB usually cannot access the phone from the lock screen.
Prerequisites:
- Install ADB on your computer:
- Ensure that ADB is installed on your computer. You can download the Android SDK Platform Tools from the official Android developer website.
- Enable Developer Options on your Android phone:
- Go to your Android phone’s Settings.
- Scroll down to find “About phone” or “About device”.
- Tap on the “Build number” 7 times in quick succession. You will see a message saying “You are now a developer!” This action enables Developer Options on your phone.
Steps to Enable USB Debugging using ADB:
1. Connect your Android phone to your computer:
Use a USB cable to connect your Android phone to your computer.
2. Open a command prompt or terminal window on your computer.
3. Verify ADB recognizes your device:
Type the following command and press Enter: adb devices
This command lists the devices connected to your computer. If your device is recognized, you will see its serial number in the list. If it prompts for authorization on your phone, allow it.
4. Enable USB debugging:
Once your device is recognized, execute the following command: adb shell settings put global development_settings_enabled 1 / adb shell settings put secure usb_debugging_enabled 1
These commands enable USB debugging on your Android phone.
5. Verify USB debugging is enabled:
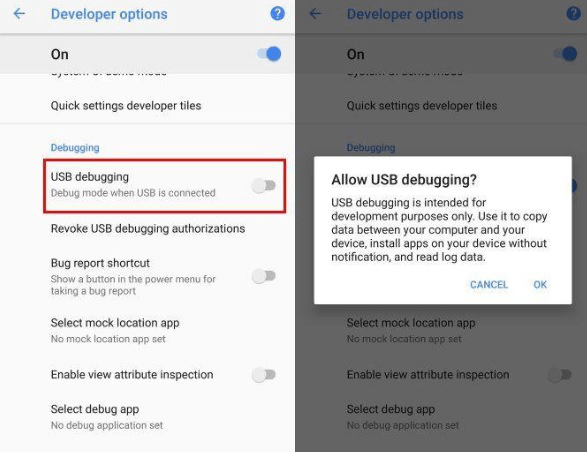
You can verify if USB debugging is enabled by checking the Developer Options on your phone:
- Go to Settings > System > Developer options (the location may vary depending on your device).
- Look for “USB debugging” and ensure it is turned on.
Additional Tips:
- Disabling USB Debugging: If needed, you can disable USB debugging using ADB by setting
usb_debugging_enabledto0using the same commands. - Handling Permissions: Depending on your Android version and manufacturer, you may need to authorize USB debugging on your phone when prompted.
By following these steps, you can use ADB commands to enable USB debugging on your Android phone.
Method 3. Enable USB Debugging on Your Phone Using Recovery Mode
Some users try to enable USB debugging through Recovery Mode when they cannot access the Android system. Recovery Mode can be useful for certain system-level operations, but it is not a guaranteed way to enable USB debugging. On most Android phones, Recovery Mode does not provide a normal switch for USB debugging.
So this method should be considered an advanced or limited option.
How to Enable USB Debugging Using Recovery Mode:
1. Boot into Recovery Mode:
Power off your Android phone completely.
Depending on your device, you’ll typically need to press and hold a specific combination of hardware buttons simultaneously to enter recovery mode. Common combinations include:
- Volume Up + Power button
- Volume Down + Power button
- Volume Up + Volume Down + Power button
Continue holding the buttons until you see the recovery mode screen.
2. Navigate in Recovery Mode:
Use the volume buttons to navigate through the options in recovery mode.
Locate and select the option that says “Apply update from ADB” or similar. This option allows you to apply updates and execute ADB commands from your computer.
3. Connect Your Phone to Your Computer:
Use a USB cable to connect your phone to your computer.
4. Open Command Prompt or Terminal on Your Computer:
On your computer, open a command prompt (Windows) or terminal (Mac/Linux).
5. Verify ADB Recognizes Your Device:
- Type the following command and press Enter: adb devices
This command lists the devices connected to your computer. If your device is recognized, you will see its serial number in the list. If it prompts for authorization on your phone, allow it.
6. Enable USB Debugging:
- Execute the following command to enable USB debugging on your phone via ADB: adb shell service call activity 42 s16 com.android.settings/.Settings\$DevelopmentSettingsActivity
This command directly launches the Development Settings activity where you can enable USB debugging.
7. Navigate to USB Debugging Option:
- On your phone, navigate through the recovery mode menu to locate the “USB debugging” option under Developer Options or a similar section.
- Enable USB debugging.
8. Exit Recovery Mode:
Once USB debugging is enabled, use the recovery mode menu to reboot your device normally.
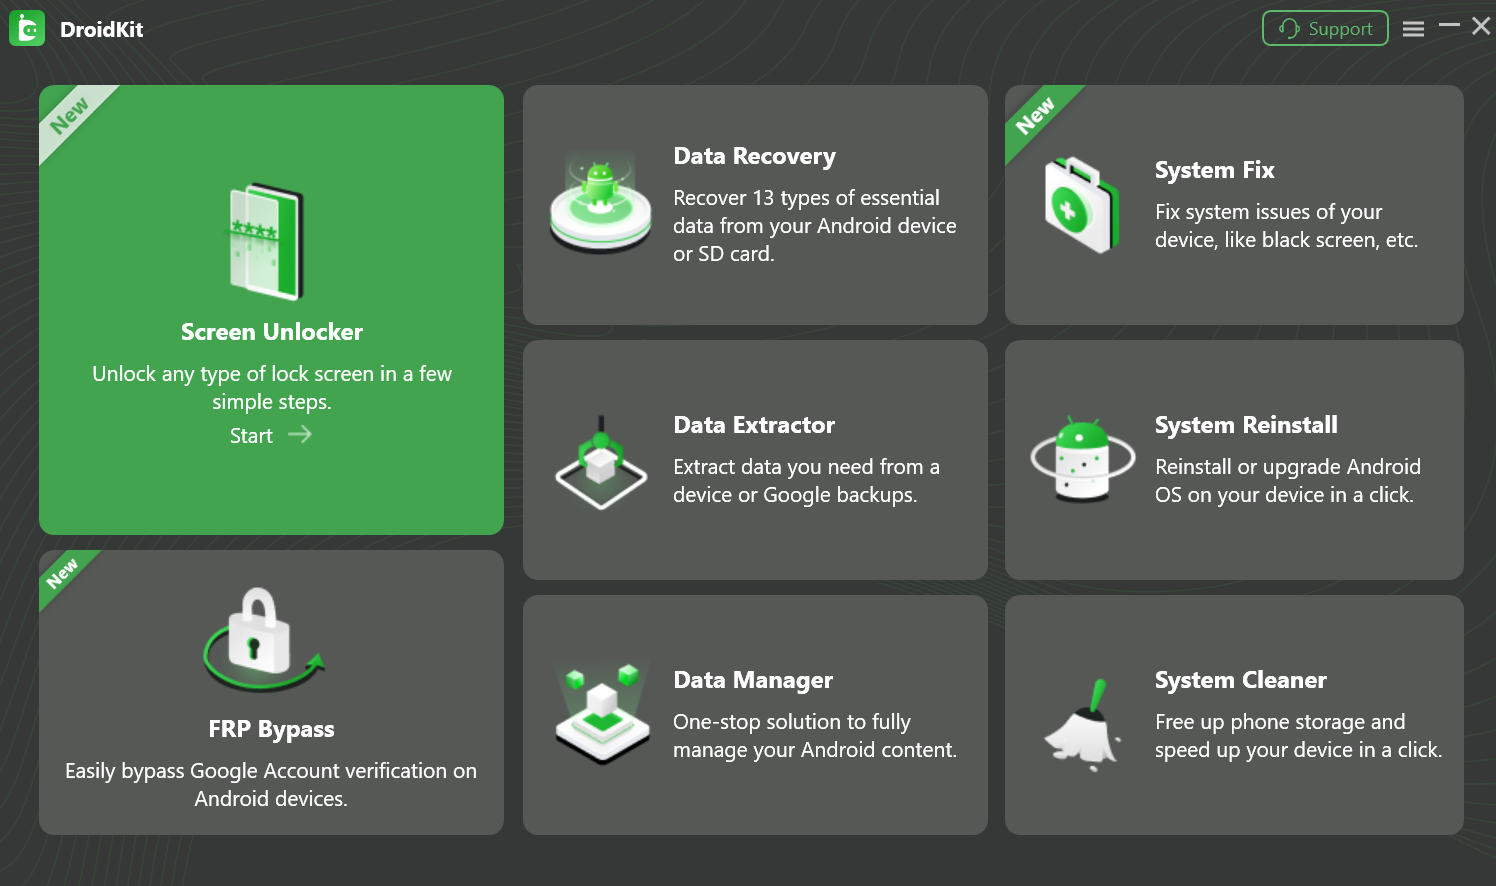
Method 4. Enable USB Debugging Using iMobie DroidKit
If you cannot enter your Android phone because of a forgotten password, pattern, PIN, fingerprint, or face lock, you may need to remove the screen lock first. This is where DroidKit can help.
iMobie DroidKit is a tool dedicated to Android devices. Including removing lock screen, bypassing FRP lock, recovering lost data, fixing system problems, etc.
Free Download * 100% Clean & Safe
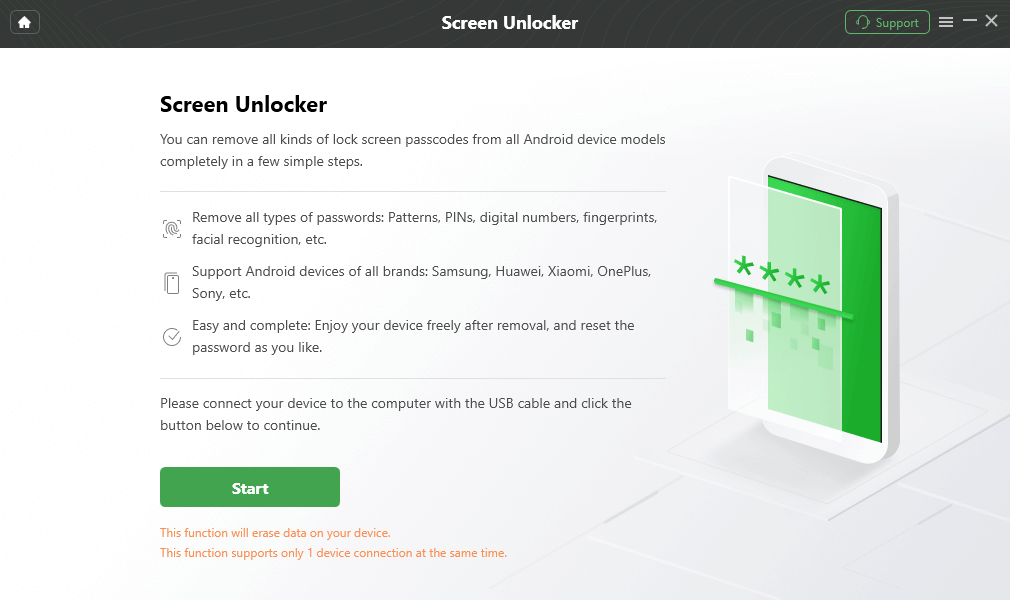
Step 1. Free download iMobie DroidKit and launch it > Click Unlock Screen.
Step 2. Connect your Samsung and Start. Note: All content on your device will be erased after the screen lock gets removed successfully.
Step 3. When the configuration file is prepared, click Remove Now.
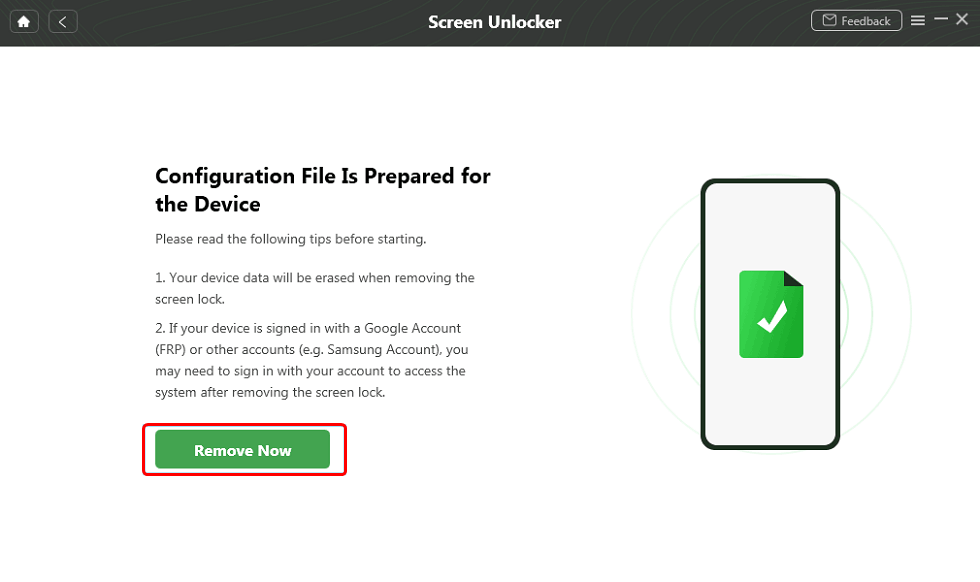
Click Remove Now Button
Step 4. Select your Device brand and Next. Follow the on-screen instruction to remove the screen password.
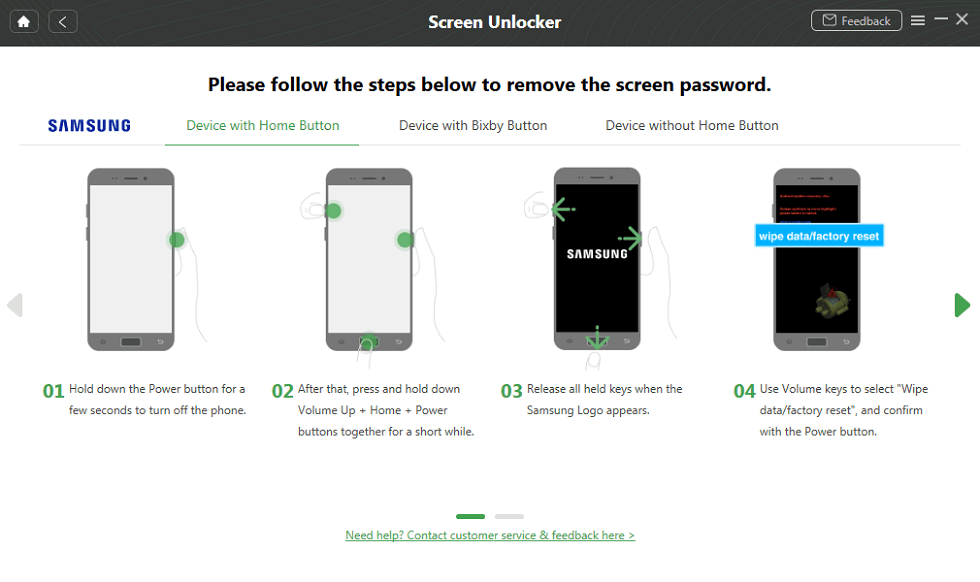
Confirm Locked Device Brand and Continue
Step 5. Wait for Screen Lock Removal Completed as below.
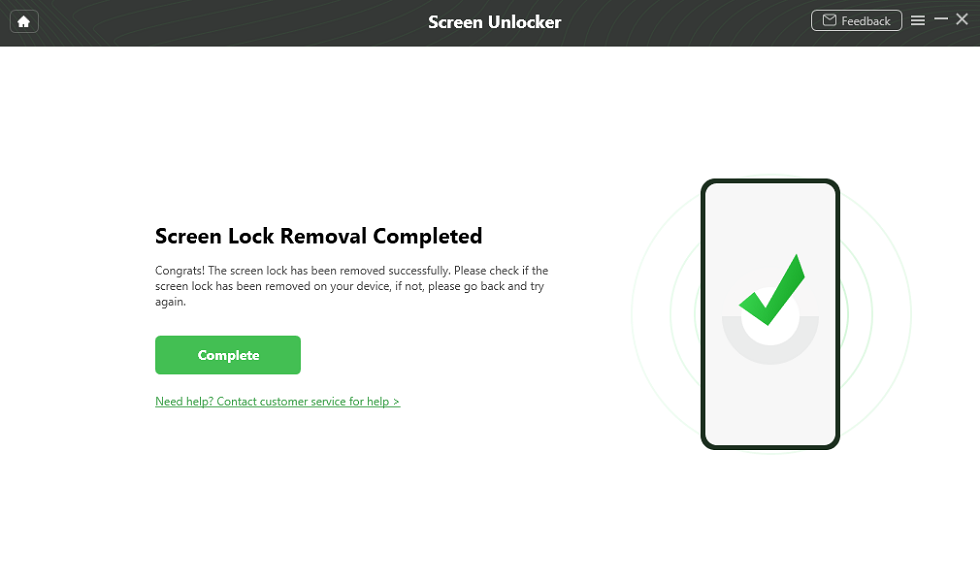
Lock Screen Removal Completed
Method 5. Use Android SDK Tools to Enable USB Debugging
Using Android SDK Tools to enable USB debugging is a straightforward process if you have the Android SDK Platform Tools installed on your computer. Here’s a step-by-step guide on how to do it:
Prerequisites:
1. Install Android SDK Platform Tools:
Download and install the Android SDK Platform Tools from the official Android developer website.
2. Enable Developer Options on Your Android Phone:
- Go to your Android phone’s Settings.
- Scroll down to find “About phone” or “About device”.
- Tap on the “Build number” 7 times in quick succession. You will see a message saying “You are now a developer!” This action enables Developer Options on your phone.
How to Enable USB Debugging Using Android SDK Tools:
1. Connect Your Android Phone to Your Computer:
Use a USB cable to connect your Android phone to your computer.
2. Open Command Prompt or Terminal:
On your computer, open a command prompt (Windows) or terminal (Mac/Linux).
3. Navigate to Android SDK Platform Tools Directory:
Change directory to where you installed Android SDK Platform Tools. For example:
- cd C:\path\to\android-sdk\platform-tools (Windows)
- cd /path/to/android-sdk/platform-tools (Mac/Linux)
4. Verify ADB Recognizes Your Device:
Type the following command and press Enter:
- adb devices
This command lists the devices connected to your computer. If your device is recognized, you will see its serial number in the list. If it prompts for authorization on your phone, allow it.
5. Enable USB Debugging:
Execute the following command to enable USB debugging on your Android phone:
- adb shell settings put global development_settings_enabled 1
- adb shell settings put secure usb_debugging_enabled 1
These commands enable USB debugging on your Android phone.
6. Verify USB Debugging is Enabled:
You can verify if USB debugging is enabled by checking the Developer Options on your phone:
- Go to Settings > System > Developer options (the location may vary depending on your device).
- Look for “USB debugging” and ensure it is turned on.
Method 6. Enable USB Debugging on Android Using USB OTG and a Mouse When Phone Is Broken
If the phone is physically damaged and unresponsive and USB debugging hasn’t been turned on beforehand, using USB OTG and a mouse to enable USB debugging is a very practical method.
In this case, since it is impossible to operate by touching the screen, USB OTG and a mouse can be used as an alternative to control the device and make necessary settings.
How to enable USB debugging on Android using USB OTG and a mouse:
Step 1: Preparation
Make sure your Android device supports the USB OTG function and prepare a USB OTG adapter.
Step 2: Connect a USB mouse
Connect the USB mouse to the Micro USB or USB Type-C port of the Android device using a USB OTG adapter.
Step 3: Operate the mouse
Operate on the device with the connected USB mouse. You can simulate touch operations by clicking, as well as scroll and navigate.
Step 4: Enable developer options
- In the device’s Settings application, find and open “About phone”.
- Find “Build number” and tap it 7 times in a row until it shows that the developer options are enabled.
Step 5: Enable USB debugging
- Return to “Settings” > “System” > “Developer options”.
- Enable “USB debugging”.
Step 6: Confirm the connection
Connect the device to the computer and make sure ADB can recognize and connect to the device. You can use the ADB command line tool on your computer to perform related operations.
FAQs About Enabling USB Debugging on Locked Phone
Can I enable USB debugging when my phone is locked?
Usually, you cannot enable USB debugging directly when the phone is locked. You need to unlock the phone first or use a method such as USB OTG, screen lock removal, or ADB if USB debugging was already enabled before.
Can I enable USB debugging without touching the screen?
If the display still works, you can use a USB OTG adapter and a mouse to control the phone. If the screen is black or completely unresponsive, it is usually not possible to enable USB debugging manually.
Can ADB enable USB debugging on a locked phone?
Only if ADB already has permission to access the device. That means USB debugging must have been enabled before and your computer must have been authorized. Otherwise, ADB cannot enable USB debugging from a locked phone.
Can Recovery Mode enable USB debugging?
In most cases, no. Recovery Mode may support limited ADB operations, but it usually cannot enable full USB debugging inside Android Developer Options.
Can I recover data without USB debugging?
In some cases, yes. If USB debugging is not available, you can try Android data recovery tools, cloud backups, SD card recovery, or professional repair depending on your device condition.
Will DroidKit enable USB debugging directly?
DroidKit does not directly switch on USB debugging from a locked screen. It helps users remove screen locks, bypass FRP, recover Android data, or repair Android system issues. After regaining access to the phone, you can enable USB debugging manually.
What should I do if my phone screen is broken?
If the display works but touch does not, try USB OTG and a mouse. If the screen is black, consider Android data recovery or professional repair.
Is it safe to keep USB debugging enabled?
USB debugging should only be enabled when needed. After finishing your operation, it is better to turn it off to reduce security risks.
The Bottom Line
Enabling USB debugging on a locked phone is a critical operation, especially for developers and technology enthusiasts. Although there are multiple ways to enable USB debugging on a locked phone, some methods may require more complicated steps or professional technical knowledge.
In this case, iMobie DroidKit, as a simple and efficient tool, can help users easily unlock their phones, bypass lock screen restrictions, and quickly enable USB debugging, so that users can more conveniently perform operations such as data transfer and application debugging.
Free Download * 100% Clean & Safe

Roger Smith is a senior technical writer with years of experience in providing Android solutions. He loves to help users solve various problems such as Android unlock, Android data recovery, and Android system repair.
Product-related questions? Contact Our Support Team to Get Quick Solution >
