How to Restore Google Authenticator
What is Authenticator and how to use it? In this article, not only will you be able to get all the answers related to these, but you will also know how to restore google authenticator. Moreover, there’s a surprise at the end of the article, so if you’re an Android user and are having problems with your Google account or FRP lock, be sure to read to the end!
Technology has made things easier for everyone, even hackers! However, many apps have been designed solely for the purpose of keeping these hackers at bay, and preventing unauthorized sign-ins to accounts and applications.
How, you ask? With an extra step of mobile app-based security.
One such app is the Google Authenticator that uses two-factor authentication (2FA) to authenticate user identities before giving access to websites and services.
However, there can be instances where you lose your phone with the authenticator app! What to do in such a scenario?
Worry not, as here is a guide on restoring the Google Authenticator from a lost phone.
Before starting with how to restore google authenticator, let’s begin with the basics of Google Authenticator.
What Is Google Authenticator?
Google Authenticator is a mobile security tool with two-factor authentication (2FA). This feature makes it difficult for a hacker to pretend to be a legitimate user, as it has a couple of steps to prove your identity.
To make reduce the rish of unauthorized sign-ins the Google Authenticator has three factors:
- Knowledge factors, which are usually a username and password.
- Possession factors are user possessions, for instance a mobile phone
- Inherence factors, which include a biometric one like a fingerprint or iris pattern.
How Exactly Does Google Authenticator Work?
Any website or service that has two-factor authentication enabled can use Authenticator. The system incorporates knowledge and possession characteristics, like most web-based 2FA apps. The user inputs his regular username and password to access websites or web-based services, followed by a one-time passcode (OTP) that is sent to his smartphone and activated by the login.
This double verification confirms that the user submitting login information on the website is the same person who downloaded the Google Authenticator app to their device. Passwords may be simple to crack or otherwise sneak. But as most extortions are carried out online, it is unusual that the hacker even has access to the user’s device.
How to Use Google Authenticator?
You must have Android version 4.4 or higher to use Google Authenticator on your Android device.
To setup google authenticator on your device
Step 1. Install Google Authenticator
Step 2. Go to your Google Account on your Android device.
Step 3. Click the Security tab.
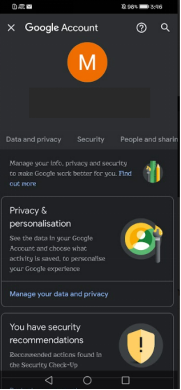
Find Security under Google Account
Step 4. Tap “2-Step Verification” under “Signing in to Google.” You might have to log in.
Step 5. Select Setup/ Get Started next to “Authenticator” app.

Start to Using Authenticator
What to Do If You Lose a Phone With Google Authenticator?
If Google Authenticator is installed on your lost phone, you must secure your accounts using an alternative login method and changing the 2FA settings. If possible, you should also remotely delete your phone’s data. Then you may re-link Google Authenticator to your accounts on a new phone by adding it to that device.
Try logging in using an alternate method
Most services offer methods for logging into 2FA-protected accounts in other ways so that you can reset verification. Some methods for login into your accounts without Google Authenticator are listed below:
Backup codes: In case you lose the device connected to the 2FA protocol, one-time backup codes are offered for emergency sign-ins. You can use one of these backup codes to log in if you have them.
Verification on a different device: You can reset or disable 2FA in the security settings if you’re logged into a service on another device. For instance, if you have Google devices like the Google Home Mini or Google Nest hooked up, you can reverify your Google account.
SMS code: If you have a new phone and SIM card, you can get a verification code by SMS to log in to an account without the need for a Google Authenticator key.
Install and Set-up Google Authenticator on your new phone
After gaining access to an impacted account, you can recover Google Authenticator by configuring it on a new phone. The general approach is the same for all accounts, even though the exact steps vary from service to service.
On an Android phone, follow these steps to setup Authenticator for a Google Account:
Step 1. Install Google Authenticator on your phone by downloading it from the Google Play store.
Step 2. Go to your Google Account’s setting 2-step verification section and choose the Authenticator app.
Step 3. A QR code will appear when you click the + Set up authenticator button.
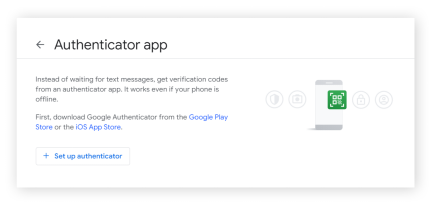
Setup Authenticator App
Step 4. In the Google Authenticator app, click the colored +.
Step 5. On your computer screen, scan the QR code for Google Authenticator. Then press Next.
Step 6. Click Verify after entering the 6-digit code from your phone.
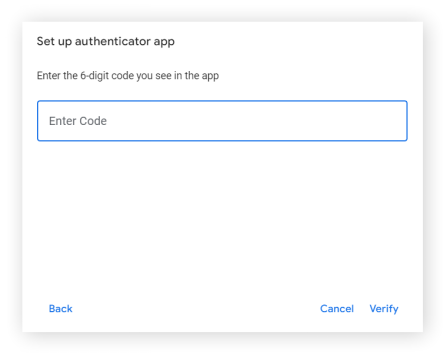
Enter 6 Digit Code from Your Phone
However, there’s always a possibility that you’re unable to sign in to your Google account or use Google Authenticator to access your phone. In such a case, we’re left with only one solution: To remove the Google account and disable FRP.
Bonus Tip: How to Remove Google Account on Android Phone?
Google FRP is a wonderful feature for those who want to protect their data from thieves in case their phone is stolen or lost. But, it is useful as far as you remember the password. If you have forgotten the password to your Google account and need to remove it from your device, here’s how you can do that.
Using the DroidKit FRP bypass, you can literally bypass the Factory Reset Protection of your device in case you don’t have access to your Google Account Password. Besides, as an all-in-one Android software, DroidKit combines Android data management, screen unlocking, data transfer, data recovery and other functions. So even if you use DK as a regular Android app, it’s a good choice!
Free Download * 100% Clean & Safe
Step 1: Once you get the latest version of DroidKit, launch it on your computer and select FRP Bypass.
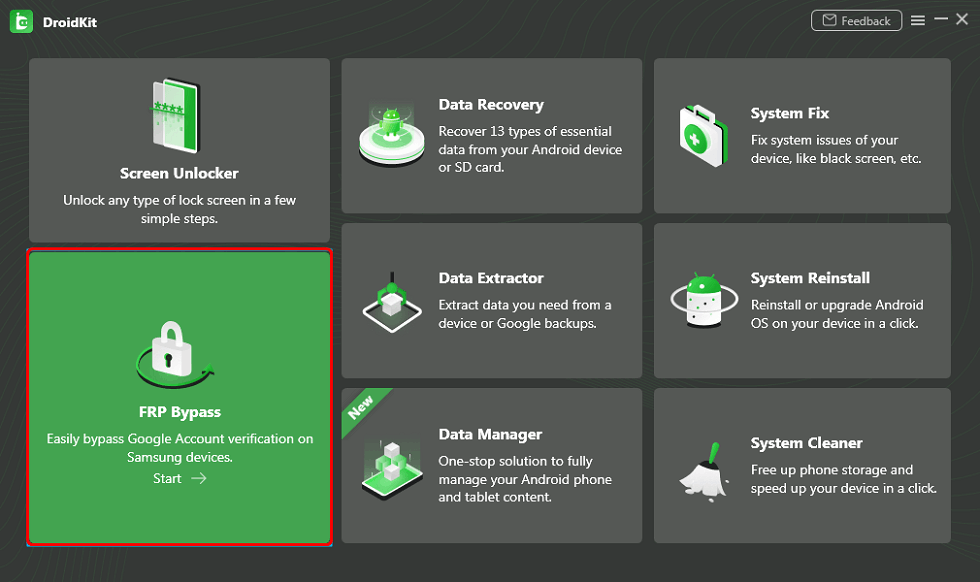
Bypass FRP Lock in DroidKit
Step 2: Connect your device to the computer, press the Start button.
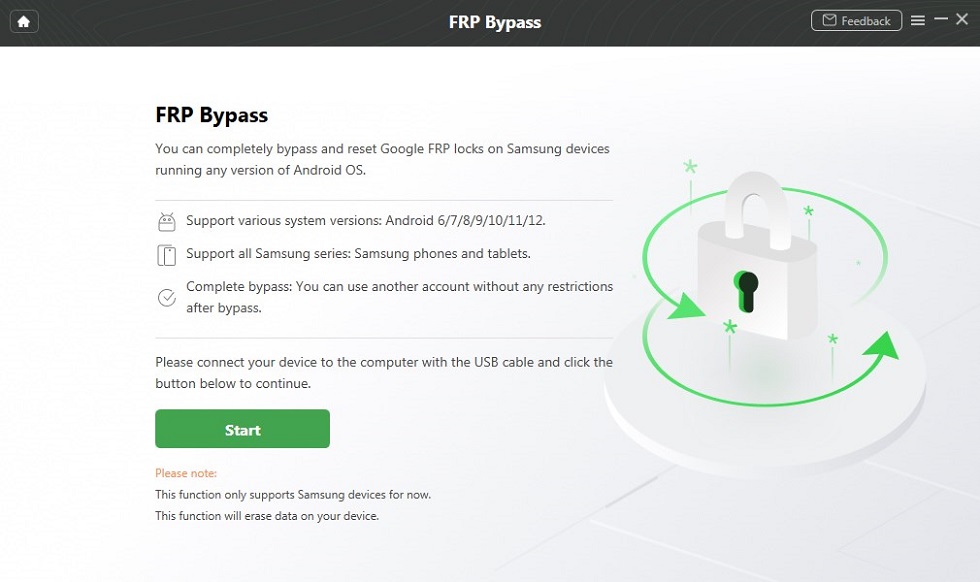
Connect your Device and Start
Step 3: The configuration file will be prepared for your device. Later, tap on Start to Bypass to continue.
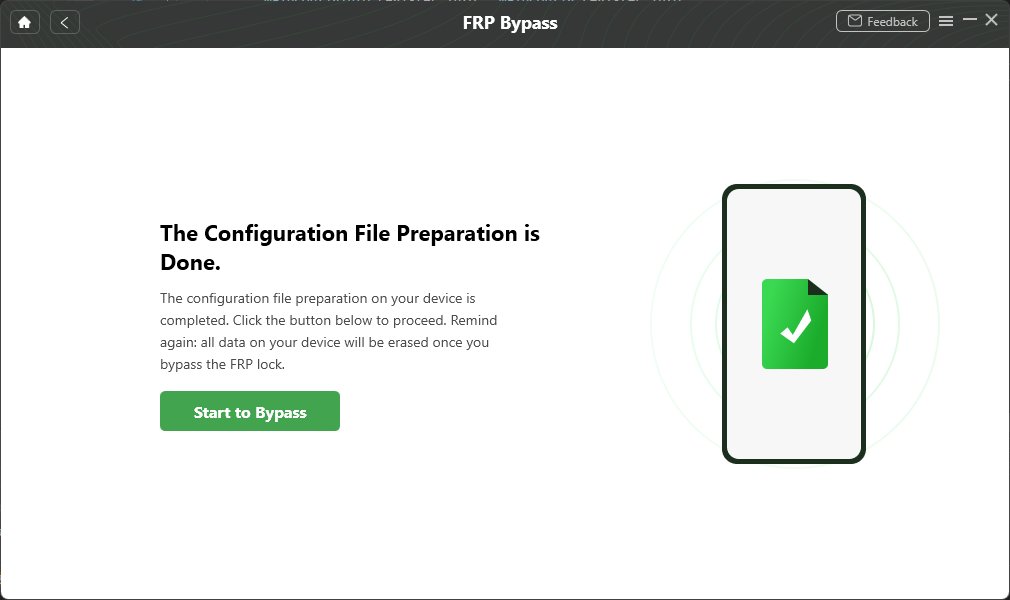
Configuration File is Prepared for Bypassing FRP Lock
Step 4: Follow the instructions shown to put your device in Recovery Mode and get your Android system version. Then, hit the Download Now button.
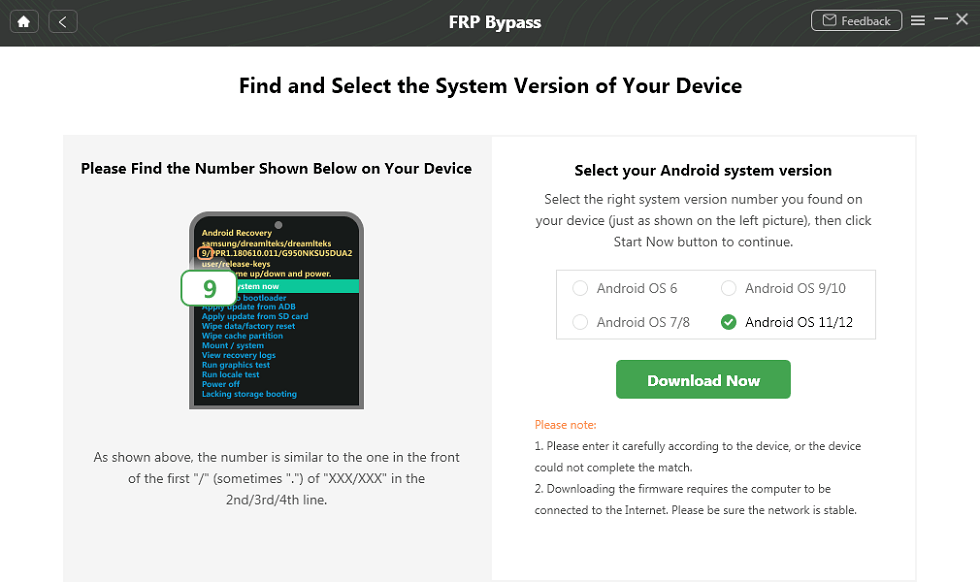
Select Android System Version
Step 5: Set up your phone according to the on-screen instructions, including wiping cache partition. After completing the preceding steps, it will begin to circumvent the FRP lock. Finally, the Bypass will be completed, and your device will be restarted.

Wipe Cache Partition
Final Words
Now you know how simple it is to restore google authenticator. DroidKit FRP bypass removes Google account verification, allowing you to bypass FRP on your android device. It covers all smartphones and tablets, regardless of whether you’re using the most recent model or an older one introduced years ago. Please share your persuasion in the comments section below.

Senior writer of the iMobie team as well as an Apple fan, love to help more users solve various types of iOS & Android-related issues.
Product-related questions? Contact Our Support Team to Get Quick Solution >
