How to Use iMovie on iPhone/iPad
If you are not sure what iMovie is or how to use it, our iMovie tutorial for iPhone and Mac below will tell you what this app is, what it can do for you, and how you can go about using it on your Apple devices. Read on to learn more.
If you have been in the Apple ecosystem for a while and you have tried to edit a video on your device during that time, you are familiar with iMovie. It is a tool you will see on both iOS and Mac based machines, and most Apple devices nowadays come preloaded with this application.
If this is the first time you heard of iMovie, the following guide will tell in you detail what it is so you know exactly what the app is about. Once you have learned about its features, you might want to use it to do tasks. It is also covered in the guide and you will learn how to use iMovie on iPhone and Mac with steps.
Part 1. What is iMovie
Have you ever wondered what that movie-like icon is for on your iPhone? Well, it is the iMovie app icon and this section should answer your “what is iMovie on the iPhone” question.

iMovie
iMovie is a video editing and movie-making application developed by Apple. It is available for both iOS devices including iPhone and iPad as well as Mac machines. On the Macs, it comes preloaded so you do not need to download it separately from the App Store. However, on certain iPhones, you will not get the app by default and you will need to visit the App Store to download the app.
Once downloaded, the app lets you perform a number of tasks on the video files on your device. As it is a standard application, you will find it on the springboard of your iPhone and in Launchpad on your Mac.
Simply tapping on the app icon will launch the app on your iPhone. On a Mac, you will need to find it in the Applications folder or in Launchpad and open it from there.
Part 2. What can iMovie do on iPhone/iPad
Now that you know what iMovie is, you might be interested in finding out all the tasks it can do for you.
iMovie is a video editor app, and like many other editing apps, it provides you with a simple interface to let you edit and retouch your videos. Using the app, you can turn the normal videos saved on your iPhone and Mac into some really amazing movies – all with the use of the built-in tools of iMovie.
With this app on your iPhone and Mac, you can do the following:
- Over 14 trailers for you to create your movies in
- Customizable titles and credits
- Animated drop zones to help select the best of your files
- Record new videos straight in the iMovie app
- 8 unique themes to help you make your movies
- Video filters developed by Apple
- Support for slow motion and fast motion
- Green screen and picture in picture mode support
- Add music from your library and sound effects
- Move projects between your Apple devices
- Mirror the contents of the app to your compatible devices
- Export your videos in 4K quality
Part 3. How to use iMovie on iOS Device
With all the amazing video editing features of iMovie available at your fingertips and for free, it really does not make sense to find any other app to tweak your videos.
After finding out what you can do with iMovie, here we tell you how you can edit a movie in iMovie on your iPhone. This section covers the how-to part of iMovie where you will learn how you can grab the app, how to import a video file, and how you can access various editing options in the app.
Let us dive into it right away:
Step 1. Launch the App Store app on your iPhone, search for the app named iMovie, and tap on Get to download and install the app on your iPhone.
Step 2. If it is the first time you are launching the app, you will see a welcome screen with a list of the app’s features. Tap on the Continue button to continue.
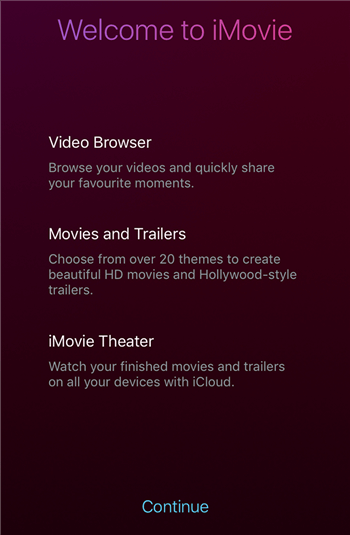
iMovie Welcome Screen on iPhone
Step 3. On the first main screen, you will find three tabs at the top. Each of these tabs does a unique task and the first one you need to tap on is called Projects. You will start off by creating a project in the app.

Start a New Project in iMovie on iPhone
Step 4. It will ask what type of project you want to create. You have two options to choose from – Movie and Trailer. Choose the one that you think will be the best fit for your project and tap on it. We will choose Trailer.
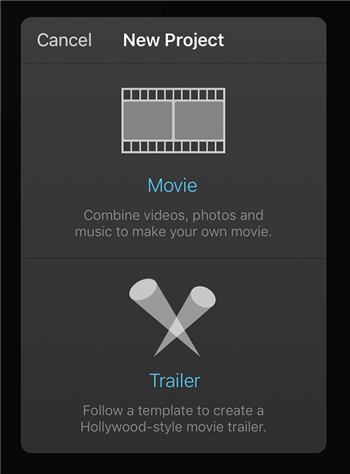
Choosing Project Type in iMovie on iPhone
Step 5. You will now see various trailer templates you can use for your project. Tap on the one you wish to use and its preview will appear on your screen. If you want to continue, tap on the Create button at the top-right corner of your screen.
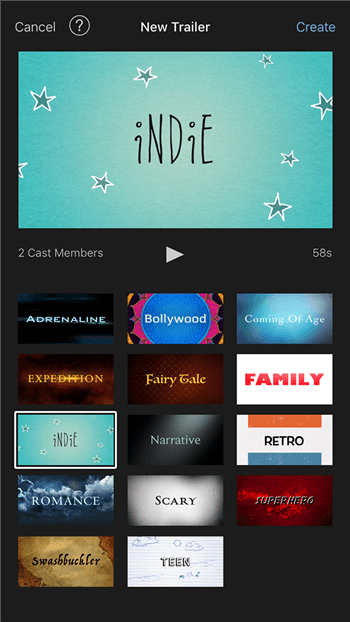
Creating a New Trailer Movie in iMovie on iPhone
Step 6. You can enter the details for your trailers like the credit names, studio, and title name. The screen should also let you preview your video at the top.
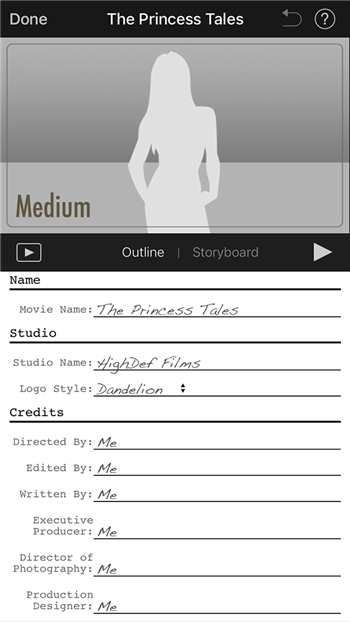
Edit the Trailer Template in iMovie on iPhone
You can play around with various options that the app offers to add effects and edit your videos.
Part 4. How to use iMovie on Mac
Using iMovie on a Mac is as easy as using it on an iPhone. Both the mobile and the Mac version of the app carry pretty much the same interface so you should not have any issues finding your favorite editing tools or the ones you frequently use if you have used the app before on an iPhone.
Since most Mac machines come preinstalled with the iMovie app, you do not need to download the app if it is already available on your machine. However, if it is not available, then it is just a matter of a few clicks in the App Store to get it on your machine.
Step 1. Launch the Mac App Store on your Mac, search for iMovie, and download and install the app on your machine.
Step 2. When the app is installed, click on Launchpad in your Dock, and search for iMovie, then click on the app when it appears on your screen.
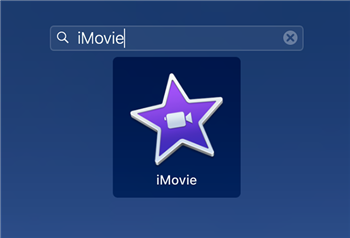
Access the iMovie App on Mac
Step 3. On the first interface of the app, you will be asked to create a project for your video editing task. Click on the Create New option to create a new project.
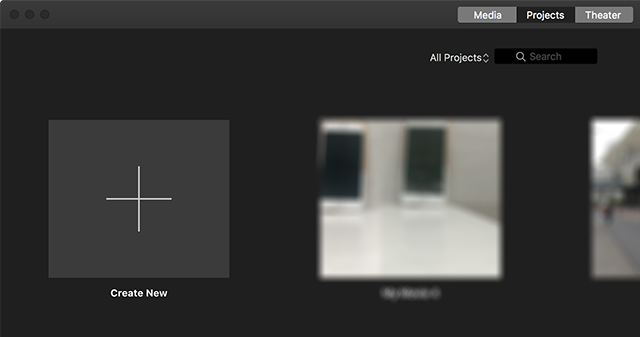
Make a New Project in iMovie on Mac
Step 4. You will then be asked what kind of project you would like to create. You can choose either Movie or Trailer. This really depends on how you would like to edit your video. Trailer will let you create a trailer kind of video. Let us select it for demonstrating this procedure.
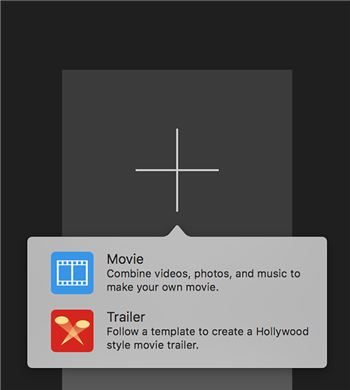
Select Project Type in iMovie on Mac
Step 5. The following screen lists out all the available trailer templates you can use for your project. Choose the one you think will be the best for your project and then click on the Create button at the bottom.
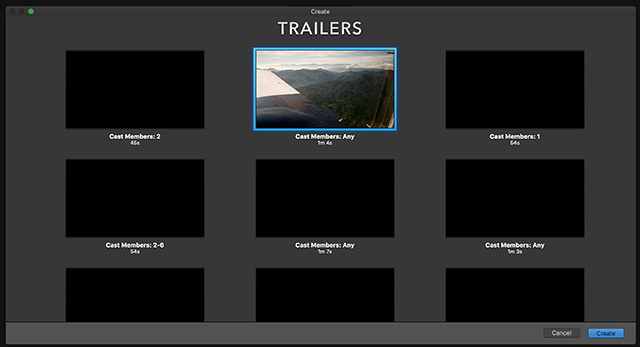
Choose Trailer Template in iMovie on Mac
Step 6. Now comes the main part where the actual actions take place. On this screen, you will find a blank area with a button in it saying Import Media. Click on it and it will let you add your video file to the project.
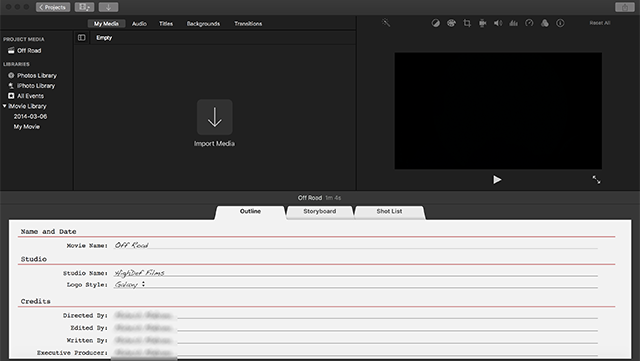
Import Media and Edit Trailer
Step 7. After adding your video file, you can edit the details for your movie. This includes the name and date of the movie, the studio, and credits. Enter these details in the given fields and continue.
As you go along creating your movie, you should be able to view the movie preview on your screen. Make sure it looks exactly the way you want, and if it does not, then alter the options so it becomes a perfect movie for you.
The Bottom Line
If you are going to use iMovie on your iPhone, iPad, or even Mac, a bit of help on how to use it will surely let you move fast with producing some amazing quality videos with the app on your devices. We hope our iMovie tutorial above helps you out with your video editing tasks.
More Related Articles

Member of iMobie team as well as an Apple fan, love to help more users solve various types of iOS & Android related issues.
Product-related questions? Contact Our Support Team to Get Quick Solution >
