How to Recover Deleted Files from USB Without Software: A Tested Guide (2026)
Deleted files from a USB drive and want to recover them without software? This guide covers the simplest built-in methods that may still work, like checking backups, restoring previous versions, and verifying hidden files. It also explains when recovery without software is no longer possible.
Losing critical data on a portable drive creates an immediate sense of panic. This is especially true when you are at work or school, staring at a restricted computer that blocks you from installing utilities.
Take the case of “Jason,” an office user who recently faced this exact scenario after he accidentally deleted data from a USB drive at work. Jason accidentally deleted a folder of reports from a USB drive at work. Because of strict IT security policies, he was blocked from installing recovery software. He was left searching for a native solution that wouldn’t trigger security alarms or require admin rights.
If you are in a similar position, this guide is for you. We focus exclusively on built-in Windows tools and methods that require no downloads. Whether you are trying to restore files or fix a drive that suddenly appears empty, the solutions below are safe, tested, and designed for restricted environments.
Recovery Methods Comparison: CMD vs. Backups vs. Software
Before attempting any specific method, it is crucial to understand what is technically possible without third-party tools. Many users search for native solutions expecting a hidden “undelete” button, but the reality is more nuanced.
Manual methods largely rely on the file system’s existing records or backups. If a file has been permanently deleted (erased from the directory) and no backup exists, Windows native tools have significant limitations.
We have compared the three primary categories of recovery to help you choose the right approach for your specific situation:
| Recovery Method | Best For | Success Rate | Technical Skill |
| Previous Versions | Recovering truly deleted files via Windows Backup. | High (if history was active) | Low |
| Command Prompt (CMD) | Unhiding files concealed by malware/viruses. | High (for hidden files only) | Moderate |
| Data Recovery Software | Recovering formatted or Shift+Deleted files without backups. | High | Moderate |
Strategic Analysis
- Previous Versions / Backups: This is the safest and most reliable method, though it requires that the drive was previously used on a computer with File History enabled.
- Command Prompt (CMD): This is often discussed as a “cure-all,” but it is primarily effective for unhiding files that malware has concealed. It rarely recovers data that has been genuinely deleted by a user.
- Data Recovery Software: While this article focuses on non-software solutions, it is objective to note that if the file system is corrupted or the data was deleted without a backup, specialized USB data recovery software is often the only way to reconstruct the raw data bits.
By understanding these distinctions, you can avoid wasting time on methods that do not apply to your specific type of data loss.
Method 1: The “Lucky Shot”—Restore Using Previous Versions
The most effective way to recover deleted files from a flash drive without software relies on a Windows feature called File History or Restore Previous Versions. This method is not guaranteed to work on every computer. Windows does not automatically create “shadow copies” for removable drives by default, so it won’t help you recover files deleted from Recycle Bin in most USB scenarios. However, if you have ever plugged your USB drive into a personal computer (like your home laptop) where File History was enabled, a cached copy of your files might exist there.
This was the solution for Jason. After failing to find the files on his work computer, he checked his home PC. He accessed Windows File History, found a snapshot of the drive from earlier that week, and restored the files without needing risky command-line procedures.
How to Check for Previous Versions
1. Connect the Drive: Plug your USB flash drive into the computer where you suspect a backup might exist (e.g., your home PC).
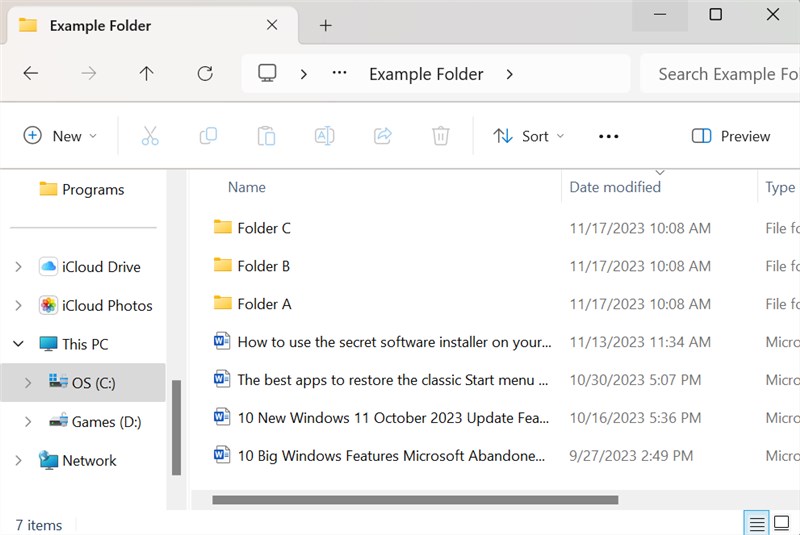
2. Open Explorer: Open File Explorer (Windows Key + E).

3. Navigate: Locate the folder where your deleted files were originally stored.
4. Properties: Right-click the folder (or the USB drive letter itself if the files were in the root directory) and select Properties.
5. Previous Versions Tab: Click the Previous Versions tab at the top of the window.
If you see a list of dates and times, you have a backup available.
- Select a Version: Click on a folder version that predates the accidental deletion.
- Preview: Click Open to verify the files are inside.
- Restore: Click Restore to overwrite the current folder, or use the dropdown arrow to Restore To a safe location on your desktop.
If the list is empty, it simply means no automated backup was created on this specific machine. Do not be discouraged; proceed to the next method to check if the files are hidden rather than deleted.
Method 2: Recover Hidden Files from Flash Drive Using CMD
If your drive appears empty but Windows Explorer still shows “Used Space” (e.g., “10GB free of 16GB,” yet you see no files), your data is likely not deleted. It is simply hidden.
This is a common symptom of “shortcut viruses” or scripts often found on shared school or office computers. In this case, the attrib command is the correct solution. This method tells Windows to forcefully remove the “Hidden,” “Read-only,” and “System” attributes from all files on the drive, making them visible again.
Steps to Run the Attrib Command
Note on Permissions: You may need Administrator privileges to run this command successfully. If you are on a restricted work computer and receive an “Access Denied” error, you will need to ask IT for help or try this on a personal computer.
1. Identify Drive Letter: Plug in your USB drive and note the drive letter assigned to it (e.g., E: or F:).
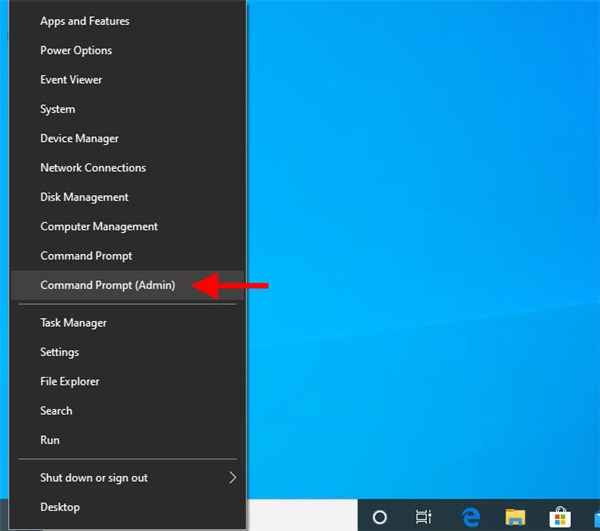
2. Open Command Prompt: Press Windows Key + Q, type cmd, and press Enter.
3. Target the USB: Type your USB drive letter followed by a colon (e.g., E:) and press Enter. The prompt should change to look like E:\>.
4. Execute Command: Type the following command. Precision is critical here. Spaces act as separators between instructions.
- The Syntax: attrib -h -r -s /s /d *.*
- Visual Breakdown: attrib [Space] -h [Space] -r [Space] -s [Space] /s [Space] /d [Space] *.*
5. Wait: Press Enter.
[Expert Insight] Do not panic if the cursor just blinks. On larger drives (32GB+), this process can take several minutes. It may look like the window has frozen. Do not close the window. Wait until the E:\> prompt reappears, indicating the process is finished.
Understanding the Syntax
- -h: Unhides the files.
- -r: Removes “read-only” status (allowing you to modify them).
- -s: Unmarks the file as a restricted system file.
- /s: Applies the command to all files in the current folder.
- /d: Applies the command to the folders themselves.
- *.*: Tells the command to apply to every file name and every file extension.
Once the command prompt returns to the standard prompt, open your USB drive in File Explorer. If your files reappear, they were merely hidden. If the folder remains empty, the files were likely genuinely deleted.
Why Old Tricks Fail: The Reality of USB Data Deletion
Many users ask, “Why don’t deleted USB files go to the Recycle Bin?” The answer lies in storage management. Unlike internal hard drives, Windows generally treats deletions on flash drives as permanent actions to conserve space on the portable device, which is why you can’t easily recover files from Recycle Bin in this case. This means there is no “Recycle Bin” safety net for standard USB drives unless you have manually configured one beforehand.
The Risk of Data Overwrite
It is vital to understand the risks. When you delete a file, the data is not immediately wiped; the space it occupied is simply marked as “writable.”
If you continue to use the drive—saving new files, editing existing ones, or even plugging it into different machines—you risk physically overwriting the deleted data with new binary code. Once that space is overwritten, recovery is impossible.
The Danger of CHKDSK
There is a dangerous misconception regarding the chkdsk command. You may see advice on forums suggesting you run “Check Disk” to fix the drive. While chkdsk is excellent for fixing file system errors, using it on a drive with deleted data can be disastrous. CHKDSK attempts to repair the file structure by converting “lost” file fragments into generic .chk files.
This process often overwrites the very data headers you are trying to save. Instead of your Excel spreadsheet, you end up with a useless file named FILE0001.CHK. Do not run CHKDSK if your primary goal is to recover deleted files.
Check Cloud Backups and Temporary Files
If the technical methods above haven’t worked, don’t lose hope yet. We can often find “shadows” of our files in places we forget to look. Before you resign yourself to data loss, consider where else your file might exist.
Hidden Backup Locations
1. Email Attachments: Did you ever email that document to a colleague or yourself? Check your Sent Items folder. The file living there is a perfect copy of what was on your USB.
2. Cloud Sync Folders: If you edited the file on a machine with OneDrive, Dropbox, or Google Drive, the desktop app might have synced a copy to the cloud. Log in to the web versions of these services and check their Trash or Bin folders.
3. Windows Temp Folder: If you opened a Word or Excel document directly from the USB, Windows often creates a temporary working copy.
- Press Windows Key + R.
- Type %temp% and press Enter.
- Sort the folder by “Date Modified” and look for files that match the time you were working. They may have strange names (e.g., ~WRL001.tmp), but try opening them with the original application.
When to Use Professional Recovery Tools
We have covered every viable method to recover files without installing software. If you have checked Previous Versions, run the attrib command correctly, and scoured your cloud backups without success, you have reached a decision point.
If the files were truly deleted (not just hidden) and no backup exists, native Windows tools cannot retrieve them. The operating system sees the space as empty. At this stage, professional data recovery software becomes the only remaining option. These tools differ from the methods above because they scan the raw magnetic or flash memory sectors to reconstruct files that have been removed from the directory structure.
Decision Checklist
- Did CMD reveal hidden files? No.
- Was File History active? No.
- Is the data critical? Yes.
If you answered yes to the last question, you will need to use a dedicated recovery utility. For users who cannot install software on their current machine due to restrictions, this may require taking the drive to a different, unrestricted computer (like a home laptop) to perform the scan.
Frequently Asked Questions About USB Recovery
Q1. Can I recover deleted files from a USB without software?
Yes, but only under specific conditions. You can recover files without software if they are merely hidden (using CMD) or if you have a backup via Windows File History or a cloud service. If the files were permanently deleted and no backup exists, you will likely need specialized software.
Q2. Why don’t deleted USB files go to the Recycle Bin?
By default, Windows bypasses the Recycle Bin for removable drives like USBs to manage storage space efficiently. This means files are marked for deletion immediately. However, you can configure the Recycle Bin for external drives in the properties settings to prevent this in the future.
Q3. Can CMD recover deleted files from a flash drive?
The Command Prompt (specifically the attrib command) is excellent for recovering files hidden by malware or system errors. However, it cannot recover files that have been permanently deleted or overwritten.
Q4. Will using CHKDSK help recover deleted files?
No, and it is often dangerous to try. CHKDSK is designed to fix file system errors, not recover data. Running it on a drive with deleted files can overwrite the data headers you are trying to restore, making permanent recovery impossible.
Conclusion
Losing data on a restricted work or school computer is stressful, but as we have seen, you are not powerless. By systematically using the Previous Versions feature, checking for hidden files via CMD, and exploring alternative backup locations like cloud trash bins, you can often retrieve your audio files, photos, or emails.
If these native methods fail, it is a strong indicator that the data has been permanently deleted from the file system’s directory. In such cases, your safest next step is to stop using the drive immediately to prevent overwriting the data and wait until you can access an unrestricted machine to perform a deeper scan. Data recovery is a race against time and activity—pause, assess your backups, and proceed with the method that matches your situation.

Joy Taylor is a seasoned technical writer with over a decade of experience in mobile technology. At iMobie, she specializes in producing in-depth content on iOS data recovery, iPhone unlocking solutions, and iOS troubleshooting.
Product-related questions? Contact Our Support Team to Get Quick Solution >
