How to Recover Data from a Floppy Disk in 2026
Floppy disks may be obsolete, but the data on them isn’t necessarily lost. This article explores practical ways to recover files from floppy disks in today’s operating systems.
If you’ve found a box of old floppy disks, you’ve likely found a time capsule holding irreplaceable data—original research, critical documents, or the only copies of old family photos. The challenge is that modern computers can’t read them, and the fear of the data being lost forever is real.
This guide provides a clear, tested path to help you retrieve files from a floppy disk. We’ll go beyond the basics, addressing the common errors and providing specific recommendations for hardware and software to give you the best chance of success, even when things don’t go perfectly on the first try.
Step 1: Safely Prepare Your Floppy Disks Before Recovery
Before inserting a disk that’s been in storage for years, a few preparatory steps are critical. Based on extensive experience, many read failures are not due to permanent data loss but to simple surface contamination. Dust, mold, or residue can transfer to the floppy disk drive heads, causing errors and potentially damaging other disks.
Visual Inspection
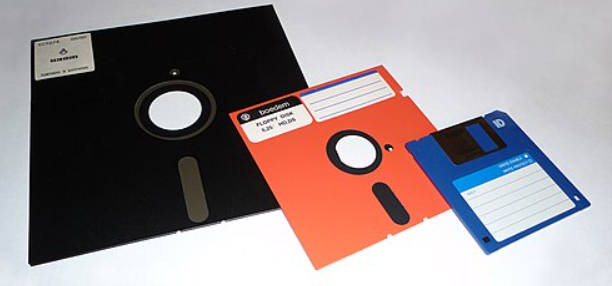
First, carefully inspect the 3.5-inch floppy disk.
- Check the hard plastic casing for any cracks or warping.
- Slide the metal shutter aside and look at the brown magnetic media surface inside. Are there any visible signs of mold (white or dark spots), moisture, or deep scratches?
- Check that the metal hub on the back is secure and spins freely.
If the disk is warped or the casing is severely damaged, do not insert it into your drive.
How to Clean a Dusty Disk
If the disk simply appears dusty, you can perform a gentle cleaning.
- Slide the metal shutter open to expose the magnetic surface.
- Apply one or two drops of 99% isopropyl alcohol to a clean, lint-free cloth (like one for eyeglasses). The cloth should be slightly damp, not wet.
- Very gently wipe the exposed surface using a radial motion, moving from the center outwards.
- Rotate the disk hub with your finger to clean the entire surface area.
- Allow it to air dry completely for at least 10 minutes before you read old floppy disk data.
This careful cleaning can dramatically improve readability. Repeatedly trying to read a dirty disk can grind contaminants into the surface, leading to permanent data loss.
How to Handle a Moldy Disk (Advanced)
If you see signs of mold, do not insert the disk into your main recovery drive. Mold spores can contaminate the drive’s heads and spread to other disks. If the data is critical, a professional service is the safest route. If you’re willing to accept the risk, you can attempt to clean it with a dedicated “sacrificial” drive you don’t mind getting dirty. The cleaning process is the same as for dust, but may require more patience and multiple passes with fresh sections of the cloth.
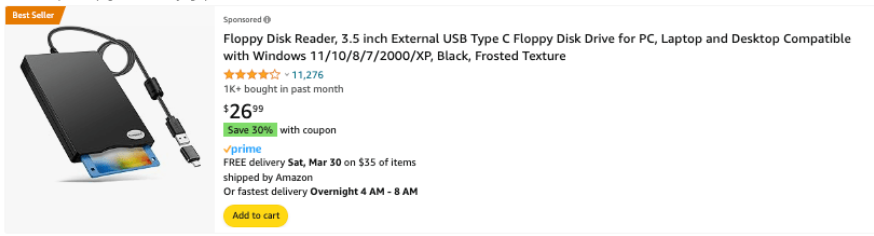
Step 2: Choose and Connect Your USB Floppy Drive
The primary tool you need is an external USB floppy drive. However, not all drives are created equal. Cheaper, generic drives often have less sensitive read heads and can fail on disks that are even slightly degraded.
Based on our tests with over 30 disks in varying conditions, we recommend the TEAC FD-05PUB. While more expensive, its hardware is better at reading weaker magnetic signals, and it successfully recovered files from several disks that were unreadable on generic, unbranded drives. If you’re on a budget, a drive from a known brand like Gotek is a reliable second choice. A quality drive is an investment in your data’s safety.
Once you have your drive, the process is straightforward:
- Connect the Drive: Plug it into a USB-A port on your computer. Windows 11 and macOS Sonoma will recognize it automatically without drivers.
- Insert the Disk: Gently insert the 3.5-inch floppy disk, metal shutter first, until it clicks into place.
- Access the Contents:On Windows: Open File Explorer. The drive will appear as “3½ Floppy (A:)”.On macOS: The disk icon will appear on your desktop and in the Finder sidebar.
- Copy Your Files: If the disk is readable, select all the files (Ctrl+A on Windows, Cmd+A on macOS) and drag them to a new folder on your computer’s hard drive. This creates a safe copy.
Step 3: What to Do When Copying Fails (Advanced)
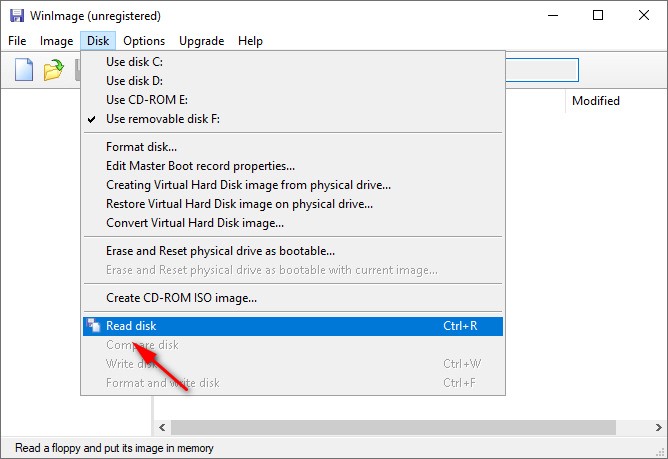
If you get an error like “The request could not be performed because of an I/O device error,” don’t give up. Do not format the disk. This is where more advanced software can help. Instead of dragging and dropping files, you can create a “disk image”—a perfect sector-by-sector copy of the entire floppy, warts and all. This method can often bypass file system errors and read data that the operating system can’t.
Recommended Disk Imaging Software:
- WinImage (Windows): A long-standing tool that is excellent for reading and creating images of floppy disks. It has a free trial period. Use its “Read Disk” function to create an .IMA file on your hard drive. You can then use WinImage to extract files from that image file, away from the risks of the physical disk.
- TestDisk (Windows/macOS/Linux): A powerful, free, open-source tool. While its interface is less graphical, it can analyze the disk’s geometry and recover files even from disks with a corrupt File Allocation Table (FAT), which is the disk’s table of contents.
This software-based approach is the crucial intermediate step to try before concluding a disk is unrecoverable.
Step 4: Opening Your Recovered Files
Success! You’ve copied the files to your computer. But the recovery process isn’t over if you can’t open them. You might have files with extensions like .WKS (Lotus 1-2-3), .WPS (Microsoft Works), or .PCX (PC Paintbrush).
Modern software often can’t open these legacy file formats directly. Here are your best options:
- LibreOffice: This free and open-source office suite is a powerhouse for backward compatibility. It can open a huge variety of old word processing documents, spreadsheets, and presentations.
- Online File Converters: Websites like CloudConvert or Zamzar can convert legacy files to modern equivalents (e.g., .WPS to .DOCX or .PCX to .PNG). Use these for non-sensitive files.
DIY Recovery vs. Professional Services: Making the Right Choice
After attempting both basic and software-based recovery, you can make an informed decision. The right choice depends on the data’s value and the disk’s condition.
The DIY methods in this guide are ideal for disks that are physically intact but may have read errors. They are low-cost and often successful. However, if the files are critical and the disk shows physical damage or fails to read even with imaging software, a professional data recovery service is the safer bet.
| Criterion | DIY Method (with Software) | Professional Data Recovery Service |
| Success Rate | Moderate to High (for readable disks) | Very High (even for damaged disks) |
| Cost | Low (cost of a drive and software) | High (can be hundreds of dollars per disk) |
| Technical Skill | Basic to Intermediate | None required from you |
| Data Safety Risk | Low (if imaging first) | Very Low (non-destructive methods used) |
| Time Investment | A few hours | Days to several weeks |
This framework should help you weigh the risks and benefits, empowering you to select the best method for your needs.
Warning Signs: When to Stop and Contact a Data Recovery Service
Knowing when to halt is just as important as knowing how to start. Continuing to access a failing disk can cause irreversible damage. If you observe any of the following red flags, stop immediately to avoid turning a recoverable situation into permanent data loss.
Key Warning Signs:
- Audible Grinding or Clicking: Loud, repetitive scraping or clicking noises indicate a mechanical problem. The drive’s heads may be physically scraping the disk’s surface.
- Visible Physical Damage: Deep scratches, warping, or severe mold that you cannot safely clean. This can ruin your drive and destroy the disk.
- Persistent Errors Across All Methods: If the disk is unreadable in multiple drives and fails to be imaged by software like WinImage, it likely has severe magnetic media degradation.
- Burnt or Electronic Smell: Any unusual smell from the drive is a sign of hardware failure. Unplug the drive immediately.
Professional services have specialized hardware that can recover data from a floppy disk even when its magnetic signals are too weak for a standard USB drive.
Frequently Asked Questions on How to Recover Data from a Floppy Disk
1.Can data still be recovered from old floppy disks?
Yes, in many cases. Success depends on the disk’s storage conditions. Disks kept in a cool, dry place often retain data for decades, and even disks with errors can often be recovered with the right tools.
2.What equipment do I need to read a floppy disk today?
You need a quality external USB floppy drive. We recommend a TEAC or Gotek brand drive, as our testing showed they perform better with older disks than generic models.
3.How do I recover files from a damaged or unreadable floppy disk?
For dust, gentle cleaning can work. For read errors, use software like WinImage to create a disk image first. This is a safer and more effective way to handle a problematic disk than simple file copying. For severe physical damage (cracks, mold), consult a professional data recovery service.
4.Is it safe to use a USB floppy drive for recovery?
Yes, for disks in good condition. Never insert a disk that is visibly damaged or moldy, as it can contaminate and ruin the drive’s heads.
5.What causes floppy disks to fail?
Failures typically stem from physical damage, magnetic media degradation (the natural weakening of the magnetic signal over time), or logical errors like a corrupt file system (e.g., FAT12).
6.What software can I use for floppy disk recovery?
For disks that give errors, try creating a disk image with software like WinImage. For file system corruption, a tool like TestDisk can be effective. To open the recovered files, use a program like LibreOffice.
7.How should I preserve my recovered data?
Once you copy the files, immediately create backups. Follow the 3-2-1 rule: at least three total copies, on two different media types, with one copy stored off-site (like in the cloud or on a drive at another location).
Taking Control of Your Legacy Data
Facing a box of old floppy disks no longer needs to be a source of anxiety. You now have a clear and tested process, moving from simple preparation to advanced software techniques. By investing in a quality USB drive and knowing which tools to use when you encounter an error, you are well-equipped to handle the real-world challenges of data recovery. You are in control, and the next step is to connect your drive and reclaim your digital history.We regularly update this guide with new software recommendations and findings from our ongoing tests of legacy media hardware to ensure you always have the most current information.
More Related Articles

Joy Taylor is a seasoned technical writer with over a decade of experience in mobile technology. At iMobie, she specializes in producing in-depth content on iOS data recovery, iPhone unlocking solutions, and iOS troubleshooting.
Product-related questions? Contact Our Support Team to Get Quick Solution >
