We have all been there. You just finished a grueling remote raid with your friends. The legendary Mewtwo is finally on your catch screen. You use a Golden Razz Berry, patiently wait for the attack animation, and land a visually perfect Excellent Curveball. One shake. Two shakes. Poof. It escapes.
After 12 identical, seemingly flawless throws, Mewtwo flees.
When this happened to me last month, I was completely demoralized. My friends and I were not talking about abstract concepts; we were complaining about punishing RNG (Random Number Generation) and incredibly low base catch rates. I was convinced my game was glitching. But then I dug into the actual game files and discovered the brutal reality of the math.

Finding and using a reliable pokemon catching rate calculator fundamentally changed how I approach the game. It replaced my frustration with hard data. If you are tired of watching raid bosses run away, you are in the right place. Below, you will find exactly what you need to calculate your odds, understand the hidden formula, and stop wasting your premium items.
Table of ContentsHide
Calculate Your Catch Odds Right Now
We know you are likely standing outside in the cold, staring at a raid boss, and needing an immediate answer. You do not need a theoretical essay right now; you need numbers.
(If the widget above is slow to load on your current mobile connection, we strongly recommend opening trusted community tools like the GamePress Catch Calculator or GoHub’s Catch Simulator).
Using a pokemon capture rate calculator allows you to plug in your current encounter variables—like your active Type Medals and ball type—to immediately see your true chance of success.
To use the tool effectively, follow these quick steps:
1. Select the target species (e.g., Tapu Lele).
2. Input its estimated level (Raid bosses are Level 20, or Level 25 if weather-boosted).
3. Choose your ball type (Select Premier Ball for raids).
4. Select your berry (Golden Razz Berry).
5. Choose your throw accuracy (Nice, Great, or Excellent).
6. Input your Type Catch Medals (Bronze, Silver, Gold, or Platinum).
By adjusting these variables in real-time, you get immediate feedback. For instance, you will instantly see that settling for a “Great” throw instead of an “Excellent” throw might drop your capture chance by a highly significant margin.
Decoding the Actual Catch Rate Formula
For years, many of us relied on the colored target ring to estimate our odds. A green ring meant easy; a dark red ring meant difficult. But during high-stakes raids, visual guesswork is completely inadequate.
If you want to understand why your pokemon catching rate calculator gives you a specific number, we need to look at the community-accepted math. The game does not simply add your bonuses together; it uses a complex, exponent-based formula.
Here is the simplified version of the mathematical engine running in the background of your game:
Probability = 1 – (1 – Base Catch Rate / (2 CPMultiplier)) ^ Multiplier
Let’s break down what this actually means in plain language:
- Base Catch Rate (BCR): Every species has a hardcoded capture percentage. A common Pidgey might have a 50% BCR. A legendary raid boss like Mewtwo has a punishingly low 2% BCR.
- CPMultiplier (CPM): This is a hidden number tied to the Pokemon’s level. The higher the level (like a weather-boosted Level 25 raid boss), the higher the CPM, which makes the boss mathematically harder to catch.
- The Exponent (Multiplier): This is where you have control. The game takes all your active bonuses (Berries, Balls, Throws, Medals) and multiplies them together to create one giant number. Because of how the formula works, a larger exponent pushes your final probability percentage higher.
Advanced players rely on this pokemon catch formula calculator logic to understand their odds. The game generates a random number between 0 and 1. If that random number is lower than your final calculated probability, you catch the Pokemon.
Stacking Your Multipliers: The Missing Mechanics
To survive bad RNG, you must artificially inflate your exponent multiplier as much as possible. Many players know about berries, but they critically misunderstand Pokeballs, throw sizes, and Type Medals.
Here is the exact breakdown of how to stack your multipliers for maximum effect:
1. The Pokeball Multiplier
If you are catching in the wild, an Ultra Ball provides a massive 2.0x multiplier compared to a standard red Pokeball. However, raids are a completely different environment.
WARNING: The Premier Ball Trap
Many players assume Premier Balls (the white balls given after raids) have an enhanced catch rate because they are earned through difficult battles. This is false. A Premier Ball has a 1.0x multiplier. It is mathematically identical to a basic, standard red Pokeball. This is the primary reason raid bosses are incredibly difficult to catch.
2. The Berry Bonus
Berries are non-negotiable for legendary encounters. A standard Razz Berry offers a 1.5x multiplier. A Silver Pinap Berry offers a 2.33x multiplier. However, the Golden Razz Berry provides the absolute highest modifier in the game: a 2.5x multiplier. Always use it for Tier 5 bosses.
3. Type Catch Medals (The Forgotten Multiplier)
This is where many casual players fail their math. At the top of your trainer profile, you have badges for catching certain amounts of specific elemental types (e.g., 2,500 Psychic types for the Platinum Psychic Medal). These actively boost your catch rate!
Bronze: 1.1x
Silver: 1.2x
Gold: 1.3x
Platinum: 1.4x
If you are facing a dual-type boss like Tapu Lele (Psychic/Fairy), the game averages your two medals. If you have a Platinum Psychic medal (1.4x) but only a Gold Fairy medal (1.3x), your final medal multiplier will be 1.35x.
4. Throw Accuracy & Curveballs
Throwing a curveball is the easiest way to instantly apply a flat 1.7x multiplier to your math.
Your throw accuracy (Nice, Great, Excellent) is not static; it scales continuously based on the exact radius of the inner circle.
- Great Throw: Ranges from a 1.3x up to a 1.69x multiplier.
- Excellent Throw: The moment the inner ring drops below 30% of its maximum size, it becomes Excellent, starting at a 1.7x multiplier and scaling all the way up to a 2.0x multiplier for a microscopic dot.
Why Raid Bosses Escape Perfect Throws
So, what happens when you do everything perfectly? You have Platinum medals (1.4x), you use a Golden Razz (2.5x), you throw a Curveball (1.7x), and you nail a pixel-perfect Excellent throw (2.0x).
Multiply those together: `1.4 2.5 1.7 2.0 = 11.9`. You have successfully created a massive 11.9x exponent multiplier.
You plug this into the formula against Mewtwo’s 2% Base Catch Rate at Level 20. The resulting pokemon capture probability is roughly 15% to 18%.
Read that again. Even with a mathematically perfect throw, the boss still has an 82% to 85% chance of breaking out of the ball.
This is why players get so frustrated. Your technique is flawless. You are not making mistakes. You are simply battling against intended mathematical friction. Understanding these numbers through a pokemon go catching probability tool removes the emotional sting of a fleeing Pokemon. It reminds you that it is a game of statistics. Maintain your excellent throws, keep stacking those multipliers, and trust the mathematical process to reward you over time.
Improve Pokémon Catching Efficiency With a GPS Location Tool
Catch rates in Pokémon GO depend on several factors, including spawn rarity, movement speed, throw bonuses, and encounter availability. As explained in Pokémon Catching Rate Calculator Guide, players often improve their success rates by targeting high-density spawn areas and maximizing encounter opportunities.
To access more active Pokémon locations, some players also use Fonelora Location Changer for flexible GPS route simulation during gameplay.
Why Players Use Fonelora Location Changer
According to Fonelora Location Changer, the software includes several GPS simulation features useful for location-based games:
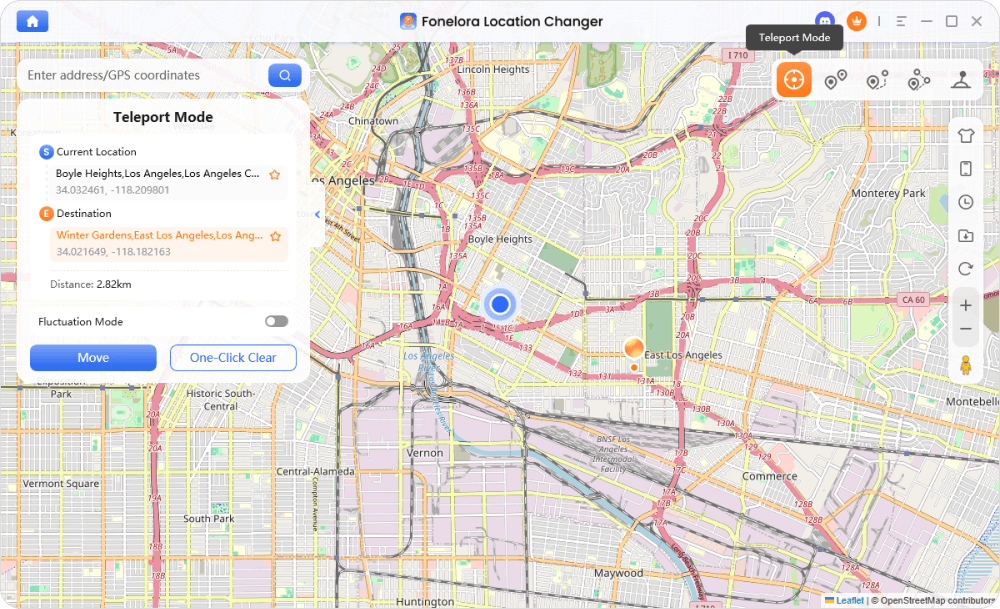
- Teleport Mode
- GPS Joystick
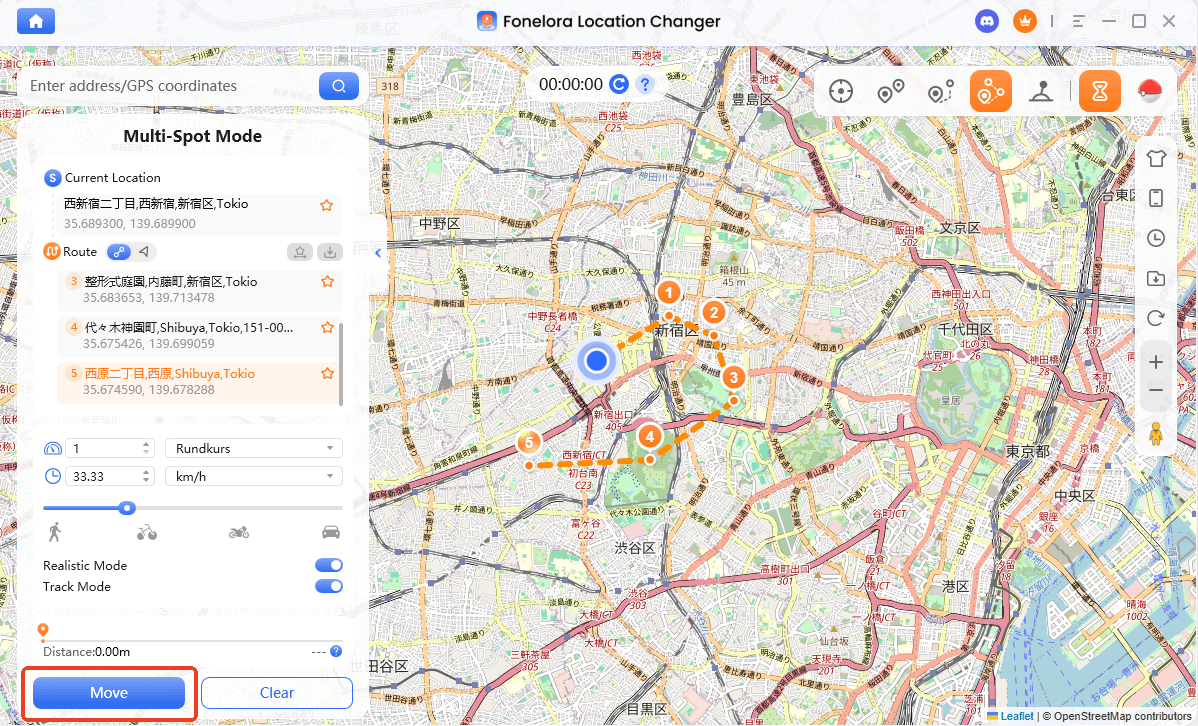
- Multi-Spot Route Simulation
- Adjustable Walking Speed
- GPX Route Import
- Cooldown Timer
The platform also highlights compatibility with:
- iPhone and iPad
- Android devices
- iOS 18 and iOS 26
- Android 15 and newer systems
Unlike modified Pokémon GO clients, the tool focuses on device-level GPS simulation rather than altering the game itself.
Key Highlights for Pokémon GO Players
Explore More Spawn-Dense Areas
Catch rates improve when players encounter more Pokémon overall. Community discussions frequently recommend high-density city locations, event zones, and lure-heavy PokéStops for efficient farming.
Fonelora’s route simulation allows players to search larger spawn areas more efficiently.
Smooth GPS Route Simulation
Instead of relying only on instant teleports, users can simulate:
- walking
- cycling
- driving routes
with customizable movement speeds for more natural gameplay behavior.
Built-In Cooldown Timer
The cooldown timer helps players manage movement intervals between distant locations more realistically.
GPS Joystick Support
Joystick mode allows precise directional control during Pokémon searches, event participation, and PokéStop farming.
How to Use Fonelora Location Changer for Pokémon GO
Step 1: Install the Software
Download and install Fonelora Location Changer on your Windows or Mac computer.

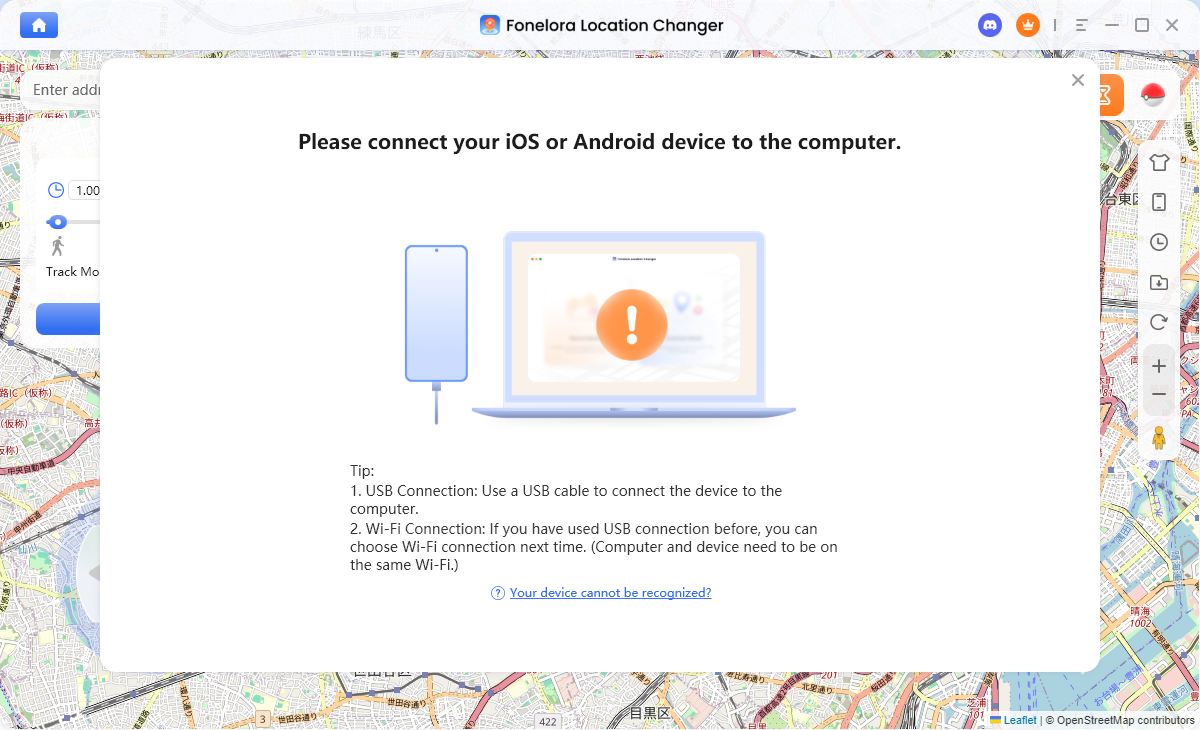
Step 2: Connect Your Device
Connect your iPhone or Android device using:
- USB
- Wi-Fi
- Bluetooth
depending on your preferred setup.
Step 3: Select a GPS Mode
Choose one of the available movement modes:
- Teleport Mode
- Joystick Mode
- Multi-Spot Route
- Jump Teleport
Step 4: Click “Move” to complete the location change.
Frequently Asked Questions About Catch Mechanics
Navigating the exact math of capture probabilities can generate many specific questions. Below are straightforward explanations to clear up common confusion.
- How does the pokemon catching rate calculator work?
- A pokemon catch rate calculator processes your exact inputs—including ball type, active berries, throw accuracy, and your profile’s Type Medals—against the target’s hidden base catch rate and level. It uses the game’s official exponent-based formula to output your exact percentage chance of a successful capture per throw.
- Why do Premier Balls feel so weak?
- Premier Balls have a 1.0x catch multiplier, making them mathematically identical to standard red Pokeballs. Because you are forced to use basic Pokeball math against legendary bosses with 2% catch rates, raids feel inherently more difficult than wild encounters where you can freely use Ultra Balls (2.0x).
The mathematical formulas provided by community game analysts are regularly updated to reflect the newest patches. The calculator widgets recommended in this guide pull live data, ensuring your catch odds remain accurate for all future seasonal raid rotations.
Start Catching With Confidence
Facing a legendary encounter without understanding the underlying numbers turns a fun game into a guessing game. By using a catching rate calculator and tools like Fonelora Location Changer to access more raid opportunities, you gain better control over both strategy and encounters.
You now know how catch mechanics really work—from Premier Ball limitations to medal bonuses. With this knowledge and the ability to reach more active raid areas, you can plan smarter, stack your multipliers, and approach every legendary encounter with confidence.


Hot Topics
