By Content Editorial Team. Tested hands-on over hundreds of hours on iPhone 15 Pro (iOS 17) and Samsung Galaxy S23 (Android 14). Our strategies focus on core gameplay mechanics, inventory management, and community coordination, proven effective across all modern mobile operating systems.
You stare at your phone screen in disbelief. A rare, shiny Charizard just spawned right in front of you, but your item bag shows exactly zero Ultra Balls. You panic-spin a nearby stop, receive two standard Poke Balls, and watch helplessly as your target flees.
Coming back to the game after a long break—or even starting fresh—feels incredibly overwhelming. You are immediately drowned in complex appraisals, mega energy, shadow boosts, and limited-time event bonuses. Without a structured method, Pokémon GO leveling up feels painfully slow, and you constantly run out of essential resources.
Early in my own return to the game, I spent 500,000 Stardust maxing out an Aggron simply because it had a high Combat Power (CP) number. I quickly learned it was completely useless in raids. Do not repeat my mistake. You do not need to guess which Pokémon to evolve or power up. This guide directly answers your most frustrating questions, giving you actionable checklists to rebuild your item bag, secure top-tier attackers, and master modern mechanics.
Table of ContentsHide
Decision-Making: Casual Gameplay vs. Optimized Strategy
The biggest separator between casual and efficient players is resource discipline. New players often waste Stardust, Rare Candy, and evolution items far too early. A stronger strategy is to delay major investments until you understand Individual Values (IVs), active raid relevance, event bonuses, and your actual team’s needs.
To understand the immediate impact of your daily decisions, consider this comparison between casual habits and an optimized play style:
| Metric | Casual Gameplay | Optimized Strategy |
|---|---|---|
| Success Rate | Low (struggles in high-tier raids) | High (builds optimal raid counters) |
| Time Cost | High (constantly grinding for lost items) | Low (efficient inventory management) |
| Technical Skill | Basic (relies on straight throws) | Advanced (consistently lands Circle Lock throws) |
| Resource Risk | High depletion of Stardust | Strict conservation for the meta |
Delaying immediate gratification secures your ability to power up top-tier combatants later. Do not power up any creature just because the CP number is high. Optimized play requires waiting for the right base stats and prioritizing your resources strictly for high-tier attackers.
⚠️ GOLDEN RULE: NEVER POWER UP BEFORE EVOLVING.
Always evolve your Pokémon fully before spending a single unit of Stardust. Evolving rerolls the creature’s moveset. If you spend 100,000 Stardust powering up a Machop, evolve it into a Machamp, and it gets terrible Steel-type attacks instead of Fighting-type attacks, you just wasted your most valuable currency.
Beginner Checklist: Quick Wins to Stop Wasting Resources
If you want fast progression, focus on these immediate, high-yield actions. Keep this checklist handy to ensure you never experience an empty item bag during crucial gameplay moments.
- Catch Absolutely Everything: Every successful catch yields Stardust and Candy. Even common, low-tier spawns like Pidgey or Lechonk provide the fundamental resources necessary for future top-tier upgrades.
- Optimize Your Item Bag: Discard standard Potions and regular Revives if you are not actively battling gyms daily. Keep your stock of Poké Balls and Pinap Berries extremely high to prepare for rare spawns.
- Exchange Gifts Daily: The daily limit for opening friend gifts provides a steady stream of free items, saving you from resource droughts.
Returning Player Guide: Catching Up on Modern Mechanics
If you have been away for years, you are likely confused by the sheer volume of updates. Here is exactly what you need to know to catch up today.
1. Naming the Meta: Safe Stardust Investments
Stop wondering what is actually “relevant.” If you want safe, long-term Pokémon to spend your Stardust on, look for these specific, easily accessible creatures:
- Machamp (Fighting): Essential for taking down gym defenders like Blissey and Snorlax.
- Mamoswine (Ice/Ground): The ultimate counter for the numerous Dragon-type legendary bosses.
- Tyranitar (Dark/Rock): A bulky, high-damage attacker excellent for psychic and flying raids.
- Eeveelutions (Glaceon, Sylveon): Cheap, accessible, and highly effective budget attackers for newer players.
2. Shadow Pokémon vs. Purified Pokémon
When you defeat Team GO Rocket, you rescue a Shadow Pokémon enveloped in purple flames. The game prompts you to “Purify” them.
🛑 WARNING: DON’T PURIFY SHADOW POKEMON FOR RAIDS.
Shadow Pokémon receive a permanent 20% boost to their attack stat, at the cost of taking more damage. Because raids are a race against the clock, damage output is everything. A 0-star IV Shadow Machamp will mathematically out-damage a perfect 4-star purified Machamp. Keep your strongest attackers in their Shadow form.
3. Mastering the Buddy System (Without Poffins)
Assigning a creature as your buddy earns you candy for walking. To cut that walking distance in half, your buddy needs to reach the “Excited” mood. You do not need to buy premium Poffins to do this.
The Secret Method: Perform a buddy action every 30 minutes. Feed them a berry, play with them (rub the screen until they smile), take a snapshot, and enter a quick practice battle against a team leader with your buddy in your party. Repeating this cycle entirely fills their hidden excitement meter, instantly cutting your required walking distance in half for the day.
4. Mega Evolutions and Routes
Mega Evolutions are temporary, ultra-powerful forms that boost the damage of everyone else raiding alongside you. Prioritize Mega Raids when they appear to collect Mega Energy for key species.
Routes are user-created walking paths on your map. Following them rewards you with Zygarde cells and unique regional spawns.
Pro Strategies: Perfect Throws and IV Appraisals
Stardust is the most valuable currency in the entire ecosystem. Applying strict discipline ensures you only invest your hard-earned assets into worthy candidates.
Before spending Stardust, fully understand Individual Values (IVs). The in-game Appraisal tool displays three distinct bars: Attack, Defense, and HP. A completely full bar equals 15 points. Creatures with a perfect 4-star rating (15/15/15) or high 3-star ratings are your primary targets for investment.
How to Execute the “Circle Lock” Method
Raid bosses are notoriously difficult to catch. They attack frequently, causing you to bounce your premier balls off their faces and waste your chances. The Circle Lock method guarantees you land Excellent curveballs consistently.
Step1. Hold and Shrink: Tap and hold the Poke Ball. Watch the target circle shrink.

Step2. Lock the Size: When the circle is small enough for an “Excellent” throw, lift your finger off the screen completely. Do not throw the ball. The circle’s size is now locked.
Step3. Wait for the Lunge: Wait patiently for the raid boss to perform its attack animation (it will lunge directly at the screen).
Step4. Throw Mid-Animation: As the boss is finishing its lunge, quickly spin the ball and throw it. The ball will connect exactly as the attack animation ends, guaranteeing the circle remains the exact size you locked it at.
Maximizing Event Bonuses: The Community Day Checklist
Events provide the highest return on your time investment. To succeed, you must prep your inventory. Use this exact checklist to transform limited-time opportunities into massive account progression.
Three Days Before the Event
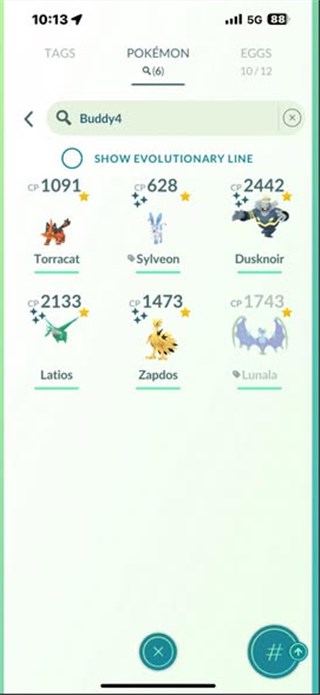
- Clear Storage Using Search Strings: Do not scroll manually. Type age0 into your search bar to see only Pokémon caught today, making daily cleanups fast. Type 0*, 1*, 2* to instantly highlight creatures with weak appraisals, allowing you to mass-transfer them.
- Hoard Supplies: Aim to secure at least 200 Ultra Balls and 150 Pinap Berries by spinning stops and opening maximum friend gifts.
During the Event
- Stack Your Multipliers: If a Community Day offers a double catch XP bonus, activate a Lucky Egg simultaneously to quadruple your total gains.
- Use the Quick Catch Technique: Drag the berry menu icon slightly toward the center of the screen with your left thumb, keep holding it, and throw the ball with your right thumb. Once the ball hits, release your left thumb, tap the screen, and press the runaway icon. The Pokémon will be safely in your bag, saving you 15 seconds of animation time per catch.
Bonus Tip: Improve Event Participation with Fonelora Location Changer
Many Pokémon GO players struggle to make the most of Community Days, Raid Hours, GO Fest events, and region-specific spawns due to time constraints or limited access to active play areas. In these situations, Fonelora Location Changer can be a useful companion for planning more efficient gameplay. With support for GPS location simulation, route customization, and joystick-based movement, it allows players to explore different in-game areas, optimize Buddy Candy farming, and better prepare for event-focused sessions. When combined with the inventory management, Stardust-saving, and raid strategies covered in this guide, Fonelora Location Changer can help trainers spend less time dealing with logistical limitations and more time focusing on catching Pokémon, completing raids, and maximizing event rewards.

Frequently Asked Questions: Actionable Solutions
- How do I coordinate Lucky Eggs with remote friends for XP?
- Reaching “Best Friend” status awards 100,000 XP, which doubles to 200,000 with a Lucky Egg. To coordinate with someone you do not know in real life, change your buddy Pokémon’s name to the exact time you plan to open the gift (e.g., “Egg@2PM EST”). This signals to the remote player exactly when they should activate their own Lucky Egg.
- What Pokémon should I immediately transfer?
- Transfer low-IV duplicates (0-star, 1-star, and 2-star appraisals) immediately to free up storage space. Keep 3-star and perfect 4-star creatures, specifically those matching the safe meta investments listed above.
- How do I save Stardust and use it wisely?
- Never power up gym defenders; any Pokémon will eventually be knocked out of a gym. Only invest Stardust into top-tier raid attackers or highly ranked PVP combatants when you absolutely require them to clear immediate, current-season content.
- What is the fastest way to get more Poké Balls?
- Opening the maximum number of daily friend gifts and spinning gym photo discs, where you hold gold badges, yield the highest item counts per interaction.
Conclusion
Mastering your daily gameplay comes down to smart resource management and disciplined decision-making. By applying the strategies above, you can avoid wasting Stardust, build stronger raid teams, and make the most of every event. From identifying valuable Shadow Pokémon to mastering Circle Lock throws, these small optimizations add up quickly over time.
For trainers who want even more flexibility during Community Days, Raid Hours, and special events, Fonelora Location Changer can help streamline route planning and location-based gameplay. Its GPS simulation and route customization features make it easier to plan efficient farming sessions, earn Buddy Candy, and explore active event areas more effectively.
Don’t let poor inventory management or inefficient grinding slow your progress. Open your game, clear out those 0*, 1*, and 2* Pokémon, and start putting these strategies into action to maximize every Pokémon GO session.


Hot Topics
