How to Backup iPhone 7/7 Plus Without iTunes/ iCloud
Protecting your data on your iPhone 7 requires backing up your information. Four quick ways to make sure your contacts, pictures, and apps are saved securely are covered in this guide. Whether using cloud services or local backups, learning how to back up iPhone 7 helps you keep your information secure and accessible.
AnyTrans – Backup iPhone 7/7 Plus
Free download AnyTrans to 1-click to Backup iPhone 7/7 Plus Without iTunes/ iCloud.
If you are an iPhone 7 owner, it is essential to make a data backup. It eliminates risks, where sometimes you might lose your contacts, applications, and photos, especially during incidents like changing to a new phone, preparing for a factory setting, or putting back unnecessary data to avoid being exposed. It becomes hazardous, especially when, for instance, your phone falls off, or there is a software glitch that deletes all your data; then, if you do not have a backup, this may prove disastrous.
In this article, you will find out four easy techniques on how to back up the iPhone 7. These procedures will assist you to ensure that your critical information is well secure and retrievable at any time. So, let’s begin to explore how to back up iPhone 7 easily!
Part 1: About iPhone 7/ iPhone 7 Plus
The iPhone 7 and iPhone 7 Plus editions, released in the year 2016, have been popular due to their beautiful look and durability. They still maintain good user service, thanks to enhanced innovation such as improved cameras and dust/water resistance. But over time, it becomes even more essential to ensure that your information is safe and not accessible to everyone. iPhone 7 backup is essential because it is only through this that one can be assured that all the vital information can be easily retrieved when needed due to upgrades or any other issues.
Part 2: Solution 1: One-click Backup iPhone 7/7 Plus Without iTunes/ iCloud
For those looking for a more comprehensive and flexible backup solution, AnyTrans offers a one-click backup option that surpasses both iTunes and iCloud. Unlike the 5GB of free storage on iCloud, AnyTrans offers an alternative that does not depend on restricted cloud storage.
You can manage and transfer music, pictures, messages, WhatsApp data, and more with ease if you use AnyTrans. Furthermore, you can find and download apps, manage the screen, customize the ringtone on an iPhone, copy data from one phone to another, and mirror the iPhone on a computer. In addition to the conventional methods, the tool allows you to have the freedom and control to safeguard all your iOS data through this single tool. Download and try it now for a seamless backup experience.
Key Features and Advantages
- Choose specific data to back up, including content iTunes might miss.
- No 5GB limit like iCloud; backup your entire iPhone without worrying about space.
- Quickly transfer music, photos, messages, and more between your iPhone and computer.
- Create and set personalized ringtones easily within the app.
- Mirror your iPhone screen to a computer for presentations, gaming, or troubleshooting.
Now, let’s explore the simple steps for AnyTrans below:
Step 1. Install AnyTrans on your PC, making sure your network is steady during the process.
Free Download * 100% Clean & Safe
Step 2. Launch AnyTrans after connecting your iPhone to your PC. Your gadget will be automatically detected.
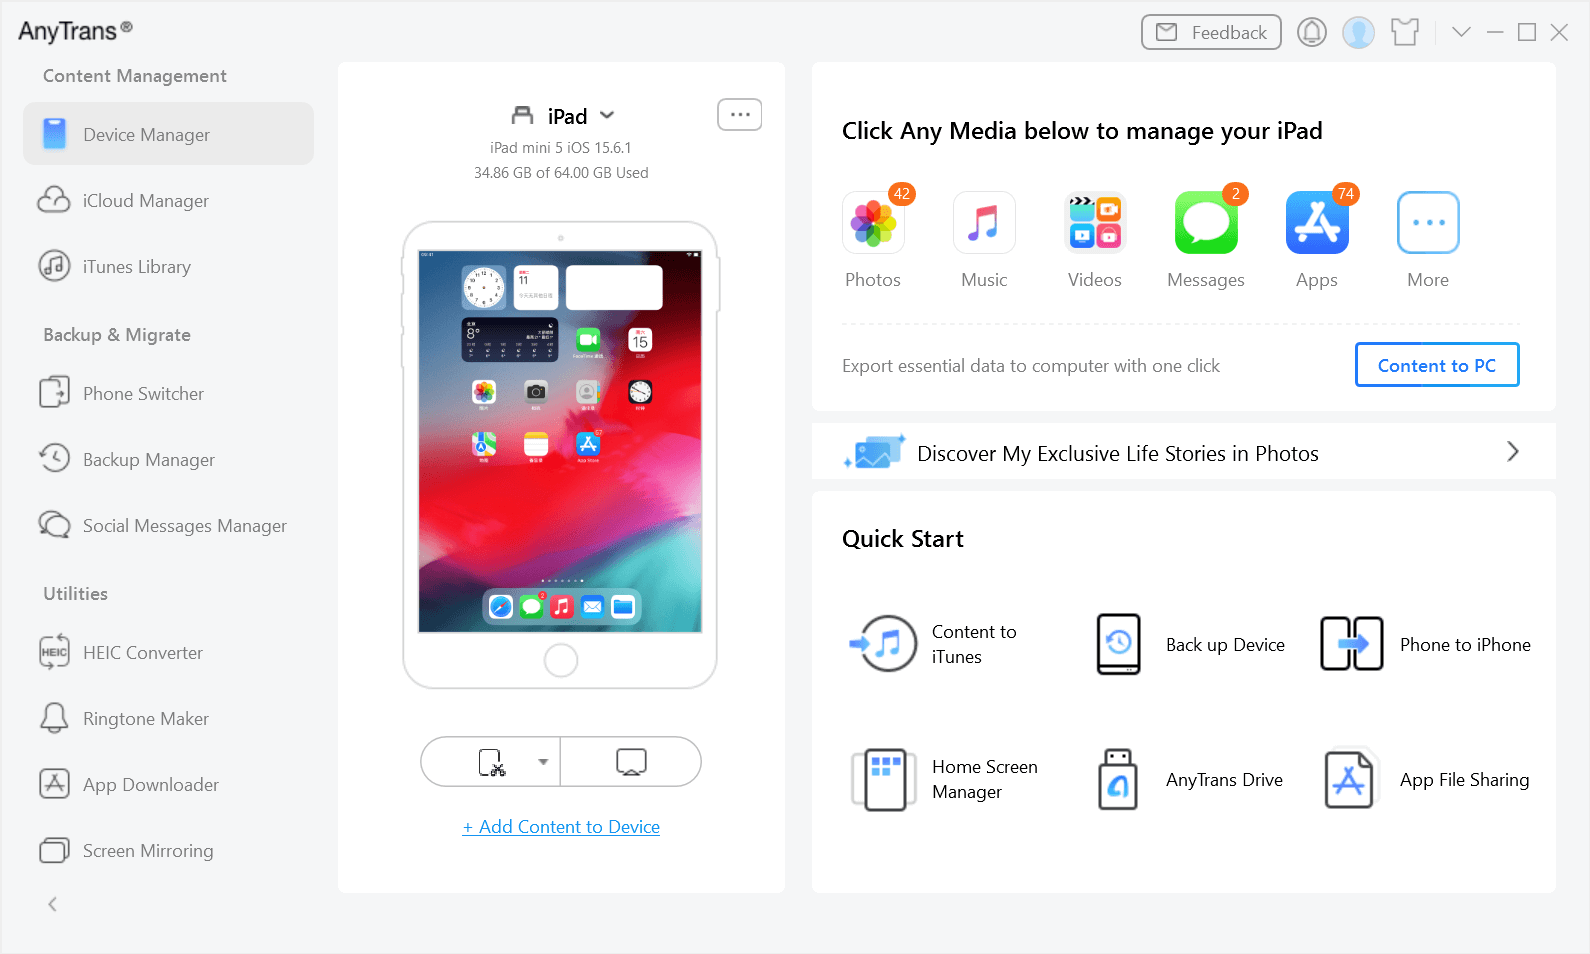
Device Connected Interface
If AnyTrans is unable to recognize iOS device, you may try these troubleshooting steps to solve this problem.
Step 3. Proceed to the Backup Manager and choose “Back Up.” You can select “Back Up Now” to begin, or you may opt to encrypt your backup using a password.
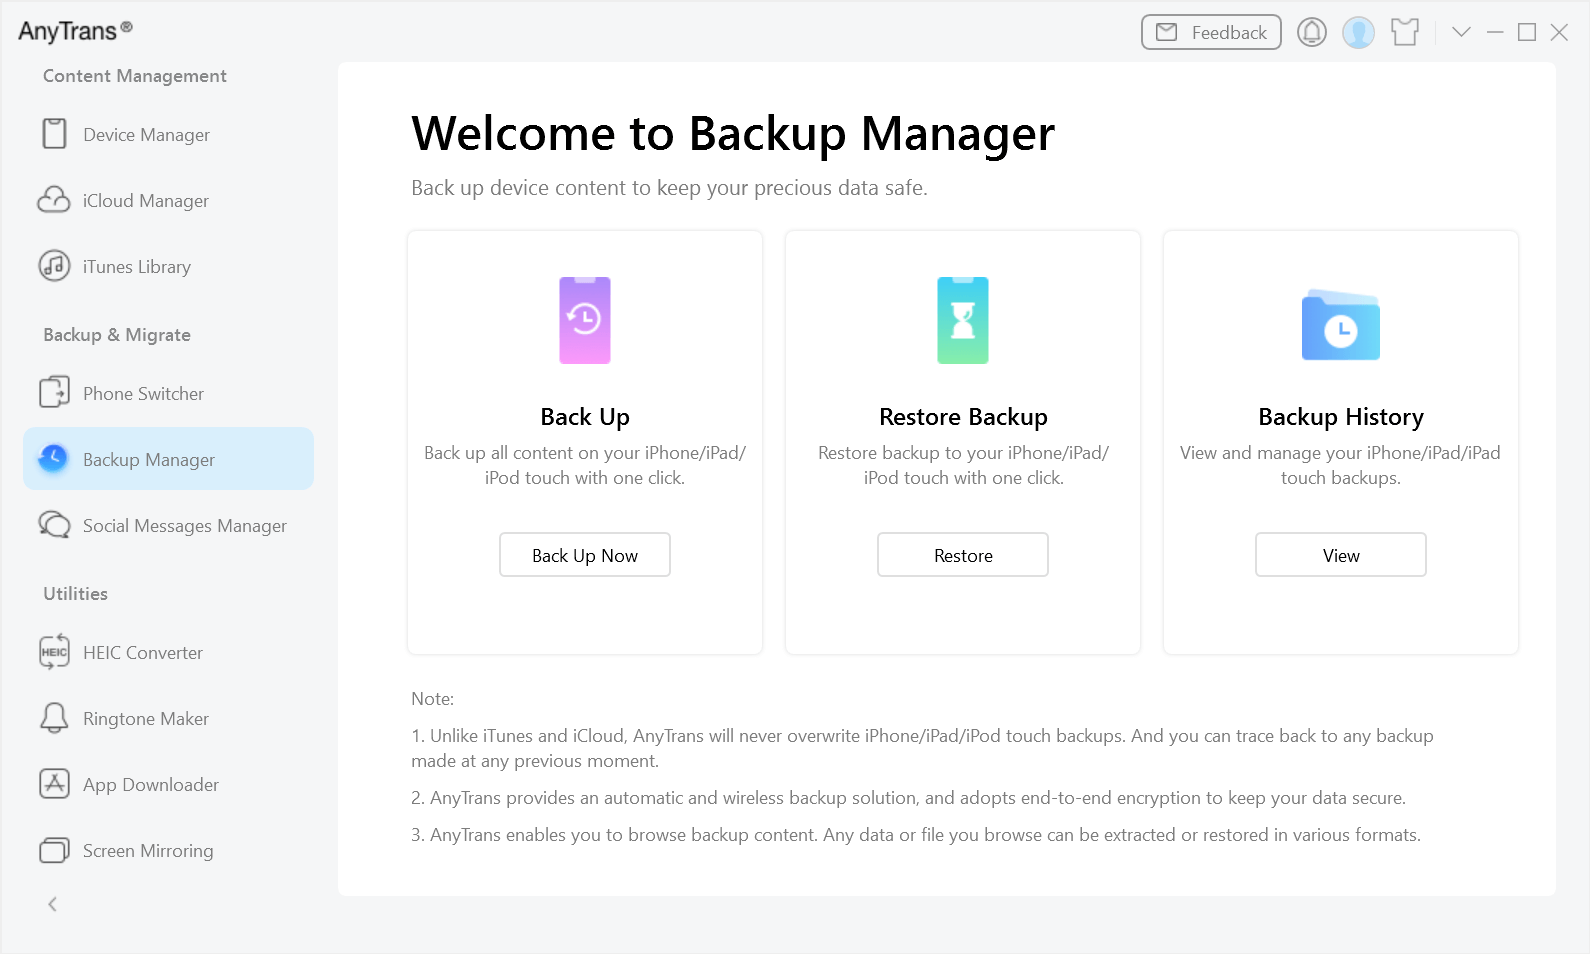
Choose Backup Manager Option
Step 4. You can choose to schedule automatic backups over Wi-Fi by enabling “AirBackup” or turn on “Incremental Backup” to back up only fresh data.
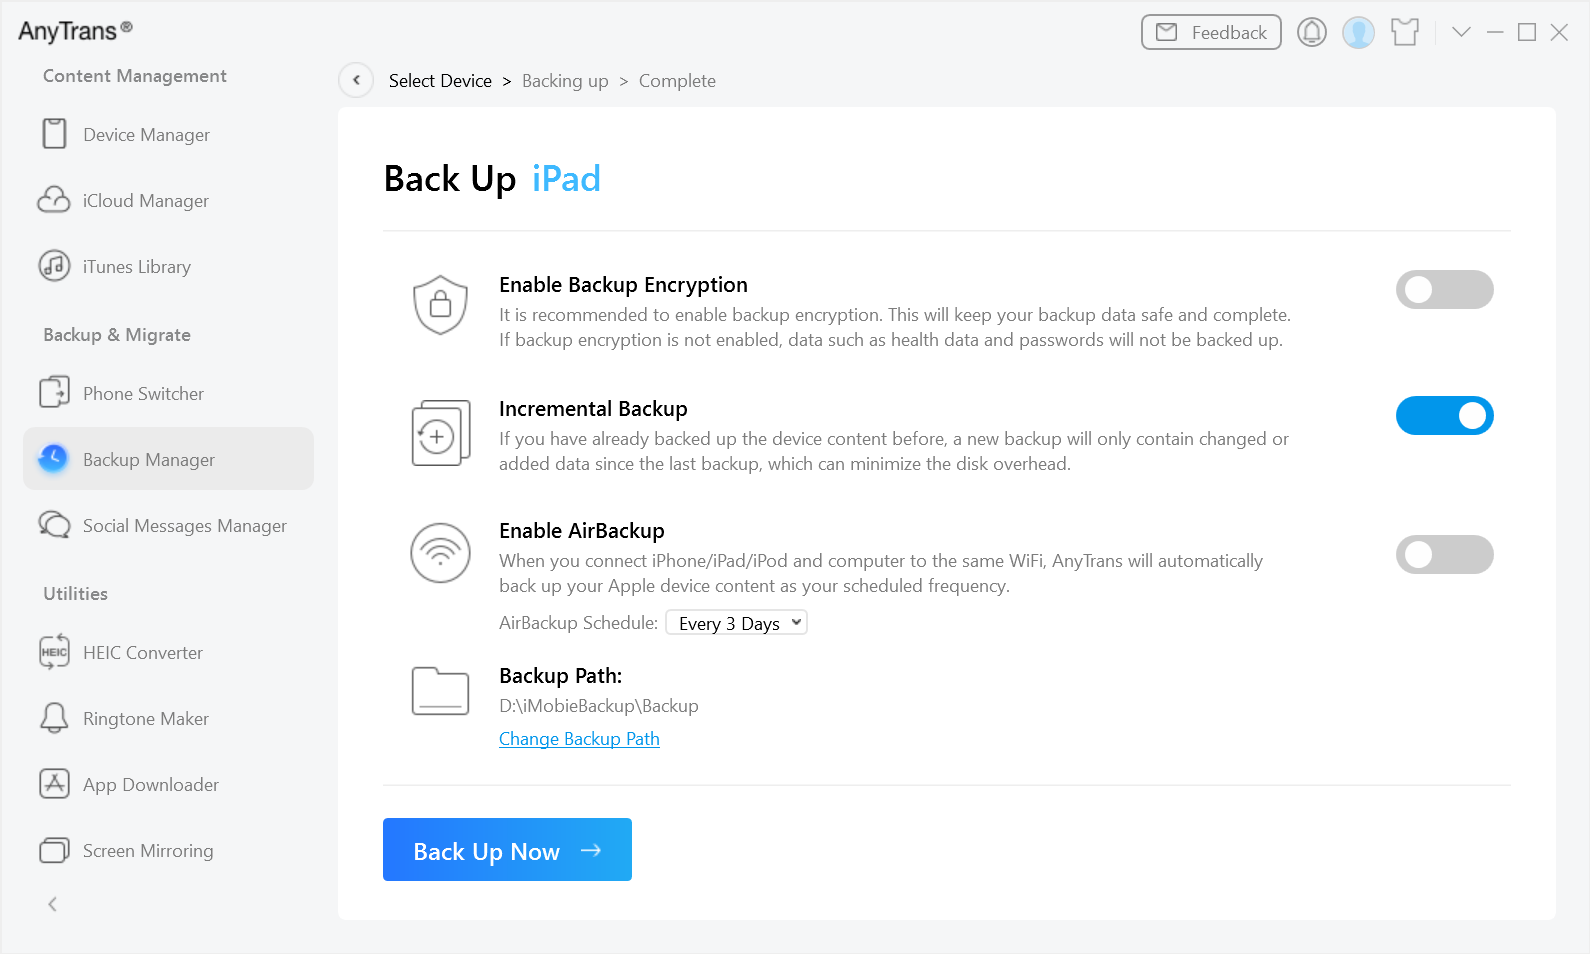
Back Up Now
1. If you want to back up only the data that has changed since the last backup operation, please turn on the Incremental Backup option.
2. If you want to back up iOS device data as your scheduled frequency once the device has been connected to the computer via same Wi-Fi, please turn on Enable AirBackup option. And you can also set up the schedule for Air Backup (from one day to a month).
Step 5. According to the size of your data, the backup procedure may start and take some time. After it’s finished, a “Backup Completed” screen with the backup information will appear.
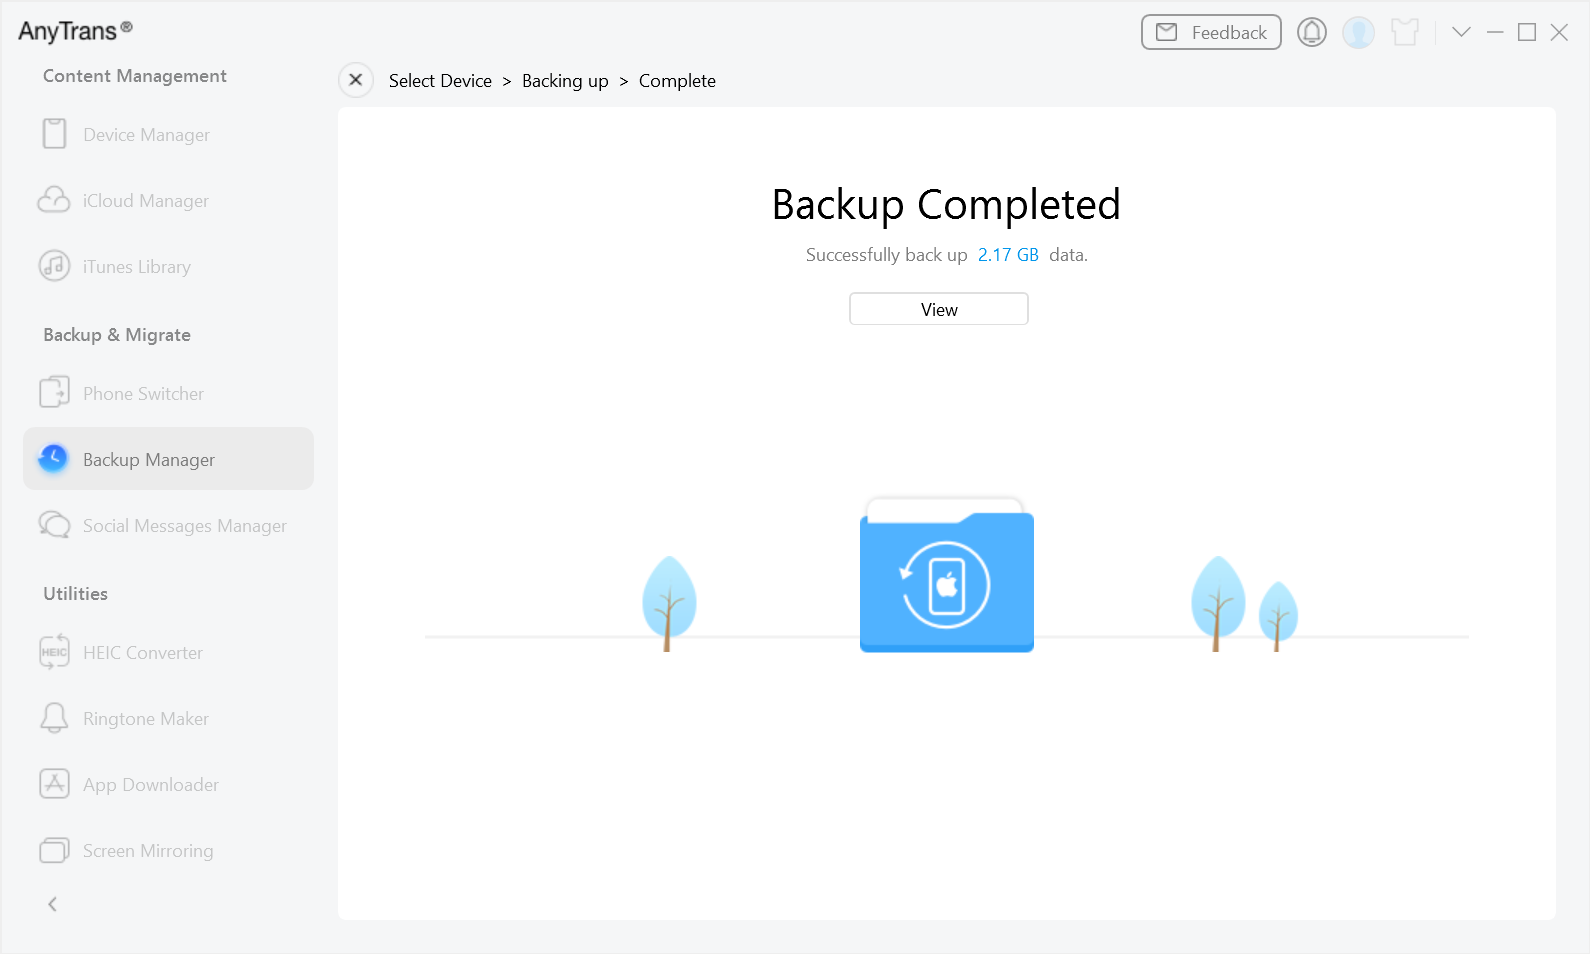
Backup Process Completed
Part 3: Solution 2: Backup iPhone 7 using Finder
For those using MacOS Catalina or later, Finder replaces iTunes to back up your iPhone 7. You can safely backup your files to your Mac using this procedure. It’s straightforward and promises the safe storage of your contacts, photographs, apps, and more. Individuals who would like to avoid utilizing third-party apps or iCloud can use Finder as a handy tool.
Here are the steps to backup iPhone 7 using Finder:
Step 1. Connect your iPhone 7 to your Mac using a USB cable.
Step 2. Access Finder and pick your iPhone from the sidebar.
Step 3. Click “General.” Choose “Back up all of the data on your iPhone to this Mac.”
Step 4. To add a password and encrypt your backup, check “Encrypt local backup.”
Step 5. Click “Back Up Now” to start the backup process.
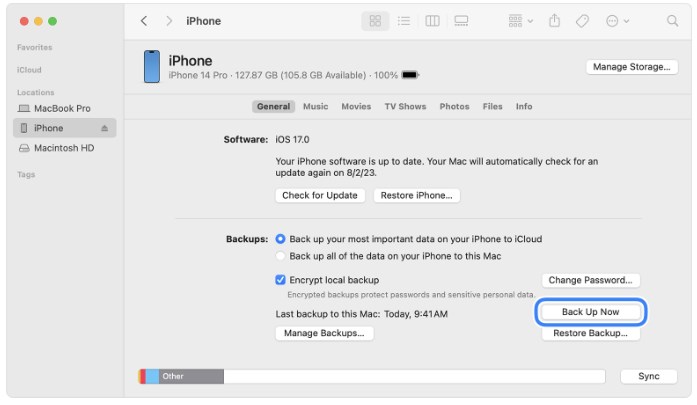
Backup iPhone 7 using Finder
Advantages:
- No need for additional software.
- Stores backups directly on your Mac.
- Easy to manage multiple backups.
Disadvantages:
- Requires macOS Catalina or later.
- No cloud backup option.
- Takes up space on your Mac.
Part 4: Solution 3: Backup iPhone 7 using iCloud
The second method of backing up the iPhone 7 is using iCloud, which is easy and does not require a computer. All your contacts, applications, photos, and everything else are backed up and synchronized by iCloud, making it safe and easily accessible. This method works in the background, specifically when your iPhone 7 is connected to Wi-Fi, making it suitable for passive users. Your backup is constantly updated with iCloud, providing you with peace of mind without requiring additional work.
Step 1. Connect your iPhone 7 to Wi-Fi. Access “Settings”> [Your Name] > “iCloud.”
Step 2. Tap on “iCloud Backup.” Ensure “iCloud Backup” is turned on.
Step 3. Tap “Back Up Now” to start the process. Wait for the backup to finish.

Tap “Back Up Now
Restrictions:
- Requires Wi-Fi connection.
- Cannot backup if iCloud storage is full.
Part 5: Solution 4: Backup iPhone 7 using iTunes
As a native application from Apple, iTunes is easy and reliable for backing up iPhone 7 or for many users who tend to use computers as storage devices. In iTunes, you can copy all essential components of your device, such as settings, contacts, programs, pictures, etc. For those who do not like experiencing data backup on the internet, this is the best solution for them. It will ensure your data is safe and can be retrieved at any time when the need arises the most. For this:
Step 1. Connect your iPhone 7 to your computer using a USB cable.
Step 2. Open iTunes on your computer. Ensure it’s the latest version.
Step 3. Click on your iPhone icon when it appears on iTunes.
Step 4. Under the “Summary” tab, select “Back Up Now.”
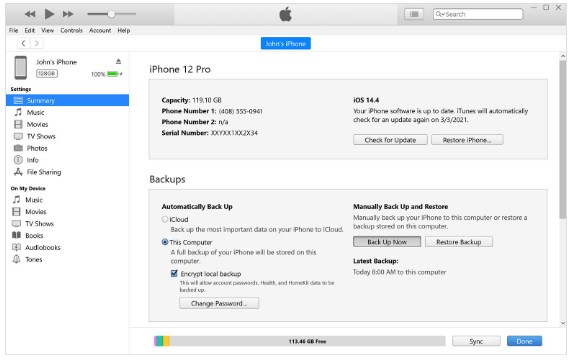
select “Back Up Now
Step 5. Choose “This Computer” to save the backup locally. Wait for the backup process to complete.
Restrictions
- Requires enough storage on your computer.
- It may not support newer iOS features.
Part 6: Backup iPhone 7 Using AnyTrans
In conclusion, you will find that there are various methods available to back up your iPhone 7, each with its strengths and weaknesses. iTunes and Finder are usable but rigid, whereas iCloud is handy but constrained by its storage capacity. We recommend using AnyTrans as it is the best backup tool and the easiest one to use. It has options such as data transfer, custom ringtones, screen sharing, and selective encryption with unlimited storage; therefore, it is the best tool for managing and backing up an iPhone.
Free Download * 100% Clean & Safe
Part 7: How to Backup iPhone 7 FAQs
1. Where is the backup on iPhone 7?
Backups are stored in iCloud or on your computer and are accessible through iTunes or Finder.
2. What is the best way to backup an iPhone 7?
The best way is to use AnyTrans for flexibility and comprehensive backup options. AnyTrans is a 100% secure way to make incremental backups, schedule backups, and more.
3. How is my iPhone 7 backed up to iCloud?
Go to “Settings” on your iPhone 7. Tap on [Your Name] and then iCloud. Make sure that “iCloud Backup” is turned ON. You can tap on “Backup Now” to sync data in real time.
Product-related questions? Contact Our Support Team to Get Quick Solution >

